WPF 自定义 ItemsControl 控件
wpf的itemscontrol用法
wpf的itemscontrol用法WPF中的ItemsControl用法WPF(Windows Presentation Foundation)是一种用于创建用户界面的技术,而ItemsControl是其重要的控件之一。
ItemsControl用于在界面中显示集合类型的数据,并提供了多种方式来定制和呈现数据。
ItemsControl的主要作用是将数据源绑定到界面上的可视元素,并将每个元素定义为一个模板。
以下是使用ItemsControl的几种常见用法:1. 基本使用方法:在XAML中,可以通过使用ItemsControl元素以及其ItemTemplate属性来显示数据。
首先,需要将ItemsSource属性绑定到要显示的数据源,然后通过定义ItemTemplate来指定每个元素的外观。
例如:```xml<ItemsControl ItemsSource="{Binding MyData}"><ItemsControl.ItemTemplate><DataTemplate><!-- 在这里定义每个元素的显示方式 --></DataTemplate></ItemsControl.ItemTemplate></ItemsControl>```2. 不同的布局方式:ItemsControl提供了多种布局方式来呈现数据。
例如,StackPanel布局可以将元素垂直或水平排列,WrapPanel布局可以自动换行显示元素。
可以使用ItemsPanel 属性来指定所需的布局方式。
例如:```xml<ItemsControl ItemsSource="{Binding MyData}"><ItemsControl.ItemsPanel><ItemsPanelTemplate><!-- 在这里定义所需的布局方式,如StackPanel或WrapPanel --></ItemsPanelTemplate></ItemsControl.ItemsPanel><ItemsControl.ItemTemplate><DataTemplate><!-- 在这里定义每个元素的显示方式 --></DataTemplate></ItemsControl.ItemTemplate></ItemsControl>```3. 利用数据模板选择器:有时候,我们可能需要根据数据的特定属性来选择不同的数据模板。
WPF自定义控件与样式-自定义按钮(Button)

WPF⾃定义控件与样式-⾃定义按钮(Button)⼀、前⾔程序界⾯上的按钮多种多样,常⽤的就这⼏种:普通按钮、图标按钮、⽂字按钮、图⽚⽂字混合按钮。
本⽂章记录了不同样式类型的按钮实现⽅法。
⼆、固定样式的按钮固定样式的按钮⼀般在临时使⽤时或程序的样式⽐较固定时才会使⽤,按钮整体样式不需要做⼤的改动。
2.1 普通按钮-扁平化风格先看效果:定义Button的样式,详见代码:<Style x:Key="BtnInfoStyle" TargetType="Button"><Setter Property="Width" Value="70"/><Setter Property="Height" Value="25"/><Setter Property="Foreground" Value="White"/><Setter Property="BorderThickness" Value="0"/><Setter Property="Background" Value="#43a9c7"/><Setter Property="Template"><Setter.Value><ControlTemplate TargetType="Button"><Border x:Name="border" Background="{TemplateBinding Background}" BorderBrush="{TemplateBinding BorderBrush}" BorderThickness="{TemplateBinding BorderThickness}" SnapsToDevicePixels <TextBlock Text="{TemplateBinding Content}" Foreground="{TemplateBinding Foreground}" VerticalAlignment="Center" HorizontalAlignment="Center"/></Border><ControlTemplate.Triggers><Trigger Property="IsMouseOver" Value="True"><Setter TargetName="border" Property="Background" Value="#2f96b4"/></Trigger><Trigger Property="IsPressed" Value="True"><Setter TargetName="border" Property="Background" Value="#2a89a4"/></Trigger></ControlTemplate.Triggers></ControlTemplate></Setter.Value></Setter></Style>引⽤⽅法:<Grid Background="White"><StackPanel Orientation="Horizontal" Margin="10" VerticalAlignment="Top"><Button Style="{StaticResource BtnInfoStyle}" Content="信息" Margin="5 0"/></Grid>上述代码实现了Button按钮的扁平化样式,如果你想调整颜⾊风格,通过修改Background的值可实现默认颜⾊,⿏标经过颜⾊以及⿏标按下颜⾊。
wpf tabcontrol控件用法

wpf tabcontrol控件用法一、WPF TabControl 控件简介WPF TabControl 控件是 WPF 中的一个常用控件,它可以将多个子控件以选项卡的形式展示出来,用户可以通过点击选项卡来切换显示的内容。
TabControl 可以方便地实现多页签功能,并且可以自定义选项卡的样式和布局。
二、TabControl 控件的基本用法1. 创建 TabControl 控件在 XAML 中创建一个 TabControl 控件非常简单,只需要在窗口或页面中添加以下代码即可:```xml<TabControl><!-- 子控件 --></TabControl>```2. 添加子控件在 TabControl 中添加子控件也很容易,只需要在 TabControl 标签内部添加其他控件即可,这些子控件将作为选项卡内容显示出来。
例如:```xml<TabControl><TabItem Header="选项卡1"><TextBlock Text="这是第一个选项卡" /></TabItem><TabItem Header="选项卡2"><TextBlock Text="这是第二个选项卡" /></TabItem></TabControl>```上面的代码创建了两个选项卡,每个选项卡都包含一个 TextBlock 控件。
3. 设置默认选中的选项卡默认情况下,TabControl 的第一个子元素会被设置为默认显示的选项卡。
如果想要更改默认选择,则可以使用 SelectedIndex 属性或SelectedItem 属性。
例如:```xml<TabControl SelectedIndex="1"><TabItem Header="选项卡1"><TextBlock Text="这是第一个选项卡" /></TabItem><TabItem Header="选项卡2"><TextBlock Text="这是第二个选项卡" /></TabItem></TabControl>```上面的代码将默认选择第二个选项卡。
wpf listviewitemcontainerstyle详解

WPF(Windows Presentation Foundation)中的ListViewItemContainerStyle是用于定义ListView控件中每个项(Item)的容器样式的属性。
这个样式决定了如何渲染和显示ListView中的每一项。
在WPF中,每种条目控件(如ListBox、ComboBox等)都有自己对应的ItemContainer,这是一个用于包含和显示数据的容器。
对于ListView来说,其ItemContainer就是ListViewItem。
通过ListView.ItemContainerStyle属性,您可以自定义ListViewItem的样式,包括布局、显示与隐藏、背景等。
这在创建具有复杂或特定视觉效果的列表时非常有用。
下面是一个简单的例子,展示了如何使用ListView.ItemContainerStyle来自定义ListViewItem的样式:xml<ListView ItemsSource="{Binding YourItemsSource}"><ListView.ItemContainerStyle><Style TargetType="ListViewItem"><Setter Property="Background" Value="LightBlue"/><Setter Property="Foreground" Value="Black"/><Setter Property="Padding" Value="10,5"/><Setter Property="Template"><Setter.Value><ControlTemplate TargetType="ListViewItem"><Border BorderBrush="Black" BorderThickness="1" Background="{TemplateBinding Background}"><ContentPresenter/></Border></ControlTemplate></Setter.Value></Setter><Style.Triggers><Trigger Property="IsMouseOver" Value="True"><Setter Property="Background" Value="LightGreen"/></Trigger><Trigger Property="IsSelected" Value="True"><Setter Property="Background" Value="LightCoral"/></Trigger></Style.Triggers></Style></ListView.ItemContainerStyle><!-- ListView的其他属性和内容 --></ListView>在上面的代码中,我们为ListViewItem定义了一个样式,设置了其背景色、前景色和内边距。
wpf prims itemscontrol 多层嵌套用法 实例

wpf prims itemscontrol 多层嵌套用法实例Prims算法是一种常用的最小生成树算法,在网络和图论领域有广泛的应用。
而在WPF(Windows Presentation Foundation)中,我们可以利用ItemsControl 来方便地实现多层嵌套的功能。
本文将分步骤说明如何使用WPF的Prims算法和ItemsControl来实现多层嵌套。
第一步:创建WPF应用程序首先,我们需要创建一个WPF应用程序作为展示我们多层嵌套的界面。
打开Visual Studio,选择“新建项目”并选择WPF应用程序模板。
给项目命名,并选择一个合适的位置进行保存。
点击“确定”后,将会创建一个默认的WPF窗体。
第二步:添加Prims算法代码在MainWindow.xaml.cs文件中,我们可以添加我们的Prims算法代码。
首先,我们需要定义一个用于存储图中节点的类。
这个类包含节点的ID和连接的边,代码如下:csharppublic class Node{public int ID { get; set; }public List<Edge> Edges { get; set; }}然后,我们需要定义一个用于存储图中边的类,包括起始节点、结束节点和边的权重,代码如下:csharppublic class Edge{public Node StartNode { get; set; }public Node EndNode { get; set; }public int Weight { get; set; }}接下来,我们可以开始实现Prims算法。
在MainWindow类中添加以下代码:csharppublic partial class MainWindow : Window{public List<Node> Nodes { get; set; } Stores all nodes in the graphpublic MainWindow(){InitializeComponent();Nodes = new List<Node>();}private void PrimsAlgorithm(){List<Edge> MST = new List<Edge>(); Stores the minimum spanning treeNode startNode = Nodes[0]; Start the algorithm from the first nodeList<Node> unvisitedNodes = Nodes.Skip(1).ToList(); List of unvisited nodesList<Node> visitedNodes = new List<Node>(); List of visited nodesvisitedNodes.Add(startNode); Add the start node to the visited nodeswhile (unvisitedNodes.Count > 0){Edge minEdge = null; Stores the minimum weight edgeNode nextNode = null; Stores the next node to visitforeach (Node visitedNode in visitedNodes){foreach (Edge edge in visitedNode.Edges){if (unvisitedNodes.Contains(edge.EndNode)){if (minEdge == null edge.Weight < minEdge.Weight){minEdge = edge;nextNode = edge.EndNode;}}}}if (nextNode != null){MST.Add(minEdge); Add the minimum weight edge to the minimum spanning treevisitedNodes.Add(nextNode); Add the next node to the visited nodesunvisitedNodes.Remove(nextNode); Remove the next node from the unvisited nodes}}Display the minimum spanning treeforeach (Edge edge in MST){Console.WriteLine("Start Node: {edge.StartNode.ID} End Node: {edge.EndNode.ID} Weight: {edge.Weight}");}}}第三步:创建多层嵌套的ItemsControl在MainWindow.xaml文件中,我们可以创建一个多层嵌套的ItemsControl来展示我们生成的最小生成树。
wpftabcontrol控件用法

wpftabcontrol控件用法WPF TabControl控件是一个非常常见和实用的控件,用于在界面中创建具有多个选项卡的布局。
每个选项卡可以包含不同的内容,使用户能够快速切换和访问不同的页面或功能。
TabControl控件提供了许多功能和选项,通过这篇文章,我将向你介绍如何使用它和一些常见的用法。
一、基本用法:1. 首先,你需要在XAML文件中添加TabControl控件。
通常,你还会添加一些选项卡Item,在TabControl内部的Items集合中。
```XAML<TabControl><TabItem Header="Tab 1"><!-- Tab 1 Content --></TabItem><TabItem Header="Tab 2"><!-- Tab 2 Content --></TabItem><TabItem Header="Tab 3"><!-- Tab 3 Content --></TabItem></TabControl>```2. 在每个TabItem中,你可以添加相应的内容,如文本、图像、按钮、输入框等。
也可以使用布局面板来组织和排列控件。
```XAML<TabItem Header="Tab 1"><StackPanel><TextBlock Text="Hello, Tab 1!" /><Button Content="Click Me" /></StackPanel></TabItem>```二、选项卡样式和模板:1. 选项卡头样式:默认情况下,TabControl使用TabControl.TabItem样式来呈现选项卡头。
WPF如何自定义TabControl控件样式示例详解

WPF如何⾃定义TabControl控件样式⽰例详解⼀、前⾔程序中经常会⽤到TabControl控件,默认的控件样式很普通。
⽽且样式或功能不⼀定符合我们的要求。
⽐如:我们需要TabControl的标题能够居中、或平均分布;或者我们希望TabControl的标题能够进⾏关闭。
要实现这些功能我们需要对TabControl的样式进⾏定义。
⼆、实现TabControl的标题平均分布默认的TabControl标题是使⽤TabPanel容器包含的。
要想实现TabControl标题头平均分布,需要把TabPanel替换成UniformGrid;替换后的TabControl样式如下:<Style x:Key="TabControlStyle" TargetType="{x:Type TabControl}"><Setter Property="Padding" Value="2"/><Setter Property="HorizontalContentAlignment" Value="Center"/><Setter Property="VerticalContentAlignment" Value="Center"/><Setter Property="Background" Value="White"/><Setter Property="BorderBrush" Value="#FFACACAC"/><Setter Property="BorderThickness" Value="1"/><Setter Property="Foreground" Value="{DynamicResource {x:Static SystemColors.ControlTextBrushKey}}"/><Setter Property="Template"><Setter.Value><ControlTemplate TargetType="{x:Type TabControl}"><Grid x:Name="templateRoot" ClipToBounds="True" SnapsToDevicePixels="True" KeyboardNavigation.TabNavigation="Local"><Grid.ColumnDefinitions><ColumnDefinition x:Name="ColumnDefinition0"/><ColumnDefinition x:Name="ColumnDefinition1" Width="0"/></Grid.ColumnDefinitions><Grid.RowDefinitions><RowDefinition x:Name="RowDefinition0" Height="Auto"/><RowDefinition x:Name="RowDefinition1" Height="*"/></Grid.RowDefinitions><UniformGrid x:Name="HeaderPanel" Rows="1" Background="Transparent" Grid.Column="0" IsItemsHost="True" Margin="0" Grid.Row="0" KeyboardNavigation.TabIndex="1" Panel.ZIndex="1"/><Line X1="0" X2="{Binding ActualWidth, RelativeSource={RelativeSource Self}}" Stroke="White" StrokeThickness="0.1" VerticalAlignment="Bottom" Margin="0 0 0 1" SnapsToDevicePixels="True"/><Border x:Name="ContentPanel" BorderBrush="{TemplateBinding BorderBrush}" BorderThickness="{TemplateBinding BorderThickness}" Background="{TemplateBinding Background}" Grid.Column="0" KeyboardNavigation.DirectionalNavigation="Contained" <ContentPresenter x:Name="PART_SelectedContentHost" ContentTemplate="{TemplateBinding SelectedContentTemplate}" Content="{TemplateBinding SelectedContent}" ContentStringFormat="{TemplateBinding SelectedContentStringFormat}" ContentSou </Border></Grid><ControlTemplate.Triggers><Trigger Property="TabStripPlacement" Value="Bottom"><Setter Property="Grid.Row" TargetName="HeaderPanel" Value="1"/><Setter Property="Grid.Row" TargetName="ContentPanel" Value="0"/><Setter Property="Height" TargetName="RowDefinition0" Value="*"/><Setter Property="Height" TargetName="RowDefinition1" Value="Auto"/></Trigger><Trigger Property="TabStripPlacement" Value="Left"><Setter Property="Grid.Row" TargetName="HeaderPanel" Value="0"/><Setter Property="Grid.Row" TargetName="ContentPanel" Value="0"/><Setter Property="Grid.Column" TargetName="HeaderPanel" Value="0"/><Setter Property="Grid.Column" TargetName="ContentPanel" Value="1"/><Setter Property="Width" TargetName="ColumnDefinition0" Value="Auto"/><Setter Property="Width" TargetName="ColumnDefinition1" Value="*"/><Setter Property="Height" TargetName="RowDefinition0" Value="*"/><Setter Property="Height" TargetName="RowDefinition1" Value="0"/></Trigger><Trigger Property="TabStripPlacement" Value="Right"><Setter Property="Grid.Row" TargetName="HeaderPanel" Value="0"/><Setter Property="Grid.Row" TargetName="ContentPanel" Value="0"/><Setter Property="Grid.Column" TargetName="HeaderPanel" Value="1"/><Setter Property="Grid.Column" TargetName="ContentPanel" Value="0"/><Setter Property="Width" TargetName="ColumnDefinition0" Value="*"/><Setter Property="Width" TargetName="ColumnDefinition1" Value="Auto"/><Setter Property="Height" TargetName="RowDefinition0" Value="*"/><Setter Property="Height" TargetName="RowDefinition1" Value="0"/></Trigger><Trigger Property="IsEnabled" Value="False"><Setter Property="TextElement.Foreground" TargetName="templateRoot" Value="{DynamicResource {x:Static SystemColors.GrayTextBrushKey}}"/></Trigger></ControlTemplate.Triggers></ControlTemplate></Setter.Value></Setter></Style>即使这样设置了,TabControl的标题还是很丑,这个时候就需要通过设置TabItem来更改标题样式了。
[WPF自定义控件]简单的表单布局控件
![[WPF自定义控件]简单的表单布局控件](https://img.taocdn.com/s3/m/93300ad977a20029bd64783e0912a21614797fed.png)
[WPF ⾃定义控件]简单的表单布局控件1. WPF布局⼀个表单在WPF 中布局表单⼀直都很传统,例如使⽤上⾯的XAML ,它通过Grid 布局⼀个表单。
这样出来的结果整整齐齐,看上去没什么问题,但当系统⾥有⼏⼗个表单页以后需要统⼀将标签改为上对齐,或者标签和控件中加⼀个:号等需求都会难倒开发⼈员。
⼀个好的做法是使⽤某些控件库提供的表单控件;如果不想引⼊⼀个这么“重”的东西,可以⾃⼰定义⼀个简单的表单控件。
这篇⽂章介绍⼀个简单的⽤于布局表单的Form 控件,虽然是⼀个很⽼的⽅案,但我很喜欢这个控件,不仅因为它简单实⽤,⽽且是⼀个很好的结合了ItemsControl 、ContentControl 、附加属性的教学例⼦。
Form 是⼀个⾃定义的ItemsControl ,部分代码可以参考这篇⽂章。
2. ⼀个古⽼的⽅法即使抛开验证信息、确认取消这些更⾼级的需求(表单的其它功能真的很多很多,但这篇⽂章只谈论布局),表单布局仍是个⼗分复杂的⼯作。
幸好⼗年前ScottGu 分享过⼀个,很有参考价值:Karl Shifflett has another great WPF blog post that covers a cool way to perform flexible form layout for LOB scenarios.<Grid Width="400" HorizontalAlignment="Center" VerticalAlignment="Center"><Grid.RowDefinitions><RowDefinition Height="Auto" /><RowDefinition Height="Auto" /><RowDefinition Height="Auto" /></Grid.RowDefinitions><Grid.ColumnDefinitions><ColumnDefinition Width="Auto" /><ColumnDefinition Width="*" /></Grid.ColumnDefinitions><TextBlock Text="⽤户名" HorizontalAlignment="Right" VerticalAlignment="Center" Margin="4" /><TextBox Grid.Column="1" Margin="4" /><TextBlock Text="密码" HorizontalAlignment="Right" VerticalAlignment="Center" Margin="4" Grid.Row="1" /><PasswordBox Grid.Row="1" Grid.Column="1" Margin="4" /><TextBlock Grid.Row="2" Text="确认密码" HorizontalAlignment="Right" VerticalAlignment="Center" Margin="4" /><PasswordBox Grid.Column="1" Grid.Row="2" Margin="4" /></Grid>使⽤代码和截图如上所⽰。
wpf listboxitem controltemplate
wpf listboxitemcontroltemplate首先,让我们了解什么是WPF ListBox 和ListBoxItem以及ControlTemplate。
WPF ListBox是一种控件,能够展示一组项目,并且允许用户选择其中的项。
ListBoxItem是ListBox中的每个项,通常包含一个Label和一个CheckBox。
ControlTemplate是一个XAML元素,用于定义控件外观的模板。
当使用ListBox时,我们通常需要定义ListBoxItem 的外观,来满足我们的需求。
这时就需要使用ControlTemplate来自定义ListBoxItem的外观。
在本文中,我们将集中讨论如何使用ControlTemplate来自定义ListBoxItem的外观。
首先,我们需要了解ControlTemplate的结构。
ControlTemplate一般由多个元素组成,最常见的是Grid 和Border。
Grid用于划分模板中的不同部分,Border用于定义边框和背景。
在定义ListBoxItem的ControlTemplate 时,我们可以使用以下结构:```xaml <ControlTemplate TargetType="{x:Type ListBoxItem}"> <Grid Name="PART_Root"> <BorderName="PART_ItemBorder"Background="{TemplateBinding Background}" BorderBrush="{TemplateBinding BorderBrush}" BorderThickness="{TemplateBinding BorderThickness}"> <ContentPresenter /></Border> </Grid> </ControlTemplate> ```上述代码定义了一个ListBoxItem的ControlTemplate,其中使用了一个Grid和一个Border。
WPF---数据绑定之ItemsControl(三)

WPF---数据绑定之ItemsControl(三)⼀、Combox绑定场景:定义多个Person,Person有Name和Age属性,将多个Person与Combox进⾏绑定,Combox中只显⽰Name信息,点击任意⼀个item,在左侧显⽰该条⽬的详细信息。
参考代码以下:using System;using System.Collections.Generic;using ponentModel;using System.Windows;using System.Windows.Controls;using System.Windows.Data;namespace BindingDemo2{public partial class MainWindow : Window{private List<Person> personList = new List<Person>();public MainWindow(){InitializeComponent();personList.Add(new Person() {Name = "Mary",Age = 18 });personList.Add(new Person() { Name = "Tom", Age = 15 });personList.Add(new Person() { Name = "Jack", Age = 28 });personList.Add(new Person() { Name = "Jim", Age = 38 });cmbPerson.ItemsSource = personList;}}public class Person : INotifyPropertyChanged{public event PropertyChangedEventHandler PropertyChanged;protected void OnPropertyChanged(string propertyName){PropertyChangedEventHandler handler = PropertyChanged;if (handler != null){handler(this, new PropertyChangedEventArgs(propertyName));}}private int _age = 18;public int Age{get { return _age; }set{_age = value;OnPropertyChanged("Age");}}private string _name = "Mary";public string Name{get { return _name; }set{_name = value;OnPropertyChanged("Name");}}public Person(){Age = 18;Name = "Mary";}}}<Window x:Class="BindingDemo2.MainWindow"xmlns="/winfx/2006/xaml/presentation"xmlns:x="/winfx/2006/xaml"xmlns:d="/expression/blend/2008"xmlns:mc="/markup-compatibility/2006"xmlns:local="clr-namespace:BindingDemo2"mc:Ignorable="d"Title="MainWindow" Height="350" Width="525" Name="win"><Grid ShowGridLines="True"><Grid.ColumnDefinitions><ColumnDefinition/><ColumnDefinition/></Grid.ColumnDefinitions><StackPanel><Label Content="Target"/><Label Content="Name"/><Label Content="{Binding ,ElementName=cmbPerson}" Height="30" Background="AliceBlue" Name="lbName"/> <Label Content="Age"/><Label Height="30" Background="AliceBlue" Name="lbAge" Content="{Binding SelectedItem.Age, ElementName=cmbPerson}"/> </StackPanel><StackPanel Grid.Column="1"><ComboBox Name="cmbPerson" ItemsSource="{Binding}" DisplayMemberPath="Name" SelectedIndex="0"></ComboBox></StackPanel></Grid></Window>运⾏结果如下:我们也可以利⽤DataContext属性来简化前台绑定,参考代码以下:<Window x:Class="BindingDemo2.MainWindow"xmlns="/winfx/2006/xaml/presentation"xmlns:x="/winfx/2006/xaml"xmlns:d="/expression/blend/2008"xmlns:mc="/markup-compatibility/2006"xmlns:local="clr-namespace:BindingDemo2"mc:Ignorable="d"Title="MainWindow" Height="350" Width="525" Name="win"><Grid ShowGridLines="True"><Grid.ColumnDefinitions><ColumnDefinition/><ColumnDefinition/></Grid.ColumnDefinitions><StackPanel DataContext="{Binding ElementName=cmbPerson, Path=SelectedItem}"><Label Content="Target"/><Label Content="Name"/><Label Content="{Binding Name}" Height="30" Background="AliceBlue" Name="lbName"/><Label Content="Age"/><Label Height="30" Background="AliceBlue" Name="lbAge" Content="{Binding Age}"/></StackPanel><StackPanel Grid.Column="1"><ComboBox Name="cmbPerson" ItemsSource="{Binding}" DisplayMemberPath="Name" SelectedIndex="0"></ComboBox></StackPanel></Grid></Window>。
WPF:WrapPanel容器的模板数据绑定(ItemsControl)

WPF:WrapPanel容器的模板数据绑定(ItemsControl)问题:有⼀些CheckBox需要作为选项添加到页⾯上,但是数⽬不定。
⽽为了⽅便排版,我选择⽤WrapPanel⾯板来作为⽗容器。
那现在的问题就是如何把这些控件添加到这个WrapPanel⾥了。
我想到了两个⽅法,第⼀个是先得到控件数⽬,然后再动态⽣成并加载到这个WrapPanel⾥,第⼆个是设置数据绑定。
我想第⼀个是可⾏的,但是项⽬中还涉及到其它问题,所以这⾥就选择第⼆个了。
问题来了,在WrapPanel中并没有可以⽤来设置绑定并实现动态⽣成的东西,那要怎么解决了?办法:新建⼀个ItemsControl控件,并为ItemsSource绑定数据源,然后把ItemsControl.ItemsPanel设置为WrapPanel,最后为ItemsControl.ItemTemplate中的CheckBox.Content绑定数据。
eg:1、创建数据源类型。
public class business{public string txt { get; set; }}2、设置数据源public MainWindow(){this.InitializeComponent();List<business> che = new List<business>(){new business() { txt = "选项1"},new business() { txt = "选项2"},new business() { txt = "选项3"},new business() { txt = "选项4"},new business() { txt = "选项5"},new business() { txt = "选项6"},new business() { txt = "选项7"}};ItemsControl.ItemsSource = che;}3、Xaml中<ItemsControl x:Name="itemsControl" Background="#B28BB2F1"><ItemsControl.ItemsPanel><ItemsPanelTemplate><WrapPanel Orientation="Horizontal"/></ItemsPanelTemplate></ItemsControl.ItemsPanel><ItemsControl.ItemTemplate><DataTemplate><Border Padding="3"><WrapPanel><CheckBox Content="{Binding txt}"/></WrapPanel></Border></DataTemplate></ItemsControl.ItemTemplate></ItemsControl>调试⼀下就OK了。
itemscontrol用法
itemscontrol用法在开发过程中,我们常常需要在一个列表中展示多个子项,以便用户进行选择。
这时,我们就可以使用ItemControl控件。
ItemControl是一个通用的控件,它可以用于显示和编辑列表中的项目。
本文将介绍ItemControl的基本用法和属性设置。
一、ItemControl的基本用法1. 添加ItemControl控件在Windows窗体设计器中,可以通过拖放一个ListBox或ComboBox控件到窗体上,然后通过属性窗口将其Style属性设置为ItemFrame,从而将其转换为ItemControl控件。
也可以在代码中直接创建ItemControl实例。
2. 添加和删除子项要添加子项,可以使用ItemControl的Items属性添加项,例如:itemControl1.Items.Add("子项内容"); 要删除子项,可以使用RemoveAt方法,例如:itemControl1.Items.RemoveAt(0);3. 选择和取消选择子项要选择一个子项,可以使用Select方法,例如:itemControl1.Select(0); 要取消选择一个子项,可以使用Deselect方法,例如:itemControl1.Deselect(0);4. 获取选中的子项要获取选中的子项,可以使用SelectedItem属性,例如:string selectedItem = itemControl1.SelectedItem.ToString();二、ItemControl的属性设置1. Items属性Items属性用于获取或设置ItemControl控件的子项集合。
可以通过此属性向ItemControl中添加、删除或更改子项。
2. ItemTemplates属性ItemTemplates属性用于设置ItemControl的子项模板。
可以通过此属性为子项设置自定义的模板,以便根据需要显示不同的子项。
WPF里ItemsControl的分组实现
WPF⾥ItemsControl的分组实现 我们在⽤到ItemsControl时,有时会⽤到分组,如ListBox,ListView,DataGrid。
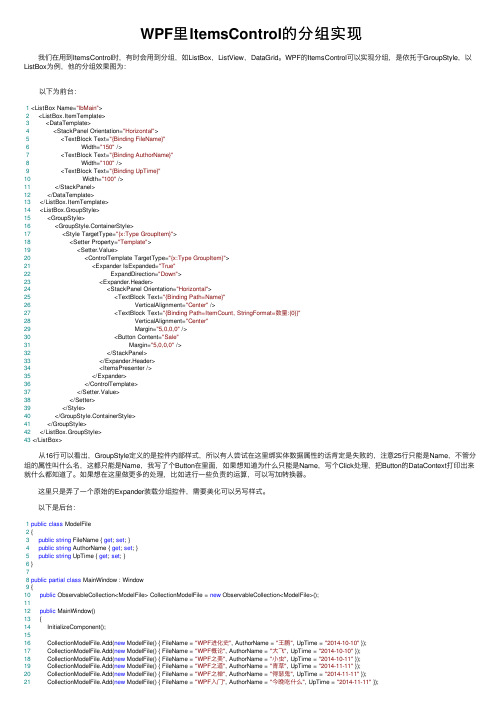
WPF的ItemsControl可以实现分组,是依托于GroupStyle,以ListBox为例,他的分组效果图为: 以下为前台:1 <ListBox Name="lbMain">2 <ListBox.ItemTemplate>3 <DataTemplate>4 <StackPanel Orientation="Horizontal">5 <TextBlock Text="{Binding FileName}"6 Width="150" />7 <TextBlock Text="{Binding AuthorName}"8 Width="100" />9 <TextBlock Text="{Binding UpTime}"10 Width="100" />11 </StackPanel>12 </DataTemplate>13 </ListBox.ItemTemplate>14 <ListBox.GroupStyle>15 <GroupStyle>16 <GroupStyle.ContainerStyle>17 <Style TargetType="{x:Type GroupItem}">18 <Setter Property="Template">19 <Setter.Value>20 <ControlTemplate TargetType="{x:Type GroupItem}">21 <Expander IsExpanded="True"22 ExpandDirection="Down">23 <Expander.Header>24 <StackPanel Orientation="Horizontal">25 <TextBlock Text="{Binding Path=Name}"26 VerticalAlignment="Center" />27 <TextBlock Text="{Binding Path=ItemCount, StringFormat=数量:{0}}"28 VerticalAlignment="Center"29 Margin="5,0,0,0" />30 <Button Content="Sale"31 Margin="5,0,0,0" />32 </StackPanel>33 </Expander.Header>34 <ItemsPresenter />35 </Expander>36 </ControlTemplate>37 </Setter.Value>38 </Setter>39 </Style>40 </GroupStyle.ContainerStyle>41 </GroupStyle>42 </ListBox.GroupStyle>43 </ListBox> 从16⾏可以看出,GroupStyle定义的是控件内部样式,所以有⼈尝试在这⾥绑实体数据属性的话肯定是失败的,注意25⾏只能是Name,不管分组的属性叫什么名,这都只能是Name,我写了个Button在⾥⾯,如果想知道为什么只能是Name,写个Click处理,把Button的DataContext打印出来就什么都知道了。
WPF集合控件实现分隔符(ItemsControlSeparator)

WPF集合控件实现分隔符(ItemsControlSeparator)在WPF的集合控件中常常需要在每⼀个集合项之间插⼊⼀个分隔符样式,但是WPF的ItemsControl没有相关功能的直接实现,所以只能考虑曲线救国,经过研究,⼤概想到了以下两种实现⽅式。
先写出ItemsControl的数据模板,如下:<ItemsControl ItemsSource="{Binding Source}"BorderThickness="1"BorderBrush="Blue"VerticalAlignment="Stretch"><ItemsControl.ItemTemplate><DataTemplate><Grid><Grid.RowDefinitions><RowDefinition Height="Auto"/><RowDefinition Height="*"/></Grid.RowDefinitions><Border Name="Bd"Grid.Row="0"Height="1"Background="Red"/><TextBlock Grid.Row="1"Text="{Binding}"/></Grid></DataTemplate></ItemsControl.ItemTemplate></ItemsControl>其中名为Bd的Border就是分隔符,此时每⼀项的头部都可以看见分隔符,现在我们的⽬标是要隐藏掉第⼀项的分隔符,这就达到了项与项之间才有分隔符的⽬的。
wpf prims itemscontrol 多层嵌套用法 实例
wpf prims itemscontrol 多层嵌套用法实例【实用版】目录一、WPF 概述二、WPF 中的 Prims 和 ItemsControl三、多层嵌套用法四、实例分析正文一、WPF 概述WPF(Windows Presentation Foundation)是微软推出的一款基于.NET Framework 平台的图形用户界面技术。
它提供了许多强大的功能,如数据绑定、样式和模板等,使得开发者可以轻松地创建出具有丰富视觉效果和交互性的 Windows 应用程序。
二、WPF 中的 Prims 和 ItemsControl在 WPF 中,Prims(Primitive)是一种基本的 UI 元素,如文本、按钮、图像等。
它们可以直接在 XAML 中定义,也可以通过代码动态创建。
而 ItemsControl 是一种用于显示集合的控件,可以绑定到数据源并自动更新界面,支持诸如排序、筛选等功能。
三、多层嵌套用法在实际应用中,我们可能会遇到需要对数据进行分组、分类等操作,这就需要用到多层嵌套的用法。
例如,一个组织架构管理系统,可能需要显示各个部门的员工列表,而每个部门又有多个员工。
这时候,我们可以通过多层嵌套的用法,将部门和员工分别作为两个不同的数据源进行绑定。
四、实例分析假设我们有如下数据模型:```public class Department{public int Id { get; set; }public string Name { get; set; }public List<Employee> Employees { get; set; }}public class Employee{public int Id { get; set; }public string Name { get; set; }}```我们可以在 XAML 中定义一个 ItemsControl,将其 ItemSource 绑定到 Department 列表,然后在 ItemTemplate 中再使用一个ItemsControl,将其 ItemSource 绑定到每个部门的员工列表。
wpf tabitem的controltemplate

wpf tabitem的controltemplate在WPF(Windows Presentation Foundation)中,可以使用ControlTemplate 来自定义TabItem的外观。
ControlTemplate允许定义控件的视觉结构和外观。
以下是一个简单的示例,演示如何为TabItem定义一个自定义的ControlTemplate:<TabControl><TabItem Header="Tab 1"><TabItem.Template><ControlTemplate TargetType="TabItem"><BorderBorderBrush="Black"BorderThickness="1"Margin="5"CornerRadius="5"> <ContentPresenter ContentSource="Header"/></Border></ControlTemplate></TabItem.Template><!--Your TabContent for Tab 1--></TabItem><TabItem Header="Tab 2"><TabItem.Template><ControlTemplate TargetType="TabItem"><BorderBorderBrush="Red"BorderThickness="2"Margin="5"CornerRadius="5"> <ContentPresenter ContentSource="Header"/></Border></ControlTemplate></TabItem.Template><!--Your TabContent for Tab 2--></TabItem></TabControl>在这个例子中,我们为每个TabItem都定义了一个ControlTemplate。
avalonoia中itemscontrol用法

avalonoia中itemscontrol用法ItemsControl 是一个 WPF 控件,用于展示一个项的集合。
它可以用来创建列表、网格或其他布局形式的控件。
可以使用Avalonia 中的 ItemsControl 来创建一个包含子项的列表或布局面板。
以下是一个使用 ItemsControl 的示例代码:```csharpusing Avalonia;using Avalonia.Controls;using Avalonia.Markup.Xaml;public class MainWindow : Window{public MainWindow(){InitializeComponent();var itemsControl = this.Find<ItemsControl>("ItemsControl"); itemsControl.ItemsSource = new string[] { "Item 1", "Item 2", "Item 3" };}private void InitializeComponent(){AvaloniaXamlLoader.Load(this);}}```上述代码中,我们创建了一个 MainWindow 类继承自窗口类Window。
在构造函数中,我们初始化了 ItemsControl,并为其指定了一个包含三个字符串的数组作为 ItemSource,用于绑定到该控件并展示子项。
然后,我们在 XAML 中定义了一个 ItemsControl,并给它一个名为 "ItemsControl" 的标识,以便在代码中进行引用。
通过Find 方法找到 ItemsControl 控件,然后使用 ItemsSource 属性将数据源绑定到该控件。
这样就完成了 ItemsControl 的使用,它会自动根据数据源中的项创建相应的子项并进行展示。
wpf toolcontrols 控件的用法 -回复

wpf toolcontrols 控件的用法-回复WPF(Windows Presentation Foundation)是Microsoft推出的一种用户界面(UI)框架,它提供了丰富的控件库,用于创建现代和可交互的应用程序。
其中,toolcontrols是WPF中的一类控件,它们可以帮助用户快速实现各种常用功能和工具。
本文将逐步介绍WPF的toolcontrols控件的用法,包括如何选择和使用这些控件,以及它们的一些常见属性和事件。
第一步:选择适合的toolcontrols控件WPF提供了多种toolcontrols控件,包括按钮(Button)、文本框(TextBox)、标签(Label)、菜单(Menu)、滑块(Slider)等。
在选择适合的控件时,需要考虑控件的功能和使用场景。
例如,如果需要实现用户输入文本的功能,可以选择文本框控件;如果需要实现菜单导航的功能,可以选择菜单控件。
第二步:使用toolcontrols控件在WPF中使用toolcontrols控件非常简单,只需要在XAML中添加相应的标记,即可创建并使用控件。
例如,若要添加一个按钮控件,可以使用以下代码:xml<Button Content="Click me" Click="ButtonClickEvent" />上述代码创建了一个按钮控件,并为其设置了显示文本为"Click me"。
同时,还为按钮的点击事件指定了一个事件处理器方法"ButtonClickEvent"。
第三步:设置控件属性和样式除了基本的控件创建和使用外,toolcontrols控件还具有丰富的属性和样式可以设置。
例如,可以通过设置按钮的前景色(Foreground)、背景色(Background)、字体样式(FontFamily、FontSize)等属性,来美化按钮的外观。
wpf prims itemscontrol 多层嵌套用法 实例

wpf prims itemscontrol 多层嵌套用法实例摘要:一、引言二、WPF Prims ItemsControl简介1.功能概述2.属性与方法介绍三、多层嵌套用法实例1.实例概述2.代码实现四、实例运行效果与演示五、总结与拓展正文:【引言】在WPF(Windows Presentation Foundation)框架中,Prims ItemsControl是一个非常实用的控件,可以用于展示一系列的项。
而多层嵌套用法更是让这个控件具备了丰富的展示效果。
本文将详细介绍WPF Prims ItemsControl的多层嵌套用法,并通过实例进行演示。
【WPF Prims ItemsControl简介】一、功能概述Prisms ItemsControl主要用于在UI中展示一系列的项,例如文本、图像、列表等。
它可以自适应项的尺寸,并提供多种布局方式,使得开发者可以轻松地创建出复杂的UI结构。
二、属性与方法介绍1.属性- Items:定义项集合,可以通过数组或集合进行设置。
- ItemTemplate:定义项的模板,可以使用XAML或C#代码设置。
- ItemContainerStyle:定义项容器的样式。
- Virtualizing:启用虚拟化,提高性能。
2.方法- Add(Object item):向项集合中添加一项。
- Remove(Object item):从项集合中移除一项。
- Clear:清空项集合。
【多层嵌套用法实例】一、实例概述本实例将创建一个多层嵌套的UI结构,其中包括文本、图像和按钮等元素。
通过设置不同的ItemTemplate和ItemContainerStyle,实现丰富的视觉效果。
二、代码实现1.XAML代码```xml<Window ...xmlns:local="clr-namespace:YourNamespace"...><Grid><local:PrismsItemControl ItemsSource="{BindingPath=DataContext.Items}"ItemTemplate="{StaticResource ItemTemplate1}"ItemContainerStyle="{StaticResource ItemContainerStyle1}"Virtualizing="True" /> </Grid></Window>```2.C#代码```csharppublic class DataContext : INotifyPropertyChanged{public IList<object> Items{get;set;}public void Initialize(){Items = new List<object>{new TextBlock { Text = "第一层" },new StackPanel{Children ={new TextBlock { Text = "第二层" },new Image { Source = new BitmapImage(new Uri("image.png")), Width = 100 },new Button { Content = "按钮" }}},new TextBlock { Text = "第三层" }};}public event PropertyChangedEventHandler PropertyChanged;}```【实例运行效果与演示】运行上述代码,将展示一个多层嵌套的UI结构,其中包括文本、图像和按钮等元素。
- 1、下载文档前请自行甄别文档内容的完整性,平台不提供额外的编辑、内容补充、找答案等附加服务。
- 2、"仅部分预览"的文档,不可在线预览部分如存在完整性等问题,可反馈申请退款(可完整预览的文档不适用该条件!)。
- 3、如文档侵犯您的权益,请联系客服反馈,我们会尽快为您处理(人工客服工作时间:9:00-18:30)。
该控件叫Summary, 主要是一些汇总信息的显示,有几个地方用,之前都是分散到各个XAML 文件里,不统一。
本人WPF新手,对XAML了解不多,做这个软件基本上都是用CM,界面布局用AvalonDock。
由于缺乏相关经验,又没有一个能问得上的人指导,写这个控件费了我很长时间(啥时有空啥时动动)。
之前主要做一些功能方面的,没有心思美化界面,现在虽然还有很多功能没写,但是基本上够自己用了,放下心思来做一些界面上的东西,要不然何苦选择WPF?先看一下图:该CustomControl 由4部分组成:大标题,小标题,值及Detail。
虽然细分这么多,但实质上还是一个列表类的控件,所以选择继承自ItemsControl.做这个控件的时候,遇到了一些详细的问题不知道怎么解决,Google/Bing 都没有找到我要了解的,Baidu 更不用提了,漫天的转载,Copy.1, 类似ComboBox 的DisplayMemberPath 如何弄?既然都自定控件了,当然是想让它适用不同场景,不能局限于某一个实体类,最好是能像DisplayMemberPath ValueMemberPath 这样的属性。
这里,我定义了:ItemTitlePathProperty 及ItemValuePathProperty 来处理。
2,有了上面两个依赖属性,但是还不足以处理更多的场景,最好是能有不同的Template 。
这里我定义了:TitleTemplate / ValueTemplate及DetailTemplate.第一个问题,只需定义一个简单的DataTemplate ,然后用TemplateBinding 即可做到。
但是要和第二个问题结合在一起,就牵扯到模板切换及数据切换的问题,因为第一问题所用的数据被指定为某实体类的某个属性,第二个问题的数据要指定为整个实体。
解决第一个问题,需要重写PrepareContainerForItemOverride 方法,第二个需要重写OnApplyTemplate不多说了,怕误导大家,毕竟,我懂的不多,上代码,供参考:模板文件:1<ResourceDictionaryxmlns="/winfx/2006/xaml/presentation"2xmlns:x="/winfx/2006/xaml"3xmlns:local="clr-namespace:AsNum.WPF.Controls"4>567<DataTemplate x:Key="SummaryTitleTemplate">8<TextBlock Text="{Binding}" Foreground="White"/>9</DataTemplate>1011<DataTemplate x:Key="SummaryValueTemplate">12<Border HorizontalAlignment="Right" Background="#FF535C7B" CornerRadius="10">13<TextBlock Text="{Binding}" Padding="8,3"Foreground="White"/>14</Border>15</DataTemplate>161718<Style TargetType="{x:Type local:Summary}">19<Setter Property="Template">20<Setter.Value>21<ControlTemplate TargetType="{x:Type local:Summary}"> 22<Border Background="{TemplateBinding Background}"23BorderBrush="{TemplateBinding BorderBrush}"24BorderThickness="{TemplateBinding BorderThickness}"25>2627<StackPanel Height="auto">28<Border Padding="20,5"CornerRadius="5,5,0,0" Background="#10a8ab">29<TextBlock Text="{Binding RelativeSource={RelativeSource FindAncestor, AncestorType={x:Typelocal:Summary}}, Path=Title}" FontSize="18.667" Foreground="White" HorizontalAlignment="Center"/>30</Border> 31<Border Background="#FF394165" CornerRadius="0,0,3,3" Padding="5">32<ItemsPresenter />33</Border>34</StackPanel>3536</Border>37</ControlTemplate>38</Setter.Value>39</Setter>40</Style>4142<Style TargetType="{x:Type local:SummaryItem}">43<Setter Property="Template">44<Setter.Value>45<ControlTemplate TargetType="{x:Typelocal:SummaryItem}">46<Border x:Name="Item"47Padding="3"48BorderBrush="{TemplateBinding BorderBrush}"49BorderThickness="{TemplateBinding BorderThickness}">505152<Border.Background>53<SolidColorBrush />54</Border.Background>5556<StackPanel>57<DockPanel>58<ContentControl x:Name="PART_Title" 59Content="{TemplateBinding Title}"60ContentTemplate="{StaticResource SummaryTitleTemplate}"61/>6263<ContentControlx:Name="PART_Value"64Content="{TemplateBinding Value}"65ContentTemplate="{StaticResource SummaryValueTemplate}"66Width="auto"67DockPanel.Dock="Right"68HorizontalAlignment="Right"69/>7071</DockPanel>72<ContentControl Margin="0,2,0,2"x:Name="PART_Detail" ContentTemplate="{TemplateBinding DetailTemplate}"/> 73</StackPanel>7475<Border.Triggers>76<EventTriggerRoutedEvent="Border.MouseEnter">77<BeginStoryboard>78<Storyboard>79<ColorAnimationTo="#FF535C7B" Duration="0:0:1"80Storyboard.TargetName="Item"81Storyboard.TargetProperty="(Border.Background).(SolidColorBrush.Color)"/>82</Storyboard>83</BeginStoryboard>84</EventTrigger>85<EventTriggerRoutedEvent="Border.MouseLeave">86<BeginStoryboard>87<Storyboard>88<ColorAnimationTo="Transparent" Duration="0:0:1"89Storyboard.TargetName="Item"90Storyboard.TargetProperty="(Border.Background).(SolidColorBrush.Color)"/> 91</Storyboard>92</BeginStoryboard>93</EventTrigger>94</Border.Triggers>959697</Border>98</ControlTemplate>99</Setter.Value>100</Setter>101</Style>102103</ResourceDictionary>Summary.cs1using System;2using System.Collections.Generic;3using System.Collections.ObjectModel;4using System.Linq;5using System.Text;6using System.Threading.Tasks;7using System.Windows;8using System.Windows.Controls;9using System.Windows.Data;10using System.Windows.Documents;11using System.Windows.Input;12using System.Windows.Media;13using System.Windows.Media.Imaging;14using System.Windows.Navigation;15using System.Windows.Shapes;1617namespace AsNum.WPF.Controls {18public class Summary : ItemsControl {192021public static DependencyProperty TitleProperty = DependencyProperty.Register("Title", typeof(string), typeof(Summary));2223public static DependencyProperty ItemTitlePathProperty = DependencyProperty.Register("ItemTitlePath", typeof(string), typeof(Summary)); 2425public static DependencyProperty ItemValuePathProperty = DependencyProperty.Register("ItemValuePath", typeof(string), typeof(Summary)); 2627public static DependencyProperty ItemDetailTemplateProperty = DependencyProperty.Register("ItemDetailTemplate", typeof(DataTemplate), typeof(Summary));2829public static DependencyProperty ItemTitleTemplateProperty = DependencyProperty.Register("ItemTitleTemplate", typeof(DataTemplate), typeof(Summary));3031public static DependencyProperty ItemValueTemplateProperty = DependencyProperty.Register("ItemValueTemplate", typeof(DataTemplate), typeof(Summary));3233public string Title {34get {35return (string)this.GetValue(TitleProperty);36}37set {38this.SetValue(TitleProperty, value);39}40}4142public string ItemTitlePath {43get {44return (string)this.GetValue(ItemTitlePathProperty); 45}46set {47this.SetValue(ItemTitlePathProperty, value);48}49}5051public string ItemValuePath {52get {53return (string)this.GetValue(ItemValuePathProperty); 54}55set {56this.SetValue(ItemValuePathProperty, value);57}58}5960public DataTemplate ItemDetailTemplate {61get {62return(DataTemplate)this.GetValue(ItemDetailTemplateProperty);63}64set {65this.SetValue(ItemDetailTemplateProperty, value);66}67}6869public DataTemplate ItemTitleTemplate {70get {71return(DataTemplate)this.GetValue(ItemTitleTemplateProperty);72}73set {74this.SetValue(ItemTitleTemplateProperty, value);75}76}7778public DataTemplate ItemValueTemplate {79get {80return(DataTemplate)this.GetValue(ItemValueTemplateProperty);81}82set {83this.SetValue(ItemValueTemplateProperty, value);84}85}8687static Summary() {88DefaultStyleKeyProperty.OverrideMetadata(typeof(Summary), new FrameworkPropertyMetadata(typeof(Summary)));89}9091protected override voidPrepareContainerForItemOverride(DependencyObject element, object item) {92base.PrepareContainerForItemOverride(element, item);93var ele = element as SummaryItem;9495{96Binding binding = new Binding();97ele.SetBinding(SummaryItem.ItemProperty, binding);98}99100if (!string.IsNullOrEmpty(this.ItemTitlePath)) {101Binding binding = new Binding(this.ItemTitlePath);102ele.SetBinding(SummaryItem.TitleProperty, binding); 103}104105if (!string.IsNullOrEmpty(this.ItemValuePath)) {106Binding binding = new Binding(this.ItemValuePath);107ele.SetBinding(SummaryItem.ValueProperty, binding); 108}109110ele.DetailTemplate = this.ItemDetailTemplate;111ele.TitleTemplate = this.ItemTitleTemplate;112ele.ValueTemplate = this.ItemValueTemplate;113}114115protected override DependencyObject GetContainerForItemOverride() {116return new SummaryItem();117}118119}120 }SummaryItem.cs1using System;2using System.Collections.Generic;3using System.Linq;4using System.Text;5using System.Threading.Tasks;6using System.Windows;7using System.Windows.Controls;8using System.Windows.Data;9using System.Windows.Documents;10using System.Windows.Input;11using System.Windows.Media;12using System.Windows.Media.Imaging;13using System.Windows.Navigation;14using System.Windows.Shapes;1516namespace AsNum.WPF.Controls {1718[TemplatePart(Name = "PART_Value", Type=typeof(ContentControl))] 19[TemplatePart(Name = "PART_Title", Type = typeof(ContentControl))] 20[TemplatePart(Name = "PART_Detail", Type = typeof(ContentControl))] 21public class SummaryItem : Control {2223public static DependencyProperty ItemProperty = DependencyProperty.Register("Item", typeof(object), typeof(Summary));24public static DependencyProperty TitleProperty = DependencyProperty.Register("Title", typeof(string), typeof(SummaryItem));25public static DependencyProperty ValueProperty = DependencyProperty.Register("Value", typeof(object), typeof(SummaryItem));26public static DependencyProperty DetailTemplateProperty = DependencyProperty.Register("DetailTemplate", typeof(DataTemplate),typeof(SummaryItem));27public static DependencyProperty TitleTemplateProperty = DependencyProperty.Register("TitleTemplate", typeof(DataTemplate),typeof(SummaryItem));28public static DependencyProperty ValueTemplateProperty = DependencyProperty.Register("ValueTemplate", typeof(DataTemplate),typeof(SummaryItem));2930public object Item {31get {32return (object)this.GetValue(ItemProperty);33}34set {35this.SetValue(ItemProperty, value);36}37}38public string Title {39get {40return (string)this.GetValue(TitleProperty);41}42set {43this.SetValue(TitleProperty, value);44}45}4647public object Value {48get {49return this.GetValue(ValueProperty);50}51set {52this.SetValue(ValueProperty, value);53}54}5556public DataTemplate DetailTemplate {57get {58return(DataTemplate)this.GetValue(DetailTemplateProperty);59}60set {61this.SetValue(DetailTemplateProperty, value);62}63}6465public DataTemplate TitleTemplate {66get {67return (DataTemplate)this.GetValue(TitleTemplateProperty); 68}69set {70this.SetValue(TitleTemplateProperty, value);71}72}7374public DataTemplate ValueTemplate {75get {76return(DataTemplate)this.GetValue(ValueTemplateProperty);77}78set {79this.SetValue(ValueTemplateProperty, value);80}81}8283static SummaryItem() {84DefaultStyleKeyProperty.OverrideMetadata(typeof(SummaryItem), new FrameworkPropertyMetadata(typeof(SummaryItem)));85}8687public override void OnApplyTemplate() {88base.OnApplyTemplate();8990var pv =(ContentControl)this.Template.FindName("PART_Value", this);91if (pv != null && this.ValueTemplate != null) {92pv.Content = this.Item;93pv.ContentTemplate = this.ValueTemplate;94}9596var pt = (ContentControl)this.Template.FindName("PART_Title", this);97if (pt != null && this.TitleTemplate != null) {98pt.Content = this.Item;99pt.ContentTemplate = this.TitleTemplate;100}101102var pd =(ContentControl)this.Template.FindName("PART_Detail", this);103if (pd != null && this.DetailTemplate != null) {104pd.Content = this.Item;105}106}107}108 }用法:1<ac:Summary Grid.Row="0" Title="用法" ItemsSource="{Binding Items2}" ItemTitlePath="Title2" ItemValuePath="Value"/>23<ac:Summary Grid.Row="2" Width="200"4Title="{Binding Title2}" ItemsSource="{BindingItems2}"5ItemTitlePath="Title2" ItemValuePath="Value">6<ac:Summary.ItemDetailTemplate>7<DataTemplate>8<TextBlock Text="{Binding Title2}"/>9</DataTemplate>10</ac:Summary.ItemDetailTemplate>1112<ac:Summary.ItemValueTemplate>13<DataTemplate>14<Button Content="{Binding Value}"/>15</DataTemplate>16</ac:Summary.ItemValueTemplate> 17</ac:Summary>还有一些小细节需要自行调整。
