SSH无密码认证(密钥)配置
Linux配置SSH免密登录“ssh-keygen”的基本用法
Linux配置SSH免密登录“ssh-keygen”的基本⽤法⽬录1 什么是SSH2 配置SSH免密登录2.1 安装必需的软件2.2 ssh-keygen创建公钥-私钥对2.3 ssh-copy-id把A的公钥发送给B2.4 在A服务器上免密登录B服务器3 扩展说明3.2 ⽂件权限3.3 ⽂件的编辑和查看1 什么是SSH引⽤百度百科的说明:SSH 为 Secure Shell的缩写,由 IETF 的⽹络⼩组(Network Working Group)所制定;它是建⽴在应⽤层基础上的安全协议。
SSH 是⽬前较可靠,专为远程登录会话和其他⽹络服务提供安全性的协议。
利⽤ SSH 协议可以有效防⽌远程管理过程中的信息泄露问题。
SSH最初是UNIX系统上的⼀个程序,后来⼜迅速扩展到其他操作平台。
为了在不同平台/⽹络主机之间的通信安全, 很多时候我们都要通过ssh进⾏认证. ssh认证⽅式主要有2种:①基于⼝令的安全认证: 每次登录的时候都要输⼊⽤户名和密码, 由于要在⽹络上传输密码, 可能存在中间⼈攻击的风险;②基于密钥的安全认证: 配置完成后就可以实现免密登录, 这种⽅式更加安全 —— 不需要在⽹络上传递⼝令, 只需要传输⼀次公钥. 常见的git的ssh⽅式就是通过公钥进⾏认证的.2 配置SSH免密登录说明: 这⾥演⽰所⽤的服务器操作系统是Cent OS 7. 我们的⽬标是:A服务器(172.16.22.131) 能免密登录 B服务器 (172.16.22.132).注意: ssh连接是单向的, A能免密登录B, 并不能同时实现B能免密登录A.2.1 安装必需的软件在操作之前, 先确保所需要的软件已经正常安装.这⾥我们需要安装ssh-keygen和ssh-copy-id, 安装⽅式如下:# 安装ssh-keygen, 需要确保服务器可以联⽹. 博主这⾥已经安装完成, 所以没有做任何事.[root@localhost ~]# yum install -y ssh-keygenLoaded plugins: fastestmirror, langpacksbase | 3.6 kB 00:00:00epel | 3.6 kB 00:00:00extras | 2.9 kB 00:00:00updates | 2.9 kB 00:00:00Loading mirror speeds from cached hostfileNo package ssh-keygen available.Error: Nothing to do# 安装ssh-copy-id[root@localhost ~]# yum install -y ssh-copy-idLoaded plugins: fastestmirror, langpacksLoading mirror speeds from cached hostfileNo package ssh-copy-id available.Error: Nothing to do2.2 ssh-keygen创建公钥-私钥对(1) 在指定⽬录下⽣成rsa密钥, 并指定注释为“shoufeng”, 实现⽰例:[root@localhost ~]# ssh-keygen -t rsa -f ~/.ssh/id_rsa -C "shoufeng"# ~密钥类型 ~密钥⽂件路径及名称 ~ 备注信息Generating public/private rsa key pair.Enter passphrase (empty for no passphrase): # 输⼊密码, 若不输⼊则直接回车Enter same passphrase again: # 再次确认密码, 若不输⼊则直接回车Your identification has been saved in /root/.ssh/id_rsa.Your public key has been saved in /root/.ssh/id_rsa.pub.The key fingerprint is:9a:e3:94:b9:69:c8:e9:68:4b:dc:fa:43:25:7f:53:f1 shoufengThe key's randomart image is:+--[ RSA 2048]----+| || . || o || . . . E || + S. || . .. .=o || oo.oB. . || ..o=o.+ || .++oo+ |+-----------------+注意: 密钥的⽂件名称必须是id_xxx, 这⾥的xxx就是-t参数指定的密钥类型. ⽐如密钥类型是rsa, 那么密钥⽂件名就必须是id_rsa.(2) ssh-keygen常⽤参数说明:-t: 密钥类型, 可以选择 dsa | ecdsa | ed25519 | rsa;-f: 密钥⽬录位置, 默认为当前⽤户home路径下的.ssh隐藏⽬录, 也就是~/.ssh/, 同时默认密钥⽂件名以id_rsa开头. 如果是root⽤户, 则在/root/.ssh/id_rsa, 若为其他⽤户, 则在/home/username/.ssh/id_rsa; -C: 指定此密钥的备注信息, 需要配置多个免密登录时, 建议携带;-N: 指定此密钥对的密码, 如果指定此参数, 则命令执⾏过程中就不会出现交互确认密码的信息了.举例说明: 同时指定⽬录位置、密码、注释信息, 就不需要输⼊回车键即可完成创建:ssh-keygen -t rsa -f ~/.ssh/id_rsa -N shoufeng -C shoufeng(3) 前往~/.ssh/⽬录下查看⽣成的⽂件:# ⽣成的⽂件以test_rsa开头, test_rsa是私钥, test_rsa.pub是公钥:[root@localhost .ssh]# lstest_rsa test_rsa.pub# 通过cat命令查看公钥⽂件:[root@localhost .ssh]# cat id_rsa.pubssh-rsa AAAAB3NzaC1yc2EAAAADAQABAAABAQC2JpLMqgeg9jB9ZztOCw0WMS8hdVpFxthqG1vOQTOji/cp0+8RUZl3P6NtzqfHbs0iTcY0ypIJGgx4eXyipfLvilV2bSxRINCVV73VnydVYl5gLHsrgOx+372Wovlanq7Mxq06qAONjuRD0c64xqdJFKb1Ov# 可以看到最后有⼀个注释内容shoufeng2.3 ssh-copy-id把A的公钥发送给B默认⽤法是: ssh-copy-id root@172.16.22.132, ssh-copy-id命令连接远程服务器时的默认端⼝是22, 当然可以指定⽂件、远程主机的IP、⽤户和端⼝:# 指定要拷贝的本地⽂件、远程主机的IP+⽤户名+端⼝号:[root@localhost .ssh]# ssh-copy-id -i ~/.ssh/id_rsa.pub -p 22 root@172.16.22.132/usr/bin/ssh-copy-id: INFO: attempting to log in with the new key(s), to filter out any that are already installed/usr/bin/ssh-copy-id: INFO: 1 key(s) remain to be installed -- if you are prompted now it is to install the new keysroot@172.16.22.132's password: # 输⼊密码后, 将拷贝公钥Number of key(s) added: 1Now try logging into the machine, with: "ssh -p '22' 'root@172.16.22.132'"and check to make sure that only the key(s) you wanted were added.2.4 在A服务器上免密登录B服务器[root@localhost .ssh]# ssh root@172.16.22.132Last login: Fri Jun 14 08:46:04 2019 from 192.168.34.16 # 登录成功3 扩展说明3.1 其他⽅式发送公钥⽂件上述2.3步骤是通过ssh-copy-id⼯具发送公钥⽂件的, 当然我们也可以通过其他⽅式实现:(1) 将A的公钥⽂件发给B:通过scp命令将A服务器的公钥⽂件发送到B服务器的⽤户⽬录下, 因为还没有配置成功免密登录, 所以期间需要输⼊B服务器对应⽤户的密码:[root@localhost .ssh]# scp id_rsa.pub root@172.16.22.132:/root/.sshroot@172.16.22.132's password:id_rsa.pub 100% 390 0.4KB/s 00:00(2) 在B上创建authorized_keys⽂件:[root@localhost .ssh]# cd /root/.ssh/[root@localhost .ssh]# lsid_rsa.pub# 通过A服务器的公钥⽣成"authorized_keys"⽂件:[root@localhost .ssh]# cat id_rsa.pub >> authorized_keys[root@localhost .ssh]# cat authorized_keysssh-rsa AAAAB3NzaC1yc2EAAAADAQABAAABAQC2JpLMqgeg9jB9ZztOCw0WMS8hdVpFxthqG1vOQTOji/cp0+8RUZl3P6NtzqfHbs0iTcY0ypIJGgx4eXyipfLvilV2bSxRINCVV73VnydVYl5gLHsrgOx+372Wovlanq7Mxq06qAONjuRD0c64xqdJFKb1OvS/nyKaOr9注意: 上述重定向时使⽤>>进⾏追加, 不要⽤>, 那会清空原有内容.3.2 ⽂件权限为了让私钥⽂件和公钥⽂件能够在认证中起作⽤, 需要确保权限的正确性:①对于.ssh⽬录以及其内部的公钥、私钥⽂件, 当前⽤户⾄少要有执⾏权限, 其他⽤户最多只能有执⾏权限.②不要图省事设置成777权限: 太⼤的权限不安全, ⽽且数字签名也不⽀持这种权限策略.③对普通⽤户, 建议设置成600权限: chmod 600 authorized_keys id_rsa id_rsa.pub;④对root⽤户, 建议设置成644权限: chmod 644 authorized_keys id_rsa id_rsa.pub.3.3 ⽂件的编辑和查看在Liunx环境下, 如果要查看、复制私钥、公钥, 以及authorized_keys等⽂件, 不要使⽤vim等编辑器打开, 因为它会产⽣不必要的回车;应该通过cat、more、less等查看命令把内容打印到终端上, 再作查看、复制等操作.总结以上所述是⼩编给⼤家介绍的Linux 配置SSH免密登录 “ssh-keygen”的基本⽤法 ,希望对⼤家有所帮助,如果⼤家有任何疑问请给我留⾔,⼩编会及时回复⼤家的。
设置ssh无密码登录linux服务器的方法

设置ssh⽆密码登录linux服务器的⽅法每次登录测试服务器,ssh登录总是需要输⼊密码。
登录的少还⾏,登录的多了,多⼀⾏命令都是多余的。
rsa认证登录⽅式制作密钥对在客户端(本地机器)终端下输⼊以下命令ssh-keygen -t [rsa|dsa]rsa和dsa代表不同的算法例如:ssh-keygen -t rsa⼀直回车就对了(不⽤设置密码)将会⽣成密钥⽂件和私钥⽂件 id_rsa,id_rsa.pub(如果⽤dsa则⽣成id_dsa,id_dsa.pub)⽣成位置在/root/.ssh/⽂件夹下(我⽤的是root⽤户所以在root下,⽣成过程会有提⽰⽂件位置).ssh 是隐藏⽂件夹使⽤ ls -a查看将公钥放到服务器指定位置⽅法⼀、直接复制1、将公钥复制到服务器的root⽤户下的.ssh⽂件夹(⽤哪个⽤户登录就复制到哪个⽤户下的.ssh⽂件夹下)scp /root/.ssh/id_rsa.pub root@172.16.0.164:/root/.ssh/2、安装公钥登录到服务器cd /root/.ssh/cat id_rsa.pub >> authorized_keys⽅法⼆、使⽤ssh-copy-id命令复制(推荐)⼀个命令直接就ok了ssh-copy-id root@172.16.0.164验证不⽤输⼊密码则成功,否则失败ssh root@172.16.0.164注意事项上⾯操作测试过是没有问题的linux的版本和使⽤的⽤户不同会有差别的。
如果出现问题可以考虑以下两点1、id_rsa.pub和authorized_keys的⽂件权限问题chmod 600 authorized_keyschmod 700 ~/.ssh2、ssh的配置⽂件vim /etc/ssh/sshd_config#启⽤ RSA 认证,默认为yesRSAAuthentication yes启⽤公钥认证,默认为yesPubkeyAuthentication yes#root⽤户ssh登录PermitRootLogin yes(这些配置我都是没有修改的,我的是redhat7.2)⾃定义写个简单shell脚本在常⽤⽂件夹下创建个⽂件touch 164.sh编辑⽂件⽂件内容 ssh root@172.16.0.164vim 164.sh#添加内容ssh root@172.16.0.164保存退出:wq增加⽤户的执⾏权限chmod u+x 164.sh搞定结合tab键使⽤更爽哟./164.shexpect命令免密登录⽅式可能你觉得需要操作服务器系统不好,当然也可以只在本地操作。
配置ssh免密码登陆
配置ssh实现节点间无密码登陆注意:三台机器dns 和默认网关必须一致。
登陆密码一致最好。
而且务必三台机器互相ping通主机,即主机名和ip解析正确。
如集群三台机器的IP地址分别为:192.168.23.111、192.168.23.112、192.168.23.113、对应节点主机名为:hadoop1、hadoop2、hadoop3。
在三台节点机分别创建用户hadoop,uid=600,密码可相同,也可不同。
操作命令以mpi 用户名为例,如下:若需修改主机名,需要修改两处:一处是/etc/sysconfig/network,另一处是/etc/hosts,只修改任一处会导致系统启动异常。
首先切换到root用户。
打开文件:/etc/sysconfig/network里面有一行HOSTNAME=localhost.localdomain (如果是默认的话),修改localhost.localdomain 为你的主机名。
打开文件:/etc/hosts有一行127.0.0.1 localhost.localdomain localhost 。
其中127.0.0.1 是本地环路地址,localhost.localdomain 是主机名(hostname),也就是你待修改的。
localhost 是主机名的别名(alias),它会出现在Konsole的提示符下。
将第二项修改为你的主机名,第三项可选。
若ping不通,修改/etc/hosts文件,使用sudo vi /etc/hosts命令,hadoop1设置如下(namenode):192.168.1.100 hadoop1192.168.1.101 hadoop2192.168.1.102 hadoop3Hadoop2(datanode)的设置为:192.168.1.100 hadoop1192.168.1.101 hadoop2192.168.1.102 hadoop3Hadoop3(datanode)的设置为:192.168.1.100 hadoop1192.168.1.101 hadoop2192.168.1.102 hadoop3本集群将namenode和jobtracker 设置成一台机器即hadoop1。
SSH三步解决免密登录

SSH三步解决免密登录
SSH 三步解决免密登录
•1.客户端生成公私钥
•2.上传公钥到服务器
•3.测试免密登录
1.客户端生成公私钥
本地客户端生成公私钥:(一路回车默认即可)
ssh-keygen
上面这个命令会在用户目录.ssh文件夹下创建公私钥
cd ~/.ssh
ls
下创建两个密钥:
1.id_rsa (私钥)
2.id_rsa.pub (公钥)
2.上传公钥到服务器
这里测试用的服务器地址为:192.168.235.22
用户为:root
ssh-copy-id-i~/.ssh/**********************.235.22上面这条命令是写到服务器上的ssh目录下去了
cd ~/.ssh
vim authorized_keys
可以看到客户端写入到服务器的 id_rsa.pub (公钥)内容。
3.测试免密登录
客户端通过ssh连接远程服务器,就可以免密登录了。
***************.235.22。
Linux之间配置SSH互信(SSH免密码登录)
[root@client /]#ssh 192.168.1.20 #s单就是分区那一块如果写更详细点对我们这种不懂分区的人来说就更好了
Linux之间配置 SSH互信( SSH免密码登录)
为简化SSH过程,采用证书方式,免去SSH登入时需要输入账号密码的过程,具体操作如下: 一、在SSH服务器所在机器上 1、以root用户登录,更改ssh配置文件 /etc/ssh/sshd_config,去除以下配置的注释
RSAAuthentication yes #启用rsa认证 PubkeyAuthentication yes #启用公钥私钥配对认证方式 AuthorizedKeysFile .ssh/authorized_keys #公钥文件路径
2、重启SSH服务
[root@server /]#systemctl restart sshd //重启ssh服务
二、在客户端机器上
1、生成公钥私钥对
[root@client /]#ssh-keygen -t rsa
一路默认回车,系统在/root/.ssh下生成id_rsa、id_rsa.pub 2、把id_rsa.pub发送到服务端机器上
[root@client /]#ssh-copy-id -i /root/.ssh/id_rsa.pub 192.168.1.20 #server ip
ssh免密登录配置(配置后还需要密码输入密码问题解决)
ssh免密登录配置(配置后还需要密码输⼊密码问题解决)背景需要搭建jenkins,⽤来⾃动部署服务到⽬标服务器,所以需要在jenkins所在机器配置免密登录⽬标服务器环境阿⾥云服务器:服务器A(jenkins所在服务器),服务器B(部署⽬标服务器)步骤⼀服务器A部分1 登录A,2 ⽣成秘钥1)⾸先查看.ssh下是否已经有id_rsa和id_rsa.pub⽂件,以免被覆盖2)⽣成秘钥ssh-keygen -t rsa -C "xxx@jenkins"3)将在.ssh⽂件夹下⽣成2个⽂件 id_rsa, id_rsa.pub,重命名为 id_rsa_jenkins,id_rsa_jenkins.pub 以免以后冲突3 配置config 在~/.ssh 下创建config⽂件Host pre1HostName xx.xx.xx.xxHost pre2HostName xx.xx.xx.xxHost *User 登录⽬标机器的⽤户Port 登录⽬标机器的端⼝IdentityFile ~/.ssh/id_rsa_jenkins 私钥所在路径 由于⽤户,端⼝号,秘钥,都是通⽤的,所以以通配符来配置,只有服务器地址不同,每个⽬标服务器单独配置4 拷贝id_rsa_jenkins.pub 内的内容⼆服务器B部分1 使⽤要免密登录的账户登录服务器B2 在~/.ssh⽂件夹下查看是否有 authorized_keys 没有则创建3 将id_rsa_jenkins.pub的内容,追加到authorized_keys后⾯4 查看 /ect/ssh/sshd_config 需要有如下配置RSAAuthentication yesPubkeyAuthentication yesAuthorizedKeysFile %h/.ssh/authorized_keys5 切换到root⽤户重启 sshd : service sshd restart结果在服务器A ssh pre1结果还让输⼊密码,⼀定是我哪⾥配置的不对,查找问题解决问题开两个窗⼝,分别登录服务器A和B服务器B:1 登录root⽤户2 停⽌ssh service ssh stop3 debug运⾏ssh /usr/sbin/sshd -d服务器A:尝试ssh : ssh -v pre1 查看详情服务器A⽇志:OpenSSH_7.6p1 Ubuntu-4ubuntu0.4, OpenSSL 1.0.2n 7 Dec 2017debug1: Reading configuration data /var/lib/jenkins/.ssh/configdebug1: /var/lib/jenkins/.ssh/config line 5: Applying options for pre1debug1: /var/lib/jenkins/.ssh/config line 8: Applying options for *debug1: Reading configuration data /etc/ssh/ssh_configdebug1: /etc/ssh/ssh_config line 19: Applying options for *debug1: Connecting to **.**.**.** [**.**.**.**] port ****.debug1: Connection established.debug1: identity file /var/lib/jenkins/.ssh/id_rsa_jenkins type0debug1: key_load_public: No such file or directorydebug1: identity file /var/lib/jenkins/.ssh/id_rsa_jenkins-cert type -1debug1: Local version string SSH-2.0-OpenSSH_7.6p1 Ubuntu-4ubuntu0.4debug1: Remote protocol version 2.0, remote software version OpenSSH_7.2p2 Ubuntu-4ubuntu2.4debug1: match: OpenSSH_7.2p2 Ubuntu-4ubuntu2.4 pat OpenSSH* compat 0x04000000debug1: Authenticating to **.**.**.**:**** as 'username'debug1: SSH2_MSG_KEXINIT sentdebug1: SSH2_MSG_KEXINIT receiveddebug1: kex: algorithm: curve25519-sha256@debug1: kex: host key algorithm: ecdsa-sha2-nistp256debug1: kex: server->client cipher: chacha20-poly1305@ MAC: <implicit> compression: nonedebug1: kex: client->server cipher: chacha20-poly1305@ MAC: <implicit> compression: nonedebug1: expecting SSH2_MSG_KEX_ECDH_REPLYdebug1: Server host key: ecdsa-sha2-nistp256 SHA256:+/jjmuxy3eZ61XEguY2327fz7OfrhIks1edgLK3AnWYdebug1: Host '[**.**.**.**]:****' is known and matches the ECDSA host key.debug1: Found key in /var/lib/jenkins/.ssh/known_hosts:4debug1: rekey after 134217728 blocksdebug1: SSH2_MSG_NEWKEYS sentdebug1: expecting SSH2_MSG_NEWKEYSdebug1: SSH2_MSG_NEWKEYS receiveddebug1: rekey after 134217728 blocksdebug1: SSH2_MSG_EXT_INFO receiveddebug1: kex_input_ext_info: server-sig-algs=<rsa-sha2-256,rsa-sha2-512>debug1: SSH2_MSG_SERVICE_ACCEPT receiveddebug1: Authentications that can continue: publickey,passworddebug1: Next authentication method: publickeydebug1: Offering public key: RSA SHA256:XS0Qkck+0F5M0iJdLn3/owfK9QGxPSQxRoYcCGcb9zQ /var/lib/jenkins/.ssh/id_rsa_jenkinsdebug1: Authentications that can continue: publickey,passworddebug1: Next authentication method: password发现在登录过程中,尝试证书认证,但是没有认证通过,改为密码登录,于是查看服务器B⽇志,看看因为什么导致证书认证错误服务器B⽇志debug1: sshd version OpenSSH_7.2, OpenSSL 1.0.2g 1 Mar 2016debug1: private host key #0: ssh-rsa SHA256:FdwiwpgHBW6MTxKJSkVYbtYS/H/kYr+o6JAoFjzOrY8debug1: private host key #1: ssh-dss SHA256:thpjst+JHWAjnRyEDtOjWeVNO7JFl5K2FETPSLU5hcgdebug1: private host key #2: ecdsa-sha2-nistp256 SHA256:+/jjmuxy3eZ61XEguY2327fz7OfrhIks1edgLK3AnWYdebug1: private host key #3: ssh-ed25519 SHA256:9X0yrjSoRLi/AM/oyozk3Sgd+G0JoDyJbIZFv1rt1Rgdebug1: rexec_argv[0]='/usr/sbin/sshd'debug1: rexec_argv[1]='-d'debug1: Set /proc/self/oom_score_adj from 0 to -1000debug1: Bind to port **** on 0.0.0.0.Server listening on 0.0.0.0 port ****.debug1: Server will not fork when running in debugging mode.debug1: rexec start in4 out 4 newsock 4 pipe -1 sock 7debug1: inetd sockets after dupping: 3, 3Connection from **.**.**.** port **** on **.**.**.** port ****debug1: Client protocol version 2.0; client software version OpenSSH_7.6p1 Ubuntu-4ubuntu0.4debug1: match: OpenSSH_7.6p1 Ubuntu-4ubuntu0.4 pat OpenSSH* compat 0x04000000debug1: Enabling compatibility mode for protocol 2.0debug1: Local version string SSH-2.0-OpenSSH_7.2p2 Ubuntu-4ubuntu2.4debug1: permanently_set_uid: 109/65534 [preauth]debug1: list_hostkey_types: ssh-rsa,rsa-sha2-512,rsa-sha2-256,ecdsa-sha2-nistp256,ssh-ed25519 [preauth]debug1: SSH2_MSG_KEXINIT sent [preauth]debug1: SSH2_MSG_KEXINIT received [preauth]debug1: kex: algorithm: curve25519-sha256@ [preauth]debug1: kex: host key algorithm: ecdsa-sha2-nistp256 [preauth]debug1: kex: client->server cipher: chacha20-poly1305@ MAC: <implicit> compression: none [preauth]debug1: kex: server->client cipher: chacha20-poly1305@ MAC: <implicit> compression: none [preauth]debug1: expecting SSH2_MSG_KEX_ECDH_INIT [preauth]debug1: rekey after 134217728 blocks [preauth]debug1: SSH2_MSG_NEWKEYS sent [preauth]debug1: expecting SSH2_MSG_NEWKEYS [preauth]debug1: rekey after 134217728 blocks [preauth]debug1: SSH2_MSG_NEWKEYS received [preauth]debug1: KEX done [preauth]debug1: userauth-request for user username service ssh-connection method none [preauth]debug1: attempt 0 failures 0 [preauth]debug1: PAM: initializing for"username"debug1: PAM: setting PAM_RHOST to "**.**.**.**"debug1: PAM: setting PAM_TTY to "ssh"debug1: userauth-request for user username service ssh-connection method publickey [preauth]debug1: attempt 1 failures 0 [preauth]debug1: userauth_pubkey: test whether pkalg/pkblob are acceptable for RSA SHA256:XS0Qkck+0F5M0iJdLn3/owfK9QGxPSQxRoYcCGcb9zQ [preauth] debug1: temporarily_use_uid: 1000/1000 (e=0/0)debug1: trying public key file /home/username/.ssh/authorized_keysdebug1: fd 4 clearing O_NONBLOCKAuthentication refused: bad ownership or modes for directory /home/usernamedebug1: restore_uid: 0/0Failed publickey for username from **.**.**.** port **** ssh2: RSA SHA256:XS0Qkck+0F5M0iJdLn3/owfK9QGxPSQxRoYcCGcb9zQConnection closed by **.**.**.** port **** [preauth]debug1: do_cleanup [preauth]debug1: monitor_read_log: child log fd closeddebug1: do_cleanupdebug1: PAM: cleanupdebug1: Killing privsep child 17849debug1: audit_event: unhandled event 12核⼼部分, /home/username ⽤户⽂件夹权限不对,修改为700 :chmod 700 /home/username再来⼀遍⼜出现了Authentication refused: bad ownership or modes for directory /home/username/.ssh改为700再来⼀遍链接成功最后提醒,解决完了千万别忘记将服务器B的ssh再启动起来最后提醒,解决完了千万别忘记将服务器B的ssh再启动起来最后提醒,解决完了千万别忘记将服务器B的ssh再启动起来。
ssh密钥认证与sftp配置

章节一:密钥认证配置一、生成密钥对1、用SecurtCRT创建密钥对1)2)3)可不输入密码,否则登陆时需每次输入密码4)生成密钥对,选择存放路径2、用linux或unix创建密钥对1)ssh-keygen –t rsa二、服务器配置1、新建用户1)useradd -md /home/longtongbin longtb2、新建.ssh目录,更改所有者和权限1)cd /home/longtb2)mkdir .ssh3)chown longtb:users .ssh3、新建authorized_keys文件,复制.pub文件内容添加至该文件末,更改所有者和权限1)cd .ssh2)vi authorized_keys3)chown longtb:users authorized_keys #注:一般600或644,读写权限很重要!三、客户端连接配置1、SecurtCRT新建ssh连接1)可取消password认证2)选择publicKey,属性3)选择Use session public key setting,key的位置仅对当前用户有效;避免与全局key冲突,当然如果所有认证都共用一个key对,可选择Use globle public key setting4)点OK后即可连接用刚创建的key对ssh连接管理服务器了。
2、Linux或unix服务器建立ssh连接1)ssh user@serverip #若以当前用户连接,可直接ssh serverip章节2:配置sft(设定chroot)前提:完成访问用户的密钥认证配置目标:1.longtb用户可以sftp连接服务器但锁定其连接目录,禁止ssh登录2.访问的目录可以不是用户家路径,可为任意路径要点:1、用户默认shell禁止登陆需设置用户shell为:/usr/sbin/nologin2、Sftp访问目录要求1)不能是链接目录文件2)访问的根目录属主需是root3)访问根目录及对应的其上级实际目录属主为root4)访问根目录及对应的其上级实际目录属组可不变3、Ssh配置文件配置1)启用internal –sftp2)匹配用户,并指定chroot路径4、Ssh服务重启重启sshd服务以使得对sshd的配置文件所做配置生效配置示例1:访问目录:/home/longtb一、更改用户shell,禁止用户登录1、root登录2、chsh -s /usr/sbin/nologin longtb二、更改sftp访问根目录及对应的其上级实际目录属主为root,属组可不变1、root登录2、chown root:longtb /home/longtb #根目录3、chown root:longtb /home #根目录对应的上级目录三、修改sshd配置文件1、root用户登录2、vi /etc/ssh/sshd_config3、#Subsystem sftp /usr/libexec/sftp-serverSubsystem sftp internal-sftp4、Match User longtbChrootDirectory /home/longtbX11Forwarding noAllowTcpForwarding noForceCommand internal-sftp5、/etc/rc.d/sshd restart配置示例2:访问目录:/logs/out/dana/jsreport一、更改用户shell,禁止用户登录1、root登录2、chsh -s /usr/sbin/nologin longtb二、更改sftp访问根目录及对应的其上级实际目录属主为root,属组可不变1、root登录2、chown root:wheel /logs/out/dana/jsreport #根目录3、chown root: wheel /logs/out/dana #根目录对应的上级目录4、chown root: wheel /logs/out #根目录对应的上级目录5、chown root: wheel /logs #根目录对应的上级目录三、修改sshd配置文件1、root用户登录2、vi /etc/ssh/sshd_config3、#Subsystem sftp /usr/libexec/sftp-serverSubsystem sftp internal-sftp #若之前已做配置,此处不做变动4、Match User longtbChrootDirectory /logs/out/dana/jsreportX11Forwarding noAllowTcpForwarding noForceCommand internal-sftp5、/etc/rc.d/sshd restart说明:1.以上sftp配置基于FreeBSD系统,linux系统的sftp配置基本类似2.区别主要在:1)创建系统用户和组时的操作命令不同Linux是:groupadd longtbuseradd -g longtb -d /home/longtb longtb2)Sshd重启命令不同。
服务器间通过ssh使用密钥对实现无密码登录solaris
服务器间通过ssh使用密钥对实现无密码登录solaris,redhat,linux受flutter的启发,把bigadmin上的文档完善并简化一下,非常简单。
E文原址:/bigadmin/content/submitted/ssh_setting.html 关键词:ssh 密钥无密码登录信任关系以下做法在solaris 10 u5,redhat as 5.0上测试通过。
2008.07.24更新.【概述】如果你(A机)想无密码ssh登录别的机器(B机),只需要完成3个步骤:1.A机生成密钥对2.把公钥传给B机3.B机对A机的公钥授权哥们,看帖要推荐啊,点这里hosta和hostb都必须同步完成以下操作,以hosta为例提示:如果没有.ssh目录可用ssh命令远程登录一下任意机器再退出即可,或者手工创建一个:mkdir .ssh;chmod 755 .ssh注意,如果按下列步骤完成后,ssh依然需要输入密码,那么请设置.ssh目录权限为755,authorized_keys*的权限为600================================================ ================1、创建密钥对,两台都做[root@hosta /]# who am iroot pts/1 2008-04-30 12:08 (172.16.10.220)[root@hosta /]# cd ~/.ssh ----------------------没有这个目录的话,你随便ssh登录一下其他机器,就有了[root@hosta .ssh]# ssh-keygen -t dsaGenerating public/private dsa key pair.Enter file in which to save the key (/root/.ssh/id_dsa):Enter passphrase (empty for no passphrase):Enter same passphrase again:Your identification has been saved in /root/.ssh/id_dsa. -------私钥名一定要叫id_dsaYour public key has been saved in /root/.ssh/id_dsa.pub.The key fingerprint is:0a:13:25:19:a2:59:2c:b1:49:e6:62:90:57:07:e5:f7 root@hostapassphrase(密钥保护) 保留为空,否则使用ssh时将要求输入passphrase(密钥保护)2、发布公钥和获取公钥[root@hosta .ssh]# scp id_dsa.pub hostb:/root/.ssh/hosta.key.pubroot@hostb's password:id_dsa.pub 100% 600 0.6KB/s 00:00[root@hosta .ssh]# scp hostb:/root/.ssh/id_dsa.pub /root/.ssh/hostb.key.pubroot@hostb's password:id_dsa.pub 100% 600 0.6KB/s 00:003、对公钥授权两台都做[root@hostb .ssh]# cat hosta.key.pub >>authorized_keys2-----对A机公钥授权,A机用私钥来登录B机[root@hostb .ssh]# cat id_dsa.pub >>authorized_keys2-----可选项,本机登录本机,可不配置如果是ssh v1版本,比如solaris 9,就使用authorized_keys文件4、使用密钥对登录[root@hosta .ssh]# ssh hostbLast login: Sun Apr 27 00:04:49 2008 from 172.16.10.220已经不用输入密码:" />:" />lol[root@hostb ~]# exitlogoutConnection to hostb closed.5、查看日志[root@hosta .ssh]# more /var/log/secureApr 27 10:26:47 hosta sshd[9309]: Accepted password for root from 172.16.10.220 port 2395 ssh2Apr 27 10:26:47 hosta sshd[9309]: pam_unix(sshd:session): session opened for user root by (uid=0)Apr 27 10:41:51 hosta sshd[12195]: Accepted password for root from 172.16.10.220 port 2408 ssh2Apr 27 10:41:51 hosta sshd[12195]: pam_unix(sshd:session): session opened for user rootby (uid=0)Apr 27 12:42:15 hosta sshd[3331]: pam_unix(sshd:session): session closed for user rootApr 27 13:08:32 hosta sshd[26563]: Accepted password for root from 172.16.10.2 port 43247 ssh2Apr 27 13:08:32 hosta sshd[26563]: pam_unix(sshd:session): session opened for user rootby (uid=0)Apr 27 13:08:33 hosta sshd[26563]: pam_unix(sshd:session): session closed for user rootApr 27 13:08:52 hosta sshd[26607]: Accepted password for root from 172.16.10.2 port 43248 ssh2Apr 27 13:08:52 hosta sshd[26607]: pam_unix(sshd:session): session opened for user rootby (uid=0)Apr 27 13:08:52 hosta sshd[26607]: pam_unix(sshd:session): session closed for user rootApr 27 13:09:15 hosta sshd[26658]: Accepted password for root from 172.16.10.2 port 43249 ssh2Apr 27 13:09:15 hosta sshd[26658]: pam_unix(sshd:session): session opened for user rootby (uid=0)Apr 27 13:09:15 hosta sshd[26658]: pam_unix(sshd:session): session closed for user rootApr 27 13:09:25 hosta sshd[26689]: Accepted password for root from 172.16.10.2 port 43250 ssh2Apr 27 13:09:25 hosta sshd[26689]: pam_unix(sshd:session): session opened for user rootby (uid=0)Apr 27 13:09:25 hosta sshd[26689]: pam_unix(sshd:session): session closed for user rootApr 27 13:51:27 hosta sshd[29770]: Accepted password for root from 172.16.10.220 port 4248 ssh2Apr 27 13:51:27 hosta sshd[29770]: pam_unix(sshd:session): session opened for user root by (uid=0)Apr 27 13:53:54 hosta sshd[29770]: pam_unix(sshd:session): session closed for user rootApr 27 15:13:48 hosta sshd[9309]: pam_unix(sshd:session): session closed for user rootApr 27 15:22:20 hosta sshd[12195]: pam_unix(sshd:session): session closedfor user rootApr 27 23:37:48 hosta sshd[7798]: Accepted password for root from 172.16.10.220 port 4948 ssh2Apr 27 23:37:48 hosta sshd[7798]: pam_unix(sshd:session): session opened for user root by (uid=0)Apr 28 04:30:58 hosta sshd[7798]: pam_unix(sshd:session): session closed for user rootApr 30 12:08:32 hosta sshd[15039]: Accepted password for root from 172.16.10.220 port 1637 ssh2Apr 30 12:08:32 hosta sshd[15039]: pam_unix(sshd:session): session opened for user root by (uid=0)Apr 30 12:11:05 hosta useradd[15282]: new group: name=mysql, GID=503 Apr 30 12:11:05 hosta useradd[15282]: new user: name=mysql, UID=503, GID=503, home=/home/mysql, shell=/bin/bashApr 30 12:22:18 hosta sshd[16164]: Accepted password for root from 172.16.10.2 port 47224 ssh2Apr 30 12:22:18 hosta sshd[16164]: pam_unix(sshd:session): session opened for user root by (uid=0)Apr 30 12:22:18 hosta sshd[16164]: pam_unix(sshd:session): session closed for user root6、查看ssh的详细操作记录(ssh -v, scp -v or sftp -v ...)[root@hosta .ssh]# scp -v /root/install.log hostb:/rootExecuting: program /usr/bin/ssh host hostb, user (unspecified), command scp -v -t /rootOpenSSH_4.3p2, OpenSSL 0.9.8b 04 May 2006debug1: Reading configuration data /etc/ssh/ssh_configdebug1: Applying options for *debug1: Connecting to hostb [172.16.10.2] port 22.debug1: Connection established.debug1: permanently_set_uid: 0/0debug1: identity file /root/.ssh/identity type -1debug1: identity file /root/.ssh/id_rsa type -1debug1: identity file /root/.ssh/id_dsa type 2debug1: Remote protocol version 2.0, remote software version OpenSSH_4.3 debug1: match: OpenSSH_4.3 pat OpenSSH*debug1: Enabling compatibility mode for protocol 2.0debug1: Local version string SSH-2.0-OpenSSH_4.3debug1: SSH2_MSG_KEXINIT sentdebug1: SSH2_MSG_KEXINIT receiveddebug1: kex: server->client aes128-cbc hmac-md5 nonedebug1: kex: client->server aes128-cbc hmac-md5 nonedebug1: SSH2_MSG_KEX_DH_GEX_REQUEST(1024<1024<8192) sent debug1: expecting SSH2_MSG_KEX_DH_GEX_GROUPdebug1: SSH2_MSG_KEX_DH_GEX_INIT sentdebug1: expecting SSH2_MSG_KEX_DH_GEX_REPLYdebug1: Host 'hostb' is known and matches the RSA host key.debug1: Found key in /root/.ssh/known_hosts:2debug1: ssh_rsa_verify: signature correctdebug1: SSH2_MSG_NEWKEYS sentdebug1: expecting SSH2_MSG_NEWKEYSdebug1: SSH2_MSG_NEWKEYS receiveddebug1: SSH2_MSG_SERVICE_REQUEST sentdebug1: SSH2_MSG_SERVICE_ACCEPT receiveddebug1: Authentications that can continue: publickey,gssapi-with-mic,passworddebug1: Next authentication method: gssapi-with-micdebug1: Unspecified GSS failure. Minor code may provide more information No credentials cache founddebug1: Unspecified GSS failure. Minor code may provide more information No credentials cache founddebug1: Unspecified GSS failure. Minor code may provide more information No credentials cache founddebug1: Next authentication method: publickeydebug1: Trying private key: /root/.ssh/identitydebug1: Trying private key: /root/.ssh/id_rsadebug1: Offering public key: /root/.ssh/id_dsadebug1: Server accepts key: pkalg ssh-dss blen 433debug1: read PEM private key done: type DSAdebug1: Authentication succeeded (publickey).debug1: channel 0: new [client-session]debug1: Entering interactive session.debug1: Sending environment.debug1: Sending env LANG = zh_CN.GB18030debug1: Sending command: scp -v -t /rootSending file modes: C0644 35582 install.logSink: C0644 35582 install.loginstall.log 100% 35KB 34.8 KB/s 00:00debug1: client_input_channel_req: channel 0 rtype exit-status reply 0debug1: channel 0: free: client-session, nchannels 1debug1: fd 0 clearing O_NONBLOCKdebug1: fd 1 clearing O_NONBLOCKdebug1: Transferred: stdin 0, stdout 0, stderr 0 bytes in 0.2 secondsdebug1: Bytes per second: stdin 0.0, stdout 0.0, stderr 0.0debug1: Exit status 0呵呵,这个我也经常做,补充一些:不只是root用户,如果两个联网的主机,test1用户在主机A1上,另一台主机A2,要想实现test1登陆A2时不用敲密码直接登陆,即建立信任关系:在A1上使用test1用户键入:ssh-keygen -t dsa然后:scp /home/test1/.ssh/id_dsa.pub A2_ip_address:/home/test1/.ssh/id_dsa.pub_b ak最后在A2上:cd /home/test1/.sshcat id_dsa.pub_bak >> authorized_keys就OK了。
SSH免密码登录

设置SSH免登陆
node01通过SSH免密码登录到node02、node03
以root用户为例
1、使用root用户登录到node01机器,首先进入root用户的家目录下
cd/root
2、进入到.ssh目录下(注意.ssh是隐藏文件)
cd .ssh
3、在.ssh目录下执行如下命令生成私钥(id_rsa)和公钥文件(id_rsa.pub)
执行命令ssh-keygen -t rsa
遇到需要输入的提示一直按回车
4、执行完成会生成私钥(id_rsa)和公钥文件(id_rsa.pub)
公钥内容如下:(注意这是我自己node01机器的root用户公钥,每个人机器上的都不一样,不需要跟我的一致)
5、通过ssh-copy-id命令将node01这台机器root用户的公钥文件(id_rsa.pub)文件内容拷贝到node02和node03两台机器
ssh-copy-id -i node02
ssh-copy-id -i node03
6、在node02和node03的root用户的家目录下,进入到.ssh目录
cd /root/.ssh
在authorized_keys文件中已经添加了node01的公钥文件内容,可以和第4步node01机器生成的root用户公钥文件内容对比下,应该是一样的
6、在node01通过ssh登录到node02和node03,此时不在需要输入密码
ssh node01这样就可以直接登录到node02机器。
如何在CentOS上使用SSH密钥认证?
如何在CentOS上使用SSH密钥认证?在服务器管理和远程访问中,SSH 密钥认证是一种更安全、更便捷的方式。
相比于传统的用户名和密码认证,SSH 密钥认证提供了更高的安全性,同时也能减少输入密码的繁琐。
下面,我们将详细介绍如何在 CentOS 上使用 SSH 密钥认证。
首先,我们需要在本地计算机上生成 SSH 密钥对。
如果您使用的是Linux 或 macOS 系统,可以打开终端;如果是 Windows 系统,可以使用 PuTTYgen 等工具。
在终端中,输入以下命令来生成 SSH 密钥对:```sshkeygen t rsa b 4096```这里,“t”指定密钥类型为 RSA,“b”指定密钥长度为 4096 位。
您可以根据需要选择不同的密钥类型和长度。
接下来,系统会提示您输入一些信息,比如保存密钥的路径、是否设置密码等。
如果您不想设置密码,可以直接按回车键。
生成完成后,您将在指定的路径(通常是~/ssh 目录)下得到两个文件:id_rsa(私钥)和 id_rsapub(公钥)。
然后,我们需要将公钥上传到 CentOS 服务器上。
可以使用以下几种方式:1、如果您已经能够通过 SSH 密码登录到 CentOS 服务器,可以使用以下命令:```sshcopyid username@server_ip```将“username”替换为您在服务器上的用户名,“server_ip”替换为服务器的 IP 地址。
执行此命令后,系统会提示您输入服务器的密码,上传成功后,您就可以使用 SSH 密钥进行认证了。
2、如果无法通过 SSH 登录服务器,您可以手动将本地的公钥内容复制到服务器上。
在本地计算机上,使用以下命令查看公钥内容:```cat ~/ssh/id_rsapub```复制显示的内容。
接下来,通过其他方式(如 FTP 、SCP 等)登录到 CentOS 服务器,在服务器上创建或编辑~/ssh/authorized_keys 文件。
ssh 密钥登录 参数
ssh 密钥登录参数
SSH 密钥登录参数是指,在通过 SSH 协议进行远程登录时,需要使用 SSH 密钥来进行身份验证,而不是输入用户名和密码。
为了实现 SSH 密钥登录,需要进行如下配置:
1. 生成 SSH 密钥:在本地计算机上使用 ssh-keygen 命令生成SSH 密钥对,即公钥和私钥。
2. 将公钥上传至远程服务器:将生成的公钥上传至需要登录的远程服务器上,一般是将公钥内容复制到远程服务器上
的 .ssh/authorized_keys 文件中。
3. 修改 SSH 配置文件:在远程服务器上,打开
/etc/ssh/sshd_config 配置文件,将参数 PubkeyAuthentication 和AuthorizedKeysFile 分别设置为 yes 和 .ssh/authorized_keys。
4. 重启 SSH 服务:在远程服务器上,使用 service sshd restart 命令重启 SSH 服务,使修改的配置生效。
配置完成后,即可使用 SSH 密钥登录远程服务器,不需要输入用户名和密码进行身份验证。
详解SSH如何配置key免密码登录
详解SSH如何配置key免密码登录如何使⽤直接指定ip然后-i 指定key⽂件,然后指定⽤户ssh 1.1.1.1 -i Test1 -l userxxx不指定⽤户实际上就是使⽤当前的本机登陆的⽤户名去登陆远端主机,⽐如本地⽤户是AAA,那么:ssh 1.1.1.1 -i Test1等同于ssh 1.1.1.1 -i Test1 -l AAA这⾥要注意,⽣成的key是和⼀对⽤户绑定的,⽣成key的⽤户以及存储这个key的公钥的远端主机的⽤户。
ssh的原理就是,公钥给⼈家,⾃⼰留秘钥,远端主机的其他⽤户也是⽆法看到这个指定的⽤户的接受到的公钥的,所以⽤户是⼀对⼀的。
⽐如我在test-server 下⾯的azuo1228⽣成key,然后拷贝到远端主机dest-server去使⽤,那么放在远端主机的哪个⽤户home⽬录下⾯,对应的远端主机的这个⽤户才可以被⽆密码登陆,并不等于对远端主机的其他⽤户也能免密码登陆。
开始操作1.⽣成key:[azuo1228@test-server ~]$ ssh-keygen这⾥⼀直敲回车就好Generating public/private rsa key pair.Enter file in which to save the key (/home/azuo1228/.ssh/id_rsa):Created directory '/home/azuo1228/.ssh'.Enter passphrase (empty for no passphrase):Enter same passphrase again:Your identification has been saved in /home/azuo1228/.ssh/id_rsa.Your public key has been saved in /home/azuo1228/.ssh/id_rsa.pub.The key fingerprint is:d2:33:66:86:0a:b4:27:a9:86:92:24:ff:13:63:96:15 azuo1228@test-serverThe key's randomart image is:+--[ RSA 2048]----+| || E || . . || . o .o ||..= .oo S ||++ +*. = o ||=..o.o ||o .. || .. |+-----------------+[azuo1228@test-server ~]$ cd .ssh/[azuo1228@test-server .ssh]$ dirid_rsa id_rsa.pub查看⽣产结果[azuo1228@test-server .ssh]$ lltotal 8-rw------- 1 azuo1228 administrator 1675 Dec 21 18:11 id_rsa-rw------- 1 azuo1228 administrator 403 Dec 21 18:11 id_rsa.pub[azuo1228@test-server .ssh]$ cat id_rsa.pubssh-rsa AAAAB3NzaC1yc2EAAAADAQABAAABAQCxp1CLe+v3L9OjlJCoBBMtQP5p2zQSACJuCD8rPRT2KQmLFznJo9ehTJQp3UfbSzAo3muudiJ9hvyL8f8hN05voXzBSyrul3v39iiqyPJGFbZhtlIsvVuHNEOVaa+StP/WVcH3nT50Y2TsIx0ikXUOVaaawHKUV3wB mZ02ALGGL0gUIV97tlhdwVQLG+2mJwSU0E3fksMVlhKxQrpaOx1OtObF0Xo4CmuuXAowtm/uW50gHRVYMA7N/VNgbWaa4hbypCV5m6UqF6P8bHp1Kgz0qm/U0ro1jFzNv1+fin2ZdwV1Ytr azuo1228@test-server2.拷贝到远端主机指定⽤户的home下⾯可以看到这次还是要输密码的[azuo1228@test-server .ssh]$ scp id_rsa.pub azuo1228@10.148.167.106:/home/azuo1228Access and Authorization to this server is controlled by Active Directory. Please login with your admin account.azuo1228@10.148.167.106's password:id_rsa.pub 100% 403 0.4KB/s 00:00在此测试登录 -- 需要密码,还没免密码[azuo1228@test-server .ssh]$ ssh azuo1228@10.148.167.106Access and Authorization to this server is controlled by Active Directory. Please login with your admin account.azuo1228@10.148.167.106's password:Last login: Wed Dec 21 18:07:21 2016 from Authorized uses only. All activity may be monitored and reported.[azuo1228@dest-server ~]$不存在.ssh的话需要创建[azuo1228@dest-server ~]$ mkdir .ssh[azuo1228@dest-server ~]$ cd .ssh/[azuo1228@dest-server .ssh]$ cat ../id_rsa.pub | tee -a authorized_keysssh-rsa AAAAB3NzaC1yc2EAAAADAQABAAABAQCxp1CLe+v3L9OjlJCoBBMtQP5p2zQSACJuCD8rPRT2KQmLFznJo9ehTJQp3UfbSzAo3muudiJ9hvyL8f8hN05voXzBSyrul3v39iiqyPJGFbZhtlIsvVuHNEOVaa+StP/WVcH3nT50Y2TsIx0ikXUOVaaawHKUV3wB [azuo1228@dest-server .ssh]$ lltotal 4-rw-r--r-- 1 azuo1228 administrator 403 Dec 21 20:33 authorized_keys需要权限为600[azuo1228@dest-server .ssh]$ chmod 600 authorized_keys[azuo1228@test-server .ssh]$ ssh azuo1228@10.148.167.106Access and Authorization to this server is controlled by Active Directory. Please login with your admin account.Last login: Wed Dec 21 20:32:08 2016 from c72Authorized uses only. All activity may be monitored and reported.[azuo1228@dest-server ~]$[azuo1228@dest-server ~]$[azuo1228@dest-server ~]$ exitlogoutConnection to 10.148.167.106 closed.再次登陆,就已经免密了[azuo1228@test-server .ssh]$ ssh 10.148.167.106Access and Authorization to this server is controlled by Active Directory. Please login with your admin account.Last login: Wed Dec 21 20:33:34 2016 from c72Authorized uses only. All activity may be monitored and reported.在尝试登陆zhour⽤户,依旧要密码,可见免密过程是⼀对⼀的。
Xshell配置ssh免密码登录-密钥公钥(Publickey)
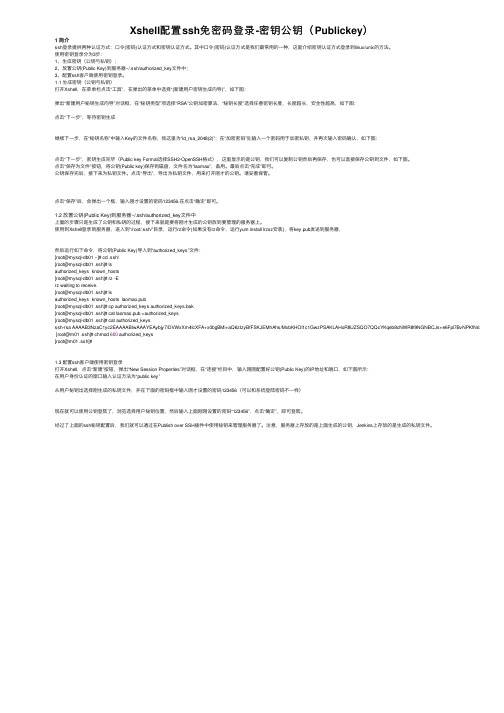
Xshell配置ssh免密码登录-密钥公钥(Publickey)1 简介ssh登录提供两种认证⽅式:⼝令(密码)认证⽅式和密钥认证⽅式。
其中⼝令(密码)认证⽅式是我们最常⽤的⼀种,这⾥介绍密钥认证⽅式登录到linux/unix的⽅法。
使⽤密钥登录分为3步:1、⽣成密钥(公钥与私钥);2、放置公钥(Public Key)到服务器~/.ssh/authorized_key⽂件中;3、配置ssh客户端使⽤密钥登录。
1.1 ⽣成密钥(公钥与私钥)打开Xshell,在菜单栏点击“⼯具”,在弹出的菜单中选择“(新建⽤户密钥⽣成向导)”,如下图:弹出“新建⽤户秘钥⽣成向导”对话框,在“秘钥类型”项选择“RSA”公钥加密算法,“秘钥长度”选择任意密钥长度,长度越长,安全性越⾼,如下图:点击“下⼀步”,等待密钥⽣成继续下⼀步,在“秘钥名称”中输⼊Key的⽂件名称,我这⾥为“id_rsa_2048(2)”;在“加密密码”处输⼊⼀个密码⽤于加密私钥,并再次输⼊密码确认,如下图:点击“下⼀步”,密钥⽣成完毕(Public key Format选择SSH2-OpenSSH格式),这⾥显⽰的是公钥,我们可以复制公钥然后再保存,也可以直接保存公钥到⽂件,如下图。
点击“保存为⽂件”按钮,将公钥(Public key)保存到磁盘,⽂件名为“laomao”,备⽤。
最后点击“完成”即可。
公钥保存完后,接下来为私钥⽂件。
点击“导出”,导出为私钥⽂件,⽤来打开刚才的公钥。
请妥善保管。
点击“保存”后,会弹出⼀个框,输⼊刚才设置的密码123456.在点击“确定”即可。
1.2 放置公钥(Public Key)到服务器~/.ssh/authorized_key⽂件中上⾯的步骤只是⽣成了公钥和私钥的过程,接下来就是要将刚才⽣成的公钥放到要管理的服务器上。
使⽤到Xshell登录到服务器,进⼊到“/root/.ssh/”⽬录,运⾏rz命令(如果没有rz命令,运⾏yum install lrzsz安装),将key.pub发送到服务器,然后运⾏如下命令,将公钥(Public Key)导⼊到“authorized_keys”⽂件:[root@mysql-db01 ~]# cd .ssh/[root@mysql-db01 .ssh]# lsauthorized_keys known_hosts[root@mysql-db01 .ssh]# rz -Erz waiting to receive.[root@mysql-db01 .ssh]# lsauthorized_keys known_hosts laomao.pub[root@mysql-db01 .ssh]# cp authorized_keys authorized_keys.bak[root@mysql-db01 .ssh]# cat laomao.pub >authorized_keys[root@mysql-db01 .ssh]# cat authorized_keysssh-rsa AAAAB3NzaC1yc2EAAAABIwAAAYEAybjy7/DVWxXm4lcXFA+x0bgBMi+aQ6zIzyBfFSKJEMhAhs/MxbKHOl1c1GwzPSAKLAHoR8UZSQO7QQcYKqeb8cNWR8f9NGNBCJs+e6Fpl7BvNPKfNrixnq+gT5VIz [root@m01 .ssh]# chmod 600 authorized_keys[root@m01 .ssh]#1.3 配置ssh客户端使⽤密钥登录打开Xshell,点击“新建”按钮,弹出“New Session Properties”对话框,在“连接”栏⽬中,输⼊刚刚配置好公钥(Public Key)的IP地址和端⼝,如下图所⽰:在⽤户⾝份认证的窗⼝输⼊认证⽅法为“public key”从⽤户秘钥出选择刚⽣成的私钥⽂件,并在下⾯的密码框中输⼊刚才设置的密码123456(可以和系统登陆密码不⼀样)现在就可以使⽤公钥登陆了,浏览选择⽤户秘钥位置,然后输⼊上⾯刚刚设置的密码“123456”,点击“确定”,即可登陆。
ssh密钥登录方法

ssh密钥登录方法SSH(Secure Shell)是一种用于安全远程登录和文件传输的网络协议。
使用SSH密钥登录方法,可以提供更高的安全性和便利性。
本文将介绍SSH密钥登录的原理、生成密钥对的方法以及配置和使用密钥登录的步骤。
一、SSH密钥登录的原理SSH密钥登录采用非对称加密算法,通过生成一对密钥:私钥和公钥。
私钥保存在本地计算机上,而公钥则保存在远程服务器上。
当用户使用SSH密钥登录时,系统会将本地计算机上的私钥与远程服务器上的公钥进行匹配,从而实现安全的登录。
二、生成密钥对的方法1. 打开终端或命令行工具。
2. 输入以下命令生成密钥对:ssh-keygen-trsa-b4096-C"**********************"这里的"**********************"应替换为你自己的电子邮件地址。
3. 系统会提示你选择密钥文件的保存位置和设置密码。
按需选择或直接回车使用默认选项即可。
4. 密钥对生成成功后,系统会显示私钥和公钥的保存路径。
三、配置和使用密钥登录的步骤1. 将公钥复制到远程服务器上。
可以使用以下命令将公钥复制到远程服务器的~/.ssh/authorized_keys文件中:ssh-copy-id user@remote_server这里的"user"替换为你的用户名,"remote_server"替换为远程服务器的地址或IP。
如果无法使用ssh-copy-id命令,也可以手动将公钥复制到远程服务器的authorized_keys文件中。
2. 配置本地计算机的SSH客户端。
在本地计算机上打开SSH配置文件(通常位于~/.ssh/config),添加以下内容:Host remote_serverUser userIdentityFile ~/.ssh/id_rsa这里的"remote_server"替换为远程服务器的地址或IP,"user"替换为你的用户名。
Linux生成ssh公钥免密码登录远程主机和Xshell跨跳板机登录

Linux⽣成ssh公钥免密码登录远程主机和Xshell跨跳板机登录Linux⽣产秘钥、公钥可以免密码登录远程主机,因为公司内⽹host设置了禁⽌直接登录,需经过跳板机ssh登录.#在登录host(或跳板机)⽣成认证密钥(私钥公钥对)1:ssh-keygen -t rsa#把本机(或跳板机)的公钥追加到⽬标host对应登录账号的 ~/.ssh/authorized_keys ⾥,可以⼿动添加或使⽤ssh-copy-id2:ssh-copy-id -i ~/.ssh/id_rsa.pub user_acount@remote_ip执⾏后需输⼊hejm账号对应的密码,后续可以直接ssh登录注:如果ssh的端⼝不是22,需指定端⼝号ssh-copy-id -i ~/.ssh/id_rsa.pub -p 23 user_acount@remote_ip3.XShell使⽤Xagent代理⾃动进⾏跳转机登录后登录远程主机(免密码登录)Xshell>Tools>Launch Xagent,开启Xagent4.在Session(会话)管理中,XShell>File>Open>Sessions管理⾥,配置对应Sessions,配置对应跳板机的账号密码.同时Login Scripts⾥输⼊执⾏登录脚本ssh user_acount@remote_ip, SSH编辑项⾥启⽤Use Xagent和Launch Xagent automatically,保存之后便可以使⽤该会话登录remote_ip5.除了在跳板机⽣成认证秘钥,Xshell的Xagent也提供⽣成管理认证秘钥的功能,另⼀种⽅式:a)Xshell>Tools>Launch Xagent>Manage Keys,可以⽣成对应秘钥(会要求需要秘钥管理输⼊密码,密码可以为空,同上⾯跳板机上⽣成⽅式⼀样)b)把对应秘钥添加到⽬标登录远程主机的~/.ssh/authorized_keys ⾥, 只能⼿⼯添加c)同跳板机登录设置⼀样,执⾏第4步即可.。
Linux下SSH免密码登录配置详解
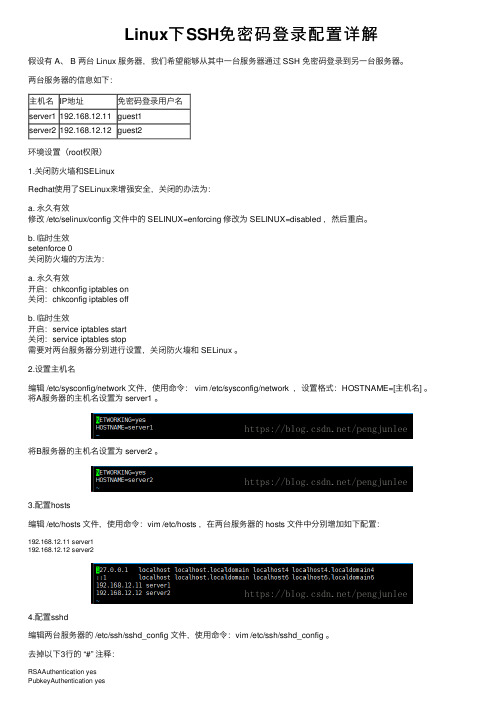
Linux下SSH免密码登录配置详解假设有 A、 B 两台 Linux 服务器,我们希望能够从其中⼀台服务器通过 SSH 免密码登录到另⼀台服务器。
两台服务器的信息如下:主机名IP地址免密码登录⽤户名server1192.168.12.11guest1server2192.168.12.12guest2环境设置(root权限)1.关闭防⽕墙和SELinuxRedhat使⽤了SELinux来增强安全,关闭的办法为:a. 永久有效修改 /etc/selinux/config ⽂件中的 SELINUX=enforcing 修改为 SELINUX=disabled ,然后重启。
b. 临时⽣效setenforce 0关闭防⽕墙的⽅法为:a. 永久有效开启:chkconfig iptables on关闭:chkconfig iptables offb. 临时⽣效开启:service iptables start关闭:service iptables stop需要对两台服务器分别进⾏设置,关闭防⽕墙和 SELinux 。
2.设置主机名编辑 /etc/sysconfig/network ⽂件,使⽤命令: vim /etc/sysconfig/network ,设置格式:HOSTNAME=[主机名] 。
将A服务器的主机名设置为 server1 。
将B服务器的主机名设置为 server2 。
3.配置hosts编辑 /etc/hosts ⽂件,使⽤命令:vim /etc/hosts ,在两台服务器的 hosts ⽂件中分别增加如下配置:192.168.12.11 server1192.168.12.12 server24.配置sshd编辑两台服务器的 /etc/ssh/sshd_config ⽂件,使⽤命令:vim /etc/ssh/sshd_config 。
去掉以下3⾏的 “#” 注释:RSAAuthentication yesPubkeyAuthentication yesAuthorizedKeysFile .ssh/authorized_keys重启 sshd 服务,使⽤命令:/sbin/service sshd restart 。
ssh免密码登录配置方法
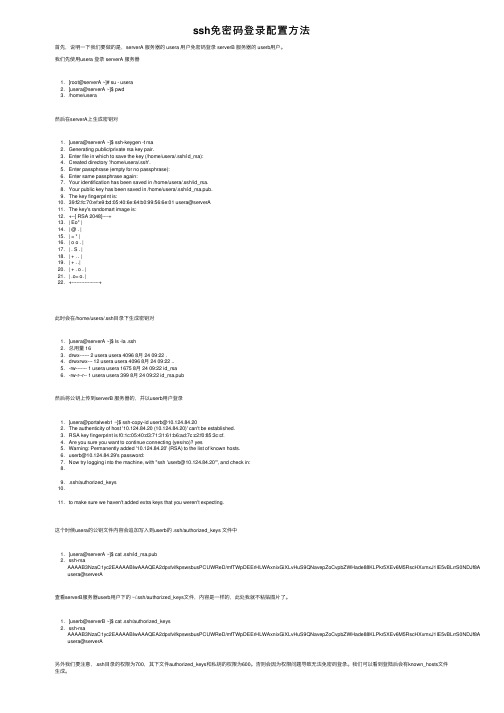
ssh免密码登录配置⽅法⾸先,说明⼀下我们要做的是,serverA 服务器的 usera ⽤户免密码登录 serverB 服务器的 userb⽤户。
我们先使⽤usera 登录 serverA 服务器1. [root@serverA ~]# su - usera2. [usera@serverA ~]$ pwd3. /home/usera然后在serverA上⽣成密钥对1. [usera@serverA ~]$ ssh-keygen -t rsa2. Generating public/private rsa key pair.3. Enter file in which to save the key (/home/usera/.ssh/id_rsa):4. Created directory '/home/usera/.ssh'.5. Enter passphrase (empty for no passphrase):6. Enter same passphrase again:7. Your identification has been saved in /home/usera/.ssh/id_rsa.8. Your public key has been saved in /home/usera/.ssh/id_rsa.pub.9. The key fingerprint is:10. 39:f2:fc:70:ef:e9:bd:05:40:6e:64:b0:99:56:6e:01 usera@serverA11. The key's randomart image is:12. +--[ RSA 2048]----+13. | Eo* |14. | @ . |15. | = * |16. | o o . |17. | . S . |18. | + . . |19. | + . .|20. | + . o . |21. | .o= o. |22. +-----------------+此时会在/home/usera/.ssh⽬录下⽣成密钥对1. [usera@serverA ~]$ ls -la .ssh2. 总⽤量 163. drwx------ 2 usera usera 4096 8⽉ 24 09:22 .4. drwxrwx--- 12 usera usera 4096 8⽉ 24 09:22 ..5. -rw------- 1 usera usera 1675 8⽉ 24 09:22 id_rsa6. -rw-r--r-- 1 usera usera 399 8⽉ 24 09:22 id_rsa.pub然后将公钥上传到serverB 服务器的,并以userb⽤户登录1. [usera@portalweb1 ~]$ ssh-copy-id userb@10.124.84.202. The authenticity of host '10.124.84.20 (10.124.84.20)' can't be established.3. RSA key fingerprint is f0:1c:05:40:d3:71:31:61:b6:ad:7c:c2:f0:85:3c:cf.4. Are you sure you want to continue connecting (yes/no)? yes5. Warning: Permanently added '10.124.84.20' (RSA) to the list of known hosts.6. userb@10.124.84.29's password:7. Now try logging into the machine, with "ssh 'userb@10.124.84.20'", and check in:8.9. .ssh/authorized_keys10.11. to make sure we haven't added extra keys that you weren't expecting.这个时候usera的公钥⽂件内容会追加写⼊到userb的 .ssh/authorized_keys ⽂件中1. [usera@serverA ~]$ cat .ssh/id_rsa.pub2. ssh-rsaAAAAB3NzaC1yc2EAAAABIwAAAQEA2dpxfvifkpswsbusPCUWReD/mfTWpDEErHLWAxnixGiXLvHuS9QNavepZoCvpbZWHade88KLPkr5XEv6M5RscHXxmxJ1IE5vBLrrS0NDJf8AjCLQpTDg usera@serverA查看serverB服务器userb⽤户下的 ~/.ssh/authorized_keys⽂件,内容是⼀样的,此处我就不粘贴图⽚了。
ssh免密认证流程

ssh免密认证流程下载温馨提示:该文档是我店铺精心编制而成,希望大家下载以后,能够帮助大家解决实际的问题。
文档下载后可定制随意修改,请根据实际需要进行相应的调整和使用,谢谢!并且,本店铺为大家提供各种各样类型的实用资料,如教育随笔、日记赏析、句子摘抄、古诗大全、经典美文、话题作文、工作总结、词语解析、文案摘录、其他资料等等,如想了解不同资料格式和写法,敬请关注!Download tips: This document is carefully compiled by theeditor. I hope that after you download them,they can help yousolve practical problems. The document can be customized andmodified after downloading,please adjust and use it according toactual needs, thank you!In addition, our shop provides you with various types ofpractical materials,such as educational essays, diaryappreciation,sentence excerpts,ancient poems,classic articles,topic composition,work summary,word parsing,copy excerpts,other materials and so on,want to know different data formats andwriting methods,please pay attention!SSH 免密认证是一种方便的登录方式,它允许用户在不输入密码的情况下通过 SSH 连接到远程服务器。
ssh配置免密码登录
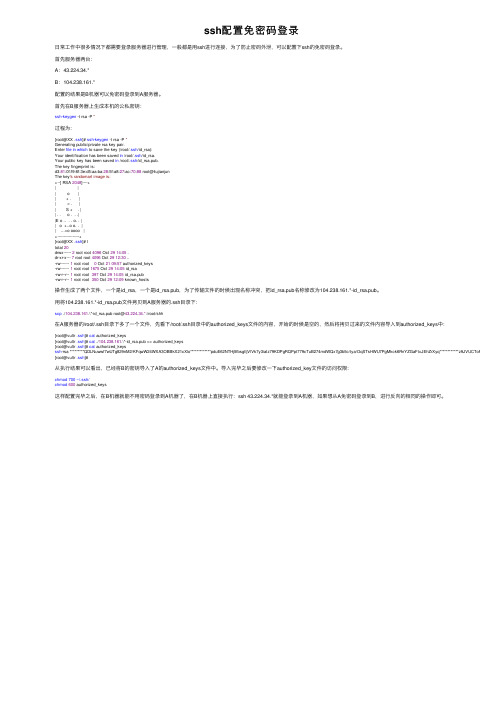
ssh配置免密码登录⽇常⼯作中很多情况下都需要登录服务器进⾏管理,⼀般都是⽤ssh进⾏连接,为了防⽌密码外泄,可以配置下ssh的免密码登录。
⾸先服务器两台:A:43.224.34.*B:104.238.161.*配置的结果是B机器可以免密码登录到A服务器。
⾸先在B服务器上⽣成本机的公私密钥:ssh-keygen -t rsa -P ''过程为:[root@XX .ssh]# ssh-keygen -t rsa -P ''Generating public/private rsa key pair.Enter file in which to save the key (/root/.ssh/id_rsa):Your identification has been saved in /root/.ssh/id_rsa.Your public key has been saved in /root/.ssh/id_rsa.pub.The key fingerprint is:d3:81:0f:f9:6f:3e:d5:aa:ba:28:5f:a8:27:ac:70:88 root@liujianjunThe key's randomart image is:+--[ RSA 2048]----+| || o || + . || = . || S + . || . . o . . .||E o .. . . o. . || o +..o o. . || ...=o oooo |+-----------------+[root@XX .ssh]# ltotal 20drwx------ 2 root root 4096 Oct 2914:05 .dr-xr-x--- 7 root root 4096 Oct 2912:30 ..-rw------- 1 root root 0 Oct 2109:57 authorized_keys-rw------- 1 root root 1675 Oct 2914:05 id_rsa-rw-r--r-- 1 root root 397 Oct 2914:05 id_rsa.pub-rw-r--r-- 1 root root 350 Oct 2912:09 known_hosts操作⽣成了两个⽂件,⼀个是id_rsa,⼀个是id_rsa.pub,为了传输⽂件的时候出现名称冲突,把id_rsa.pub名称修改为104.238.161.*-id_rsa.pub。
- 1、下载文档前请自行甄别文档内容的完整性,平台不提供额外的编辑、内容补充、找答案等附加服务。
- 2、"仅部分预览"的文档,不可在线预览部分如存在完整性等问题,可反馈申请退款(可完整预览的文档不适用该条件!)。
- 3、如文档侵犯您的权益,请联系客服反馈,我们会尽快为您处理(人工客服工作时间:9:00-18:30)。
服务端SSH相关配置文件的修改
修改SSH的配置文件:
[root@localhost ~]# vi /etc/ssh/sshd_config
#Protocol 2,1SSH协议版本:将“#”删除,再将行末的“,1”删除,只允许SSH2方式的连接。
#ServerKeyBits 768密钥强度:将“#”删除,并将768改为1024,将ServerKey强度改为1024比特。
#PermitRootLogin yes 允许以root登录开关:将“#”删除,并将yes改为no。
修改为不允许用root进行登录。
#PasswordAuthentication yes密码方式的登录开关:将“#”删除,将yes改为no,修改后不允许密码方式的登录
#PermitEmptyPasswords no空密码登录开关:将“#”删除,不允许空密码登录。
保存并退出。
因为我们只想让SSH服务为管理系统提供方便,所以在不通过外网远程管理系统的情况下,只允许内网客户端通过SSH登录到服务器,以最大限度减少不安全因素。
设置方法如下:[root@localhost ~]# vi /etc/hosts.deny←修改屏蔽规则,在文尾添加相应行
#
# hosts.deny This file describes the names of the hosts which are
# *not* allowed to use the local INET services, as decided
# by the '/usr/sbin/tcpd' server.
#
# The portmap line is redundant, but it is left to remind you that
# the new secure portmap uses hosts.deny and hosts.allow. In particular
# you should know that NFS uses portmap!
sshd: ALL←添加这一行,屏蔽来自所有的SSH连接请求[root@localhost ~]# vi
/etc/hosts.allow←修改允许规则,在文尾添加相应行
#
# hosts.allow This file describes the names of the hosts which are
# allowed to use the local INET services, as decided
# by the '/usr/sbin/tcpd' server.
#
sshd: 192.168.0.←添加这一行,只允许来自内网的SSH连接请求
重新启动SSH服务
在修改完SSH的配置文件后,需要重新启动SSH服务才能使新的设置生效。
# /etc/rc.d/init.d/sshd restart
这时,以正常的密码的方式是无法登录服务器的。
SSH客户端公钥与私钥的建立
在客户端(linux)登录为需要建立密钥的用户,基于这个用户建立公钥与私钥。
(这里以oracle用户为例)
[root@localhost ~]# su - oracle//登录为一般用户oracle
[oracle@localhost ~]$ ssh-keygen -t rsa //建立公钥与私钥对
Enter file in which to save the key (/home/kaz/.ssh/id_rsa): //私钥的路径,这里保持默认直接回车
Created directory '/home/kaz/.ssh'
Enter passphrase (empty for no passphrase): //私钥的密码(自动登录就设为空)Enter same passphrase again: //再次输入口令
Your identification has been saved in /home/kaz/.ssh/id_rsa. //私钥
Your public key has been saved in /home/kaz/.ssh/id_rsa.pub. //公钥
The key fingerprint is:
tf:rs:e3:7s:28:59:5s:93:fe:33:84:01:cj:65:3b:8e oracle@
将客户端用户公钥导成服务端authorized_keys
copy客户端用户公钥到远程服务器的远程用户的home/.ssh目录下:
[oracle@localhost ~]$ cd ~/.ssh//进入用户SSH配置文件的目录
[oracle@localhost .ssh]$ ls -l
[oracle@localhost .ssh]$ cat ~/.ssh/id_rsa.pub >>~/.ssh/authorized_keys//将用户公钥导成uthorized_keys
[oracle@localhost .ssh]$ rm -f ~/.ssh/id_rsa.pub//删除原来的公钥文件
[oracle@localhost .ssh]$ chmod 400 ~/.ssh/authorized_keys//将新建立的公钥文件属性设置为400。
