初中生物常考的识图填空题,95%的题都这样考!
CareFusion CRSTAT005A00 心电图监控器安装说明书

Manufacturer reserves the right to discontinue, or change at any time, specifications or designs without notice and without incurring obligations.Printed in U.S.A.Form IIK-CRSTAT05-01 Rev. A Pg 1 10-2020Replaces: NEWInstallation InstructionsPart No. CRSTATUS005A00PACKAGE CONTENTSSAFETY CONSIDERATIONSInstallation of this accessory can be hazardous due to system pressures, electrical components, and equipment location (such as a roof or elevated structure). Only trained, qualified installers and service technicians should install, start-up, and service this equipment.When installing this accessory, observe precautions in the literature, labels attached to the equipment, and any other safety precautions that apply:•Follow all safety codes•Wear safety glasses and work gloves•Use care in handling and installing this accessoryIt is important to recognize safety information. This is the safety-alert symbol: . When you see this symbol on the unit and in instructions or manuals, be alert to the potential for personal injury.Understand the signal words DANGER, WARNING,CAUTION, and NOTE. These words are used with the safety-alert symbol. DANGER identifies the most serious hazards which will result in severe personal injury or death. WARNING signifies hazards which could result in personal injury or death. CAUTION is used to identify unsafe practices, which may result in minor personal injury or product and property damage. NOTE is used to highlight suggestions which will result in enhanced installation,reliability, or operation.INSTALLATIONFan Status SwitchNOTE: The fan status switch can be installed to monitor indoor fan status (ON/OFF). The filter status switch can be used to indi -cate when filter is dirty by providing a set of dry contacts that can be monitored. Follow the procedures below and perform the steps necessary to install the fan status switch.1.Turn off power to the unit.2.Open the blower access door on the unit.3.Mount the switch (HK06WC027) on the fan housing in the fan section as shown in Fig. 1, using the #10 screws provided.NOTE: To ensure proper operation of the switch, the switch must be installed vertically as shown.4.Mount the pick-up tube to the fan housing using the #8screws provided.NOTE: The arrow of the pick-up tube should point down as shown in Fig. 1.5.Connect the control tube to the higher-pressure port (marked “+”) of the pick-up tube installed in Step 4.6.Route wires for the switch from low voltage section to status switch. Connect the gray wire to the “COM” side of the switch. Connect the black wire to the “NO.” (See Fig. 2.) The other end can be tied into building controls for monitoring.7.Proceed to filter status installation.Filter Status Switch1.Ensure that power is off.2.Mount the switch (HK06WC0039) on the fan bracket and screw assembly into coil tube sheet as shown in Fig. 1, using the #10 screws provided.NOTE: To ensure proper operation of the switch, the switch must be installed vertically as shown.3.Insert tube over barbed port (+) and route the other end through hole in the sheet metal bracket as shown in Fig. 1.4.Locate wires (orange and brown). Route wires from low volt -age section to switch. Connect brown to “COM” and the orange to “NO.” The other end can be tied into building con -trols for monitoring. (See Fig. 2.)5.Restore power to unit.SETUPEach switch will need to be adjusted for job site conditions. Turn -ing adjustment screw clockwise will increase set point.Fan StatusUsing an ohm meter to monitor switch status, start from highest setting and decrease until switch makes. Decrease beyond this point to ensure switch makes when fan starts.Filter StatusUsing an ohm meter connect leads to brown and orange wires to monitor switch state. Increase adjustment until switch is made with clean filters. Increase it above this point to compensate for dirt build up.NOTE: Return all panels and restore power to unit once controls have been wired.PART NUMBER QTY DESCRIPTION48HG5036991BracketHK06WC0391Switch, Pressure Differential AL56AU1664Screw, 8-18 x 1/2 LG 48HG5005971Tube, ControlAL48AM2172Screw, 10AB x 5/8 LG HK06WC0271Switch, Pressure EV83XZ1501Air Flow Tube 50HJ5002882Tube, Control 99MK0073XC2200181Wire Assembly 99MH0073XC2200181Wire Assembly 99MB0084XC2160181Wire Assembly 99MG0084XC2160181Wire Assembly HY76TB1254Wire TieFan/Filter Status Switch AccessorySingle Package Rooftop Units15 to 25 TonFan StatusFig. 1 — Fan/Filter Status SwitchFig. 2 — Wiring Diagram© 2020 CarrierManufacturer reserves the right to discontinue, or change at any time, specifications or designs without notice and without incurring obligations. Printed in U.S.A.Form IIK-CRSTAT05-01 Rev. A Pg 4 10-2020Replaces: NEW。
铱星全球通信设备说明书

Valid to 31‐01‐16DescriptionIridium Hardware$1,396.28 IR‐00‐AHKT1301Iridium GO! Global Communciations Device ‐ CONTACT YOUR ACCOUNT MANAGERFOR SPECIAL PRICINGc/w AC Travel Adapter, international plug kit, DC travel adapter, rechargeable Li‐ionbattery,protective cover, micro USB cable, user guide, legal guide, GEOS brochureIR‐00‐CPKT1101Iridium 9575 Portable Satellite Telephone ‐ CONTACT YOUR ACCOUNT MANAGER FOR$2,345.77 SPECIAL PRICINGc/w AC Travel Charger and International Plug, Rechargeable LI‐Ion Battery, Data CD,Adapter 9575 Power USBAdapter 9575 Antenna Power USB, Portable Auxiliary Antenna, Auto Accessory Adapter,Leather Holster,USB to Mini USB Cable, Hands Free Headset, Quick Start Guide and User GuideIR‐00‐BPKT0801Iridium 9555 Portable Satellite Telephone ‐ CONTACT YOUR ACCOUNT MANAGER FOR$1,898.95 SPECIAL PRICINGc/w AC Travel Charger and International Plug, Rechargeable LI‐Ion Battery, Data CD,Antenna Adapter, Portable Auxiliary Antenna, Auto Accessory Adapter, Holster,USB to Mini USB Cable, Hands Free Headset, Quick Start Guide and User GuideIR‐00‐MOCKGO!Dummy 9560 Iridium GO! Unit$122.87 IR‐00‐MOCK9575Dummy 9575 Handset$134.04 IR‐00‐MOCK9555Dummy 9555 Handset$100.53 IR‐00‐APKT0401 Iridium 9505A Portable Satellite Phone ‐ US Made Non‐RoHS$2,989.14 c/w AC Travel Charger and International Plug, Rechargeable LI‐Ion Battery,Antenna Adapter, Portable Auxiliary Antenna, Auto Accessory AdapterLeather Holster, Lanyard, Hands Free Headset and User GuideIR‐00‐SBD3D1201‐9603Iridium 9603 Transceiver & Developers Kit$4,026.52 IR‐00‐SBD1201‐9603‐1Iridium 9603 Transceiver & Developers Kit (10+)$2,558.02 IR‐00‐SBD3M1201‐9603Iridium 9603 Transceiver$738.19 IR‐00‐100724 Iridium 9602 Transceiver & Developers Kit$3,737.76 IR‐00‐SDB2M1001Iridium 9602 Transceiver$622.96 IR‐00‐102158Iridium 9522B LBT Tranceiver$2,118.06 IR‐01‐102167Iridium 9522B Accessory Kit$87.21IR‐00‐CLBT1101‐9523Iridium 9523 Core$2,684.34 IR‐00‐LBTDT1101‐9523Iridium 9523 Development & Transceiver Kit$4,026.52 Iridum Go! CablesIR‐01‐GO‐ADAPTCABLE Iridium Go! Adaptor Cable (ex Thailand)$25.00 IR‐01‐W5USB1301Outdoor cable 5M usb‐a to MicroUSB plug$95.77 IR‐01‐WBAT13019560 Battery 3500mAh$134.05 IR‐01‐WBKT1301Bracket Kit ‐ wall mount for 9560$79.82 IR‐01‐WCCS1301Carry Bag with karabiner for 9560 ‐ bagged$70.24 IR‐01‐WACTC1301AC Charger, USB 5V 2.1A, Black, 4 region plugs, Boxed$92.58 IR‐01‐WAUT1301Auto Adaptor, Cig‐lighter plug to USB$35.13 IR‐01‐WCVR13019560 Protective Cover (uses BEA_018_130) with polybag$35.13 IR‐01‐WMUSB1301Cable USB 1.2m USB‐A plug to microUSB plug, thick gauge$22.34 Standard Accessories for 9575 & 9555 Portable PhoneIR‐01‐PHS300IC Iridium AxcessPoint WiFi$325.47 IR‐01‐USBC0801USB‐Mini USB Cable ‐ 9555$65.77 Standard Accessories for 9575 Portable PhoneIR‐01‐BAT31001Rechargeable Li‐ion Battery ‐ 9575$213.70 IR‐01‐H3AA1101Adapter, 9575 Antenna, Power USB$263.03 IR‐01‐H3APU1101Adapter, 9575, Power USB$230.13 IR‐01‐H3HOL1101Leather Holster ‐ 9575$82.19 IR‐01‐H3QS1101Quick Start Guide – printable copies available via IR‐01‐H3UG1101User Guide ‐ 9575$39.46 IR‐01‐H3CD1101Data CD ‐ 9575$13.15 Standard Accessories for 9555 Portable PhoneIR‐01‐BAT41101Rechargeable Hi Capacity Li‐ion Battery ‐ 9555$295.90 IR‐01‐H2UG1002User Guide ‐ 9555 (& 9575)$39.46 IR‐01‐USBC0801USB‐Mini USB Cable ‐ 9555$65.77 IR‐01‐ H2AA0801Antenna Adapter ‐ 9555$115.06 IR‐01‐HOL0801Leather Holster ‐ 9555$82.19 IR‐01‐BAT21101Rechargeable Li‐ion Battery ‐ 9555$197.26 IR‐01‐H2CD0801Data CD ‐ 9555$13.15 PEL‐01‐1300Peli case for 9555$166.37 Standard Accessories for 9575, 9555 & 9505A Portable PhoneIR‐01‐ACTC0701AC Travel Charger $180.83 IR‐01‐IPK0601International Plug Kit $65.77 IR‐01‐AUT0901Auto Accessory Adapter $115.06 IR‐01‐PAA0601Portable Auxiliary Antenna$246.58 IR‐01‐HFHS0601Hands Free Headset, Retractable$36.17 Standard Accessories for 9505A Portable PhoneIR‐01‐RDA0401RS‐232 Adapter for Data Kit ‐ 9505A$164.38 IR‐01‐ADKT0602Data Kit ‐ 9505A$276.15 IR‐01‐PUG0602User Guide ‐ 9505A$39.46 IR‐01‐BAT0602Rechargeable Li‐ion Battery 2800 mAh ‐ 9505A$197.26Standard Accessories for SS9500, SS9505 and 9505A Portable PhonesIR‐01‐AAA0601Auxiliary Antenna Adapter$115.06 IR‐01‐DCD06002CD‐ROM$13.15 Standard Accessories for both SS9505 and 9505A Portable PhonesIR‐01‐SYN7863A Leather Holster for 9505$82.19 IR‐01‐ANT0501Replacement Antenna ‐ 9505/9505A$443.83 Standard Accessories for both SS9500 and SS9505 Portable PhonesIR‐01‐ACDC0601AC/DC Converter ‐ 9500/9505$147.96 IR‐01‐SYN7024A International Plug Kit$65.77 IR‐01‐SYN0039B Auto Accessory Adapter ‐ 9500/9505$115.06 IR‐01‐SYN0060C High Capacity Battery ‐ 9500/9505 $197.26 IR‐01‐SYN8371B Data Kit c/w Data Cable, Tripod Bracket & CD‐ROM ‐ 9505$276.15 IR‐01‐SYN0091A RS‐232 Adapter for Data Kit ‐ 9505 ‐ Whilst Stocks Last$164.38 Iridium SIM CardsIR‐01‐SIM SDL Iridium SIM Card (Includes Activation)IR‐01‐SIM 325 SDL Iridium SIM Card ‐ 325 for Pre‐Paid ServiceIR‐01‐SIM 318 SDL Iridium SIM Card ‐ 318 for Crew Calling Service。
派克液压密封件说明书

派克汉尼汾公司版权所有未经许可不能摘录,翻印。
保留修改权利2021年6月警告销售条件本样本中产品和/或系统或相关产品出现故障,选型不当或使用不当,均可能导致人身伤亡和财产损失。
本文档以及由派克·汉尼汾公司及其子公司和授权经销商提供的其他资料,为具有技术知识的用户提供进一步研究所需的产品和/或系统选项。
重要的是,用户必须对您的应用进行全面的分析,并对当前产品样本中与产品或系统相关的资料进行评估。
由于工作条件以及产品或系统的多样性,用户必须自行分析和测试,并独自承担一切后果,包括:产品和系统的最终选型以及确保满足应用的所有性能、安全和警告等方面的要求。
派克·汉尼汾及其子公司可能会随时对本样本中的产品,包括但不限于:产品的特性、产品的规格、产品的结构、产品的有效性以及产品的价格作出变更而不另行通知.本样本中的所有产品均由派克·汉尼汾公司及其子公司和援权经销商销售。
与派克签订的任何销售合同均按照派克标准条件和销售条件中规定的条款执行(提供复印件备索)。
本公司的密封件,只能在本公司的文件资料述及的应用参数范围与接触介质、压力、温度和存放时间相一致的情况下才能使用。
在规定的应用参数范围外使用以及错误选用不同的材料都可能导致密封件寿命的缩短以及设备的损坏,甚至更严重的后果(如生命安全,环境污染等)。
样本中所列出的工作压力、温度范围、运动速度是极限值,它们之间相互关联、相互影响;在极端的工况下,建议不要同时把各个参数都同时用到极限值。
对于特殊的要求(压力、温度、速度、介质等),请联系派克汉尼汾公司以咨询合适的密封结构、材料、配置、安装建议等。
由于诸多工作参数会影响到流体传动系统及密封元件,这些设备的制造商必须在实际工作条件下测试、验证并批准密封系统的功能与可靠性。
此外,对于不断出现的新的介质(液压油、润滑脂、清洗剂等),用户特别注意它们与目前所用的密封件弹性体材料的兼容性。
我们建议用户在大批量应用之前,在厂内或现场先做密封材料的兼容性能测试,作为密封产品与系统供应商,我们建议用户遵循我们的这些建议。
Lincoln Power TIG 275 焊接机说明书

ProcessesStick, TIGProduct NumberK2619-1K2619-2K2620-1K2618-1 Ready-Pak®Package See back for complete specs© Lincoln Global, Inc. All Rights Reserved.275TIG WELDERSInput Power (Voltage/Phase/Hertz)K2619-1/K2618-1:208/230/460/1/60K2619-2:460/575/1/60K2620-1:220-230/380-400/415/1/50/60Input Current at Rated Output208V:104460V:47220-230V:95575V:38230V:94380-400V:55415V:50Rated Output: Current/Voltage/Duty Cycle275A/31V/40%Weight/Dimensions (H x W x D)397 lbs. (180 kg)31 x 22 x 26 in.(787 x 559 x 660 mm)INPUT OUTPUTK2618-1 Includes:K2619-1Under-Cooler Cart Water Cooler –PH: +1.216-481-8100 • LI NC OL N E L E C TR ICShown K2619-1[ 2]|Precision TIG ®275What Is It?Pulse welding systems vary weld current between peak (high heat) and background current (low heat) levels. Adjusting the pulse frequency controls the level of heat input applied to the weld relative to the weld travel speed.ResultsBetter control of heat input in the weld, resulting in:•Reduced warping and burnthrough on thin materials. •Smaller heat-affected zone – good for thin material.•Smaller bead profile without compromising proper penetration.Easy “Set It/See It” Operation:•Flashing indicator light lets you see the pulse rate before you strike an arc.W e l d i n g C u r r e ntTimePulsed TIG Weld (at 60 amps)Standard TIG Weld (at 60 amps) Smaller HeatAffected ZoneSmaller Bead ProfileMicro-Start ™II Technology aids arc stabilityTHROUGHOUT THE WELD CYCLE – even at the lowest amperage! Micro-Start ™II Technologycontrolled ramp down helps precisely fill the weld crater for quality results.Micro-Start ™II Technology minimizes high frequency and ‘hot starts’ to deliver soft arc starts without arc wandering for AC and DC welding. Arc PerformanceMicro-Start ™Stable, Focused Arc Precise Crater Fill“Set It/See It” Pulse Control — Make attractive and consistent welds!N O WIN C L U D ESf o r A L UM IN U MW E L D INGA CPrecision TIG ®275| [ 3]AC Auto Balance ®Controls —Automatically sets the optimal cleaning vs. penetration level for aluminum welding!What Is It?When aluminum welding, the positive (+) portion of the AC weldingamperage cleans the oxides from the aluminum surface. The negative (-)portion delivers more heat input, increasing penetration level.Patented AC Auto Balance ®automatically sets the ratio of cleaning action (+) versus penetration (-) based on amperage.Manual balance control provides the flexibility to customize the arc to your preference.Easy Operation:•Set it and forget it or override when you choose to customize the settings.More Cleaning (+)Less Cleaning (+)Less Penetration(-)More Penetration (-)W E L D I N G W E L D I N G TIMETIMEMaximum Cleaning SettingMaximum Penetration SettingAuto Balance Setting•Fan-As-Needed (F.A.N.)™minimizes repeated heating and cooling of internal components, keeps dust and dirt build-up to a minimum and saves on electricity costs. •Engineered cooling air routing brings clean air in from the top and exhausts at the bottom to draw and collect less dirt in the machine. •Compare these reliability enhancing design features: — Crimped and soldered power connections.— Wound and varnished electrical coils do not require coil spacers used on competitive models. — Locking tabs on PC board connectors eliminates loose connections.•Tough testing cycles ensure long service — dropping, jerking,rolling, shipping, vibration, resistance to real world extreme conditions, and extended in-service life testing. •CSA C/US certified.•Lincoln three-year warranty on parts and labor.Clean, cool air route shown.Snap-action durable switches make positive mechanical contact to reduce chances ofintermittent contact failure.[ 4]| Precision TIG ®275Shown: K2618-1Water-Cooled Ready-Pak ®PackageTorch Parts Storage Compartment.Optional TIG pulsing helps you make great welds.Water-cooled torch connections with no adapters — side mounted to keep out of the way and protected.Neat/organized cable management with integratedtorch holster.Separate output studs for stick and TIG keep both stick electrode holder and TIG torch connected at the same time — eliminates set-up changeover when switching processes.Easily accessible input voltagereconnect panel.Low-Lift ™ Shielding Gas Bottle Platform.Lockable Undercarriage Storage and Water Cooler Drawers.Reliable Pro-Con Pump.Optional Features:(standard with K2618-1 Water-Cooled Ready-Pak ®Package)Precision TIG ®275| [ 5]Large, well-spaced controls make it easy to view and set upwith gloved hands.SET-UP MENUPress and hold the menu button to display up to seven programmable parameters. The setting of the desired level is displayed, and increasing or decreasing the level setting is easy.The Set-Up Menu includes:Standard•DC TIG Start Modes: High Frequency, Scratch Start, and Touch Start TIG ®.•Adjustable Preflow Time.•Adjustable Start Pulse for Soft or Forceful Starts.With Optional Advanced Control Panel •Adjustable TIG Hot Start.•Adjustable Upslope Time.•Adjustable Stick Hot Start.•Adjustable Stick Arc Force.A)Minimum Output Control & Display Switch (Also displays output voltage)B)Set-Up Menu (see below)C)Digital MeterD)Local/Remote Current Control Switch E)Maximum Output Control F)Post Flow Time G)Thermal Shutdown Light H)Optional Advanced Control Panel 1)Trigger Switch (2-step/4-step)2)Pulse/Spot Time Mode Switch 3)Pulse Frequency Control 4)Pulse % On Time Control 5)Pulse Background Current Control 6)Downslope Time, In Seconds 7)Spot Time I)Polarity Switch J)Power Switch K)AC Balance Control L)Mode SwitchH123 4 & 756BCDEAF G HI J KLC U S T O M E R A S S I S T A N C E P O L I C YThe business of The Lincoln Electric Company ®is manufacturing and selling high quality welding equipment, consumables, and cutting equipment. Our challenge is to meet the needs of our customers and to exceed their expectations. On occasion, purchasers may ask Lincoln Electric for information or advice about their use of our products. Our employees respond to inquiries to the best of their ability based on information provided to them by the customers and the knowledge they may have concerning the application. Our employees, however, are not in a position to verify the information provided or to evaluate the engineering requirements for the particular weldment. Accordingly, Lincoln Electric does not warrant or guarantee or assume any liability with respect to such information or advice. Moreover, the provision of such information or advice does not create, expand, or alter any warranty on our products. Any express or implied warranty that might arise from the information or advice, including any implied warranty of merchantability or any warranty of fitness for any customers’ particular purpose is specifically disclaimed.Lincoln Electric is a responsive manufacturer, but the selection and use of specific products sold by Lincoln Electric is solely within the control of, and remains the sole responsibility of the customer. Many variables beyond the control of Lincoln Electric affect the results obtained in applying these types of fabrication methods and service requirements.Subject to Change – This information is accurate to the best of our knowledge at the time of printing. Please refer to for any updated information.For best welding results with Lincoln Electric equipment,always use Lincoln Electric consumables. Visit for more details.GENERAL OPTIONSAdvanced Control Panel Provides 2/4-step trigger with adjustable Pulser controls and Downslope timer for TIG welding.Also includes adjustable Hot Start and Arc Force internal panel controls for stick welding, and other user selectable features.Order K2621-1Under-Cooler Cart Water Cooler Includes “cooler-in-a-drawer” with hoses and a lockable storage drawer on a dual bottle undercarriage. Two gallon (7.5 ltrs.) capacity.Order K1828-1UndercarriageIncludes a dual bottle rack with chain and front casters, rear wheels and a handle. Order K1869-1Harris ®Argon Flowmeter RegulatorDeluxe flowmeter/regulator. Includes 10 ft. (3.0 m) hose. Order 3100211Work Clamp & Cable Assembly 15 ft. 2/0 cable with 1/2 in. stud lug and work clamp. Order K2150-1STICK OPTIONSAccessory KitFor stick welding. Includes 35 ft.(10.7 m) 2/0 electrode cable with lug, 30 ft. (9.1 m) 2/0 work cable with lugs, headshield, filter plate,work clamp and electrode holder.400 amp capacity.Order K704Accessory KitFor stick welding. Includes 20 ft. (6.1 m) #6 electrode cable with lug,15 ft. (4.6 m) #6 work cable with lugs, headshield, filter plate, work clamp, electrode holder and sample pack of mild steel electrode. 150amp capacity.Order K875Remote Output ControlConsists of a control box with choice of two cable lengths. Permits remote adjustment of output. 6 pin connection.Order K857for 25 ft. (7.6 m)Order K857-1for 100 ft. (30.5 m) TIG OPTIONSMagnum®Pro-Torch™TIG TorchesA full line of air-cooled and water-cooled torches available.Request publication E12.150PTA-26 One-Cable AdapterAdapts the 7/8 in. PTA-26 fitting tothe 5/8 in. gas and powerconnection on machine. Order K2166-1PTA-9, -17 One-Cable Adapter Adapts the 3/8 in. PTA-9 or -17fitting to the 5/8 in. gas and power connection on machine.Order K2166-3PTA-9, PTA-17, PTA-26 Two-Cable AdapterConverts the 7/8 in. water andpower connection on the machine to a 1/2 in. output stud for use with a two-cable air-cooled TIG torch.Order K2166-2Foot Amptrol ™Varies current for making critical TIG welds. Depress pedal to increase current. Depressing pedal fullyachieves maximum set current. Fully raising the pedal finishes the weld and starts the afterflow cycle.Includes 25 ft. (7.6 m) control cable.6-pin plug connection.Order K870Hand Amptrol ™Provides 25 ft. (7.6 m) of remote current control for TIG welding (6 pin plug connection). Velcro straps secure torch.Order K963-3(One size fits all Pro-Torch ™TIG Torches.)Arc Start SwitchNeeded if an Amptrol ™is not used when TIG welding. Comes with a 25ft. (7.6 m) cable. Attaches to the TIG torch for convenient finger control. 6-pin plug connection. Order K814Cut Length Consumables TIG welding filler metals are available for welding stainless steel, mild steel, aluminum and copper alloys.See publication C1.10。
Philips 蓝牙 Hi-Fi 音频适配器 AEA2000 说明书

PhilipsAdaptateur Hi-Fi Bluetooth ®AEA2000Diffusez sur une chaîne Hi-Fi la musique d'un smartphone sans filCompatible BluetoothL'adaptateur Hi-Fi Bluetooth ® Philips transforme votre chaîne ou vos enceintes de PC en un système audio sans fil. Connectez simplement l'adaptateur, et vous êtes prêt à diffuser sur votre chaîne Hi-Fi la musique de votre smartphone, de votre tablette et d'autres appareils Bluetooth.Écoutez votre musique sans fil avec Bluetooth ®•Fonctionne avec n'importe quel smartphone ou n'importe quelle tablette Bluetooth •Connexion sans fil via la technologie Bluetooth•Diffusez par streaming votre bibliothèque musicale locale via la technologie Bluetooth•Diffusez en streaming des applications musicales depuis votre smartphone ou votre tablette sur votre chaîne Hi-FiChangez votre chaîne Hi-Fi en système audio sans fil•Se connecte à presque tous les systèmes d'enceintes pour PC et chaînes Hi-Fi •Utilisez les prises RCA ou 3,5 mm pour connecter l'adaptateur •Profitez d'un son de meilleure qualité que sur votre smartphone Simplicité d'utilisation•Plug-and-play pour un usage facile •Design élégant et compactPoints fortsConnexion à un smartphone ou unetabletteL'adaptateur Hi-Fi Bluetooth ® fonctionne avec les téléphones et tablettes Bluetooth. Activez simplement Bluetooth, connectez l'adaptateur Hi-Fi Bluetooth, et votre chaîne Hi-Fi diffusera la musique de votre smartphone/tablette.Connectivité Bluetooth®L'adaptateur Hi-Fi Bluetooth ® fonctionne avec toutes les versions de Bluetooth.Diffusion par streaming d'unebibliothèque musicaleVous stockez votre musique sur un smartphone ou une tablette. Grâce àl'adaptateur Hi-Fi Bluetooth ®, votre chaîne Hi-Fi peut diffuser toute la musique de votre bibliothèque musicale.Streaming d'applications musicales enligneChaque mélomane a son service musical ou ses applications de radio en ligne préférées sur ses appareils mobiles. Désormais, votre chaîne Hi-Fi peut les diffuser directement.Fonctionne avec la plupart des chaînesHi-FiVous pouvez connecter l'adaptateur Hi-Fi Bluetooth ® à presque tous les systèmesd'enceintes pour PC et chaînes Hi-Fi au moyen de prises analogiques RCA ou 3,5 mm standard.Prise RCA ou 3,5 mmPrises analogiques standard RCA ou jack 3,5 mm (câbles inclus)Profitez d'un son de meilleure qualitéVous aimez la musique, comme le prouve l'immense bibliothèque musicale se trouvant sur votre smartphone ou votre tablette. Mais leur haut-parleur intégré n'est pas vraiment à la hauteur. Avec l'adaptateur Hi-Fi Bluetooth ®, vous pouvez écouter toute votre musique préférée en profitant d'un son de meilleure qualité.Plug-and-playL'adaptateur hi-fi Bluetooth ® se connecte facilement à votre chaîne hi-fi préférée.Branchez-le simplement sur les prises RCA ou jack 3,5 mm pour que votre chaîne hi-fi diffuse la musique de votre smartphone ou de votre tablette.Design compactAvec son design élégant et compact, l'adaptateur Hi-Fi Bluetooth ® trouvera parfaitement sa place sur votre chaîne Hi-Fipréférée.Date de publication 2022-04-24Version: 3.0.1012 NC: 8670 000 97953 EAN: 08 71258 16686 00© 2022 Koninklijke Philips N.V.Tous droits réservés.Les caractéristiques sont sujettes à modification sans préavis. Les marques commerciales sont la propriété de Koninklijke Philips N.V. ou de leurs détenteurs respectifs.CaractéristiquesConnectivité•Version Bluetooth: 2.1+EDR •Profils Bluetooth: A2DP, AVRCP •Portée Bluetooth: Jusqu'à 10 m •Entrée AUX RCA•Entrée audio(3,5 mm) Accessoires•Adaptateur CA •Câbles: Câbles RCA-3,5 mm •Guide de mise en route Dimensions•Dimensions du produit (l x H x P): 74 x 22 x 74 mm•Poids du produit: 0,04 kg Alimentation •Alimentation: 100-240 V, 50-60 Hz。
ni718成分

ni718成分摘要:1.NI718 的概述2.NI718 的成分及其特性3.NI718 的应用领域4.NI718 的发展前景正文:【1.NI718 的概述】I718 是镍基合金,其全称为Nickel Alloy 718,是一种高强度、高韧性的合金材料。
NI718 合金由镍、铬、铁、钼、钴、铜、锰、铌、钽等元素组成,具有优异的抗腐蚀性能、高温性能和抗氧化性能,因此在各个领域都有着广泛的应用。
【2.NI718 的成分及其特性】I718 的主要成分有:镍(50-55%)、铬(20-25%)、铁(15-20%)、钼(3-5%)、钴(2-3%)、铜(1-2%)、锰(0.3-1%)、铌(0.15-0.45%)、钽(0.10-0.30%)等元素。
这些元素的合理配比使得NI718 合金具有以下特性:(1)优异的抗腐蚀性能:NI718 合金在高温、高压、高湿等腐蚀环境下具有优异的抗腐蚀性能,是许多行业领域的理想材料。
(2)高强度、高韧性:NI718 合金具有高强度和高韧性,可以承受各种复杂的应力条件,适用于制造高强度、高韧性的零部件。
(3)良好的抗氧化性能:NI718 合金在高温环境下具有很好的抗氧化性能,可以有效抵抗氧化性气体的侵蚀。
(4)良好的焊接性能:NI718 合金具有较好的焊接性能,可以采用各种焊接方法进行焊接。
【3.NI718 的应用领域】I718 合金因其优异的性能,在许多领域都有着广泛的应用,包括:(1)航空航天领域:NI718 合金在航空航天领域中,常用于制造发动机零部件、涡轮叶片等高温、高压、高强度、高韧性的零部件。
(2)化工领域:NI718 合金在化工领域中,常用于制造耐腐蚀的设备和零部件,例如,热交换器、反应釜、管道等。
(3)核能领域:NI718 合金在核能领域中,可用于制造核电站的蒸汽发生器、核燃料棒等关键部件。
(4)医疗领域:NI718 合金在医疗领域中,可用于制造医疗器械,如支架、骨科植入物等。
电子元器件型对应表

电子元器件型号对应表741 运算放大器2063A JRC杜比降噪20730 双功放24C01AIPB21 存储器27256 256K-EPROM27512 512K-EPROM2SK212 显示屏照明3132V 32V三端稳压3415D 双运放3782M 音频功放4013 双D触发器4017 十进制计数器/脉冲分配器4021 游戏机手柄4046 锁相环电路4067 16通道模拟多路开关4069 游戏机手柄4093 四2输入施密特触发器409841256 动态存储器52432-01 可编程延时电路56A245 开关电源5G0401 声控IC5G673 八位触摸互锁开关5G673 触摸调光5G673 电子开关6116 静态RAM6164 静态RAM65840 单片数码卡拉OK变调处理器7107 数字万用表A/D转换器74123 单稳多谐振荡器74164 移位寄存器7474 双D触发器7493 16分频计数器74HC04 六反相器74HC157 微机接口74HC405374HCU04 六反相器74LS00 与门74LS00 4*2与非门74LS00 四2与非门74LS00 与门74LS04 6*1非门74LS08 4*2与门74LS11 三与门74LS123 双单稳多谐振荡器74LS123 双单稳多谐振荡器74LS138 三~二译码器74LS142 十进制计数器/脉冲分配器74LS154 4-16线译码器74LS157 四与或门74LS161 四2计数器74LS161 十六进制同步计数器74LS161 四~二计数器74LS164 数码管驱动74LS18 射频调制器74LS193 加/减计数器74LS193 四2进制计数器74LS194 双向移位寄存器74LS27 4*2或非门74LS32 四或门74LS32 4*2或门74LS374 八位D触发器74LS374 三态同相八D触发器74LS37774LS48 7位LED驱动74LS73 双J-K触发器74LS74 双D触发器74LS85 四位比较器74LS90 计数器75140 线路接收器75141 线路接收器75142A 线路接收器75143A 线路接收器7555 时钟发生器79MG 四端负稳压器8051 空调单片机8338 六反相器A1011 降噪ACVP2205-26 梳状滤波视频处理AD536 专用运放AD558 双极型8位D-A(含基准电压)变换器AD558 双极型8位D-A(含基准电压)变换器AD574A 12比特A/D变换器AD650AD670 8比特A/D变换器(单电源)1995s-2、15 AD7523 D-A变换器1994x-125AD7524 D-A变换器1994x-126AD7533 模数转换器1994x-141AD7533 模数转换器1995s-184ADC0804 8比特A/D变换器1995s-2、20 ADC0809 8CH8比特A/D 1995s-2、23ADC0833 A/D变换4路转换器1995s-2 ADC80 12比特A/D变换器1995s-2、8 ADC84/85 高速12比特A/D变换器1995s-2 AG101 手掌游戏机1993x-155AM6081 双极型8位D-A变换器1994x-127 AMP1200 音频功放皇后1993s-104AN115 立体声解码1991-135AN2510S 摄象机寻象器1994x-109AN2661NK 影碟机视频1995s-45AN2662K 时基校正(模拟)1995s-45AN2664FBP 影碟机视频1995s-45AN2664NK 影碟机视频1995s-45AN2870 影碟机伺服1995s-45AN3100N 射频调制器1991-55AN362 立体声解码1991-135AN363N 立体声解码1991-135AN3890FBS 影碟机主轴电机驱动1995s-45AN3891FBP 影碟机主轴电机驱动1995s-45 AN5026K 红外接收1993x-106AN51354 中放/音频/视频解调1994s-255 AN5138K 图象通道1994-308AN5265 音频功放1994s-298AN5342K 亮度锐度加强电路1994s-243 AN5344FBP CFU地1995s-274AN5352 模拟开关1994-245AN5515 彩电场输出1995s-34AN5515 场输出1994-73AN5521 场输出电路1991-203AN5521 场输出1994-73AN5521 场输出1994-240AN5521 场扫描1994-308AN5600K 图象处理1994-308AN5612 色差解调1994s-245AN5652 伴音中放1994-308AN5862K PIP切换输出1994s-245AN6551 双运放1991-54AN6612 电机稳速1992-63AN6612S 杜比降噪1995s-43AN6650 电机稳速1991-183AN6650 电机稳速1992-7AN6650 电机稳速1992-83AN6650 电机稳速1992-127AN6650 电机稳速1993s-165 AN6913L 双运放1995s-85AN7106K 单片放音机1992-63 AN7108 单片放音机1992-7AN7108 单片放音机1992-127 AN7108 单片放音机1992-136 AN7108 单片放音机1993s-165 AN7110 音频功放1994x-107 AN7112E 音频功放1994s-39 AN7158N 音频功放1991-3AN7158N 音频功放1991-203 AN7168 双音频功放1991-195 AN7178 音频功放1994x-107 AN7188NK 双音频功放1992-14 AN7311 双前置放大1991-195 AN7315 双前置放大1992-99 AN7410 立体声解码1991-135 AN74LS293 1994x-93AN7812 三端稳压器1994s-299AN78N05 三端稳压器1994s-298AP500/A DC功放驱动1995s-60AP500/A 双声道DC功放驱动1995s-156 AT24C01 存储器1994x-46ATC105 充电控制1993x-191AX5212D 微机鼠标编码1994s-183BA1035B 高速运放1994x-94BA1106F 放音前置放大及功放1995s-43 BA1310 立体声解码1991-135BA1320 立体声解码1991-135BA1330 立体声解码1991-135BA1335 立体声解码1991-135BA1404 调频发射1994x-183BA3015 电风扇电脑1994s-162BA3105 电风扇电脑1994x-58BA3212N 录放前置1994-180BA328 双前置放大1991-43BA328 低噪前置1992-58BA328 双声道前置放大1995s-189BA3506 音频功放1991-139BA3822LS 5段均衡1994-180BA508 遥控电路1995s-171BA5102 音频前置1993x-108BA5102 遥控电风扇编码1995s-119BA5104 电风扇遥控1995s-183BA527 音频功放1991-168BA5302 红外接收头1995s-183BA5406 双功放1992-47BA6124 电平指示1991-31BA6209 录象机加载1991-11BA6209 主导电机驱动1994-192BA6219B 加载电机驱动1994-120BA6227 电机稳速1991-139BA6303 磁鼓控速1992-139BA6439P 主导电机驱动1994-120BA728 双运放1992-91BA7751LS 录象机音频处理1993s-84 BA8105 遥控电风扇电路1995s-119BA8206A4 电风扇控制1995s-183BAS3108T FM发射1992-94BGJ3302 四运放电压比较器1994-25 BH-SK-I 声控IC 1994s-175BH-SK-V 声控IC 1994x-74BISS0001 红外传感信号处理1995s-182BL3102 时钟频率脉冲1994s-255BL3207 BBD延时1994s-255BL50462AP 遥控编码与发射1995s-299 BM5060 彩电CPU 1994-308BM5067 彩电CPU 1995s-212BM5069 彩电CPU 1995s-212BTS114 感温高速开关管1992-34BTS115 感温高速开关管1992-34BTS130 感温高速开关管1992-34BTS131 感温高速开关管1992-34BTS240 感温高速开关管1992-34BTS412 电源开关模块1992-112C036 4*2与非门1993s-93C043 双D触发器1993s-101C066C 4*2与非门1993x-147C1225H 音响驱动1992-198C1470 电机稳速1992-99C1490HA 红外接收1991-110C1676 超高频放大1995s-199C1891A 环绕声处理器1992-24C7642 单片收音机1991-95CA3069 运放1994x-184CA3160 1994x-188CA3193 音频运放1994x-36CA3524 脉冲调制1992-14CC14433 三位半A/D转换1991-46CC14433 三位半A/D转换1991-174CC4093 含施密特触发器的四2输入与非门1994s-44 CC4511 七段译码器1991-46CCU3000-17 从属微处理器1995s-299CCU3002-FDTV-11 彩电CPU 1995s-299CD1403 单运放1991-2CD4001 4*2或非门1993s-69CD4001 4*2或非门1994x-2CD4011 4*2与非门1993s-53CD4011 4*2与非门1993x-150CD4011 四2输入与非门1994s-80CD4013 双D触发器1991-2CD4013 双D触发器1993s-101CD4013 双D触发器1993x-6CD4013 双D触发器1994s-82CD4013 双D触发器1994x-22、54CD4017 十进制计数/分配1991-110CD4017 十进制计数/分配1993s-142CD4017 十进制计数译码器1994s-82CD4017 十进制计数器/脉冲分配器1994s-34 CD4017 十进制计数器/脉冲分配器1994x-2 CD40174 六D触发器1992-130CD4017B 十进制计数/分配1993x-173CD4017B 十进制计数器1995s-184CD40193B 双向可预置可逆计数器1994x-84 CD4020 14级二进制计数器1994s-80CD4024 七位二进制串行计数器1994s-80 CD4028 二~十进制译码器1992-98CD4035 移位寄存器1994s-72CD4040 十二进制二进制计数器1992-22 CD4040 十二进制二进制计数器1993s-207 CD4040 12级二进制计数器1993x-125CD4040 12级二进制计数器1994s-80CD4046 锁相环电路1994x-188CD4046 锁相环电路1995s-181CD4051 模拟开关1992-130CD4051 模拟多路转换器1995s-2、35CD4052 四选一模拟开关1992-82CD4053 3*2模拟开关1992-62、207CD4053 3*2模拟开关1994x-54CD4053 3*2模拟开关1994x-126CD4053B TV/AV切换1994-219CD4053B 双向模拟开关1994-247CD4060 分频计数1993s-12CD4060 十四位计数器/分配器/振荡器1994s-30、40 CD4066 4*2模拟开关1992-112CD4066 4*2模拟开关1993s-91CD4066BE 四路模拟开关1994-269CD4067 模拟多路转换器1992-162CD4067 模拟多路转换器1995s-2CD4069 6*1非门1991-166CD4069 6*1非门1993s-45CD4069 6*1非门1993x-150CD4069 六非门1994s-4、82CD4071 4*2或门1994s-30CD4072 2-4输入或门1992-130CD4075 三或门1991-170CD4078 多输入或门1991-170CD4093 四与非门施密特触发器1994x-42CD4099 8路可寻址锁存器1991-170CD4510 二~十加减计数器1992-98CD4511 LED显示驱动1991-2CD4511 译码驱动1993x-159CD4511 译码显示1994s-30CD4514 4-10线译码器1993x-158CD4518 双二~十进制计数器1993x-125 CD4518 计数器1994s-30CD4541B 双D触发器1995s-79CD4553 三位BCD码计数器1993s-47 CD74206 音频功放1994x-107CD9020-002 字符产生器1994s-255CD9135 六路互复位触摸开关1994x-188 CE550 电风扇控制1994s-170CH1058 音乐片1991-192CH208 译码输出1991-174CH220 电子密码锁1994x-26CIC7642 调幅收音1994s-55CIC9140 电话按键码1993s-107CNX82A2 稳压反馈光电耦合器1995s-299 CP4027 双J-K触发器1993s-109CS839 霍尔开关1994s-34CS8704 电话振铃1994-46CSC5089 单片电话机1994-77CTC9140 电话脉冲拨号1994-46CU001 多功能遥控1991-56CU47C433AN-002 彩电CPU 1994s-255 CW-18 呼救语音1993x-133CW8403 音乐IC 1993s-125CW9300 音乐IC 1993s-101CW9300 音乐IC 1993x-198CX20029 单片收音机1992-111CX20106 红外接收1993s-126CX20106 红外接收1994-230CX20106A 红外预放器1991-30CX20106A 红外接收1994x-22CX20111 调频调幅中放1992-127CX20112 电视立体声/多语种解码1994x-4 CX20188 杜比B/C降噪1992-174CX522-054 彩电CPU 1994s-302CX7959 存储器1994s-307CXA1019 单片收音机1991-114CXA1019 单片调频收音1991-152CXA1019 调频静噪1995s-52CXA1019M 单片收音机1994-74CXA1019P 单片调频收音1993x-85CXA1034P 单片放音机1992-83CXA1100 杜比降噪1991-106CXA1101 杜比降噪1991-106CXA1101 杜比降噪1992-108CXA1102 杜比降噪1991-106CXA1145P 游戏机色处理1991-131CXA1145P PAL编码1993x-78CXA1191M 调幅调频电视单片收音1993x-158 CXA1191M 单片收音机1994s-198CXA1191M 单片调频调幅收音1994x-63CXA1191P 收音专用1994-11CXA1238 单片收音机1991-140CXA1238M 调频收音1994s-130CXA1238M 调频收音1994s-156CXA1250 场频驱动1993x-103CXA1262N 单片放音机1993x-99CXA1315M 彩电副总线1995s-272CXA1642 消歌声1993s-64CXA1642 消声(卡拉OK)1995s-36CXA1642 消歌声1995s-204CXA1644P 卡拉数字延时1993x-72CXA1735S 音频处理器1995s-272CXA8008P 单片放音机1991-75CXA8008P 单片收音机1992-163CXD1254AQ 摄象机同步1993x-103CXD1310BLA 视频处理器1993x-103CXK1001P 存储器1994-307CXP80420-139S 彩电CPU 1994-334D1130 AM/FM收音1992-43D2024 音频功放1991-48D2283 音频低放1994s-135D2283 音频功放1994x-47D2822 助听器专用1991-167D414 单片收音机1991-167D7176AP 中放及伴音鉴频1994-19D7240AP 音频功放1991-3D75028CW 空调器CPU 1995s-194D7796 音频均衡1991-32DAC08 双极型8位D-A变换器1994x-129DAC08 双极型8位D-A变换器1994x-135DAC90 双极型8位D-A(含基准电压)变换器1994x-126 DBL2004 彩电场输出1995s-34DCM0016 系列高速带掉电保护RAM 1995s-174DCM0064 系列高速带掉电保护RAM 1995s-174DCM0256 系列高速带掉电保护RAM 1995s-174DCM8128 系列高速带掉电保护RAM 1995s-174 DJ2001 洗衣机电脑1991-159DN888 数字延迟1993x-110DPU-2553-25 偏转处理器1995s-299DRAM4164 数据存储1993s-80DS8629N 100分频器1992-22DTI-2260 数字瞬态改善处理器1995s-299EA1062 语音电路1994-138EK001 混频厚膜1994s-255ELM742A 低压低功耗电压比较器1995s-118 ET91210 电话程控1991-58F1212 程序快门1992-71GL7488P 录象机伺服系统1994-210GP605 开关电源PWM脉宽调制1995s-126 GS8200 录象机系统控制1994-210GSE-3568 多音声效片1994s-128GY65839 单片卡拉OK专用1994s-172GY9308 DDC数码延迟1993x-120GY9403 数码卡拉OK延迟1994x-52H9081 四声5闪光片1994x-167HA11227 立体声解码1991-135HA112A 音乐门铃1991-156HA11414 行场扫描1993s-28HA11489 亮度/彩色矩阵1991-203HA11489 视频处理1994x-19HA11509N 亮/色/行场扫描1991-43HA1166Z 黑白机行场扫描1994-82HA12017 放音均衡1991-8HA12058 杜比降噪1993x-160HA12102 双前置放大1991-43HA13001 音频功放1993s-75HA13119 音频功放1994x-99HA1392 音频功放1992-188HA1397 音频功放1991-176HA3302 四运放电压比较器1994-25HA51338SP 亮/色/行场扫描1991-43HA51338SP 彩电行场扫描/色度/亮度1995s-163 HCF40015 红外接收前置放大1994s-118HD14053B 电视遥控发射1993x-164HD401304 彩电CPU 1995s-174HD401314 彩电CPU 1995s-174HD44007A 彩色同步1991-14HEF4017 2-10进制计数器/脉冲分配器1994x-22 HEF4053BP 3*2模拟开关1994s-7HEF4066B 四路模拟开关1994-269HEF4503 3*2模拟开关1992-207HF-268/288 保密语音模块1995s-94HFC3030 彩灯闪光片1994x-71HFC3040 多发光二极管控制1991-64HFC3040 彩灯六路闪光芯片1994s-50HFC5203A 语音1994x-90HFC5219 “有电危险、请勿靠近”语音块1995s-95 HIC101 放象机电源厚膜块1995s-85HM50256 动态存储器1995s-159HM50464 动态存储器1995s-159HM511000 动态存储器1995s-159HM6117 游戏存储1993s-11HM6232 电源厚膜1993x-35HM6401 电源/场输出厚膜1991-115HM7101 电源厚膜1993x-35HM7942 电源厚膜1993x-35HM8951 电源厚膜1993s-35HM8951A 电源厚膜1995s-99HM8951B 电源厚膜1993x-195HM8951B 电源厚膜1994-65HM9007 电子镇流器1991-82HM9007 电子镇流器1993s-146HM9102 电源厚膜1992-103HM9102 电源厚膜1993x-35HM9102 开关电源取样1994-141HM9102D 电话按键码1993s-107HM911L 热释电红外线探测1994x-194 HM9201 电源厚膜1993x-35HM9205 稳压电源取样1994-332HM9207 电源厚膜1993s-3HM9207 电源厚膜1994-65HM9207B 电子镇流器1994s-6HM-JL1 音频模块1993s-160HN6401 电源厚膜1993x-35HPC177C 四运放电压比较器1994-25 HPC339C 四运放电压比较器1994-25 HT12C 遥控发射1994x-110HT2880 八音音乐片1994s-32HT6337A 风扇遥控接收1994x-110 HT7713 声控闪光片1994x-10HT7713 触摸调光1994x-63HT82D 双音音乐门铃1994s-32HY12503 可程式化语音模块1995s-94HY-20A 语音录放1994s-78HY42503 可程式化语音模块1995s-94HY-88A 动物叫声效片1993x-182HY8-S 三端音乐片1991-172IC1818P 单片游戏机1993s-95IC7107 三位半A/D转换器1993x-181ICL7107 三位半A/D驱动1993s-62ICL7107 三位半模/数转换器1994s-80ICL7107 DVM三位半A/D 1995s-2、21ICL7109 积分型12比特A/D变换器1995s-2 ICL7139 自动量程万用表1992-42ICL7660 双直流变换1993s-62ICL7660 DC-DC变换器1995s-39、68ICL8038 函数发生器1994x-112ICL8211 欠压检测用IC 1995s-40、89ICM7555 时基电路1995s-46ICM7556 时基电路1995s-40ICWJ9301 电脑密码锁1994s-190ICX045BLA 1/3寸CCD图象传感器1993x-103 IR2155 日光灯电子镇流模块1995s-38IR3M02 微机开关电源1994s-109IR3M03A DC-DC变换1992-86IR3M03A DC-DC变换1993s-119ISD1000A 系列单片语音录放IC 1995s-174 ISD1100 系列单片语音录放IC 1995s-174 ISD1400 系列单片语音录放IC 1995s-174 ISD2500 系列单片语音录放IC 1995s-174 IVR1601 一次性编程语音1993s-159IX0238CE 场输出1994-73IX0250CE 音频功放1994-73IX0256CE 开关电源1994-73IX0308 电源厚膜1992-127IX0308CZ 电源厚膜1994-67IX0323CD 电源厚膜1994s-3IX0323CE 电源厚膜1994-33IX0324CFNI 行场扫描/色解码1994-34IX0355CE 场输出1994-73IX0465CE 开关电源1994-73IX0517CE 开关电源1994-73IX0640CE 场输出1994-73IX0689CE 电源厚膜1994-48IX0711CE 彩电中放1994-73IX0711CEN 图象中放1994x-83IX0712CE 亮/色/行场扫描1994-73IX0712CEN1 扫描/解码1994-96IX0933CE 彩电CPU 1994-96JU0114 电源厚膜1991-155JU0114 彩电电源厚膜块1995s-43、51 JU0116 电源厚膜1994-66K2356 语音保密1992-178KA2184A 红外预放器1991-30KA2184A 红外线接收预放1991-56KA2184A 红外接收1993s-126KA2184A 红外接收放大1993x-170KA2209 音频功放1993x-43KA22134 音频功放1994x-83KA2221 双前置放大1991-43KA22429 调频收音1994s-55KA2402 电机稳速1993x-99KA2402 电机稳速1995s-131KA2407 电机稳速1993x-43KA2410 电话振铃1994x-11KA2410 电话振铃1994-138KA2915 单片黑白电视机1993s-167 KAC4558 双运放1991-71KD-07 闪光灯、音乐集成块1995s-71KD-100 音乐IC 1993x-5KD-152B 音乐IC 1993x-189KD-155 口哨声控片1995s-183KD-253 “叮咚”门铃1994x-194KD-253B “叮咚”门铃1994s-62KD-254 音乐片1994s-143KD482FB 石英钟报时1991-4KD-482FC 钟控打点1993s-142KD483 程控双音打点石英钟1994s-175 KD5068 狗叫声音乐片1993x-126KD5105 电子爆竹1993s-38KD-5601 爆竹声1993x-189KD56010 “恭喜发财”语音片1994x-138 KD56012 鸟叫声1993s-157KD56012 鸟叫IC 1994x-143KD-5602 军号声音乐片1995s-191KD5603 “欢迎光临”语音片1991-62KD5603 欢迎光临1993s-142KD-5603 “欢迎光临”语音片1994s-63 KD56032 六秒自然声1995s-143KD56033 娃娃哭笑语音块1995s-103 KD5604 谢谢光临1993s-142KD-5608 “狗叫”音乐片1992-168KD9300 音乐门铃1991-156KD9300 音乐门铃1994s-138KD9300 音乐门铃1994x-2、34KD9561 警车声音乐片1992-68KD9561 音乐IC 1994x-42KD9562B 警报声音乐1993x-52KD9562C 八声声效片1992-10KH1668 风扇控制1994x-154KIA6227H 音频功放1994-346KIA6299H 音频功放1994x-107KIA6401 电话振铃1994x-11KIA7299P 音频功放1994s-51KIA75558P 录象机伺服系统1994-210 KIA8125S 音频前置放大1994s-51KIA8127F AM/FM中放1994-180KM41C64P-10 画中画DRAM 1995s-299 KS5194/5 液晶显示驱动1994x-66KS5803 红外遥控发射1991-56KS5803 红外发射1992-95KS5917 语音电路1993s-183L200 五端集成稳压器1994s-110L4960 开关电源脉宽调制1995s-102 L4962 开关电源脉宽调制1995s-102 L4962 脉宽调制器1995s-152L4964 开关电源脉宽调制1995s-102 L4970 开关电源脉宽调制1995s-102 L4974 开关电源脉宽调制1995s-102 L78MR05 1994-240LA1231N FM解调1991-35LA1260 调频、调幅收音1994-104 LA3160 双前置放大1991-43LA3160 前置放大1994-340LA3350 立体声解码1991-135LA3361 立体声解码1991-66LA3361 立体声解码1991-135LA3365 立体声解码1991-135LA4127 双前置放大1993x-83LA4140 音频功放1993x-91LA4140 音频功放1994-137LA4275 音频功放1994s-255LA4422 音频功放1994-73LA4445 音频功放1991-67LA4445 音频功放1991-203LA4445 音频功放1993x-27LA4597 音频功放1993x-27LA5110 彩电稳压电源1995s-187LA5112 彩电稳压电源1995s-187LA5511 电机稳速1991-3LA5515 电机稳速1991-3LA5521D 电机稳速1995s-131LA7016 制式切换1995s-299LA7299 音频功放1991-67LA7555 中频信号处理1995s-342LA7575 PLL同步检波中频解码1995s-299LA7680 图象/伴音中频/视放/解码1994-273、302 LA7830 场输出电路1991-203LA7830 场输出电路1992-39LA7830 场输出1994-73LA7832 彩电场输出1995s-27LA7832/33 场输出1994s-255LA7837 场输出1994s-299 1995-62LA7838 场输出1994-268LA7905 50Hz/60Hz识别1994s-255LA7910 波段开关1994-248LA7920 波段开关1994s-307LAG665 单片放音机1991-132LAG665 单片放音机1991-199LAG665 单片放音机1992-47LAG665 随身听IC 1994s-20LAG665 单片放音机1994x-83LAG665F 单片放音机1993x-109LAG665F 单片立体声放音1995s-12LB1405 电平指示1993x-154LB1407 电平指示1995s-55LC219 风扇红外遥控发射1993x-170LC219 红外发射编码1994-230LC220A 六路译码器1993x-170LC220A 红外译码1994-230LC4036 双向模拟开关1994s-255LC4066B 四路模拟开关1994-269LC7441 PIP系统控制1994s-245LC7444 双时钟发生器1994s-245LC7480 多路转换开关和模/数转换器1994s-245 LC7881 D/A转换1992-124LCL102 计程显示器1994s-34LD398C 卫视接收厚膜块1993x-157LD505 音频放大1992-141LD866A 雷达探测模块1994s-63LD866B 雷达探测模块1994s-63LF398 取样与保持1995s-2、29LH-169B “抓贼呀”语音片1994s-7LIC1149-5 降压控制器1994s-104LM010 1994x-192LM1035 音量、平衡、音调直流控制1993s-32 LM1036 音量、平衡、音调直流控制1993s-32 LM1040 音量、平衡、音调直流控制1993s-32 LM12 运放1995s-30LM134 1994x-192LM1851N 漏电检测1994x-42LM1875 运算放大器1991-36LM1875 音频功放1994s-68LM1894 杜比降噪1991-106LM1894 动态降噪1991-200LM1894 降噪1993s-90LM1894 动态降噪1993s-170LM2575 开关电源脉宽调制1995s-102LM258 双前置放大1993x-43LM2904CT 三端稳压器1994s-168LM2907/2917 频率/电压转换器1994s-199LM293X 低压差三端稳压器1995s-41LM311 专用运放比较器1994x-18LM317 三端可调稳压电源1991-103LM317 三端可调稳压电源1993s-124LM317 三端可调稳压电源1994s-4LM317 正压可调三端稳压1995s-39LM317T 可调三端稳压1991-186LM318N 高速运放1994x-128LM3272C 石英钟芯1992-35LM331 V/F变换器1995s-2、37LM337 负压可调三端稳压1995s-39、46 LM339N 四运放电压比较器1994-25LM3524A 开关电源脉宽调制1995s-102 LM358 双运放1992-8LM358P 运放1995s-299LM358PS 录象机主导放大整形1994-120 LM35DZ 温度传感1992-198LM385 小功率基准电压1995s-39、60、76 LM386 音频功放1991-168LM386 音频功放1993s-6、77LM386N 音频功放1994x-90LM3875T 单片功放1993s-146LM3875T 音频功放1993x-144LM3876T 单片功放1993s-146LM389 调频发射1992-70LM3900 电流型四运放1994s-199 LM3909 单片振荡器1995s-63LM3909N 闪烁灯1995s-88LM3914 电平显示1993x-22LM3915 显示驱动1994x-16LM4280 音频功放1995s-299LM567 频率解调1991-2LM567 音频解调1991-62LM567 红外音频解调1991-134LM567 红外音频解调1994x-2LM567 红外音频解调1994x-119LM567 调频发射、接收1995s-143 LM6181 视频放大1994x-7LM723 通用型稳压块1994s-79LM833 双运放1993s-170LM8361 数字钟1994x-162LM837 四运放1993s-170LMC1982 数控音响1993s-178LP167 环形脉冲分配/驱动1994s-122LP2950CZ 低压差5V稳压器(三端)1995s-88 LQ46 四合一语音片1992-76LQ46 语音片1994x-162LR3714AM 遥控发射1993x-156LR40993 电话机发号1995s-111LR6 低压线性稳压器1995s-94LS190 对数放大器1994x-77LS7232 触摸调光1991-100LS7232 触摸调光1993s-94LS7232 触摸调光1994x-142LS85 1994x-77LT1005 逻辑控制稳压器1995s-39LT1057 音频运放1991-120LT1073 充电检测控制1994s-56LT1173CS8 DC-DC变换器1994x-8a)a 》模拟ab》地址总线accessorier》配件adc》模拟到数字的转换afc》自动频率控制agc》自动增益控制aged》模拟地afms》来自音频信号alarm》告警ant》天线antsw》天线开关atms》到移动台音频信号(b)base》三极管基极batt+》电池电压b+》内电路工作电压buzz》蜂鸣器(c)cdma》码分多址control》控制cpu》中央处理器(d)d》数字dac》数字到模拟的转换d b》数据总线dcin》外接直流电愿输入dgnd》数字地dtms》到数据信号dfms》来数据信号dsp》数字信号处理器(e)emitter》三极管发射极en》使能etacs》增强的全接入通信系统ext》外部的(f)feed back》反馈fdma》频分多址fh》跳频fl》滤波器fm》调频from》来自于(g)gain》增益gnd》地(h)hook》外接免提状态(i)i》同相支路if》中频int》中断i/o输入输出ictrl》供电电流大小控制端(l)led》发光二极管loop fliter》环路滤波器lspctrl》扬声器控制(m)mclk》主时钟mic》送话器mod》调制信号mopip》调制i信号正modin》调制i信号负mute》静音(o)ofst》偏置on》开onsrq》免提开关控制(p)powcontrol》功率控制powlev》功率级别pwrsrc》供电选择pll》锁相环q》正交支路(r)ram》随机储存器(暂存)ref》参考reset》复位rf》射频rfadat》射频频率合成数据rfaenb》射频频率合成启动rssi》接收强度指示rx》接收rxon》接收开rxifp》接收中频信号正rxifn》接收中频信号负sat-det》饱和度检测saw》声表面波滤波器spk》扬声器spi》串行外围接口swdc》末调整电压synstr》频率合成器启动synclk》频率合成器时钟syndat》频率合成器数据synton》频率合成器开/关sw》开关(t)tdma》时分多址temp》温度监测txvco》发送压控振荡器频率控制tp》测试点tx》发送tx en》发送使能txon》发送开(v)vbatt》电池电压vrpad》调整后电压vpp》峰峰值vppflash flash》编程控制vcxocont》基准振荡器频率控制vswitch》开关电压vcc》电愿vco》压控振荡第一节电阻器电阻,英文名resistance,通常缩写为R,它是导体的一种基本性质,与导体的尺寸、材料、温度有关。
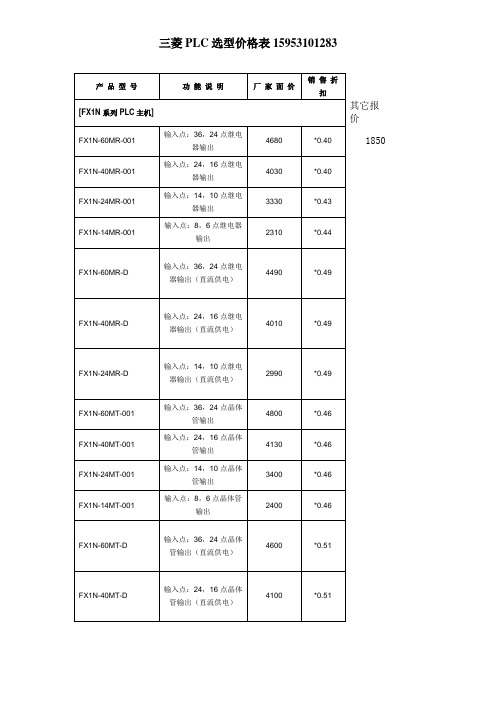
三菱变频器PLC选型价格表
0.6
FX-EEPROM-8
8K EEPROM MEMORY CASSETTE
620
0.6
FX-EEPROM-16
16K EEPROM MEMORY CASSETTE
1020
0.6
[通讯模块]
FX2NC-232-ADP
RS232通讯模块
1230
*0.60
FX2NC-485-ADP
RS485通讯模块
输入点:16,16继电器输出(直流供电)
5180
*0.49
FX2N-128MT-001
输入点:64,64点晶体管输出
10330
*0.44
FX2N-80MT-001
输入点:40,40点晶体管输出
7180
*0.42
FX2N-64MT-001
输入点:32,32点晶体管输出
6410
*0.42
FX2N-48MT-001
输入点:36,24点晶体管输出
4800
*0.46
FX1N-40MT-001
输入点:24,16点晶体管输出
4130
*0.46
FX1N-24MT-001
输入点:14,10点晶体管输出
3400
*0.46
FX1N-14MT-001
输入点:8,6点晶体管输出
2400
*0.46
FX1N-60MT-D
输入点:36,24点晶体管输出(直流供电)
4通道D/A
3270
*0.46
FX2N-5A
4通道A/D, 1通道D/A
3400
*0.53
FX2N-8AD
8通道A/D
7630
*0.46
Lincoln Magnum PRO Curve 450 商品说明书

Operator’s ManualRegister your machine:/registerAuthorized Service and Distributor Locator: /locatorIM10416| Issue D a te Aug-17© Lincoln Global, Inc. All Rights Reserved.For use with Code Numbers:K3518-2, K3518-2-8-45, K3518-2-10-45Save for future referenceDate PurchasedCode: (ex: 10859)SECTION A:WARNINGSC ALIFORNIA PROPOSITION 65 WARNINGSWARNING: This product, when used for welding or cutting, produces fumes or gases which contain chemicals known to the State of California to cause birth defects and, in some cases, cancer. (California Health & Safety Code § 25249.5 et seq.)ARC WELDING CAN BE HAZARDOUS. PROTECTYOURSELF AND OTHERS FROM POSSIBLE SERIOUS INJURY OR DEATH. KEEP CHILDREN AWAY.PACEMAKER WEARERS SHOULD CONSULT WITH THEIR DOCTOR BEFORE OPERATING.Read and understand the following safety highlights. For additional safety information, it is strongly recommended that you purchase a copy of “Safety in Welding & Cutting - ANSI Standard Z49.1” from the American Welding Society, P.O. Box 351040, Miami, Florida 33135 or CSA Standard W117.2-1974. A Free copy of “Arc Welding Safety” booklet E205 is available from the Lincoln Electric Company, 22801 St. Clair Avenue, Cleveland, Ohio 44117-1199.BE SURE THAT ALL INSTALLATION, OPERATION,MAINTENANCE AND REPAIR PROCEDURES ARE PERFORMED ONLY BY QUALIFIED INDIVIDUALS.FOR ENGINE POWERED EQUIPMENT.1.a.Turn the engine off before troubleshootingand maintenance work unless themaintenance work requires it to be running.1.b.Operate engines in open, well-ventilated areas or vent the engineexhaust fumes outdoors. 1.c.Do not add the fuel near an open flame weldingarc or when the engine is running. Stop the engine and allow it to cool before refueling to with hot engine parts and igniting. Do not spill fuel when filling tank. If fuel is spilled, wipe it up and do not start engine until fumes have been eliminated.1.d. Keep all equipment safety guards, coversand devices in position and in good repair.Keep hands, hair, clothing and tools away from V-belts, gears, fans and all other moving parts when starting, operating or repairing equipment.1.e.In some cases it may be necessary to remove safety guards toperform required maintenance. Remove guards only when necessary and replace them when the maintenance requiring their removal is complete. Always use the greatest care when working near moving parts. 1.f. Do not put your hands near the engine fan. Do not attempt tooverride the governor or idler by pushing on the throttle control rods while the engine is running. 1.g.To prevent accidentally starting gasoline engines while turningthe engine or welding generator during maintenance work,disconnect the spark plug wires, distributor cap or magneto wire as appropriate. 1.h.To avoid scalding, do not remove the radiatorpressure cap when the engine is hot.ELECTRIC ANDMAGNETIC FIELDS MAY BE DANGEROUS2.a.Electric current flowing through any conductorcauses localized Electric and Magnetic Fields (EMF).Welding current creates EMF fields around welding cables and welding machines 2.b.EMF fields may interfere with some pacemakers, andwelders having a pacemaker should consult their physician before welding. 2.c.Exposure to EMF fields in welding may have other health effectswhich are now not known. 2.d.All welders should use the following procedures in order tominimize exposure to EMF fields from the welding circuit:2.d.1.Route the electrode and work cables together - Securethem with tape when possible.2.d.2.Never coil the electrode lead around your body.2.d.3.Do not place your body between the electrode and workcables. If the electrode cable is on your right side, the work cable should also be on your right side.2.d.4.Connect the work cable to the workpiece as close as pos-sible to the area being welded.2.d.5.Do not work next to welding power source.SAFETYTABLE OF CONTENTSTechnical Specifications.........................................................................................................................................A-1Installation ..................................................................................................................................................Section A Connector Kit Installation to Gun Cable......................................................................................................................A-2 K466-1 and K466-8 Installation (for Lincoln Feeders)................................................................................................A-3 K466-2 Installation (For Tweco Adapted Feeders)......................................................................................................A-3 K466-3 Installation (For Miller feeders; i.e. Millermatic 200, Cricket, S-32P, 54D...)...................................................A-3 K466-6 and K466-10 Installation (Wirematic and Lincoln 10 Series Feeders).............................................................A-3 Liner Installation and Trimming Instructions...............................................................................................................A-4 Rotating the Gun Tube...............................................................................................................................................A-4 Contact Tip and Gas Nozzle Installation......................................................................................................................A-4 Connection to Feeder.................................................................................................................................................A-4 Connection to Lincoln Feeders...................................................................................................................................A-4 Connection to Tweco Adapted Feeders......................................................................................................................A-4 Connection to Miller Feeders.....................................................................................................................................A-5 Connection To Lincoln Wirematic, Hobart Series 2000 Feeders, Or Sp100t Type Feeders..........................................A-5 Connection To Lincoln 10 Series Feeders..................................................................................................................A-5 Consumable Thread Sizes.........................................................................................................................................A-5Operation ..................................................................................................................................................Section B Electrodes and Equipment.........................................................................................................................................B-1 Making a Weld..........................................................................................................................................................B-1 Avoiding Wire Feeding Problems................................................................................................................................B-1Maintenance..................................................................................................................................................Section C Removal, Installation and Trimming Gun Liners.........................................................................................................C-1 Gun Tubes and Nozzles.............................................................................................................................................C-1 Gun Cables ............................................................................................................................................................C-1 Cable Repair ............................................................................................................................................................C-1 Troubleshooting............................................................................................................................................Section DPARTS CONTENT/DETAILS MAY BE CHANGED OR UPDATED WITHOUT NOTICE. FOR MOST CURRENT INSTRUCTION M ANUALS, GO TO .FIGURE 2FIGURE 3.125g)Slip the connector nut over the copper strands with the threadend out. Orient gun tube connector so machined flat is on theFIGURE 4 Pull the cut-off lead terminals off the trigger assembly andWire Feeder End Repair(REQUIRES 2 #S19492-1 TERMINALS)a)Remove the cable liner per 3.1.b)Remove the feeder end connector, molded gas plug (orbarbed fitting), cable handle nut, plastic tailpiece, andconnector cover (see Figure 6).NOTE:In order to remove the cable handle nut, the tail of the connector cover must be depressed and the cable handle nut rotated 1/4 turn counterclockwise as viewed from the feeder end.c)Remove incoming connector from cable by unscrewingconnector nut from incoming connector. If the cable innertube is difficult to remove from the connector assembly,carefully slit it lengthwise with a knife up to the brassconnector.d)Move the cable boot, cable handle, and strain relief towardthe middle of the cable past the damaged section.e)Cut off the damaged section of cable and strip off the outerjacket as shown in Figure 3. Be careful not to cut theinsulation on the control wires while stripping jacket. Stripthe red and white control leads 1/4" (6.4 mm) from the endand crimp a new S19492-1 terminal to each lead. Trim theinner tube to dimensions shown.NOTE:The cable contains four control leads. Any two control leads can be used, provided the two colors used are the same at both ends. The extra leads are spares that can be used if one of the other leads breaks.f)Check that the cable boot, cable handle and strain relief areon the cable. Slip the connector nut over the copper strands with the threaded end out. Assemble incoming connector tocable by forcing the steel tube of the connector into the inside diameter of the cable inner tube until the copper strands are butted against the incoming connector shoulder. Keeping the copper strands against the shoulder, pull the connector nutover the copper strands, engage the incoming connectorthreads, and tighten in place. Refer to Figure 4.NOTE:For best results, insert a .250" (6.4mm) diameter rod through the connector and into core of cable approximately11.00" (280 mm) when pushing the connector tube into thecable core tube. To tighten, hold the connector in place while turning the nut, then remove the rod from the core. Thisprocedure assures the inner core does not kink whileassembling or tightening.Position the plastic strain relief such that the tapered end is7.10" (180 mm) from the incoming connector (see Figure 6).Lock into place with steel housing.g)Position cable boot and cable handle on cable and assemblereplacement control wire terminals in place on the cablehandle. Insert connector cover in place. Install tailpiece and fasten to cable handle with cable handle nut. Refer to Figure 6.h)Replace the molded gas plug (or barbed fitting) and feederend connector.i)Install and trim liner per Section 1.2.FIGURE 6If for any reason you do not understand the test procedures or are unable to perform the tests/repairs safely, contact yourIf for any reason you do not understand the test procedures or are unable to perform the tests/repairs safely, contact yourATENÇÃOJapaneseChineseKoreanArabicREAD AND UNDERSTAND THE MANUFACTURER’S INSTRUCTION FOR THIS EQUIPMENT AND THE CONSUMABLES TO BE USED AND FOLLOW YOUR EMPLOYER’S SAFETY PRACTICES.SE RECOMIENDA LEER Y ENTENDER LAS INSTRUCCIONES DEL FABRICANTE PARA EL USO DE ESTE EQUIPO Y LOS CONSUMIBLES QUE VA A UTILIZAR, SIGA LAS MEDIDAS DE SEGURIDAD DE SU SUPERVISOR.LISEZ ET COMPRENEZ LES INSTRUCTIONS DU FABRICANT EN CE QUI REGARDE CET EQUIPMENT ET LES PRODUITS A ETRE EMPLOYES ET SUIVEZ LES PROCEDURES DE SECURITE DE VOTRE EMPLOYEUR.LESEN SIE UND BEFOLGEN SIE DIE BETRIEBSANLEITUNG DER ANLAGE UND DEN ELEKTRODENEINSATZ DES HER-STELLERS. DIE UNFALLVERHÜTUNGSVORSCHRIFTEN DES ARBEITGEBERS SIND EBENFALLS ZU BEACHTEN.ATENÇÃOJapaneseChineseKoreanArabicLEIA E COMPREENDA AS INSTRUÇÕES DO FABRICANTE PARA ESTE EQUIPAMENTO E AS PARTES DE USO, E SIGA AS PRÁTICAS DE SEGURANÇA DO EMPREGADOR.customer assistance policYThe business of The Lincoln Electric Company is manufacturing and selling high quality welding equipment, consumables, and cutting equipment. Our challenge is to meet the needs of our customers and to exceed their expectations. On occasion, purchasers may ask Lincoln Electric for advice or information about their use of our products. We respond to our customers based on the best information in our possession at that time. Lincoln Electric is not in a position to warrant or guarantee such advice, and assumes no liability, with respect to such information or advice. We expressly disclaim any warranty of any kind, including any warranty of fitness for any customer’s particular purpose, with respect to such information or advice. As a matter of practical consideration, we also cannot assume any respon-sibility for updating or correcting any such information or advice once it has been given, nor does the provision of information or advice create, expand or alter any warranty with respect to the sale of our products.Lincoln Electric is a responsive manufacturer, but the selection and use of specific products sold by Lincoln Electric is solely within the control of, and remains the sole responsibility of the customer. Many variables beyond the control of Lincoln Electric affect the results obtained in applying these types of fabrication methods and service requirements.Subject to Change – This information is accurate to the best of our knowledge at the time of printing. Please refer to for any updated information.。
Philips X818手机说明书

XeniumX818BlackLTE/WCDMA/TD-SCDMA/CDMA/GSMCTX818BK19 days standby time in a slim designMeet the latest Philips X818 with a whole array of powerful smart features packed in a sleek body! 3900mAh battery, 5.5'' FHD display with SoftBlue technology and antimicrobial coating, all setting you free to explore the exciting world.Designed for youDual SIM for 2 groups of contactsFingerprint access to your personal applicationsExcellent surfing experience with Dual 4G (TDD-LTE/FDD-LTE)Sensational touch5.5" FHD IPS display for rich viewing detailsSoftBlue LED tech easy on eyes and deliver brilliant colorSuperlative Li-ion 3900mAh batteryPower saving key & Xpower tech to save power up to 10% more16MP PDAF camera focus faster and deliver brilliant photoBright sparks, fast speedsBest in class speed with 2.0GHz octa core processor32GB built-in memory and 3GB RAM for excellent experienceAndroid 6.0HighlightsDual SIMOrganize your life better and keep yourcontacts separate by using 2 different phone numbers. With Dual SIM, you don't need to carry 2 phones around.Fingerprint authenticationSmart fingerprint authentication restricts your Philips mobile phone and data to be accessed only by you - using your unique fingerprint. All you need to do is to register your fingerprint via the phone's built-in fingerprint sensor. A quick swipe of your finger will verify the match and allow you exclusive use of your phone and its amazing functions and applications.Dual 4G (TDD-LTE and FDD-LTE)Your Philips mobile phone incorporatesdual-mode 4G radio, that allows you to use mobile internet on a blazing speeds both in TDD-LTE and FDD-LTE networks. Now you can enjoy wider LTE coverage with just one phone.2.0GHz octa core processorlaze ahead of others with the almighty 2.0GHz octa core processor on your Philips mobile phone. This phenomenal powerhouse zips along with your demanding needs without a cinch like no other processor before it - be it watching videos, downloading web pages or engaging in immersive gaming - and with exceptional picture quality to boot. Withlightning speeds like this, what's not to like?5.5" FHD IPS displayYour Philips mobile phone comes endowed with an awesome 5.5" fully high definition display that brings you truly vibrant colors and razor-sharp detail. The IPS technology ensures great viewing from any angle, while the vibrant colors and vivid images render a full-bodied viewing experience. To top it off, navigating on the wide screen is also swift and effortless.Whether you are surfing your favorite websites or viewing your latest snapshots and videos,the 5" screen gives you an unbeatable visual treat while on the go.Li-ion 3900mAh batteryYour Philips mobile phone comes packed with a standout 3900mAh Li-ion battery forseamless and long lasting connections on the go. With such exceptional battery performance,you can banish nagging worries about missing important calls from both your professional and personal contacts. And when both work and family matters have been tackled to yoursatisfaction, you can hone in on transcendent gaming and surfing experiences on a single charge, thanks to the phone's best-in-class power technology.Power saving key & Xpower techBy clicking the power saving key, you can enable this function to help to save the power.It will shut down the WiFi, GPS and Bluetooth functions, while dimming the screen display simultaneously. Meanwhile, empowered by new X-power technology, Philips mobile phones are highly optimized to provide unsurpassed standby time and battery life.Through adjusting the GPU current, the Xpower technology can save the power fundamentally when you use the GPS navigation, play games, watch videos and listen to music.16MP PDAF camera with flashNever miss another picture perfect momentagain with your Philips mobile phone. Whether you are shooting in low light or macroconditions, your phone's 16 megapixel PDAF camera with flash will capture every precious detail. Comparing with traditional autofocus,built-in with phase detection sensor, PDAF can be faster and more accurate focus onphotographing goals to get brilliant photo,especially in the dark scenario.32GB ROM, 3GB RAMYour Philips smartphone comes with a 32GB built-in memory, so you can pack more into your life on the go. With such generous storage available for your ever expanding needs, there is more room for your favorite apps, photos and important documents. The 3GB RAM can let you enjoy excellent performance duringplaying games and watching movies in spare time.Android 6.0Empowered by Android, your Philips mobile now comes with a fully customizable mobile platform that is open to a wide range of smart applications and functions. Find your pocket PC, games console and telephone all rolled conveniently into one.SoftBlue LED technologyDesigned for you, the Philips Brilliance mobile phone features new SoftBlue LED technology easy on the eyes and deliver brilliant, colorful images. SoftBlue technology uses a smart technology to reduce the harmful blue light waves without sacrificing the color or image of the display.SpecificationsDimensionsHandset color: BlackHandset dimensions:76mm×153.5mm×6.95mmHandset weight: 167.5gNetwork FeaturesGSM band: 850, 900, 1800, 1900 MHz EDGE3G: WCDMA WCDMA band: 1900MHz, 850MHz4G FDD-LTE: 1800(B3), 2600(B7), 700(B28),1700(B4), 1900(B2)Picture/DisplayDiagonal screen size (inch): 5.5 inchStorage MediaBuilt-in memory (RAM): 3 GBMaximum memory card capacity: 128 GB GBBuilt-in memory (ROM): 32 GBAccessoriesStandard Package Includes: Battery, Charger,Stereo Headset, User Manual, USB data cable,Eject pinPowerBattery Capacity: 3900 mAh* Availability of certain features is subject to valid servicesubscription from your network operator.* All visuals provided are for reference purposes only.Actual product features such as phone colors andscreenshots may vary from those pictured.* Actual available memory for end user usage may varyfrom market to market due to pre-configuration.© 2021 Koninklijke Philips N.V.All Rights reserved.Specifications are subject to change without notice. Trademarks are the property of Koninklijke Philips N.V. or their respective owners.Issue date 2021‑12‑18 Version: 3.0.112 NC: 8670 001 42999 EAN: 87 12581 74427 4。
海尔行包代200806换表文档

[维修资料] 海尔行输出变压器代换表海尔, 行输出变压器, 代换海尔行输出变压器代换表海尔行输出变压器代换表海尔行输出变压器代换表 " E# L9 z0 }( f1 a+ \( nTB1238机芯HT-2180 21F99彩虹 BSC25-0279E BSC24-0303B JF0501-19125. m/ D0 L- C" ^7 N. i' ~% KTB1238机芯HT-2180 21F99北松(粗)BSC25-1192E BSC25-4801 BSC25-0251BSC25-0281CTB1238机芯HT-2180 21F99北松(细)BSC25-0227 BSC25-1192HTB1238机芯HT-2599HS-2596福地BSC25-1030L JF0501-21918 JF0501-21800 BSC25-0271C BSC25-1056A JF0101-01905 F. L( a' w) `% g+ c, WLA76810机芯LC863332. 5Z59 HT-2199(A)赛格 BSC25-0291LA76810机芯 HT-2199D北松BSC25-0244 BSC25-1192F ; n& e! ]3 D. q( o* t# Y/ WLA76810机芯彩虹JF0501-90813 BSC25-0282A BSC25-0206 BSC25-0287E. e6 O/ ^" X% ~! c LA76810机芯HS-2596 25T8D-S福地JF0101-01809 BSC27-1082H BSC25-0284+ \' z7 J9 h' uLA76810机芯HS-3709彩虹 BSC23-1126CJF0501-19142 BSC25-0273C . u4 O! O4 w/ Q6 a% NLA76810机芯北松BSC25-0221 BSC23-1126H" \ H7 a) D( @$ X" _! m Q5 ^LA7687机芯HS-2528 HS-2580 彩虹BSC27-0138 JF0101-0190 BSC27-0168 BSC25-1056A / c' d+ `' R, {3 ~& \4 Q6 VLA7687机芯29寸A9机芯三星BSC29-0164JF0101-01117' p. C* S0 f; e8 e6 b) X- X LA7687机芯HS-2980JF0101-0111TBSC25-1030E: r9 g4 W. [ N4 o7 g) JTDA8843机芯25F99三星纯平单聚焦BSC27-0101 BSC29-0166' j. L: g# H8 w: {% ^# I+ X! tTDA8843机芯 29F18 永新纯平双聚焦BSC27- 0157TDA8843机芯HP-2999 永新超平 BSC29-0166 F0101-01801 JF0101-81803 ! a0 w* w) r, C6 u9 p* v9 f$ cTDA8843机芯29F9A-P彩虹纯平单聚焦BSC29-0160TDA8844机芯29F98 29F95 三星纯平双聚焦BSC29-0105TDA8844机芯29F98 29F95 三星、彩虹纯平单聚焦BSC29-0105E BSC29-1083E/ d$ \) H" D' `' l9 m6 R! Q5 TTDA8844机芯29F66三星双聚焦BSC29-0177-c( V9 S; V: M9 u1 d# I+ T6 L* |TDA8844机芯HP-3408 HP-3499 HP-3458HP-2995永新超平BSC29-1081E JF0101-01147 BSC29-0175BSC29-0175A BSC30-1083H1 E/ y" Y$ Z t) L* d j+ ULA76818机芯37T6637T88彩虹JF0501-19929 LA76818机芯21F8D-S 21F2A-SLA76818机芯21F8D-S 21F2A-S三星纯平华飞纯平BSC25-0290D JF0501-19916LA76818机芯21F7A-S(A)彩虹CF0801-21LA76818机芯25F2A-S 25F7A-S LG福地纯平JF0501-21906BSC29-0129A # A: u+ Q( Z$ q @% J. w0 dLA76818机芯25F8D-S三星纯平单JF0501-21906BSC29-0129ALA76818机芯25T9B-S(G) 25T9G-SBSC27-0136DJF0101-21905LA76818机芯25T2A-S彩虹、福地JF0101-21905 BSC27-0136D3 F1 J0 R+ X+ k7 l9 _8 VLA76832机芯29T1A-S 25F9B-S 29T2A-P(G)永新超平 JF0101-81001 BSC25- 1082S+ ^# v3 j8 f/ Q/ ]% FLA76832机芯29T8D-S 29T6A-S北松超平JF0101-81833LA76832机芯29T8D-T福地超平BSC29-0187B LA76832机芯29F2A-S(A) 29F95(G) 29F98永新、三星纯平双聚焦BSC-0139E9 v7 J; C6 V8 ~1 L: cLA76832机芯 29F99ALG纯平单聚焦BSC29-0139F BSC29-0139DLA76832机芯 29F99A 三星纯平单聚焦BSC29-0139D BSC29-0139FLA76828机芯HP-2999(G) 29T8D-T29T2A-P(G)29T5A-S(G)29F8D-T(A)北松超平JF0501-21933 j* p& V% d/ F- Q) G j) c TDA9373机芯29F1A-P(A) 29F8D-P 29TE永新纯平双聚焦BSC29-0130ETDA9373机芯29F9B-P(G)三星北松 LG纯平单聚焦BSC29-01305 ~# \2 X3 c# l. N8 ^5 y' m& eTDA9373机芯34P5A-P赛格普平JF0501-85908$ h1 ~( `4 h4 u% Y) D( }! c$ z TMPA8803机芯 25T7A-T 25T5A-TRGBTV25TA-TD彩虹福地 JF0501-21926JF0501-21918TMPA8803机芯21T9G-T 21F5D-T 21T7A-T21T9B-T21T2A-T 21T5A-T 赛格、彩虹.北松BSC25-0281C BSC25-0206TMPA8809A机芯29T2A-P 29T8D-TJF0101-01810 BSC29-0130FTMPA8809A机芯29T5A-TBSC29-0130FJF0101-018104 w( L+ i5 J0 l \1 t8 T0 P0 KTMPA8809A机芯29F7A-T 29F5A-T 29F8D-T29F2A-T 永新纯平双聚焦 BSC29-0112E/ Z- u" {2 C" _, d6 vTMPA8809A机芯29F7A-T 29F5A-T 29F8D-T29F2A-T LG、彩虹纯平单聚焦 JF0101-01820" _: {6 ]/ D" K7 }. t* a1 STMPA8809A机芯29F7A-T 29F5A-T 29F8D-T29F2A-T三星纯平双聚焦 BSC29-0112EJF0101-82803: W5 ?, @2 w! H% K+ _3 Z TMPA8809机芯34P2A-P 赛格普平JF0101-85016 BSC29-0169BTMPA8809机芯34F2A-T 34F5D-T 三星纯平双聚焦 JF0101-85918MK14机芯 29F9B-PY 29F7A-PN 29F6G-PN 三星纯平单聚焦 BSC29-0136EMK14机芯 29F9B-PY 29F7A-PN 29F6G-PN 彩虹纯平单聚焦 BSC29-0138A JF0101-85919 MK14机芯 29F9B-PY 29F7A-PN 29F6G-PN 彩虹纯平单聚焦 JF0101-85919 BSC29-0138A9 c0 \( g" s8 h. S O& JMK14机芯 34F3A-PN 34F8A-PN 34F5D-PY 三星纯平双聚焦 BSC29-0178C j( F9 T6 x6 ]'`" ?/ M+ _4 L2 F6 a833机芯 29F3A-N JF0101-83825JF0101-83827 CF0801-7482 6 [' l1 j) ?1 ^; r2 a7 g9 [' z3 F( cTMPA8829机芯 29F6D-T 彩虹纯平单聚焦BSC29-0116D海尔行输出变压器代换表(老产品)8361机芯 HP-2998B BSC27-5201 BSC25-1030D BSC27-2403O M8361机芯H-2999 BSC25-1059CBSC25-1059G BSC25-1058K JF0101-01016 u4 m0 i9 ?2 w' W, ]& Z$ f8361机芯 HP-2559 BSC25-1059Lm8376机芯H-3498P JF0101-0134Ab8376机芯 H-2988PN 双聚焦 JF0101-28033 @$ [2 v1 H; n6 q0 f* Y. X海尔行输出物料代换表EFBT-A-02 BSC25-0284A JF0501-90817) {8 E) h- Z2 R3 a G/ I8 aFBT-A-03 BSC25-0228FBT-A-04 BSC25-0303B BSC25-0251JF0501-19125( n& i& T! \ t" s: b0 x+ \8b/ P( `FBT-A-05 BSC25-1192E BSC25-0273BRFBT-A-06 BSC25-1192F BSC25-0244JF0501-90828- v1 A& d. c3 j9 D i3 [; x FBT-A-07 BSC25-1192N BSC25-0206JF0501-90813`FBT-A-08 BSC25-0279FuFBT-A-09 JF0501-19912FBT-A-10 CF0801-3722 BSC25-02A-1JF0501-19807FBT-A-11 BSC25-0278D JF0501-90827FBT-A-12 BSC25-0281GFBT-A-13 BSC25-02A JF0501-19129CF0801-37228 a' S0 z x! d3 }& YFBT-A-14 BSC25-0281C JF0501-19910ACF0801-5426- U7 x: j& c3 |* i- l/ Q" @FBT-A-15 BSC25-0295A JF0501-199091 D2 L) f+ m; u. a% i9 TFBT-A-16 BSC25-0287E/ e% E1 v N8 ]7 f5 j+ R2 c, u/ `FBT-A-17BSC25-0290D JF0501-199167 ~. [' x2 J4 I; _FBT-A-18 BSC25-02A JF0501-19829CF0801-54221 |& m4 R) J: f' n/ d% l% e$ m5 i. xFBT-A-19 JF0501-19929 BSC25-0296A' M$ q. K u" _ d8 JFBT-A-20 BSC25-02A-1 JF0501-19827 CF0801-3722: L; \( z1 H+ e5 s7 l" f8 yFBT-A-21 BSC25-0283D JF0501-19905$ e% F: }6 s7 a% o: K. dFBT-A-22BSC25-0291% N* u* q4 r% c3 OFBT-A-23 JF0501-199301 u1 Q4 l, n# ?, Z1 b( I' FFBT-A-24 BSC25-0279FFBT-A-25 JF0501-199079 X4 Y. E. s1 U# M* C! }/ cFBT-A-26 JF0501-19946FBT-A-27 CF0801-2123FBT-A-28 CF0801-2124 JF0501-19954BSC25-0217AFBT-A-29 JF0501-19949 CF0801-5429tFBT-A-33 BSC25-0206EFBT-B-01 BSC27-1082H BSC25-0284JF0101-018096 w( t( ?& r5 j' f* X( T3 K FBT-B-02 BSC25-1030L BSC25-0271CJF0501-21800FBT-B-03 BSC25-1056A BSC27-0138$ M, [6 a! z: FFBT-B-04 BSC25-1030E BSC29-0164JF0101-01117$ B* f1 ]4 y; H8 D9 k! ^ FBT-B-05 BSC25-0274FFBT-B-06 BSC30-1083E BSC29-0105E$ c2 b5 g1 g& | pFBT-B-07 CF0801-7481 BSC29-0160JF0101-81803 O, z3 c9 s" e# U6 [* W FBT-B-08 BSC29-1081E BSC29-0166JF0101-01801FBT-B-09 BSC30-1083H BSC29-0175AJF0101-01147FBT-B-10 BSC27-0103A JF0501-21811FBT-B-11 BSC27-1082S BSC25-0282A/ ^" n' Q& I1 [* O9 x2 {3 {FBT-B-12 BSC29-0167E JF0101-818207 V U,~ Z1 k; f6 GFBT-B-13 BSC29-0187B JF0101-81833FBT-B-14 BSC29-0139D JF0101-818318 K7p8 ]% A' n) U" WFBT-B-15 JF0101-018106 O- O, | z7 F h% k, T) k5 CFBT-B-16 BSC29-0166G1 w0 g6 i7 g, w; X, ?6 R/ e: nFBT-B-17 BSC29-0169B JF0101-85016BT-B-18 BSC29-0129A JF0501-219060j( K$ I# ~. RFBT-B-19 JF0101-01820 BSC29-0130FJF0501-21918 BSC27-0103B BSC28-1085S3 [" K& z& ]5 ^' [; P8 Z1 ?( E- iFBT-B-21 BSC29-0160EFBT-B-22 BSC29-0130F$ _; e5 u i4 M. L FBT-B-23 BSC27-0168AFBT-B-24 BSC27-0136F2 U1 K! n9 b) Z% P& _3 S3 UFBT-B-25 BSC29-0130 JF0501-21910FBT-B-26 BSC27-0136D JF0101-21905FBT-B-27 BSC29-0136E5 \* w1 ~3 j7 w# YFBT-B-28 BSC29-0138AFBT-B-29 JF0501-21925 BSC27-0103CFBT-B-30 JF0501-21926 BSC27-0103EBSC28-1085T; ~ ~0 b- K7 A6 M2 g- j9 I FBT-B-31 BSC29-0197F JF0501-21933BSC29-1081GFBT-B-32 JF0101-85919 CF0801-7484& ~1 B3 k' n, y! bFBT-B-33 JF0101-82806 CF0801-7422FBT-B-34 JF0101-83825FBT-B-35 CF0801-74824 C4 N5 N h# J$ | FBT-B-36 BSC29-0116DFBT-B-37 BSC29-0142C+ i+ E0 T, k q' [7 Q FBT-B-38 BSC27-1082Y2 [5 b4 _( m- H FBT-B-39 JF0101-85945FBT-B-40 CF0801-7493 JF0101-85947FBT-B-41 JF0101-85958 BSC29-0147CFBT-B-42 JF0101-82806AFBT-B-43 BSC29-0130DFBT-B-46 JF0101-85978$ U3 a1 q8 n7 W6 u FBT-C-01 BSC29-0105FBT-C-02 BSC29-0178C8 V& X, ~$ C) K8 H M0。
PLA 85 说明书

50119511 G1 Valid from 2018 week 46PLA 85Pos. No. Varebetegnelse Description of goods WarenbezeichnungDésignation des pièces80690085 Plasmaslange med centraltilslutning, 6m Plasma torch with central adaptor plug, 6m Plasmaschlauch mit Zentralanschluss, 6m Torche plasma avec raccordement central, 6m 1 45050101 TastTrigger Taster Gâchette 2 71610194 Monteret print PCBPlatine Circuit imprimé montée 3 80600096 VippearmTipping device Kippvorrichtung Dispositif à bascule 4 80600092 Håndtag Handle HandgriffPoignée5 80600098 Skruer for håndtag (1 sæt = 5 stk)Screw for handle (1 set = 5 pcs) Schraube für Handgriff (1 Satz = 5 Stück) Vis pour poignée (1 jeu = 5 pièces) 6 80600097 Kontaktstift Contact pin Kontaktstift Fiche de contact 7 80650005 Brænderhoved Torch body Brennerkörper Corps de torche 7a 80600018 Gasrør Gas tube Gasrohr Tubeà gaz 8 80610005 Elektrode Electrode Elektrode Electrode9 80630009 Dyse 1,2 mm Nozzle 1.2 mm Düse 1,2 mm Buse 1,2 mm 9 80630010 Dyse 1,4 mm Nozzle 1.4 mm Düse 1,4 mmBuse 1,4 mm 10 80630011 Beskyttelseskappe Protective capSchutzkappe Bague de protection 11 80600088 Afstandsfjeder Distance spring AbstandsfederRessort de distance 12 80600101 Afstandsbøjle (2 ben)Distance ring (2 legs)Distanzbügel (2 Schenkel) Dispositif de distance (2 pied)12A 80600108 Afstandsbøjle Distance ringDistanzbügel Dispositif de distance 13 24510237 NøgleKey Universalschlüssel Clef14 82034014 GasflowmeterGas flowmeter GasdurchflußmesserDébitmètre de gaz15 80680085 Slangemodul PDX 85 m/ZA, 6mHose module PDX 85 with ZA, 6mSchlauchmodul PDX 85 with ZA, 6m Module de torche PDX 85 avec ZA, 6m 16 45070007 Slangeaflastning ø35 Hose protection ø35Schlauchentlastung ø35 Douille isolate de cable ø3517 40110406 CHJ skrue M4x6CHJ screw M4x6 Zylinderkopfschraube M4x6 Vis CHJ screw M4x618 25450047 Aflastningsring Relief-ringEntlastungsringBague d’allègement 19 80200335 Møtrik til ZA, plastik Nut for ZA, plasticMutter für ZA, Plastik Écrou pour ZA, plastique 20 80300601 Centraltilslutning Central adaptor plug ZentralsteckerFiche de contact 21 80300603 Hanstik kontaktdel Male contact partKontaktteil männlich Partie de contact, mâle 21a 80300602 Hanstik til ledningMale pin for wireKontaktteil für Leitung, männlich Connecteur mâle (câble)22 80600091 Cirkelslag kompletCircle cutting device completeKreisschneide-Einrichtung komplett Support pour coupe circulaire complet 22A 80600094 Stang for cirkelslagRadius arm for circle cutting device Führungsstang für Kreisschneide-Einrichtung Bras support pour coupe circulaire 22B 80600090 Brændervogn (drejebar) Torch carriage (revolving) Brennerwagen (drehbar) Support torche (pivotant)23 80600093 Brændervogn (fast) Torch carriage (fixed)Brennerwagen (fest)Support torche (fixe)。
i95指数

i95指数随着数字化时代的到来,网络已经成为人们获取信息的主要途径。
而在这个海量信息的世界里,如何快速准确地衡量某个品牌在网络上的曝光度和话题热度,成为了各领域专业人士关注的话题。
i95指数作为一种网络声量分析工具,成功地解决了这一难题,成为了网络营销和品牌管理的重要指标。
一、i95指数的定义i95指数是指一定时间段内,某个品牌在全网范围内的热度排名,体现了该品牌在网络上所受关注程度的高低。
其取名由来是因为该指数的计算公式中,选取了包含i和95两个数字的指标。
二、i95指数的计算方式具体地,i95指数的计算方式如下:1. 首先从全网范围内收集该品牌的所有相关信息,包括新闻报道、社交媒体、论坛、博客等。
2. 对这些信息进行筛选和统计,形成该品牌的网络热点分布图。
3. 根据该分布图,选取热点排名前90%的信息作为正向指标,称为i45指数;选取热点排名后10%的信息作为负向指标,称为i50指数。
4. 合并i45和i50指数,得到i95指数。
需要注意的是,i95指数并不仅仅是一个数字,而是一个时间序列,反映了品牌在不同时间段内的网络热度排名变化。
三、i95指数的应用价值i95指数对品牌营销和品牌管理的价值在于,它能够帮助企业全面了解自身在网络中的形象、曝光度、关注度等各方面情况,并在此基础上制定相应的营销策略和品牌形象管理策略,优化品牌的网络宣传和口碑效应,提高品牌知名度和美誉度。
具体来说,i95指数可以应用于以下方面:1. 精准定位品牌:通过分析i95指数,可以了解到品牌在哪些领域受到更多网络关注,从而帮助企业精准定位品牌形象和目标人群,优化营销策略。
2. 挖掘品牌事件:i95指数能够反映出品牌在不同时间段内的热度排名,从而帮助企业发现品牌事件,把握热点话题,及时参与、引导公众讨论,扩大品牌曝光度。
3. 监测品牌声誉:i95指数可以反映出品牌的正面和负面评价,帮助企业了解品牌在公众心目中的形象和口碑,及时发现品牌危机和负面影响,制定相应的公关处理策略,维护品牌形象和声誉。
冰箱新品推介

旋转制冰盒
冰激凌存放 制冰
关键部件
关键部件\原材料
名称
产地
特点
压缩机
ZEL(扎奴西)
天津
高效、静音
内胆
BASF(巴斯夫)
德国
环保、无异味
发泡剂
HUNTSMAN(亨斯迈) 美国
保温、隔热效果好
侧板
POSCO(普项)
韩国
强度高、耐腐蚀
门封条
外协驻厂
山东 多气囊、密封好、韧度高
不锈纲BCD-177ZA/187ZA
产地
上海
面板配色
不锈钢拉丝面板
新卖点
1.最优化的系统匹配,使冰箱达到欧洲节能标准,噪 音小 2.温度自动补偿,省去人工设定麻烦. 3.IMD模内注塑水晶装饰扣手 4。冷冻室抗菌抽屉
介绍重点
1.氧负离子保鲜,空气清鲜,抗菌除臭 2.采用国际公认丝管网式蒸发器,制冷均匀、速度 快,不生锈,保鲜效果好。 3。双宽设计,满足不同地区不同电压、湿度要求,让 冰箱任何时刻都能正常运行,更适合农村环境。
188
198
218
国色天香BCD-188/198/218SZC
产地 面板配色
上海 纯平红/纯平银(美学国色天香图案)
新卖点
1.最优化的系统匹配,使冰箱达到欧洲节能标准,噪音小 2.温度自动补偿,省去人工设定麻烦. 3.配置不锈钢红酒架,品位高档 4.智能电脑三循环设计,三温三控,冷藏冷冻室自由 关闭
2009年10月中日冰箱新品推介
中日CCTV-1黄金资源投放
型号 BCD-188ZAE BCD-198ZAE BCD-218ZAE
国色天香BCD-188/198/218ZAE
STBAPU 实体套圈滚针轴承

机加工滚针轴承带挡边滚针轴承无挡边滚针轴承调心滚针轴承组合滚针轴承内圈机加工滚针轴承带挡边滚针轴承 (003)带挡边滚针轴承中,外圈加工有挡边,与滚针和保持架组成一个自保持单元。
这些径向紧凑的轴承具有高的承载能力,非常适用于径向空间有限的设计。
这种轴承有带内圈和不带内圈、双侧密封和开式等类型。
对淬硬和磨削的轴来说,不带内圈的轴承是最好的解决方案。
如果轴不能作为滚动轴承的滚道,要用带内圈的滚针轴承。
无挡边滚针轴承 (037)外圈不带挡边的滚针轴承是可分离轴承。
这就意味着外圈、滚针和保持架组件及内圈能分别安装。
这使轴承安装非常容易。
轴承有带内圈和不带内圈及单列和双列设计。
对淬硬和磨削的轴来说,不带内圈的轴承是最好的解决方案。
调心滚针轴承 (051)调心滚针轴承有一个外表面为球面的外圈和一个冲压外套。
因此,它们补偿静态轴线不对中可达3°,但是不适于支撑摆动运动。
轴承有带内圈和不带内圈的设计。
对淬硬和磨削的轴来说,不带内圈的轴承是最好的解决方案。
组合滚针轴承 (059)组合滚针轴承是向心轴承,带有支撑轴向载荷的轴向部件。
它们用作定位或半定位轴承而且不允许轴和轴承座之间的任何倾斜。
轴承有带内圈和不带内圈的设计。
对淬硬和磨削的轴来说,不带内圈的轴承是最好的解决方案。
内圈 (077)如果轴不适宜用作滚道,内圈可作为滚动体和密封唇的滚道。
如果轴和轴承座之间有较大的轴向位移,要采用较宽的内圈。
001 <<<>>> 002带挡边滚针轴承带挡边滚针轴承页产品概览带挡边滚针轴承 (005)特性 (006)无内圈滚针轴承 (006)带内圈滚针轴承 (006)密封 (006)润滑 (006)密封圈和宽内圈 (007)工作温度 (007)保持架 (007)后缀 (007)设计与安全指南最小径向载荷 (008)转速 (008)轴承布置设计 (008)精度内部径向游隙 (010)包络圆 (010)尺寸表无内圈滚针轴承 (011)带内圈滚针轴承 (023)无内圈带密封滚针轴承 (035)036带内圈带密封滚针轴承.........................................................产品概览带挡边滚针轴承无内圈单列或双列NK 、NKS 、RNA48、RNA49、RNA69RNA69..-ZW103 244a103 187b 唇式密封RNA49..-RSR RNA49..-2RSR103 260a103 246a 带内圈单列或双列NKI 、NKIS 、NA48、NA49、NA69NA69..-ZW103 245a 103 192b 唇式密封NA49..-RSR NA49..-2RSR103 259103 247a 005 <<<特性单列或双列带挡边滚针轴承由带挡边的机加工外圈、滚针和保持架组件以及可分离内圈组成。
松下发布新款FZ1000Ⅱ和TZ95相机
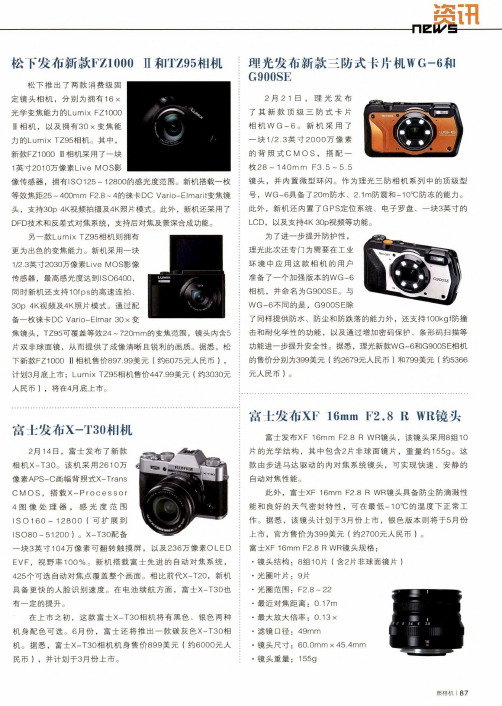
松下发布新款FZ1000 II 和TZ95相机松下推出了两款消费级固 定镜头相机,分别为拥有16 x光学变焦能力的Lumix FZ1000II 相机,以及拥有30x 变焦能力的Lumix TZ95相机。
其中, 新款FZ1000 II 相机采用了一块1英寸2010万像素Live MOS 影像传感器,拥有ISO125-12800的感光度范围。
新机搭载一枚 等效焦距25 ~ 400mm F2.8 - 4的彳来卡DC Vario-Elmarit 变焦镜 头,支持30p 4K 视频拍摄及4K 照片模式。
此外,新机还采用了DFD 技术和反差式对焦系统,支持后对焦及景深合成功能。
另一款Lumix TZ95相机则拥有 更为出色的变焦能力。
新机采用一块1/2.3英寸2030万像素Live MOS 影像传感器,最高感光度达到IS 06400, 同时新机还支持10fps 的高速连拍、30p 4K 视频及4K 照片模式。
通过配备一枚彳来卡DC Vario-Elmar 30 x 变焦镜头,TZ95可覆盖等效24 ~ 720mm 的变焦范围,镜头内含5片双非球面镜,从而提供了成像清晰且锐利的画质。
据悉,松 下新款FZ1000 II 相机售价897.99美元(约6075元人民币),计划3月底上市;Lumix TZ95相机售价447.99美元(约3030元 人民币),将在4月底上市。
理光发布新款三防式卡片机WG-6和G900SE2月21曰,理光发布了其新款顶级三防式卡片相机W G — 6 o 新机采用了 一块1/2.3英寸2000万像素 的背照式CMOS,搭配一枚28 〜140mm F3.5 ~ 5.5镜头,并内置微型环闪。
作为理光三防相机系列中的顶级型号,WG-6具备了20m 防水、2.1m 防震和-109防冻的能力。
此外,新机还内置了GPS 定位系统、电子罗盘、一块3英寸的LCD,以及支持4K 30p 视频等功能。
为了进一步提升防护性,理光此次还专门为需要在工业环境中应用这款相机的用户 准备了一个加强版本的WG-6 相机,并命名为G900SE o 与WG —6不同的是,G900SE 除了同样提供防水、防尘和防跌落的能力外,还支持100kgf 防撞 击和耐化学性的功能,以及通过增加密码保护、条形码扫描等 功能进一步提升安全性。
阿尔派汽车音响用户手册说明书

EN FR ESFOR CAR USE ONLY/POUR APPLICATION AUTOMOBILE/PARA USO EN AUTOMÓVILES• OWNER’S MANUALPlease read before using this equipment.• MODE D’EMPLOIVeuillez lire avant d’utiliser cet appareil.• MANUAL DE OPERACIÓNLéalo antes de utilizar este equipo.ALPINE ELECTRONICS MARKETING, INC.1-7, Yukigaya-Otsukamachi, Ota-ku,Tokyo 145-0067, JAPANPhone: 03-5499-4531ALPINE ELECTRONICS OF AMERICA, INC.19145 Gramercy Place, Torrance,California 90501, U.S.A.Phone 1-800-ALPINE-1 (1-800-257-4631)ALPINE ELECTRONICS OF AUSTRALIA PTY. LTD.161-165 Princes Highway, HallamVictoria 3803, AustraliaPhone 03-8787-1200ALPINE ELECTRONICS GmbHWilhelm-Wagenfeld-Str. 1-3,80807 München, GermanyPhone 089-32 42 640ALPINE ELECTRONICS OF U.K. LTD.Alpine House Fletchamstead Highway, Coventry CV4 9TW, ALPINE ELECTRONICS France S.A.R.L.184 allée des Erables CS 52016 – Villepinte 95 945 Roissy CDG cedex FRANCE Phone : + 33(0)1 48 63 89 89ALPINE ITALIA S.p.A.Viale Cristoforo Colombo, 820090 Trezzano sul Naviglio MI, Italy Phone +39 02 484781ALPINE ELECTRONICS DE ESPAÑA, S.A.Portal de Gamarra 36, Pabellón, 3201013 Vitoria (Alava)-APDO 133, SpainPhone 945-283588MRV-M1200MONO POWER AMPLIFIERJEIL Moon Hwa Co.18-6, 3Ga, Pil_dong, Jung_gu, Seoul, Korea Designed by ALPINE Japan Printed in Korea 68-29530Z91-A (Y-A5)M3514596010WARNING (1)SERVICE CARE (2)ACCESSORIES (2)INSTALLATION (3)ATTACHING THE TERMINAL COVERS (3)CONNECTIONS (4)CONNECTION CHECK LIST (8)SWITCH SETTINGS (9)SYSTEM DIAGRAMS (11)SPECIFICATIONS (14)Points to Observe for Safe UsageRead this manual carefully before using the system components. They contain instructions on how to use this product in a safe and effective manner. Alpine cannot be responsible for problems resulting from failure to observe the instructions inthis manual.DO NOT OPERATE ANY FUNCTION THAT TAKES YOUR ATTENTION AWAY FROM SAFELY DRIVING YOUR VEHICLE.Any function that requires your prolonged attention should only be performed after coming to a complete stop. Always stop the vehicle in a safe location before performing these functions. Failure to do so may result in an accident.KEEP THE VOLUME AT A LEVEL WHERE YOU CAN STILL HEAR OUTSIDE NOISES WHILE DRIVING.Excessive volume levels that obscure sounds such as emergency vehicle sirens or road warning signals (train crossings, etc.) can be dangerous and may result in an accident. LISTENING AT LOUD VOLUME LEVELS IN A CAR MAY ALSO CAUSE HEARING DAMAGE.DO NOT DISASSEMBLE OR ALTER.Doing so may result in an accident, fire or electric E THIS PRODUCT FOR MOBILE 12V APPLICATIONS. Use for other than its designed application may result in fire, electric shock or other injury.USE THE CORRECT AMPERE RATING WHEN REPLACING FUSES.Failure to do so may result in fire or electric shock.DO NOT BLOCK VENTS OR RADIATOR PANELS.Doing so may cause heat to build up inside and may result in fire.MAKE THE CORRECT CONNECTIONS.Failure to make the proper connections may result in fire or product damage.USE ONLY IN CARS WITH A 12 VOLT NEGATIVE GROUND. (Check with your dealer if you are not sure.) Failure to do so may result in fire, etc.BEFORE WIRING, DISCONNECT THE CABLE FROM THE NEGATIVE BATTERY TERMINAL.Failure to do so may result in electric shock or injury due to electrical shorts.DO NOT ALLOW CABLES TO BECOME ENTANGLED IN SURROUNDING OBJECTS.Arrange wiring and cables in compliance with the manual to prevent obstructions when driving. Cables or wiring that obstruct or hang up on places such as the steering wheel, gear lever, brake pedals, etc. can be extremely hazardous.DO NOT SPLICE INTO ELECTRICAL CABLES.Never cut away cable insulation to supply power to other equipment. Doing so will exceed the current carrying capacity of the wire and result in fire or electric shock.DO NOT DAMAGE PIPE OR WIRING WHEN DRILLING HOLES.When drilling holes in the chassis for installation, take precautions so as not to contact, damage or obstruct pipes, fuel lines, tanks or electrical wiring. Failure to take such precautions may result in fire.DO NOT USE BOLTS OR NUTS IN THE BRAKE ORSTEERING SYSTEMS TO MAKE GROUND CONNECTIONS.Bolts or nuts used for the brake or steering systems (or anyother safety-related system), or tanks should NEVER beused for installations or ground connections. Using suchparts could disable control of the vehicle and cause fire etc.KEEP SMALL OBJECTS SUCH AS BATTERIES OUT OF THEREACH OF CHILDREN.Swallowing them may result in serious injury. If swallowed,consult a physician immediately.HALT USE IMMEDIATELY IF A PROBLEM APPEARS.Failure to do so may cause personal injury or damage tothe product. Return it to your authorized Alpine dealer orthe nearest Alpine Service Center for repairing.HAVE THE WIRING AND INSTALLATION DONE BYEXPERTS.The wiring and installation of this unit requires specialtechnical skill and experience. To ensure safety, alwayscontact the dealer where you purchased this product tohave the work done.USE SPECIFIED ACCESSORY PARTS AND INSTALL THEMSECURELY.Be sure to use only the specified accessory parts. Use ofother than designated parts may damage this unitinternally or may not securely install the unit in place. Thismay cause parts to become loose resulting in hazards orproduct failure.ARRANGE THE WIRING SO IT IS NOT CRIMPED ORPINCHED BY A SHARP METAL EDGE.Route the cables and wiring away from moving parts (likethe seat rails) or sharp or pointed edges. This will preventcrimping and damage to the wiring. If wiring passesthrough a hole in metal, use a rubber grommet to preventthe wire’s insulation from being cut by the metal edge ofthe hole.DO NOT INSTALL IN LOCATIONS WITH HIGH MOISTUREOR DUST.Avoid installing the unit in locations with high incidence ofmoisture or dust. Moisture or dust that penetrates into this unit may result in product failure.♦IMPORTANT NOTICE This Amplifier has been type tested and found to comply with the limits for a Class B computing device in accordance with the specifications in Subpart J of Part 15 of FCC Rules. This equipment generates and uses radio frequency energy, and it must be installed and used properly in accordance with the manufacturer’s instructions.SERIAL NUMBER: INSTALLATION DATE: INSTALLATION TECHNICIAN: PLACE OF PURCHASE: ♦IMPORTANT Please record the serial number of your unit in the space provided here and keep it as a permanent record. The serial number plate is located on the rear of the unit. ♦For European Customers Should you have any questions about warranty, please consult your store of purchase. ♦For Customers in other Countries IMPORTANT NOTICE Customers who purchase the product with which this notice is packaged, and who make this purchase in countries other than the United States of America and Canada, please contact your dealer for information regarding warranty coverage.ACCESSORIES • Self-Tapping Screw (M4 × 20) ......................................4• Terminal Cover ..........................................................1 SET • Speaker Input Connector ..............................................1• Hexagon Wrench ..............................................................1• Remote Bass Control Unit .....................................1 SET –Connection Cable (5 m)..............................................1 –Self-Tapping Screw (M4 × 12).. (4)Due to the high power output of the MRV-M1200 considerable heat is produced when the amplifier is in operation. For this reason, the amplifier should be mounted in a location which will allow for free circulation of air, such as inside the trunk. For alternate installation locations, please contact your authorized Alpine dealer.1. Using the amplifier as a template, mark the fourscrew locations.2. Make sure there are no objects behind thesurface that may become damaged duringdrilling.3. Drill the screw holes.4. Position the MRV-M1200 over the screw holes,and secure with four self-tapping screws. NOTE:• To securely connect the ground lead, use an already installed screw on a metal part of the vehicle (marked ()) or a clean, bare metal spot on the vehicle’s chassis. Be sure this is a good ground by checking continuity to the battery (–) terminal. Connect all equipment to the same ground point while keeping wire length as short as possible. These procedures will help eliminate noise.5. Attach the Remote Bass Control Unit.Attach the Remote Bass Control Unit under the instrument panel or side of the front console,etc., by using the four supplied Self-TappingScrews.CAUTIONDO NOT ALLOW CABLES TO BECOME ENTANGLED IN SURROUNDING OBJECTS. Cables or wiring that obstruct or hang up on places such as the steering wheel, gear lever, brake pedals, etc. can be extremely hazardous.TERMINAL COVERSAttach the terminal covers (included) after connections and confirmation of correct operation. Attaching the terminal covers will improve the appearance of the unit.How to attach the terminal covers:Attach the terminal covers to the main unit.Terminal CoversCAUTIONDo not lift or carry the unit by the attachedterminal covers.*Be sure to add an in-line fuse with the battery lead as close as possible to the battery’s positive (+) terminal.Before making connections, be sure to turn the power off to all audio components. Connect the battery lead from the amp directly to the positive (+) terminal of the vehicle’s battery with appropriate in-line vehicle’s fuse (see Battery Lead section). Do not connect this lead to the vehicle’s fuse block.To prevent external noise from entering the audio system• Locate the unit and route the leads at least 10 cm (4”) away from the vehicle’s harness.• Keep the battery power leads as far away from other leads as possible.• Connect the ground lead securely to a bare metal spot (remove any paint or grease if necessary) of the vehicle’s chassis.• If you add an optional noise suppressor, connect it as far away from the unit as possible. Your Alpine dealer carries various noise suppressors, contact them for further information.• Your Alpine dealer knows best about noise prevention measures so consult your dealer for further information.Speaker Output Terminals• The speaker terminals of this unit are insert terminal type.Be sure to observe correct speaker output connections and polarity in relation to the other speakers in the system. Connect the positive output to the positive speaker terminal and the negative to negative.About Bridged ConnectionsIn the bridged mode, connect the left positive to the positive terminal of the speaker and the right negative to the negative terminal of the speaker. Do not use the speaker (–) terminals as a common lead between the left and right channels.NOTES:• Do not connect the speaker (–) terminal to the vehicle’s chassis.• The input is stereo but the output is monaural.• Reversing subwoofer polarity (swapping positive and negative connections to the subwoofer) may be desirable in some installations for optimum bass performance.Fuse: 25A x 4USE THE CORRECT AMPERE RATING WHEN REPLACING FUSES.Failure to do so may result in fire or electric shock.Power Supply TerminalBattery Lead (Sold Separately)Be sure to add an in-line fuse with the battery lead as close as possible to the battery’s positive (+) terminal. This fuse will protect your vehicle’s electrical system in case of a short circuit. See below for appropriate fuse value and minimum wire gauge requirement:• 100 amp fuse, 4 AWG/21 mm2Ground Lead (Sold Separately)Connect this lead securely to a clean, bare metal spot on the vehicle’s chassis. Verify this point to be a true ground by checking for continuity between that point and the negative (–) terminal of the vehicle’s battery. Ground all your audio components to the same point on the chassis to prevent ground loops while keeping wire length as short as possible.Minimum required wire gauge for this connection is as follows:• 4 AWG/21 mm2 Remote Turn-On Lead (Sold Separately) Connect this lead to the remote turn-on (positive trigger, (+) 12 V only) lead of your head unit. If a remote turn-on lead is not available, see “CONNECTION CHECK LIST” section onpage 8 for alternative method.NOTE:• When connecting the speaker output leads of the head unit to this unit with a Speaker Input Connector (included), you do not need to connect the remote turn-on lead, owing to the “REMOTE SENSING” function of this unit. However, the “REMOTE SENSING” function may not work depending on the signal source connected. In such a case, connect the remote turn-on lead to an incoming power supply cord (accessory power) in the ACC position.Speaker Level Input ConnectorThese input leads are for use with head units not equipped with preamp outputs. When not using the RCA Line Input connectors, you should connect these wires to the speaker output leads of your head unit. The MRV-M1200 accepts input from high power or standard power head units. NOTE:• For the “Speaker Level Input System” setting, connecting the Remote Turn-On Lead is not required due to the “REMOTE SENSING” function of this product. However, the “REMOTE SENSING” function may not work depending on the signal source connected. In such a case, connect the Remote Turn-On Lead to an incoming power supply cord (accessorypower) in the ACC position.RCA Input JacksConnect these jacks to the line out leads on your head unit using RCA extension cables (sold separately). Be sure to observe correct channel connections; Left to Left and Right to Right.NOTE:• Use either RCA line level or speaker level inputs. Do not connect both at the same time. Pre-Out JacksThese jacks provide a line level output. This is an ideal output for driving a second subwoofer amp. This output is full-range, and is not affected by the crossover. Remote Bass Control Jack Connection CableRemote Bass Control UnitThe Remote Bass Control Unit adjusts the output level remotely. This is not to replace appropriate gain level setting between the amplifier and head unit. Speaker Input Connector Front Left Speaker (White (+)) Front Left Speaker (White/Black (–)) Front Right Speaker (Gray (+)) Front Right Speaker (Gray/Black (–)) Rear Right Speaker (Violet/Black (–)) Rear Right Speaker (Violet (+)) Rear Left Speaker (Green/Black (–)) Rear Left Speaker (Green (+))CAUTION About Power supply wires If the length of the power and ground cables exceed 1 m, or if you connect more than one amplifier, a distribution block should be used. See below for wire gauge recommendations for distribution block connection to battery and ground (depends upon wire length necessary): 2 AWG (33 mm 2) or 1/0 AWG (53 mm 2)2)1 m 2) or 2)To vehicle’s battery To vehicle’s chassis * *Connect all equipment to the same ground point while keeping wire length as short as possible.Ensure that you install a correctly-rated in-line fuse on the power cable near the battery positive post.Cautions on wire lead connections When using third-party wire cables (power supply wire), use the supplied screws to simplify the connection. Refer to the description below for the proper procedure. If you are in doubt about how to make this connection, consult your dealer.1. Check the wire size.• Required Wire Size –Battery Lead/Ground Lead ....4 AWG (21 mm 2) –Remote Turn-On Lead .............12 AWG (3 mm 2) –Speaker Output Lead ................8 AWG (8 mm 2)• If the wire gauge used is unknown, ask your dealer.2. Remove the insulation from the ends of the wireleads by about 7 – 10 mm (9/32” – 13/32”).Lead end side ofthe productwire leads7 – 10 mmNOTES:• If length of the exposed wire is too short, a poor connection may occur causing operation failure or sound interruption.• On the other hand, if the length is too long, an electrical short-circuit may occur.3. Tighten the hexagon hole screw with the hexagon wrench (included) to secure the lead.Before making this connection, use insulated shrink tubing to cover any exposed wireextending beyond the terminal.wire leadsNOTES:• Use only the screws included.• For safety reasons, connect the battery leads last.• To prevent disconnection of the leads ordropping of the unit, do not use the cabling to carry the unit.Please check your head unit for the conditions listed below:Remote Turn-On Leada. The head unit does not have a remote turn-onor power antenna lead.b. The head unit’s power antenna lead is activatedonly when the radio is on (turns off in the tape or CD Mode).c. The head unit’s power antenna lead is logic leveloutput (+) 5V, negative trigger (grounding type), or cannot sustain (+) 12V when connected toother equipment in addition to the vehicle’spower antenna.If any of the above conditions exist, the remote turn-on lead of your MRV-M1200 must beconnected to a switched power source (ignition) in the vehicle. Be sure to use a 3A fuse as closeas possible to this ignition tap. Using thisconnection method, the MRV-M1200 will turnon and stay on as long as the ignition switch is on.If this is objectionable, a SPST (Single Pole,Single Throw) switch, in addition to the 3A fuse mentioned above, may be installed in-line onthe MRV-M1200 turn-on lead. This switch willthen be used to turn on (and off) theMRV-M1200. Therefore, the switch should bemounted so that is accessible by the driver.Make sure the switch is turned off when thevehicle is not running. Otherwise, the amplifier will remain on and drain the battery.Blue/WhitePower AntennaRemote Turn-On LeadTo other Alpine component’s Remote Turn-OnLeadsSPST Switch (optional)Fuse (3A)As close as possible to the vehicle’s ignition tapIgnition SourceInput Gain Adjustment ControlSet the MRV-M1200 input gain to the minimum position. Using a dynamic CD as a source, increase the head unit volume until the output distorts. Then, reduce the volume 1 step (or until the output is no longer distorted). Now, increase the amplifier gain until the sound from the speakers becomes distorted. Reduce the gain slightly so the sound is no longer distorted to achieve the optimum gain setting.Crossover Frequency Adjustment Knob (LP FILTER)Use this control to adjust the crossover frequency between 50 to 400 Hz.Bass EQ Adjustment KnobAdd a 50 Hz bass boost up to +12 dB to tune your bass response.About Power IndicatorLights up when power is on.Is off when power is off.Indication color StatusSolutionBlue Amplifier circuit is normal.Red(blinking)Operating temperature is high.Decrease the vehicle’s interior temperature to a normal level.The indicator color changes to blue.RedAmplifier circuit is abnormal. An electrical short hasoccurred, or supply current is too high.Turn off the power supply and eliminate the cause.Then turn on the unit and verify that the indicator color has changed to blue.If it remains red, turn off the unit and consult your dealer.Operating temperature is too high.Decrease the vehicle’s interior temperature to a normal level.The indicator color changes to blue.Power supply voltage is too high.Use the correct power supply voltage.The indicator color changes to blue.When you connect one or multiple subwoofers, please take care to configure the correct total impedance before connecting to subwoofer(s) to the amplifier. Subwoofer Head Unit, etc. Subwoofer OutputRCA Extension Cable (Sold Separately) Y-Adapter (Sold Separately)TYPICAL SYSTEM CONNECTIONSConnecting to the Speaker Level Input System 1 For the “Speaker Level Input System” setting, connecting the Remote Turn-On Lead is notrequired due to the “REMOTE SENSING” function of this product. However, the “REMOTE SENSING” function may not work depending on the signal source connected. In such a case, connect the Remote Turn-On Lead to an incoming powersupply cord (accessory power) in the ACC position.2 If connecting both Speaker Input Leads and RCA Inputs at the same time, do not connect both signals to the same input channel of the amplifier. Instead, be sure to connect each pair of inputs to a different Input channel pair. example; Speaker Input Leads: FL/FR to CH1/CH2, RL/RR to CH3/CH4 RCA Inputs:SUBWL/SUBWR to SUBWL/SUBWR2 Subwoofer System (MONO)Connecting to the Speaker Level Input SystemNOTE:• Specifications and design are subject to change without notice.。
- 1、下载文档前请自行甄别文档内容的完整性,平台不提供额外的编辑、内容补充、找答案等附加服务。
- 2、"仅部分预览"的文档,不可在线预览部分如存在完整性等问题,可反馈申请退款(可完整预览的文档不适用该条件!)。
- 3、如文档侵犯您的权益,请联系客服反馈,我们会尽快为您处理(人工客服工作时间:9:00-18:30)。
识图填空题是初中生物中的一种重要题型,在使用复习提纲复习的时候,图例往往容易被孩子忽视。
因此,老师整理了初中阶段经常考查的识图题,以方便孩子们复习时使用。
1、下图是普通光学显微镜的结构图,据图回答下列问题。
(1)填写图中标号的名称:
1目镜 2镜筒 3转换器 11镜柱
(2)使用显微镜的正确步骤是取镜和安放、对光和观察。
(3)在显微镜已经看见物象,但不够清晰,要使物象更加清晰,需要调节[13]细准焦螺旋。
2、下图是菜豆种子结构图,据图回答下列问题。
(1)填写图中标号的名称:
1 种皮
2 子叶3胚轴4胚芽 5 胚根
(2)图中含有丰富营养的结构是发育成茎和叶的结构是具[2] 子叶。
(3)图中2、3、4、5组成[6] 胚,它实际上是幼小的生命体。
3、下图是木本植物幼茎的切面示意图,据图回答下列问题。
(1)填写图中标号的名称1 木质部2韧皮部
(2)运输水分和无机盐的结构是[ 3 ] 导管,它是由许多长形、管壮的细胞组成的,上下细胞间的细胞壁已经消失。
(3)在木质部和韧皮部之间有[ 2] 形成层,它的细胞能不断
地分裂、分化,形成新的木质部细胞和韧皮部细胞,使茎不断长粗。
4.下图是玉米种子的结构图,填写有关结构名称和功能。
(1)①的结构名称是_胚乳_,功能是_储存营养_;
(2)②的结构名称是_种皮_,功能是_ 保护_;
(3)⑦是_胚_,是新植物体的_幼体_,是种子的_主要结构_。
5、下图是家鸽的呼吸系统示意图,请据图回答:
(1)写出图中各部分名称:①气管②气囊③肺
(2)家鸽在吸气和呼气时肺里都能进行气体交换,能保证飞翔时肌肉所需的氧气供应。
6、下图为关节模式图,请在图中标出关节各部分的名称:
(在“”中填名称)
(1)1、关节腔,2、关节头,3、关节软骨,4、关节
窝,5、关节囊。
(2)在你身上有哪些关节,试着说出三个腕关节、肘关节、踝关节。
7.下图为鸡卵的结构图,据图回答:
(1)图中⑥所代表的结构名称是:气室。
(2)鸡卵的结构中,将来发育成雏鸡的部位是图中[4] 胎盘,里面含有细胞核。
(3)胚胎发育过程中营养物质主要来自于图中标号[3]卵黄。
8、哺乳动物的牙齿
(1)兔等草食性动物的牙齿应是图甲。
狼等肉食性的牙齿应是图乙。
(2)写出图中牙齿的名称及其作用。
A.门齿,作用是切断食物;
B.臼齿,作用是磨碎食物;
C.犬齿,作用是撕扯食物。
9、肌肉示意图
(1)一块骨骼肌由两部分组成:①是肌腹,②是肌腱。
(2)③是指_肱三头_肌,④是指_肱二头_肌。
(3)屈肘时_肱二头_肌处于收缩状态,_肱三头_肌处于舒张状态;
伸肘时_肱三头__肌处于收缩状态,_肱二头__肌处于舒张状态。
10、蝗虫的外部形态图
(1)蝗虫的身体分为三个部分_头部、胸部、腹部_。
(2)蝗虫的体表包着一层坚硬的外骨骼,具有_保护_和_支持内部柔软器官、防止_体内水分蒸发_的作用,能够更好地适应_陆地_生活。
11、下图是心脏结构示意图,识图回答:
(1)填写各部分名称
①上腔静脉②肺静脉③动脉瓣④右心房
⑤右心室⑥下腔静脉⑦左心室⑧左心房
⑨肺静脉⑩肺动脉⑾主动脉
(2)在图中,③使血液从 5 流向10 ,④与⑤之间有_房室瓣_,使血液从 4 流向 5 ,从而保证血液按单一方向流动而不能倒流。
12、下图为体循环示意图,
(1)在图写出中A、B、C的名称。
A右心室,B左心房,C主动脉
(2)在图中画出肺循环。
13、下图表示的是外耳、中耳、内耳结构图(中、内耳被放大),箭头示声波传导及神经冲动传导方向。
请据图回答以下问题。
(1)指出序号所示结构[1]_鼓膜_,[2]_听小骨_。
(2)[3]内有_听觉感受器_,在接受声波刺激后能产生_神经冲动_。
(3)[4]是_听觉_神经,可将神经冲动传导到_大脑_。
(4)最终在_大脑皮层听觉中枢_形成听觉。
14、观察下图,回答有关问题。
(1)填写各部分名称:
①_肺泡壁_②_肺泡_③_毛细血管_。
(2)气体交换时,氧气从[2]扩散到[3],只需经过_2_层细胞,这样的结构有利于进行_气体交换。
15、下图是用显微镜观察血液涂片时,在视野中看到的图像,请据图分析回答问题。
(1)在同一视野中所见到的数目最多的是[2]_红细胞_。
(2)图中[2]_红细胞有运输氧气的功能。
(3)当人被细菌感染时,其数目会增多的是[1]_白细胞_。
(4)能运输养料和废物的是[A]_血浆_。
16、右图是尿的形成过程示意图。
请回答.
(1)写出下列结构名称:
①入球小动脉②出球小动脉③肾小球④肾小囊⑤肾小管
(2)④内的液体是原尿;由⑤流出的液体是终尿。
(3)在尿的形成过程中,A表示滤过作用;B表示重吸收作用。
17、下图为人的眼球结构和照相机结构示意图,请分析回答:
(1)想一想我们的眼睛,通常被称为“黑眼球”的结构是[ 2]_虹膜_。
(2)装有胶卷的照相机和人的眼球,在结构上有许多相似的地方,其中照相机的镜头和暗室壁分别相当于眼球中的_3晶状体、9玻璃体_(填序号)。
(3)你能看到远处的山峦,是因为它反射的光线在[ 7]_视网膜_上形成清晰的物像,物像刺激其上的感光细胞产生神经冲动,神经冲动通过[8]视神经传导到_大脑皮层视觉中枢,形成视觉。
(4)若长时间近距离看书写字,就容易造成假性近视,这时眼球[3]晶状体的特点是_凸度过大_。
(5)有一失明患者,经检查眼球的结构完好无损,原因之一可能是图中[8]视神经发生了病变。
18、右图是根尖的结构图,回答问题。
(1)写出图中所注编号代表的结构名称
①_成熟区__②_伸长区_③_分生区_④_根冠_
(2)①_成熟区_是根尖吸收水和无机盐的主要部位,其表皮细胞形成的_根毛_增大了与土壤的接触面积。
吸收的水和无机盐通过其中_导管_输送到植物体。
②_伸长区_是根尖生长最快的区域。
③分生区的细胞具有_分裂_能力,会产生许多新的细胞。
④根冠具有_保护_作用。
19、右图为反射弧的模式图,请据图回答下列问题:
(1)图中[一]是脊髓灰质,是神经元的细胞体密集的部位。
(2)图中[二]是由神经纤维构成,具有传导功能。
(3)用图中代号和箭头表示神经冲动在反射弧中的传导路线:
[5]感受器→[4]感觉神经→ [3]神经中枢→[2]运动神经→[1]效应器。
20、下图是人脑图,看图回答问题。
(1)指出名称。
A、大脑B、小脑C、脑干
(2)人的脑包括大脑、小脑、脑干三部分,大脑特别发达。
21、根据下面细胞的结构示意图回答问题。
(1)你认为该图表示植物细胞,做出此判断的依据是此细胞具有[2]细胞壁、[4]中央大液泡和[6]叶绿体等结构。
(2)结构①的名称是线粒体,在有氧的条件下,它能将细胞内的一些有机物分解并释放能量,供细胞的利用。
(3)结构⑤的名称是细胞核,其内有由DNA和蛋白质组成的物质叫做染色体。
22、下图为细菌结构的示意图,请据图回答下列问题。
(1)图中A是细菌细胞遗传物质集中的区域。
(2)F是鞭毛,D叫做荚膜。
(3)字母 B细胞膜所代表的结构能够控制物质进出细菌细胞。
(4)与高等植物细胞相比,该细菌的结构中没有细胞核,也不具备可以进行光合作用的细胞器,即叶绿体。
23、请分析下列各图,回答有关人体免疫的问题。
(1)图 A 和图 D 表示人体的第一道防线;图B和图 C 表示人体的第二道防线。
这两道防线人人生来就有,不只针对某一类特定的病原体,而是对多种病原体都有防御作用,因此叫做非特异性免疫。
(2)第三道防线是人体在出生以后才逐渐建立起来的后天防御功能,其特点是只针对某一特定的病原体或异物起作用,因此叫做特异性免疫。
14、下图是叶片结构示意图,据图回答问题。
(1)图中的①和⑤分别表示表皮细胞和保卫细胞。
它们各由一层细胞构成;在其细胞的外壁常有一层透明的角质层。
(2)⑥的名称是气孔;其作用是与外界环境进行气体交换的门户。
(3)②的细胞中比④的细胞中含有较多的叶绿体。
(4)③是叶脉,其功能是输导水和无机盐。