HPR260_remote control
MX HomePro MXHP-R700 用户手册说明书
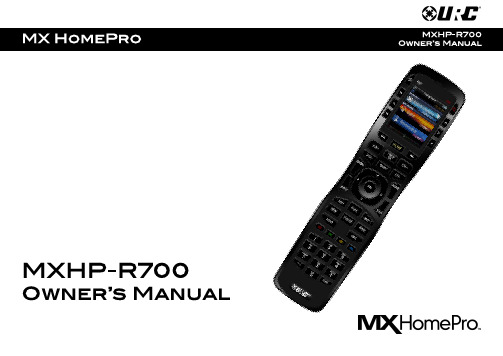
MX HomePro MXHP-R700 Owner’s Manual© 2018 Universal Remote Control Inc. all rights reserved.The information in this manual is copyright protected. No part of this manual may be copied or reproduced in any form without prior written consent fromUniversal Remote Control.Universal Remote Control SHALL NOT BE LIABLE FOR OPERATIONAL, TECHNICAL, OR EDITORIAL ERRORS/OMISSIONS MADE IN THIS MANUAL. The information in this manual is subject to change without prior notice.MXHP-R700 Owner’s Manual © 2018 Universal Remote Control, Inc. URC - Control the Experience is a registered trademark of Universal Remote Control, Inc.Table of ContentsCongratulations (1)Features and Benefits.......................................................................................................1Parts List.............................................................................................................................1Before Getting Started......................................................................................................2Connecting the Lithium Polymer Battery......................................................................2Using the Charging Cradle...............................................................................................2Using the MXHP-R700.......................................................................................................3Displaying the Settings....................................................................................................4Settings Menu.. (5)MX HomePro Editor (13)Specifications (13)Limited Warranty Statement (13)End User Agreement (13)Congratulations!Thank you for purchasing the MXHP-R700 Wi-Fi based remote for your MX HomePro system. This remote offers real-time two-way feedback on compatible smart devices throughout the home or small office space. Controlling and monitoring the home’s devices is as simple as a click on the remote.Features and Benefits:The MX HomePro remote is designed to be the perfect companion to any TV room or bedroom night table. Enjoy the following features:●Quick Connect Wi-FiWhen picked up, the remote automatically connects to Wi-Fi within moments to control the home’s audio/video system and devices.●Two-way Meta-data Feedback:Experience real-time two-way feedback right on the remote’s LCD screen when used with compatible Z-Wave smart devices. Enjoy this same feedback when used with URC’s ever expanding list of 3rd party products.●Button LED Backlighting:Use your remote with ease regardless of lighting conditions thanks to the MXHP-R700’s LED button backlighting.●Pick-Up Sensor:Lifting the remote immediately wakes it up and turns on the LCD screen. It quickly connects to Wi-Fi allowing the user to control their MX HomePro system instantly.●Rechargeable Lithium Polymer Battery:Parts List:Included in the MXHP-R700 box:●MXHP-R700 Wi-Fi Remote●AC Power Adapter●Rechargeable Lithium Polymer Battery●Charging CradleBefore Getting Started:Prior to installing an MX HomePro system, there are a few things to remember:●MX HomePro systems are designed for use on the home’s local network .The hub can be connected to the home network through an Ethernet cable or wirelessly via Wi-Fi.●Adding a TRF-ZW Z-Wave Gateway gives the MX HomePro system access to control the home’s Z-Wave devices such as locks, thermostats, lighting,cameras, and scenes.●Programming is performed via the MX HomePro Editor . The smart home professional must log into this web portal in order to program all applicable MX HomePro devices. Further enhancements may be added, for all inquires please contact URC Technical Support .●This remote communicates exclusively through 2.4 GHz Wi-Fi usingb/g/n signals.Connecting the Lithium Polymer Battery:When getting ready to add the remote to the system or replacing a battery, perform the following steps:1. Press the spring lock down to open the remote cover.2. Place the battery (included) into the compartment making sure to align the contacts on the battery and the remote.3.Replace the ing the Charging Cradle:Connect the 6V DC adapter into the power outlet and into the rear of the charging cradle (also connects to the remote for direct charging). Gently place the MXHP-R700 remote into the cradle. The remote automatically aligns itself to the contacts on the charging base. The status light immediately illuminates:●Red indicates that the remote is charging.●Blueindicates the remote is fully charged.Using the MXHP-R700 (Remote):The Home menu pages display all the programmed activities and devices within the MX HomePro system.To navigate to this, simply press the Home button and use the Up and Down buttons to move throughout the menu.Press any button adjacent to the screen to select an activity or device. Press the Homebutton to return to the previous page and select a new device or activity.The Volume and Mute buttons are alwaysavailable regardless of what screen is displayed.The Home button always displays the Home Menupages.The Up and Down buttons areused to navigate through amenu screen.Displaying the Settings:Entering the Settings Menu is accomplished by pressing and holding the Home and Enter (ENT) buttons simultaneously for three (3) seconds.Use the Up and Down buttons to navigate between items on the Settings Menu. To select, press the button on the side of the LCD screen or the Select (SEL) button when the item is highlighted.Shown below is an expanded view of the MXHP-R700’s Settings Menu, not all options on this image are available on the screen at once.Settings Menu:The following sections cover the sub-menus found within the Settings Menu: Network Settings:This menu displays the network information about the MXHP-R700 and the network it is connected to.From this screen, it is possible to scan for different Wi-Fi networks, select a network to connect to, and enter any custom settings.Base Station (Hub) Setup:This menu displays all of the hubs that are currently connected to the network.Remember, hubs are identified by their Wired MAC Address.This can be found on the underside of a hub (refer to MX HomePro MXHP-H500Owner’s manual).TRF-ZW Z-Wave Accessory Account Info:When using smart home devices that use Z-Wave, it is necessary to log the Accessory Account info onto the remote (see MX HomePro Installation Guide). The Accessory Account info item allows the entry of a URC TRF-ZW account username and password.The screens displayed at the right show how this looks when the Accessory Account information has been entered and verified.Contact your smartinstaller to acquire Z-Wave home lighting,comfort, and security products for use withyour MX HomePro system.Sleep Timer:This setting item allows the user to adjust the amount of time the LCD remains On when not in use.The time can be set independently based on whether the remote is using battery power or is connected to the charger.Selecting an item on this screen allows for the settings of each Sleep Timer value.Once the Sleep Timers are adjusted, press Save . The Go Back button returns the remote’s to the Setup Menu and preserves the last saved setting.Brightness:This item allows the user to adjust the brightness of the LCD screen’s e the “-” and “+” buttons to decrease or increase the LCD’s brightness.Once complete, press Save . Pressing Go Back button returns to the remote’s last saved setting.Button Light:Adjust the brightness of the LEDs that backlight the buttons of the MXHP-R700.Adjust the button light brightness by using the “-” and “+” buttons to do so.Once adjusted, press Save . Pressing Go back reverts to the remote’s lastsaved setting.System:This menu displays data about the remote’s operating system, memory, and other information.Press the More button to view further system information or press Go Back to exitto the previous menu.Power:Displays the remaining battery level of the remote.The low battery warning message can be adjusted from this section. Adjust the battery percentage using the “-” and “+” buttons to do so.Once adjusted, press Save . Pressing Go back reverts to the remote’s last saved setting.Sound:Through this menu, adjusting the sound on button presses can be changed.Press the adjacent hard buttons to increase or decrease the button volume.Once adjusted, press the Save button. Pressing the Go Back button returns to the remote’s last saved setting.Pickup:This menu allows the user to adjust the sensitivity of the remote when reacting to being picked up.Increase or decrease the sensitivity using the “-” and “+” buttons.Once adjusted, press the Save button. Pressing the Go Back button returns to the remote’s last saved settingFirmware Update:Selecting this makes the remote search for any available firmware update. When available, the screen displays as seen on the right. Select Yes to begin the updating the remote’s firmware. Select No to return to the previous menu.When the firmware updates successfully, this screen is displayed as confirmation.Factory Default:Warning!Selecting this options returns the MXHP-R700 to its factory default settings. All programming is lost and the system requires re-programming.Select Yes starts the factory reset process. This should only be done wheninstructed by URC Technical Support or by the smart home professional installer.Selecting No returns the user to the previous screen.Exit:When completed with adjusting any user settings, select Exit to return the remote to normal operation.MX HomePro Editor:To begin programming the system, log into the MX HomePro Editor via:See the MX HomePro Programming Guide for more details.Specifications:LCD: 2 inch screen (240 x 320) LCD Backlighting by LEDDevices: Supports up to 255 devices with text, less with heavy graphics Macro Capability: Up to 255 steps each; however, nesting is allowed Wi-Fi: IEEE 802.11 b/g/nBattery: Lithium polymer 1,960mAhBattery Charging Time: 5 hoursSize: 8.46” H x 2.04” W x 1.02” DBattery Warranty: 90 days Limited Warranty Statement Click on the section title above to read the full terms and conditions of the Limited Warranty Statement. Also available publicly on the URC home page.End User Agreement Click on the section title above to read the full terms and conditions of theEnd User Agreement. Also available publicly on the URC home page.Federal Communication Commission Interference Statement:This equipment has been tested and found to comply with the limits for a Class B digital device, pursuant to part 15 of the FCC Rules. These limits are designed to provide reasonable protection against harmful interference in a residential installation. This equipment generates, uses and can radiate radio frequency energy and, if not installed and used in accordance with the instructions, may cause harmful interference to radio communications. However, there is no guarantee that interference will not occur in a particular installation. If this equipment does cause harmful interference to radio ortelevision reception, which can be determined by turning the equipment off and on, the user is encouraged to try to correct the interference by one more of the following measures:●Reorient or relocate the receiving antenna.●Increase the separation between the equipment and receiver.●Connect the equipment into an outlet on a circuit different from that to which the receiver is connected.●Consult the dealer or an experienced radio/TV technical for help.Warning!Changes or modifications not expressly approved by the manufacturer could void the user's authority to operate the equipment.The manufacturer is not responsible for any Radio or TV interference caused by unauthorized modifications to this equipment. Such modifications could void the user's authority to operate the equipment.FCC Caution:This device complies with Part 15 of the FCC Rules. Operation is subject to the following two conditions:1. This device may not cause harmful interference.2. This device must accept any interference received, including interference thatmay cause undesired operation. Any changes or modifications not expresslyapproved by the party responsible for compliance could void the authority tooperate equipment. The antenna(s) used for this transmitter must not be co-located or operating in conjunction with any other antenna or transmitter. Federal Communication Commissions (FCC)Radiation Exposure Statement:This remote device is approved as a hand-held and hand-operated only portable (relative to hand) device, which is normally operated at 5cm from a person’s body.。
体育馆设计说明PDF
体育馆设计说明PDF象山中学体艺馆音响、灯光系统设计方案二、扩声技术方案2、1、设计依据国家扩声系统设计标准JGJ/T16-92《民用建筑电气设计规范》JGJ/T131-2000 《体育馆声学设计及测量规程》GBJ232-92《电气装置安装工程施丄及验收规范》GB/T14197-93《声系统设备互联优选配接值》GB/T14947-94《声系统设备互联用连接器应用》2、2、功能设计象山中学体艺馆是校区内的大型活动场所能满足高水平的篮球运动和群体运动以及大型的文艺活动馆内看台分为北区和南区两个大块东面为文艺活动时流动舞台搭建的位置此次要求建设针对看台以及运动场的扩声系统在征询了建设方的意见结合体育馆功用定性后凭借我司多年配合项LI建设的经验我们对各部分的功能做如下初步剖析融合篮球赛、群体运动、文艺演出等形式设讣时将扩声系统按照观众区、比赛区、功能房和流动演岀分成4个可独立控制的子系统子系统间互相独立乂互相协调。
主席台预备话筒界面五位。
合适规模的调音台操作方便直观的对各子系统进行控制与平衡管理。
周边处理采用数字音频处理器具备均衡、参量均衡、音箱延迟、压缩限幅等功能。
音箱应满足播音的清晰度。
播送音乐有满意的音质。
2、3、性能设计a、扩声标准根据体育场馆的功能设计我们采用了中华人民共和国行业标准JGJ/T131-2000《体育馆声学设计及测量规程》中的二级标准做为设计参考。
国家标准J42-2000《体育馆声学设计及测量规程》分类特性体育馆扩声系统二级最大声压级空场稳定准峰值声压级dB 0. 254kHz范内平均声压级?98dB传输频率特性以2504KHz平均声压级为OdB在此频率内允许4dB/-6dB的变化1/3倍频程测量传声增益dB 1254KHz平均不小于- 12dB声场不均匀度OdB中心频率为10004000HZ1/3倍频程带宽时大部分区域不均匀度不大于10dB b、建筑声学要求体育馆比赛大厅的建筑声学条件应保证语言清晰为主。
HG260快速使用指南(修正版)
4 安装连接 ..................................................... 9
服务 请勿自行拆卸本产品或打开机体外壳, 这将会导致您的产品失去保修 权益。本产品出现下列问题时,请及时与您的服务商联系。 电源线或电源插头损坏。 有液体落入本产品中。 摔落或重击导致机壳损坏。 依照操作指示使用,但设备无法正常运行。
1
2 物品清单
打开 HG260 的包装盒,盒内包含以下物品。
后面板
网口 1/网口 3/网口 4 iTV 语音 1/语音 2 网络 G 电源 直流 12 伏
说 明 用于启动或关闭 2.4GHz 频段 无线 WPS 协商 短按该按钮:重启设备 长按该按钮 5 秒钟: 恢复 电信默认设置 长按该按钮 10 秒钟以 上:恢复出厂设置 用于开启或关闭 2.4GHz 频段 无线功能 用于连接移动存储设备 用于连接计算机或其它网络设 备 用于连接机顶盒 用于连接电话机 用于连接上行网络设备 用于接通或断开 HG260 的电 源 用于连接电源适配器
无线功能
3
符合 IEEE 802.11b/g/n 标准,支持 802.11b/802.11g/802.11g Mixed/802.11n/802.11n Mixed 等多种工作模式。 采用外置全向天线,无线电波的室内覆盖半径大于 50m。 支持多 SSID,提供多个虚拟无线网络。
HP Color LaserJet CM2320 MFP 系列 说明书

HP Color LaserJet CM2320 MFP 系列用户指南版权与许可© 2008 Copyright Hewlett-Packard Development Company, L.P.未经事先书面许可,严禁进行任何形式的复制、改编或翻译,除非版权法另有规定。
此处包含的信息如有更改,恕不另行通知。
HP 产品及服务的保修仅以随该产品及服务提供的书面保修声明为准。
本文所述任何内容不应被视为附加保修。
对任何技术或编辑错误或者本文所述内容的遗漏,HP 不承担任何责任。
Edition 2, 04/2008部件号:CC434-90928商标声明Adobe®、Acrobat®和 PostScript®是 Adobe Systems Incorporated 的商标。
Microsoft®、Windows®和 Windows NT®均为 Microsoft Corporation 在美国的注册商标。
UNIX®是 The Open Group 的注册商标。
目录1 产品基本信息产品比较 (2)产品功能 (3)产品概览 (4)正视图 (4)后视图 (5)接口端口 (6)2 控制面板HP Color LaserJet CM2320 控制面板 (8)HP Color LaserJet CM2320 MFP 传真型号和 HP Color LaserJet CM2320 MFP 内存卡型号控制面板 (9)控制面板菜单 (10)使用控制面板菜单 (10)控制面板设置菜单 (10)特定功能菜单 (20)3 Windows 软件支持的 Windows 操作系统 (26)Windows 支持的打印机驱动程序 (27)HP 通用打印驱动程序 (UPD) (28)UPD 安装模式 (28)选择适用于 Windows 的正确打印机驱动程序 (29)打印设置优先级 (30)更改 Windows 打印机驱动程序设置 (31)适用于 Windows 的软件安装类型 (32)删除 Windows 软件 (33)Windows 支持的实用程序 (34)HP ToolboxFX (34)内嵌式 Web 服务器 (34)HP Web Jetadmin (34)其它 Windows 组件和实用程序 (34)适用于其它操作系统的软件 (36)4 配合使用产品与 Macintosh用于 Macintosh 的软件 (38)支持的 Macintosh 操作系统 (38)Macintosh 支持的打印机驱动程序 (38)ZHCN iii更改 Macintosh 打印机驱动程序设置 (38)适用于 Macintosh 的软件安装类型 (39)从 Macintosh 操作系统中删除软件 (39)Macintosh 支持的实用程序 (39)使用 Macintosh 打印机驱动程序中的功能 (40)打印 (40)扫描 (42)传真(仅限 HP LaserJet CM2320 传真型号/CM2320 内存卡型号) (43)照片 (43)5 连接方式支持的网络操作系统 (46)USB 连接 (46)打印机共享免责声明 (47)支持的网络协议 (48)在网络上安装产品 (49)配置网络产品 (50)查看设置 (50)更改设置 (50)设置密码 (51)IP 地址 (51)链接速度设置 (52)6 纸张和打印介质了解纸张和打印介质的使用 (54)支持的纸张和打印介质尺寸 (55)支持的纸张类型和纸盘容量 (57)特殊纸张或打印介质规格 (58)装入纸张和打印介质 (59)纸盘 1 (59)纸盘 2 或 3 (60)配置纸盘 (62)7 使用产品功能经济设置 (64)存档打印 (64)字体 (65)选择字体 (65)打印可用字体列表 (65)8 打印任务取消打印作业 (68)使用 Windows 打印机驱动程序中的功能 (69)打开打印机驱动程序 (69)使用打印快捷方式 (69)设置纸张和质量选项 (69)设置文档效果 (69)iv ZHCN获取支持和产品状态信息 (70)设置高级打印选项 (70)更改打印质量设置 (72)打印边到边原件 (73)9 复印装入原件 (76)使用复印功能 (78)单触复印 (78)多份副本 (78)取消复印作业 (78)缩小或放大副本 (79)更改复印整理设置 (80)彩色复印或黑白复印(单色) (80)复印设置 (81)复印质量 (81)定义自定义复印设置 (82)在不同类型和尺寸的介质上复印 (82)恢复默认复印设置 (84)复印书籍 (85)复印照片 (87)复印混合尺寸原件 (88)双面复印作业 (89)自动复印双面文档(仅限 HP Color LaserJet CM2320 MFP 内存卡型号) (89)手动复印双面文档 (90)10 窗口颜色管理颜色 (94)自动 (94)灰度打印 (94)手动颜色调整 (94)颜色主题 (94)匹配颜色 (96)使用 Microsoft Office Basic Colors 调色板匹配颜色 (96)使用 HP 基本配色工具匹配颜色 (96)使用“查看自定义颜色”匹配颜色 (97)使用高级颜色功能 (98)HP ColorSphere 碳粉 (98)HP ImageREt 3600 (98)介质选择 (98)颜色选项 (98)标准红绿蓝 (sRGB) (98)11 扫描装入要扫描的原件 (100)使用扫描功能 (102)扫描方法 (102)使用扫描功能 (102)ZHCN v扫描设置 (108)扫描文件格式 (108)扫描仪分辨率和颜色 (108)扫描质量 (109)扫描书籍 (110)扫描照片 (112)12 传真(仅限传真型号)传真功能 (114)设置 (115)安装和连接硬件 (115)配置传真设置 (117)管理电话簿 (118)设置传真轮询 (121)更改传真设置 (122)设定音量设置 (122)发送传真设置 (122)接收传真设置 (126)使用传真 (131)传真软件 (131)取消传真 (131)从内存删除传真 (132)在 DSL、PBX、ISDN 或 VoIP 系统上使用传真 (132)发送传真 (133)接收传真 (143)解决传真问题 (144)传真错误消息 (144)断电时保持传真内存 (147)传真记录和报告 (147)更改错误纠正和传真速度 (151)发送传真出现问题 (154)接收传真出现问题 (155)执行问题 (157)13 照片插入内存卡 (160)更改内存卡默认设置 (162)直接从内存卡打印照片 (163)打印内存卡缩略图页 (165)从校样页打印和扫描照片 (166)14 管理和维护产品信息页 (168)HP ToolboxFX (170)查看 HP ToolboxFX (170)状态 (171)警报 (172)产品信息 (173)vi ZHCN帮助 (176)系统设置 (177)打印设置 (179)网络设置 (180)电子邮件 (180)嵌入式 Web 服务器 (181)功能 (181)使用 HP Web Jetadmin 软件 (182)安全功能 (183)使用内嵌式 Web 服务器可以启用密码保护功能。
LR260调试说明
LR2601、恢复工厂设置进入4 Service-4.1 Device Reset -选择Factory Defaults -确定(首次设置不需要操作此步骤)2、设定参数进入2 Setup-2.2 Input -2.2.1 Sensor Calibration -2.2.1.4 Sensor Units -选择M (单位是米)2.2.1.5 Operation -选择Level(物位测量)2.2.1.6 Low Calibration Pt -输入16(满量程16米)2.2.1.7 High Calibration Pt -输入0(高位点)2.2.7 Rate -2.2.7.1 Response Rate -fast(选择反应速度)标红处根据实际情况设定。
3、回波选择(如以上步骤完成后仪表正常工作,不需调整此项)2.2.4. Echo Processing -2.2.4.1 Echo Select -供选择形式12种,第三项L ,第八项BLF ,第十二项TF 是常用的形式,根据实际情况调整。
如果使用延长导波管,建议使用第三项L。
4、阻尼时间设定2.2.4.3.2 Damping Filter,工厂默认为0,一般可设定5-20S。
可以抑制测量波动。
5、自动抑制范围2.2.5.3 Auto Suppression Range 工厂默认为1.00M,可以根据实际情况设置范围是0-30M。
一般设置为法兰下端面至喇叭天线的长度加20-30CM。
(出厂设置为0.2米,首次设置不需要调整。
)2.2.5.2 Auto False Echo Suppression 虚假波抑制学习,选择Learn,等待变为On,设置成功。
6、波形图3.1 Echo Profile ,观察波峰位置。
HP Integrity rx2660 服务器安装指南
/ja/index.html
/ko/index.html
/zh_cn/index.html
/zh_tw/index.html
随hp产品及服务提供的明示性担保声明中列出了适用于此hp产品及服务的专用担保条款
HP Integrity rx2660 服务器安装指南
*AB419-9000B-zh_cn*
HP 部件号:AB419-9000B-zh_cn 出版日期:2007 年 5 月
© 版权所有 2007 Hewlett-Packard Development Company, L.P. 法律声明 本文档所包含的信息如有更改,恕不另行通知。随 HP 产品及服务提供的明示性担保声明中列出了适用于此 HP 产品及服务的专用担保条款。本 文中的任何内容均不构成额外的担保。HP 对本文中的技术或编辑错误以及缺漏不负任何责任。 Intel、Pentium、Intel Inside、Itanium 和 Intel Inside 徽标是 Intel Corporation 及其子公司在美国和其他国家(地区)的商标或注册商标。 Linux 是 Linus Torvalds 在美国的注册商标。 Microsoft 和 Windows 是 Microsoft Corporation 在美国的注册商标。 本地化的文档 本安装指南已翻译为下列几种语言:
1 简介.......................................................................................................13
服务器控件、端口和指示灯...................................................................................................................14 前面板视图.....................................................................................................................................14 详细的前面板视图......................................................................................................................15 后面板视图.....................................................................................................................................15 详细的后面板视图...........................................................................................................................16 I/O 子系统..........................................................................................................................................17 处理器 ................................................................................................................................................17 内存....................................................................................................................................................17 散热....................................................................................................................................................17 数据中心服务器散热........................................................................................................................17 Office Friendly 版服务器散热............................................................................................................17 电源....................................................................................................................................................18 rx2660 Data Center 版服务器电源....................................................................................................18 Office Friendly 版服务器电源............................................................................................................18 System Insight Display...........................................................................................................................18 海量存储 .............................................................................................................................................18 固件....................................................................................................................................................19 用户界面........................................................................................................................................19 错误和事件的事件 ID.......................................................................................................................19 尺寸和重量..........................................................................................................................................19 服务器规格..........................................................................................................................................19 安全信息 .............................................................................................................................................20 安装顺序和检查清单.............................................................................................................................21
2-in-1 Universal Remote Control 说明书
O w n e r ’s M a n u a lP l eas er ea dbef or eus i ngthise qui p m ent .2-in-1 UniversalRemote ControlX ContentsFeatures (3)Introduction (4)Preparation (5)Installing Batteries (5)Setting Up Your Remote Control (6)Operation (8)Converting the CBL Key (8)Reassigning the CBL Key (8)Restoring the CBL Key (9)Using Volume Lock (9)Setting Volume Lock To Cable Converter (9)Resetting Volume Lock To TV (9)Cancelling Volume Lock (9)Manual Code Search (10)Checking Your Code (10)Manufacturers’ Codes (12)Troubleshooting (22)Care (22)Specifications (23)2ContentsX FeaturesYour RadioShack 2-in-1 Universal Remote Control al-lows you to control both your TV and cable converter with one easy-to-use, compact remote control. Its fea-tures include:Last Station Recall — lets you go from the station you are currently watching to the last one at the touch of a button.Large, Easy-to-Use Buttons — improve remote control access and operation.+100 Key — lets you access the higher cable channels.Powerful Infrared Beam — lets you operate your TV or cable converter from a greater distance than many other remote controls.Extensive Code Library — contains remote control codes for virtually every television and cable converter made today, including discontinued devices.For your convenience, the remote control has been pre-set to control an RCA TV (compatible with code 0047) and a Jerrold cable converter (compatible with code 0003). To control other brands, you must do some sim-ple programming after you install three AAA alkaline bat-teries (not included).For best results, please read and perform all remaining instructions. Also, keep these instructions for future ref-erence.3Features4IntroductionX IntroductionYour Radio Shack 2-in-1 Remote Control was designed to control the most commonly-used functions on your TV and cable converter.When you set up the remote control, its command keys operate the same as the keys on your original TV and Cable remote controls. For example, the POWER key works like the POWER ON/OFF key on your original TV remote control.Note: This remote control might not be able to duplicate some of your original remote control’s seldom-used functions.KeyFunction PUse to program the remote control.POWERVOL +VOL –CH +CH –LASTMUTEENTER(0–9)+ 100A/BOperate the same as the corre-sponding keys on your original remote CBL Use to set up the remote control to replace your original remote con-trols. Also use in normal operation toremotely select a desired device tocontrol.X PreparationINSTALLING BATTERIESYour remote requires three AAA batteries (not supplied) for power. For the best performance and longest life, we recommend RadioShack alkaline batteries.When batteries become low, the remote control will cease to operate in order to protect stored settings. Re-placing the batteries with new ones will restore full func-tionality and will not require you to reprogram your remote control.Cautions:•Use only fresh batteries of the required size and recommended type.•Do not mix old and new batteries, different types of batteries (standard or alkaline).•Do not use rechargeable batteries.•Do not press any of the remote control’s keys while installing batteries.1.Press the battery compartment cover’s tab and liftoff the cover.2.Place the batteries in the compartment as indicatedby the polarity symbols (+ and –) marked inside. 3.Replace the cover.When the remote control’s range decreases or it stops operating properly, replace the batteries.Warning: Dispose of old batteries promptly and proper-ly. Do not burn or bury them.Caution: If you do not plan to use the remote control for a month or longer, remove the batteries. Always remove old or weak batteries. Batteries can leak chemicals that can destroy electronic parts.5PreparationNote: Do not place objects on top of the remote control after you have installed the batteries. Doing so might de-press keys for an extended period of time and reduce the battery life.SETTING UP YOUR REMOTE CONTROLYou can use the remote control’s device keys to control the following types of devices:TV – TVsCBL – Cable convertersYour remote control is preset to an RCA TV (compatible with code 0047) and a Jerrold cable converter (compati-ble with code 0003). Not all RCA TVs and Jerrold cable converters will work with the preset codes. Some will re-quire the other codes listed in Manufacturer’s Codes. Follow these steps to control other brand devices or to use a different RCA or Jerrold code.1.Refer to “Manufacturers’ Codes” on Page12 andwrite down the codes for the brand of device you want to program on the supplied label.Note: Some manufacturers might have several codes listed. Try each until you find the right one. If you cannot find the correct code, try performing a manual search (see “Manual Code Search” on Page10).2.Turn on your TV (or cable converter).3.Press TV (or CBL).4.Hold down P until the red light blinks twice, thenenter the 4-digit manufacturer’s code for the desired device. When the red light blinks twice, the remote control has accepted the code.For example, to set up the remote control of a Pana-sonic TV (manufacturer’s code 0051), press TV, hold down P until the red light blinks twice, then press 0051.6PreparationNote: If you entered the code incorrectly, the red light blink once.5.Point the remote control at your TV (or cable con-verter) and press POWER. The device should turn off.If the remote does not operate your device, try the other codes listed in “Manufacturers’ Codes” on Page12 for your brand of TV or cable converter.You can also search to find a working code (see “Manual Code Search” on Page10).6.Repeat Steps 2–5 to program the other device(cable converter or TV).7PreparationX OperationThe command keys on the remote control work the same way as their counterpart keys on the original re-mote controls. However, they might be labeled different-ly.1.Point the remote control at the device you want con-trol and press its device key (TV or CBL). Then press POWER to turn on the device.2.Press the desired command keys.3.Repeat Steps 1 and 2 for the other device you wantto operate.4.To turn off the last device you selected, pressPOWER. To turn off the remaining device, press its device key, then press POWER. CONVERTING THE CBL KEYIf you are not using CBL, you can reprogram it to operate a second TV.Reassigning the CBL Key1.Hold down P until the red light blinks twice.2.Press 992. The red light blinks twice.3.Press TV.4.Press CBL. The red light blinks twice to indicate suc-cessful programming.5.Program the converted CBL key with the code forthe second TV (see “Setting Up Your Remote Con-trol” on Page6).Now each time you press CBL, you can control the sec-ond TV by pressing the desired function keys.8OperationRestoring the CBL KeyWhen you are finished using your second TV, you can restore the CBL key to control a cable converter.1.Hold down P until the red light blinks twice.2.Press 992. The red light blinks twice.3.Press CBL.4.Press CBL again. The red light blinks twice to indi-cate successful programming.USING VOLUME LOCKVolume Lock is preset so that pressing VOL+/– or MUTE only controls your TV’s volume, even if you press CBL. If your cable converter has a volume control, you can change this setting to add control of the cable convert-er’s volume.Setting Volume Lock To Cable Converter1.Hold down P until the red light blinks twice.2.Press 993. The red light blinks twice.3.Press CBL. The red light blinks twice.To control your cable converter’s volume, press CBL then VOL +/–.Resetting Volume Lock To TV1.Hold down P until the red light blinks twice.2.Press 993. The red light blinks twice.3.Press TV. The red light blinks twice.Cancelling Volume Lock1.Hold down P until the red light blinks twice.2.Press 993. The red light blinks twice.9Operation3.Press VOL+. The red light blinks four times. MANUAL CODE SEARCHIf your TV or cable converter does not respond to remote control commands after trying all of the codes listed for your brand, or if your brand is not listed at all, try search-ing for your code.1.Turn on your TV or cable converter.2.Press TV (or CBL)once.3.Hold down P until the red light blinks twice.4.Press 991. The red light blinks twice.5.Aim the remote control at the TV or cable converterand slowly alternate between pressing POWER and TV (or CBL). Stop when the TV or cable converter turns off. A working code has been found.Note: The remote control sends codes from its extensive library to the selected device, starting with the most popular codes first. Because of the library’s size, this procedure may take some time.When the red light blinks twice, the search of every code is complete.6.Press P once to lock in the code.Note: If the TV turns off during the search, but does not operate after you lock in the code, begin the search again, pausing longer between key presses. Checking Your CodeIf you set up the remote control using the “Manual Code Search” procedure, follow these steps to find out what code is operating your TV or cable converter.1.Press TV or CBL once.2.Hold down P until the red light blinks twice.3.Press 990. The red light blinks twice.10Operation4.To view the code for the first digit, press 1. Count thenumber of blinks (for example, 3 blinks = 3) and write down the number.Note: The red light does not blink if the code digit isa 0.5.Repeat Step 4, pressing 2, 3, and 4 to view thecodes for each successive digit.11OperationX Manufacturers’ Codes The following list tells you which 4-digit codes to enter to set up the remote control.Notes:•The remote control might not have every command featured on your original remote controls.•Use the supplied label to record the manufacturers’codes for your remote-controlled devices.• A key on the remote control that has the same name as a key on your original remote control may have a slightly different function.Manufacturer Code Number RadioShack Cat. No.Cable ConvertersABC0003, 0008, 0014, 0017Allegro0153, 0315Americast0899Antronix0022, 0207Archer015316-1283002215-1285020716-12830797Bell & Howell0014Bell South0899Cabletenna0022Cableview0022Century0153Citizen0153, 0315Contec0019Emerson0797Everquest0015GC Electronics020712Manufacturers’ Codes13Manufacturers’ Codes Garrard 0153Gemini 0015, 0797General Instru-ment 0476, 0276, 0810GoldStar 0144Goodmind 0797Jasco 0015, 0153, 0315Jerrold 0003, 0012, 0476, 0276, 0014, 0015, 0810Memorex 0000Movie Time 0063NSC 0063Oak 0019Optimus 0021Panasonic 0000, 0021Paragon 0000Philips 0153Pioneer 0144, 0533, 0877Pulsar 0000Quasar 0000RCA 0021Radio Shack 0015, 0303, 0315, 0883079715-1288Realistic 020716-1283, 15-1285ARunco 0000Samsung 0144Scientific Atlanta 0008, 0477, 0017, 0877Signal 0015Sprucer 0021Starcom 0003, 0015Stargate 0015, 0797Starquest 0015TV860063ManufacturerCode NumberRadioShack Cat. No.14Manufacturers’ CodesTandy 0258Tocom 0012Toshiba 0000Tusa 0015Unika 0153, 0022, 0207Universal 0153, 0022, 0207Viewstar 0063, 0258Zenith0000, 0525, 0899TelevisionsA-Mark 0003Akai 0218Akiba 0218Akura 0218Alba 0218Amstrad 0218Asuka 0218Audiosonic 0218AOC 0030, 0019, 0003Abex 0032Admiral 0093, 0463Aiko 0092Akai 0030Alaron 0179America Action 0180Anam 0180Archer 0003Astro Text 0596Audiovox 0451, 0180, 0003, 0092, 0623Basic Line 0218Baysonic 0180Belcor 0019Bell & Howell0154, 0016ManufacturerCode NumberRadioShack Cat. No.15Manufacturers’ Codes Blue Sky 0218Bradford 0180Brockwood 0019Broksonic 0236, 0463, 0003BTC 0218Bush 0218CXC 0180Candle 0030, 0056Canton 0218Carnivale 0030Carver 0054Celebrity 0000Cimline 0218Cineral 0451, 0092Citizen 0060, 0030, 0056, 0039, 0092Clatronic 0218Concerto 0056Contec 0180Craig 0180Crosley 0054Crown 0180, 0039CS Electronics 0218Curtis Mathes0047, 0054, 0154, 0051, 0451, 0093, 0060, 0030,0145, 0056, 0016, 0039, 0166, 0466Cybertron 0218Daewoo 0451, 0019, 0039, 0092, 0623, 0624, 0218Daytron 0019Dainichi 0218Denon 0145Dumont0017, 0019ManufacturerCode NumberRadioShack Cat. No.16Manufacturers’ CodesElectroband 0000Electrohome 0409Elite 0218Emerson0154, 0236, 0463, 0180, 0282, 0178, 0019, 0179,0039, 0623, 0624Envision 0030Fisher 0154Flint 0218Fujitsu 0179Funai 0180, 0179, 0171Futuretech 0180GBC 0218GE 0047, 0051, 0451, 0093, 0282, 0178, 0021Genexxa 0218Gibralter 0017, 0030, 0019GoldStar 0030, 0178, 0019, 0056, 0032, 0409Goodmans 0218GPM 0218Gradiente 0053, 0056Grunpy 0180, 0179Hallmark 0178Harley Davidson 0179Harman/Kardon 0054Harvard 0180HCM 0218Hikona 0218Hinari 0218Hisawa 0218Hitachi 0145, 0056, 0016, 0032, 0409ICE0218ManufacturerCode NumberRadioShack Cat. No.17Manufacturers’ Codes ICEs 0218Infinity 0054Inteq 0017Intervision 0218Irradio 0218Isukai 0218JBL 0054JCB 0000JVC 0053, 0218Kaisui 0218KEC 0180KTV 0180, 0030, 0039Kenwood 0030, 0019Konka 0218Lifetec 0218LG 0056LXI 0047, 0054, 0154, 0156, 0178Logik 0016Luxman 0056MGA 0150, 0030, 0178, 0019MTC 0060, 0030, 0019, 0056Magnavox 0054, 0030, 0179Majestic 0016Marantz 0054, 0030Matsushita 0250Megatron 0178, 0145, 0003Memorex 0154, 0250, 0463, 0150, 0178, 0056, 0016Midland 0047, 0017, 0051, 0039, 0032Minutz 0021Mitsubishi 0093, 0150, 0178, 0019Motorola0093ManufacturerCode NumberRadioShack Cat. No.18Manufacturers’ CodesMultitech 0180NAD 0156, 0178, 0166NEC 0030, 0019, 0056NTC 0092Nikkai 0218Nikko 0030, 0178, 0092Onwa 0180, 0218Optimus015402500166Optonica 0093, 0165Orion 0236, 0463, 0179Orline 0218Osaki 0218Oso 0218Osume 0218Panasonic 0051, 0250Penney0047, 0156, 0051, 0060, 0030, 0178, 0021, 00190056, 0039, 0003, 0032Philco 0054, 0463, 0030, 0145, 0019Philips 0054Pilot 0030, 0019, 0039Pioneer 0166Portland 0019, 0039, 0092Prism 0051Proscan 0047Proton 0178, 0003, 0466Pulsar 0017, 0019Quasar 0051, 0250, 0165RCA 0047, 0051, 0093, 0019, 0090Radialva0218ManufacturerCode NumberRadioShack Cat. No.19Manufacturers’ Codes Radio Shack0047, 0154016516-232, 16-233, 16-236, 16-250,16-260018016-252, 16-253, 16-262, 16-292003016-256, 16-263, 16-268, 16-280, 16-289017816-254, 16-255, 16-256, 16-2650019, 0056, 0039, 0032, 0409Realistic015401650180, 0030, 0178, 0019005616-2880032, 0039Roadstar 0218Runco 0017, 0030, 0603SSS 0180, 0019Sampo 0030, 0039, 0032Samsung 0060, 0030, 0178, 0019, 0056, 0032Samsux 0039Sansei 0451Sansui 0463Sanyo 0154Schneider 0218Scimitsu0019ManufacturerCode NumberRadioShack Cat. No.20Manufacturers’ CodesScotch 0178Scott 0236, 0180, 0178, 0019, 0179Sears 0047, 0054, 0154, 0156, 0178, 0179, 0056, 0171Sentra 0218Semivox 0180Semp 0156Sharp 0093, 0165, 0039Shogun 0019Signature 0016Sony 0000Soundesign 0180, 0178, 0179Spectricon 0003Squareview 0171Starlite 0180Standard 0218Stenway 0218Supreme 0000Susumu 0218Sylvania 0054, 0030Symphonic 0171TMK 0178, 0056Tandy 0093, 0218Tatung 0003Technics 0051, 0250Technol Ace 0179Techwood 0051, 0056, 0003Teknika0054, 0180, 0150, 0060, 0019, 0179, 0056, 00160039, 0092Telefunken 0056Tensai 0218Texet0218ManufacturerCode NumberRadioShack Cat. No.21Manufacturers’ Codes Toshiba0154, 0156, 0060Totevision0039Tristar0218Vector Research0030Victor0053Vidikron0054Videologic0218Vidtech0178, 0019Wards 0054, 0165, 0030, 0178,0021, 0019, 0179, 00560016Watson 0218White Westing-house 0463, 0623, 0624Yamaha 0030, 0019Yoko 0218Zenith 0017, 0463, 0016, 0092,0624Zonda0003ManufacturerCode Number RadioShack Cat. No.X TroubleshootingIf the remote control stops working after you have suc-cessfully tested the control for each device, or if you are unable to get the remote control to work at all, check these things:•Be sure you press the device key for the device you want to control before you press any other key.•Confirm that your IR devices are working properly by using the original remote control or the manual controls.•Replace the batteries.CAREKeep the remote control dry; if it gets wet, wipe it dry im-mediately. Use and store the remote control only in nor-mal temperature environments. Handle the remote control carefully; do not drop it. Keep the remote control away from dust and dirt, and wipe it with a damp cloth occasionally to keep it looking new.Modifying or tampering with the remote control’s internal components can cause a malfunction and might invali-date its warranty and void your FCC authorization to op-erate it. If your remote control is not performing as it should, take it to your local RadioShack store for assis-tance. If the trouble is affecting the telephone lines, the phone company can ask you to disconnect your remote control until you have resolved the problem.22TroubleshootingX SpecificationsPower .............................................................. 3 AAA Batteries IR Control Range ......................................... 26 ft ±30 degrees Dimensions (HWD) ...................................... 61/2 × 21/2× 11/4 In(165 × 38 × 32 mm) Weight (Without Batteries) .............................................. 3.2 oz(90.1 g) Specifications are typical; individual units might vary. Specifica-tions are subject to change and improvement without notice.23SpecificationsRadioShack Corporation Fort Worth, Texas 7610215-198910/00 Printed in KoreaLimited Ninety-Day WarrantyThis product is warranted by RadioShack against manufacturing de-fects in material and workmanship under normal use for ninety (90) days from the date of purchase from RadioShack company-owned stores and authorized RadioShack franchisees and dealers. EXCEPT AS PROVIDED HEREIN, RadioShack MAKES NO EXPRESS WAR-RANTIES AND ANY IMPLIED WARRANTIES, INCLUDING THOSE OF MERCHANTABILITY AND FITNESS FOR A PARTICULAR PUR-POSE, ARE LIMITED IN DURATION TO THE DURATION OF THE WRITTEN LIMITED WARRANTIES CONTAINED HEREIN. EXCEPT AS PROVIDED HEREIN, RadioShack SHALL HAVE NO LIABILITY OR RESPONSIBILITY TO CUSTOMER OR ANY OTHER PERSON OR ENTITY WITH RESPECT TO ANY LIABILITY, LOSS OR DAM-AGE CAUSED DIRECTLY OR INDIRECTLY BY USE OR PERFOR-MANCE OF THE PRODUCT OR ARISING OUT OF ANY BREACH OF THIS WARRANTY, INCLUDING, BUT NOT LIMITED TO, ANY DAMAGES RESULTING FROM INCONVENIENCE, LOSS OF TIME, DATA, PROPERTY, REVENUE, OR PROFIT OR ANY INDIRECT, SPECIAL, INCIDENTAL, OR CONSEQUENTIAL DAMAGES, EVEN IF RadioShack HAS BEEN ADVISED OF THE POSSIBILITY OF SUCH DAMAGES.Some states do not allow limitations on how long an implied warranty lasts or the exclusion or limitation of incidental or consequential dam-ages, so the above limitations or exclusions may not apply to you.In the event of a product defect during the warranty period, take the product and the RadioShack sales receipt as proof of purchase date to any RadioShack store. RadioShack will, at its option, unless other-wise provided by law: (a)correct the defect by product repair without charge for parts and labor; (b) replace the product with one of the same or similar design; or (c) refund the purchase price. All replaced parts and products, and products on which a refund is made, become the property of RadioShack. New or reconditioned parts and products may be used in the performance of warranty service. Repaired or re-placed parts and products are warranted for the remainder of the orig-inal warranty period. You will be charged for repair or replacement of the product made after the expiration of the warranty period.This warranty does not cover: (a) damage or failure caused by or at-tributable to acts of God, abuse, accident, misuse, improper or abnor-mal usage, failure to follow instructions, improper installation or maintenance, alteration, lightning or other incidence of excess voltage or current; (b) any repairs other than those provided by a RadioShack Authorized Service Facility; (c) consumables such as fuses or batter-ies; (d) cosmetic damage; (e) transportation, shipping or insurance costs; or (f) costs of product removal, installation, set-up service ad-justment or reinstallation.This warranty gives you specific legal rights, and you may also have other rights which vary from state to state.RadioShack Customer Relations, 200 Taylor Street, 6th Floor, FortWorth, TX 76102We Service What We Sell12/99。
HP Color LaserJet Pro MFP M282-M285 使用者指南说明书
828D简明调试手册_2019 4.8 SP4
惠普彩色激光多功能打印机用户指南说明书
䐙ㄨㇸ≈
/videos/LaserJet /support/colorljM479MFP
HP Color LaserJet Pro M479 用户指南
版权与许可
© Copyright 2019 HP Development Company, L.P.
2 纸盘 .......................................................................................................................................................................................................... 17 简介 .......................................................................................................................................................................................... 17 将纸张装入纸盘 1 ................................................................................................................................................................ 18 简介 ..................................................................................................................................................................... 18 将纸张装入纸盘 1(多用途纸盘) ............................................................................................................ 18 纸盘 1 纸张方向 ............................................................................................................................................... 20 将纸张装入纸盘 2 ................................................................................................................................................................ 22 简介 ..................................................................................................................................................................... 22 将纸张装入纸盘 2 ........................................................................................................................................... 22 纸盘 2 纸张方向 ............................................................................................................................................... 24 将纸张装入纸盘 3 ................................................................................................................................................................ 26 简介 ..................................................................................................................................................................... 26Fra bibliotek商标说明
HP LaserJet Professional M1130 M1210 MFP 系列 使用者指南说
ZHTW
v
移除 Mac 的軟體 ............................................................................................................................... 28 Macintosh 列印設定值的優先順序 ................................................................................................. 28 變更 Mac 的印表機驅動程式設定 ................................................................................................... 29 使用 Mac 來列印 ................................................................................................................................................. 30 使用 Mac 來建立並使用列印預設 ................................................................................................... 30 變更文件尺寸或使用 Mac 在自訂尺寸的紙張上列印 ................................................................... 30 使用 Mac 列印封面 ........................................................................................................................... 30 使用 Mac 進行單張多頁列印 ........................................................................................................... 31 使用 Mac 列印正反兩面 (雙面列印) ............................................................................................... 31 使用 Mac 傳真 (僅限 M1210 系列) .................................................................................................................... 33 使用 Mac 掃描 ..................................................................................................................................................... 34
T260中文操作手册
莱伯泰科有限公司
easyCONTROL 程序登陆 打开主机电源开关,同时260终端如下图显示。.
从登陆界面选择用户名并输入密码,然后触摸或用鼠标点击“OK”
出厂初始密码设置为: Administrator=123456 User =123
密码可由服务工程师更改。 程序注销
点击注销键可退到最初状态。此时可关掉仪器电源或另一用户登陆。微波主机电源关掉 时260终端同时也会关掉。 easyCONTROL桌面 登陆后,easyCONTROL软件就会显示开始界面。就可在软件授权的范围通过点击不同的按键运行相应的程 序。 1. Logout 2. Panel Administration (only by service) 3. press PREP
排风 开始键,点此键程序开始运行.
莱伯泰科有限公司
暂停键,点此键程序暂停运行
停止键,点此键程序停止运行. 程序运行完毕后点此键,程序回到开始界面.
图表显示按键: 点此键取消或激活键功能,点此键显示传感器在图表中实时曲线图:
HPR260XD 数控等离子切割机工作流程
HPR260XD 数控等离子切割机工作流程1、查收设计图纸根据图纸图号选择合适大小、厚度的钢板;熟悉将进行加工的工件图纸;2、启动设备检索图库设备开机时会进行自检操作,气体系统检测;自检完毕,根据图纸图号检索主机中对应的设计图;3、起吊钢板将合适钢板放置在切割机床上等待切割;摆正摆齐钢板,比较钢板前后两端位置(误差5mm)4、设置切割参数根据设计图纸中的板的实际情况需求设置切割表数据(电流、板厚、角度、排、列等);根据主机图纸选择合适的钢板上的进刀点;5、开始切割注意割炬火光、火花大小;注意割炬切割的实际轨迹与图纸之间的偏差;6、正确区分废料与工件正确区分什么是废料与什么是工件;将不方便抬走的废料用火焰切割成小块,留下大块的钢板原料留用下次切割;7、工件与废料吊离平台将切割完毕的工件要及时吊离平台,移至空旷地等待除渣、转运处理;将切除之后剩下的废料调离平台丢放至废料区等待处理;8、清理熔渣将切割好的工件进行简单除渣处理;将工件按工单进行分类,准备运送至下一道工序;9、填写工单转运工件根据工单要求填写转运工单;将工件正确的转运到下一道工序参与生产;HPR260XD 数控等离子切割机常识1、更换HPR易损件时特别需要注意哪些事项:(取下割枪本体,清洁本体,使用硅润滑脂润滑密封圈,使用专用工具,安装易损件时不要用力过大)2、切割过程中有哪几个需要高度设定(安全高度,初始定位高度,穿孔高度,切割高度)3、切割波纹产生的原因(导轨运行不平稳。
弧压不稳定,割枪没有被固定住,喷嘴损坏)4、切割角度不好的原因(割枪不垂直钢板,切割高度/不正确的弧压,易损件,割枪本体)5、如何延长保护帽的寿命(及时清渣,正确的切割高度,防溅液)6、引起喷嘴寿命下降的原因是哪些(穿孔太低,使用超过寿命的电极,切割电流过高,使用不正确的气体设定,穿太厚的板,速度是否合适,台面熔渣是否太多)7、电极中心导电的介质我们常用的两种金属材料(铪,钨),最佳切割的金属材料是(碳钢,不锈钢或铝)8、银电极使用一段时间后,为了保证切割角度,弧压需要如何适当调整(升高弧压)9、如何延长电极的寿命(冷却水流量足够,少穿孔,减少非正常断弧,及时更换水管)10、挂渣有那两种主要形式(高速和低速挂渣)11、海宝等离子电源切割熔渣过多的原因•气体设置不正确。
HP服务器远程管理软件iLO使用介绍
HP服务器远程管理软件iLO使用介绍iLO 是一组芯片,内部是vxworks的嵌入操作系统,在服务器的背后有一个标准RJ45口对外连接生产用交换机或者带外管理的交换机. iLO自己有处理器,存储和网卡,默认网卡配置是DHCP,可以在服务器启动的时候进入iLO 的ROM based configuration utility 修改. 服务器的面板左侧,会有一个白色的纸吊牌,上面写着iLO 网卡上的DNS name和Password. 请勿随便更改,更改了不要遗失.iLO的使用很简单. 用网线把iLO口和你的LAN switch或者专门的OB switch 相连. 如果你准备让iLO 默认方式工作,你需要有一个LAN内的DHCP和DNS 服务器存在. 如果你在服务器启动的时候修改dhcp 到static ip,就无所谓了. 在你的笔记本或者pc上,开一个IE(支持java),然后地址那里书写 iLO DNS name(写在纸吊牌上的,你需要DHCP DNS 服务器在局域网内). 就可以看到iLO界面了. 或者直接填写iLO的ip地址也可以.iLO界面除了报告一些硬件信息之外,主要提供了三大类控制:第一类是Virtual console,就是类似pc anywhere 的远程控制了,但是和软件的控制不一样,它是完全硬件级的,哪怕你的服务器没有操作系统,或者硬盘损坏,或者重新启动,都可以完整的进行控制,所以除非更换被管理服务器的硬件,正常的操作都可以用iLO来做,根本不用进入机房.(当然得保证网络通畅).第二类是 Virtual power,虚拟电源,模拟所有的电源开关动作,比如按住不放,按住就放等等...第三类是Virtual media,虚拟介质,你可以将pc或者笔记本上的光驱软驱,通过LAN虚拟给被管理的服务器。
这个主要是用来安装操作系统,或者传输数据,打补丁之类的。
比如那个被管理服务器是新的,没有操作系统,硬盘也没有作阵列,我怎么结合上面的三类控制手段来操作呢?1. 用virtual power重启动服务器2. 用virtual console 远程操作服务器,在服务器启动的POST时候,进入服务器的Smart array 6i Rom based utility 进行阵列配置3. 用virtual console 远程操作服务器,在服务器POST完毕的结束阶段,F9进入系统的BIOS,我们行话叫RBSU 进行配置4. 用virtual media 将我本地笔记本或者pc的光驱虚拟出去,然后在我本地的光驱中,放windows/linux等的安装盘5. 远端的被管理服务器认为自己插了一个usb 光驱,或者软驱,然后按照大家熟悉的正常方式从光盘软盘启动,不过却是用的我本地的盘.6. 你在virtual console 里面进行和平时一样的安装操作.有一点要注意,默认的服务器买来,iLO 是不支持图形界面的,也就是说,当你virtual console 里面的远程服务器开始进入windows或X-windows的时候,你本地pc笔记本的IE 就看不出远端的画面了,需要向hp购买iLO advanced pack,一个iLO serial number,把这个iLO serial number输入到iLO的一个专门输入注册号的地方,就可以突破这个限制了,不过远端如果是linux并且是字符界面,就无所谓买不买了. 这个输入注册号的地方,在你IE访问iLO 后出现的管理界面的菜单上有的,最后一个.就这些,HP的iLO目前是x86服务器系统中最理想的技术了,我们比较了好几种同类产品,在标配不加卡的情况下,HP 的管理应该是最好的.服务器集成 iLO 端口的配置iLO 全名是 Integrated Lights-out,它是惠普某些型号的服务器上集成的远程管理端口,它能够允许用户基于不同的操作系统从远端管理服务器,实现了虚拟存在和控制,从而进行智能型基础构架和管理.开机自检时,按F8键进入 iLO 的设置界面:1. 进入 iLO 的设置:在 File 下的“Set Defaults”是将所有的设置恢复为出厂值。
Philips MC260 用户手册说明书
Micro Hi-Fi System MC260 user manualmanuel d'utilisationmanual del usarioUse of controls or adjustments or performance of procedures other than herein may result in hazardousradiation exposure or other unsafe operation.liilIndex English------------------------------------------------6Français--------------------------------------------22Español---------------------------------------------3854目錄一般事項環保資訊 (55)隨機供給配件 (55)安全須知 (55)準備工作背面的連接...........................................................56–57連接其他附屬音響器材 (57)裝入遙控器電池 (57)控制鍵本機和遙控器上的控制鍵 (58)基本功能開啟本機 (59)自動切換至省電待機模式 (59)調節音量和音效 (59)光碟機操作播放光碟 (60)選擇不同曲目 (60)在一首曲目中找尋某個段落 (60)不同的播放模式:Shuffle (亂序播放)和 Repeat (重複播放) (61)編輯曲目播放清單 (61)檢查曲目播放清單 (61)抹除曲目播放清單 (61)電台接收調諧選台 (62)編輯預設電台 (62)選擇預設電台 (63)改變調諧頻階 (63)磁帶機操作 / 錄音磁帶播放 (64)磁帶翻面 (64)翻面模式選項 (64)錄音一般說明 (64)CD 同步錄音 (65)從收音機錄音 (65)從輔助設備 (Aux) 錄音 (65)設定計時器錄音 (65)時鐘 / 計時器設定時鐘 (66)設定計時器 (66)開啟及關閉計時器 (66)開啟及關閉睡眠計時器 (66)技術規格 (67)維護保養 (67)故障排除....................................................68–69一般事項環保資訊本產品無任何不需要的包裝材料。
HP2603打印机错误代码
HP2603打印机错误代码警报消息和警告消息错误信息Calibrating...说明打印机正在进行调校。
对策不需采取任何对策。
Cleaning...错误信息Cleaning...说明打印机正在清洗模式之中。
对策不需采取任何对策。
Device error错误信息Device errorPress说明打印机中发生内部错误。
对策按(“选择” )恢复作业。
Door open错误信息Door open说明打印机盖板未关闭。
对策必须关闭盖板,然后才可继续打印。
Duplexer Error错误信息Duplexer ErrorTurn off then on说明此消息是一条严重错误消息,可能表示出现了故障。
执行电源循环可以解决此问题。
如有严重错误反复发生,打印机则可能需要进行维修。
双面打印器没有连接或安装有误。
对策使用电源开关切断电源,等待至少 30 秒钟,然后启动电源并等待打印机完成初始化过程。
如果使用了电涌保护器,请将其拆除。
将打印机直接接入壁装电源插座。
使用电源开关启动打印机。
如果仍有错误,请联系 HP Customer Care。
请访问 HP Customer Care ,或请参阅打印机包装盒中附带的支持手册。
Engine comm. error错误信息Engine comm. error说明打印机出现了内部通信错误。
对策此消息只是警告消息。
可能会影响作业输出。
Engine error错误信息Engine errorPress说明打印机中发生内部错误。
对策按恢复作业。
HP supplies installed错误信息HP supplies installed说明打印机已从部分采用惠普耗材过渡至完全采用惠普耗材。
对策不需采取任何对策。
Incorrect black错误信息Incorrect black说明黑色硒鼓安装有误。
对策重新安装黑色硒鼓。
Incorrect cyan错误信息Incorrect cyan说明青色硒鼓安装有误。
HP Remote Graphics Software 用户手册说明书

DatasheetHP RemoteGraphics SoftwareRemote access to workstation performanceFeel the freedom of working remotely while still accessing thehigh-performance 3D or media-rich applications you counton. With HP Remote Graphics Software (RGS), you can takeyour graphics-intensive workstation applications wherever yougo. From the remote worker to the road warrior, get completeaccess to the power of your workstations from any computerin any location. Collaborate with colleagues around the officeor around the world! HP provides remote access to workstationperformance with HP RGS standard with every HP workstation.Real-time collaborationShare your workstation screen with multipleusers simultaneously – grant view only or fullinteractive access.Remote workers Consolidate Workstation resources and allow your professionals to connect in from any computer at any location.1Workstation-class mobility Get complete remote access to the full power of your workstation and your professional workstation-class applications when off-site.2Work without boundariesBenefits from Unlimited Remote AccessHigh quality imageHigh performance compression enables real-time visualization for graphic-heavy applications.New in 6.0!Expand the reach of remote workstation access with the massive reduction in required bandwidth Advanced video compressionfor RGS connections.New in 6.0!Improved WAN performance with adaptive network analysis, packet loss protection, congestion HP Velocitydetection and wi-fi acceleration.Windows and LinuxEnjoy cross-platform access with support for both of these desktop environments.Open GL and Direct XHP RGS offers full 3D graphics API support for workstation-class performance.Application independentRGS sends pixels not data. So regardless of what application you’re using, RGS just works.Many to oneAccess one or many workstations with Directory Mode using a single sign-on.Multiple displays with resolutionHP RGS auto-sets resolution and multi-display settings to match the receiver’s system.3and layout matchingRemote USBVirtually attach a USB device to a remote system with local control and access.4No extra hardwareThis software-only solution allows deployment without additional infrastructure costs. And itsFREE on HP Personal Workstations.1Internet access required.2Performance dependant on network latency and image frame content.3Match display layout not supported on Linux. Resolution matching on Linux may require additional X-server setup.4 Not all USB devices supported. Remote USB not supported on Linux Sender . See user guide for list of supported USB devices.Tech specsSupported operating systems• Windows XP SP3, 32-bit, x64• Windows 7 Professional• Windows 8 Professional• RHEL v5.2-v6.3• SLED 11 SP2HP RGS 6.0 system requirements Sender and Receiver systems require 1.5 GHz or greater processor with SSE2 multi-mediainstruction extension. 32-bit color display adapter and 512 MB minimum RAM. Recommended system requirements• Sender system graphics: nVidia Quadro 2000 or better.• Driver: 305.29 or greater• Public Internet access required on both sender and receiver sides.• If a proxy is required, Windows system must be set up with manual proxy configuration. PAC andWAPD (automatic configuration script and automatic proxy detection) will not work. Support• /support/rgsCare Packs• HP 1-year 24x7—Phone-in RGS software technical support./product/sku/2600275/mfg_partno/UC267E• HP 1-year 9x5—Phone-in RGS software technical support./product/sku/2600276/mfg_partno/UC268E• 60-Day Trial Licensehttps:///portal/swdepot/try.do?productNumber=RGS52CFor more technical details see:The HP RGS QuickSpecs© Copyright 2012-2013 Hewlett-Packard Development Company, L.P. The information contained herein is subject to change without notice.The only warranties for HP products and services are set forth in the express warranty statements accompanying such products andservices. Nothing herein should be construed as constituting an additional warranty. HP shall not be liable for technical or editorial errors oromissions contained herein.All other trademarks are the property of their respective owners.4AA0-8844ENW, February 2013。
东芝 1.5HP 变频冷暖空调 无线局域网使用说明书
在使用该产品功能之前,请详细阅读该使用说明书并保存好以作将来的参考。
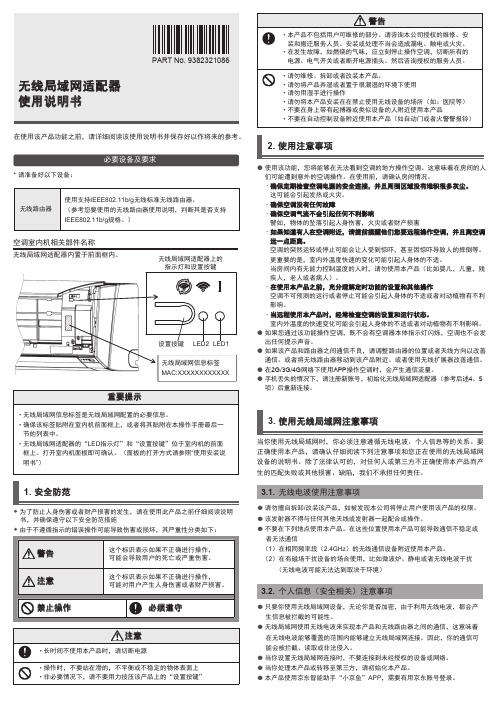
必要设备及要求*请准备好以下设备:空调室内机相关部件名称无线局域网适配器内置于前面框内。
无线局域网适配器上的指示灯和设置按键MAC:XXXXXXXXXXXX1. 安全防范✹ 为了防止人身伤害或者财产损害的发生,请在使用此产品之前仔细阅读说明书,并确保遵守以下安全防范措施 2. 使用注意事项使用该功能,您将能够在无法看到空调的地方操作空调。
这意味着在房间的人们可能遭到意外的空调操作。
在使用前,请确认房间情况。
确保定期检查空调电源的安全连接,并且周围区域没有堆积很多灰尘。
这可能会引起发热或火灾。
确保空调没有任何故障确保空调气流不会引起任何不利影响譬如,物体的坠落引起人身伤害,火灾或者财产损害如果知道有人在空调附近,请提前提醒他们您要远程操作空调,并且离空调远一点距离。
空调的突然运转或停止可能会让人受到惊吓,甚至因惊吓导致人的摔倒等。
更重要的是,室内外温度快速的变化可能引起人身体的不适。
当房间内有无能力控制温度的人时,请勿使用本产品(比如婴儿,儿童,残疾人,老人或者病人)。
在使用本产品之前,充分理解定时功能的设置和其他操作空调不可预测的运行或者停止可能会引起人身体的不适或者对动植物有不利影响。
当远程使用本产品时,经常检查空调的设置和运行状态。
室内外温度的快速变化可能会引起人身体的不适或者对动植物有不利影响。
如果您通过该功能操作空调,既不会有空调器本体指示灯闪烁,空调也不会发出任何提示声音。
如果该产品和路由器之间通信不良,请调整路由器的位置或者天线方向以改善通信。
或者将无线路由器移动到该产品附近。
或者使用无线扩展器改善通信。
在2G/3G/4G 网络下使用APP 操作空调时,会产生通信流量。
手机丢失的情况下,请注册新账号,初始化无线局域网适配器(参考后述4、5项)后重新连接。
3. 使用无线局域网注意事项3.1. 无线电波使用注意事项3.2. 个人信息(安全相关)注意事项当你使用无线局域网时,你必须注意遵循无线电波、个人信息等的关系。
