MCreator系列教程-第七章 食物和燃料
沃玛WPM1000系列电子糖果炸麦机及熔化站操作指南说明书
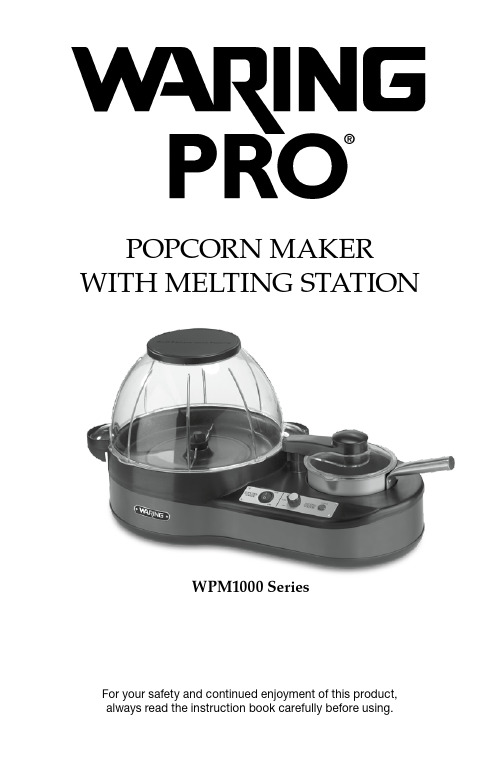
WPM1000 SeriesPOPCORN MAKER WITH MELTING STATIONFor your safety and continued enjoyment of this product,always read the instruction book carefully before using.Table of ContentsImportant Safeguards (2)Special Cord Set Instructions (4)Parts (5)Popping Instructions (6)Popping Chart (6)Popping Additional Batches of Popcorn (7)Melting Station Instructions (8)Tips & Hints (9)Cleaning & Maintenance (10)Recipes (12)IMPORTANT SAFEGUARDS When using any electrical appliance, basic safety precautions should always be taken, including the following:1. R EAD ALL INSTRUCTIONS.2. Always unplug this appliance when not in use.3. Do not use this appliance for other than intended use.4. T he use of accessory attachments not recommendedby Waring may cause injuries.5. K EEP OUT OF REACH OF CHILDREN. Close supervisionis necessary when this appliance is used by or nearchildren.6. D o not allow cord to hang over any edge where a childcan reach it. Arrange cord to avoid pulling, tripping orentanglement.7. D o not operate the appliance with a damaged cord or plug,or after the appliance malfunctions or has been damagedin any manner. Send the unit to the nearest authorizedservice center for examination, repair or adjustment.(ONLY technicians should open up the unit.)8. E XTREME CAUTION must be used when emptyingpopcorn maker. Always empty popcorn over a countertop so that residual hot oil or water will not drip out. Alwaysturn the popping plate away from you when turning.POPPING PLATE SURFACE IS VERY HOT.9. E xtreme caution must be used when moving an appliancecontaining hot oil or other hot liquids. Allow hot parts tocool down before handling or moving the appliance.10. Do not attempt to repair this appliance yourself.11. Do not attempt to pop corn kernels without using oil.12. D o not touch hot surfaces. Always use handles or knobsto operate.13. T his popcorn maker will not shut off automatically.To avoid overheating, add oil and then corn kernels before plugging in and turning on the unit (as specified in thePopping Instructions on page 6).14. D o not use this appliance or any parts on the stovetop,under the broiler, in the freezer, or in the oven.15. Do not use this appliance outdoors.16. T o protect against electric shock, do not immerse cord,plug or other electrical parts in water or other liquids.17. T urn both switches to OFF position before disconnectingpower plug from the wall outlet.18. After popping OR melting, unplug cord from wall outlet.19. N ever leave appliance unattended when it is plugged intoan outlet.20. K eep the cord away from hot parts of the appliance andhot surfaces during operation.21. Do not clean using any abrasive material.22. Never force any part or gear into position.23. D o not operate popcorn maker without popcorn kernels,oil, popping pan and bowl.24. Do not operate the melting station without ingredients.25. A LL PARTS ARE NOT DISHWASHER SAFE. SeeCleaning & Maintenance for instructions.26. U nit should be in the OFF position when the popping panis removed.27. D o not operate your appliance in an appliance garageor under a wall cabinet. When storing in an appliancegarage, always unplug the unit from the electricaloutlet. Not doing so could create a risk of fire, especiallyif the appliance touches the walls of the garage or the door touches the unit as it closes.28. U nplug from outlet when not in use and before cleaning.Allow to cool before putting on or taking off parts, andbefore cleaning the appliance.29. D o not place on or near a hot gas or electric burner,or in a heated oven.30. D o not let cord hang over edge of table or counter,or touch hot surfaces.31. T he melting station is not a fondue pot or deep fryer andis not intended for use with oil.32. D o not operate melting station for more than 10consecutive minutes.SAVE THESE INSTRUCTIONS FOR HOUSEHOLD USE ONLY SPECIAL CORD SET INSTRUCTIONSThis appliance is for 120 volts only and should not be used with a converter.This appliance has a polarized plug (one blade is wider than the other). To reduce the risk of electric shock, this plug will fit in a polarized outlet only one way. If the plug does not fit fully in the outlet, reverse the plug. If it still does not fit, contact a qualified electrician. Do not modify the plug in any way.1. A short power supply cord is provided to reduce the riskof becoming entangled in or tripping over a long cord.2. E xtension cords may be used if care is exercisedin their use.3. If an extension cord is used:A. T he marked electrical rating of the extension cordshould be at least as great as the electrical ratingof the appliance.B. T he longer cord should be arranged so that it will notdrape over the countertop or tabletop where it can bepulled on by children or tripped over unintentionally.CONTROL PANEL*M elting Pot ceramic nonstick coating is PTFE and PFOA free.BEFORE FIRST USEAfter unpacking the Popcorn Maker with Melting Station, follow the Cleaning & Maintenance instructions on page 10. POPPING INSTRUCTIONS1. P lace the popcorn maker and melting station base on aflat, dry surface.2. Place popping plate on base.3. It is not necessary to preheat the unit.4. P our the recommended amount of oil onto the poppingplate (do not add more oil than recommended and do notsubstitute with butter, margarine, shortening or lard, asthese will burn and cause excessive smoking).N OTE: You may use either vegetable, peanut or canola oilfor popping.5. A dd the recommended amount of corn kernels spread outevenly across the popping plate.POPPING CHARTOil CornYieldVegetable, Peanut, Canola KernelsMinimum Batch 1½ tablespoons ½ cup Up to 13 cups Maximum Batch 2 tablespoons 2∕3 cup Up to 20 cups 6. P lace popping bowl on the popping plate, making surehandles of the popping bowl line up and fit into the handles on the popping plate.7. D o not place black lid on the popping bowl during thepopping process. The vents in the popping bowl willallow steam to release during the popping process. 8. P lug into an outlet and turn the unit on by turning therocker switch to the left of the control panel to the POPposition. The stirring rod will rotate as long as the popcorn maker is in the POP position. In approximately 3½ minutes (depending on quantity and type of kernels being popped), the popping cycle will be complete and you will no longerhear the corn popping. Turn the popcorn maker powerswitch to the OFF position and unplug from outlet if you are not utilizing the melting station.N OTE: Do not shake the popcorn maker during thepopping cycle.9. I mmediately after the popping cycle is complete, firmlyplace the black lid on the top of the popping bowl, grasp handles and flip the popping bowl along with the popping plate upside down, turning the popping plate away fromyou (the popping bowl becomes a serving bowl).W ARNING: POPPING PLATE IS HOT. TOUCH ONLYDESIGNATED HANDLES.N OTE: Do not leave popped corn on the popping plateafter the popping cycle has been completed, as thepopping plate surface is still hot and could cause thepopped corn to overcook or burn.10. P opcorn is now ready to serve. Top with salt or followthe melting pot instructions to top popcorn with butter,chocolate, caramel and more!11. F or consecutive batches, wipe popping plate with cleancloth after each batch.POPPING ADDITIONAL BATCHESOF POPCORNIf you plan to pop multiple batches, transfer popcornfrom popping bowl to another serving bowl. Follow steps1 through 11.CAUTION: Popping plate is extremely hot after multiple batches.MELTING STATION INSTRUCTIONSBefore popping popcorn, begin melting the toppings. Typical melting times will vary, as indicated on page 9. You may also wish to pop multiple batches of popcorn while using the melting station.1. R2. Pproperly.3. A4. A5. Ais locked into place.6. Tsection.N OTE: When melting new ingredients, begin by setting the control dial to LOW and adjust if needed. The LOW setting is similar to the LOW setting on a stovetop, while the HIGH setting is similar to the MEDIUM setting on a stovetop.Ingredients Setting Time12 oz. Milk Chocolate Chips LOW4–6 minutes8 tbsp. Butter HIGH3–5 minutes7. T hroughout the melting cycle, look through the lid to seethat ingredients are mixing properly and that nothing hasinterfered with the stirrer.N OTE: During the melting process, ingredients may rise up and interfere with the stirring process. If this occurs, simply realign the stirring arm with the gear assembly and be sure that it is rotating properly.8. O nce melted, remove the melting pot, mix and pour themixture over freshly made popcorn or as described in therecipe section. Use caution when removing the meltingpot from the base as the handle may be hot. Do notuse metal utensils to mix ingredients or scrape excessingredients from the melting pot.9.Turn the melting station control dial to the OFF position. TIPS & HINTS• D o not fill the melting pot with ingredients past the MAX fill line (2 cups).• M elting pot has a nonstick interior, but to further reduce the chance of sticking, spray cooking spray on the bottom of the melting pot and on stirrer.• U se a heatproof spatula to remove/scoop ingredients from the melting pot.• S oak the melting pot with stirrer in hot water immediately after using. Some ingredients, such as caramel, will bestubborn to remove.• S emisweet chocolate chips do not melt well. Use milk chocolate for best results.• S pread ingredients out as evenly as possible in the melting pot for faster results.• D uring the melting process, ingredients may rise up and interfere with the stirring process. If this occurs, simply realign the stirring mechanism and be sure that it is rotating properly.• W hile ingredients are melting, minimize the amount of times that you open the lid, as this will interfere with the stirringmechanism and ingredients may get dislodged. CLEANING & MAINTENANCEBefore performing any cleaning and maintenance operations, be sure that the popcorn maker and melting station controls are both in the OFF position and that the unit is unpluggedand cooled. Clean the popcorn maker and melting pot after every use.NOTE: Do NOT place parts in an automatic dishwasher. Melting pot is NOT dishwasher safe.To Clean the Popcorn Maker1. W ash popping bowl, popping plate and lid in warm, soapywater with a dishcloth or sponge. Rinse thoroughly anddry. Do not use scouring pads or abrasive powder on lid as these could cause scratching.2. C lean surface of base with a damp, soapy dishcloth,sponge or nylon scouring pad such as Scotch BriteCookware Scrub ’n Sponge®. Wipe surface with a dampcloth and dry. Do not use abrasive scouring pads orpowders on nonstick finish, as scratching may occur. After consistent use, the nonstick finish may discolor. To remove discoloration, use a soft cloth saturated with lemon juiceor vinegar and rub over finish. Then wipe the finish with adamp cloth and dry.To Clean the Melting StationDue to the type of ingredients being melted in the melting pot, it is best to empty and clean the melting pot immediately after each melting cycle is complete. Clean all parts by hand as described below. Melting pot and parts are not dishwasher safe.1. R emove the melting pot from the base and remove the lid.CAUTION: Melting pot and base are hot.2. R emove the stirring arm from the lid by releasing the tabson the inside of the lid. Press down and out on the tabsand gently pull the lid off. Wipe the stirring arm clean with a damp, non-abrasive cloth. Do not submerge the stirringarm in water.3. W ash the lid, stirrer and melting pot in the sink with warmsoapy water, being sure to remove all residue. Do not use metal utensils to scrape the inside of the melting pot. NOTE: If you find that ingredients are sticking to the bottom of the melting pot, you can fill the melting pot with hot water upto the max fill line. Replace the melting pot into the base, along with the stirrer, lid and stirring arm properly assembled. Turn the control knob to HIGH and run for approximately 3–5 minutes. This will help to release any stubborn ingredients. After this, repeat steps 1–3 above.4. I f any ingredients drip into the base of the melting pot, usea damp, non-abrasive cloth to wipe clean. CAUTION: HOT.5. B e sure that all parts are thoroughly dry beforereassembling.Any other servicing should be performed by an Authorized Service Representative.RECIPESAll recipes are meant to be eaten with 18 cups of popcorn.Simply Chocolate Popcorn12 oz. (1 bag) milk chocolate chips (or chocolate madefor melting)With the stirrer in place, pour milk chocolate chips into themelting pot.Align the cover with the gear in the housing and the center of the stirrer. Set the control dial to LOW and melt for approximately 5½ minutes. Mix the chocolate and drizzle over popcorn.It is best to clean the melting pot immediately after melting cycle is complete. To clean the melting pot and stirrer, refer to the Cleaning & Maintenance instructions on page 11.Simply Butter Popcorn8 t ablespoons butter (for quicker results useroom-temperature butter)With the stirrer in place, cut butter into ¼-inch pieces and evenly place them in the melting pot. Align the cover with the gear in the housing and the center of the stirrer. Set the control dial to HIGH until the butter is melted. This will take approximately 5 minutes. Turn the control dial to the OFF position. Remove the cover and mix until you have a smooth consistency. Drizzle melted butter over popcorn.It is best to clean the melting pot immediately after melting cycle is complete. To clean the melting pot and stirrer, refer to the Cleaning & Maintenance instructions on page 11.Peanut Butter Popcorn10 oz. (1 bag) peanut butter chipsWith the stirrer in place, pour peanut butter chips into the melting pot. Align the cover with the gear in the housing and the center of the stirrer. Set the control dial to LOW and melt for approximately7 minutes. Turn the control dial to the OFF position. Remove the cover and mix until you have a smooth consistency. Drizzle melted mixture over popcorn.It is best to clean the melting pot immediately after melting cycleis complete. To clean the melting pot and stirrer, refer to the Cleaning & Maintenance instructions on page 11.Sesame Ginger Soy Mix Popcorn½ cup soy sauce3 teaspoons sugar2 teaspoons sesame oil2 teaspoons freshly grated ginger2 tablespoons toasted sesame seedsWith the stirrer in place, combine soy sauce, sugar and sesame oil in the melting pot. Align the cover with the gear in the housing and the center of the stirrer. Set the control dial to HIGH. At the 6-minute mark, turn the control dial to the OFF position, tilt open the cover and add the grated ginger to the melting pot. Replace the top and turn it back to HIGH, allowing it to cook for one more minute. Turn the control dial to the OFF position. Stir the mixture and pour over the popcorn. Toss the popcorn with the sesame seeds so that all the ingredients combine evenly.It is best to clean the melting pot immediately after melting cycle is complete. To clean the melting pot and stirrer, refer to the Cleaning & Maintenance instructions on page 11.Cilantro Herb Buttered Popcorn½ s tick salted butter (for quicker results useroom-temperature butter)½ teaspoon cumin¼ teaspoon garlic powder¼ teaspoon paprika1 tablespoon freshly chopped cilantro½ teaspoon saltWith the stirrer in place, cut butter into ¼-inch pieces and evenly place them in the melting pot, along with the cumin, garlic powder and paprika. Align the cover with the gear in the housing and the center of the stirrer. Set the control dial to HIGH. After approximately 4½ minutes (or once the butter has melted), turn the control dial to the OFF position. Mix thoroughly, and then drizzle the mixture over popcorn, alternating with a sprinkling of the freshly chopped cilantro, making sure to toss so that the popcorn is evenly coated. Once butter mixture is added you can season with ½ teaspoon of salt to taste.It is best to clean the melting pot immediately after melting cycle is complete. To clean the melting pot and stirrer, refer to the Cleaning & Maintenance instructions on page 11.S’mores Popcorn5 oz. milk chocolate chips2 oz. mini marshmallows1½ to 2 c ups chopped graham crackers (or graham cracker crumbs)With the stirrer in place, pour milk chocolate chips into the melting pot. Align the cover with the gear in the housing and the center of the stirrer. Set the control dial to LOW. After approximately 5½ minutes, turn the control dial to the OFF position. Remove cover and mix for smooth consistency. Drizzle melted chocolate over popcorn, and then add the marshmallows and graham crackers. Combine the entire mixture together and let sit until the chocolate has set.It is best to clean the melting pot immediately after melting cycle is complete. To clean the melting pot and stirrer, refer to the Cleaning & Maintenance instructions on page 11.Peanut Butter Bacon Popcorn4 t ablespoons butter (for quicker results useroom-temperature butter)10 oz. (1 package) peanut butter chips16 oz. (1 package) thick-cut bacon, cooked and cutinto bite- size piecesWith the stirrer in place, cut butter into ¼-inch pieces and evenly place them in the melting pot. Then add the peanut butter chips to the melting pot. Align the cover with the gear in the housing and the center of the stirrer. Set the control dial to LOW. After approximately 10 minutes, turn the control dial to the OFF position. Remove the cover and mix until you have a smooth consistency. Drizzle melted mixture over popcorn and sprinkle in the bacon.It is best to clean the melting pot immediately after melting cycle is complete. To clean the melting pot and stirrer, refer to the Cleaning & Maintenance instructions on page 11.Caramel Popcorn2 oz. mini marshmallows¹/³ cup brown sugar3 t ablespoons butter (for quicker results useroom-temperature butter)With the stirrer in place, cut butter into ¼-inch pieces and evenly place them in the melting pot. Then add the mini marshmallows and brown sugar. Align the cover with the gear in the housing and the center of the stirrer. Set the melting station control dial to HIGH. After approximately 10 minutes, turn the control dial to the OFF position. Remove the cover, stir the caramel until it has a smooth consistency and drizzle caramel over the popcorn. Mix with tongs or spoon until caramel is evenly distributed.It is best to clean the melting pot immediately after melting cycle is complete. To clean the melting pot and stirrer, refer to the Cleaning & Maintenance instructions on page 11.Sriracha Popcorn6 t ablespoons butter (for quicker results useroom-temperature butter)¼ cup Sriracha® hot sauce*With the stirrer in place, cut butter into ¼-inch pieces and evenly place them in the melting pot, then add Sriracha sauce. Align the cover with the gear in the housing and the center of the stirrer. Set the control dial to HIGH and cook for approximately 7 minutes. Turn control dial to the OFF position, remove cover and pour evenly over popcorn.It is best to clean the melting pot immediately after melting cycle is complete. To clean the melting pot and stirrer, refer to the Cleaning & Maintenance instructions on page 11.*If desired, cut the heat by adding a little bit of grated Parmesan or crumbled blue cheese to the mixture after the Sriracha and butter have been added to the popcorn.Birthday Party Popcorn3 t ablespoons butter (for quicker results useroom-temperature butter)½ cup sugar1 teaspoon pure vanilla extract2 ounces mini marshmallows¹/³cup rainbow sprinkles1 teaspoon salt (to taste)With the stirrer in place, cut butter into ¼-inch pieces and evenly place them in the melting pot, then add the sugar, vanilla extract and marshmallows. Align the cover with the gear in the housing and the center of the stirrer. Set the temperature knob to HIGH, and after approximately 10 minutes, turn the knob to OFF and remove the cover. Mix well and then evenly coat the popcorn with the marshmallow mixture. While mixing the popcorn mixture, distribute the sprinkles on the popcorn. Salt to taste.It is best to clean the melting pot immediately after melting cycle is complete. To clean the melting pot and stirrer, refer to the Cleaning & Maintenance instructions on page 11.NOTES_______________________________________________________________________________________ _______________________________________________________________________________________ _______________________________________________________________________________________ _______________________________________________________________________________________ _______________________________________________________________________________________ _______________________________________________________________________________________ _______________________________________________________________________________________ _______________________________________________________________________________________ _______________________________________________________________________________________ _______________________________________________________________________________________ _______________________________________________________________________________________ _______________________________________________________________________________________ _______________________________________________________________________________________ _______________________________________________________________________________________ _______________________________________________________________________________________ _______________________________________________________________________________________ _______________________________________________________________________________________ _______________________________________________________________________________________ _______________________________________________________________________________________ _______________________________________________________________________________________ _______________________________________________________________________________________ _______________________________________________________________________________________ _______________________________________________________________________________________ _______________________________________________________________________________________ _______________________________________________________________________________________ _______________________________________________________________________________________ _______________________________________________________________________________________ _______________________________________________________________________________________ _______________________________________________________________________________________ _______________________________________________________________________________________ _______________________________________________________________________________________ ______________________________________________________________________________________________________________________________________________________________________________ _______________________________________________________________________________________ _______________________________________________________________________________________ _______________________________________________________________________________________ _______________________________________________________________________________________ _______________________________________________________________________________________ _______________________________________________________________________________________ _______________________________________________________________________________________ _______________________________________________________________________________________ _______________________________________________________________________________________ _______________________________________________________________________________________ _______________________________________________________________________________________ _______________________________________________________________________________________ _______________________________________________________________________________________ _______________________________________________________________________________________ _______________________________________________________________________________________ _______________________________________________________________________________________ _______________________________________________________________________________________ _______________________________________________________________________________________ _______________________________________________________________________________________ _______________________________________________________________________________________ _______________________________________________________________________________________ _______________________________________________________________________________________ _______________________________________________________________________________________ _______________________________________________________________________________________ _______________________________________________________________________________________ _______________________________________________________________________________________ _______________________________________________________________________________________ _______________________________________________________________________________________ ______________________________________________________________________________________________________________________________________________________________________________ _______________________________________________________________________________________ _______________________________________________________________________________________ _______________________________________________________________________________________ _______________________________________________________________________________________ _______________________________________________________________________________________ _______________________________________________________________________________________ _______________________________________________________________________________________ _______________________________________________________________________________________ _______________________________________________________________________________________ _______________________________________________________________________________________ _______________________________________________________________________________________ _______________________________________________________________________________________ _______________________________________________________________________________________ _______________________________________________________________________________________ _______________________________________________________________________________________ _______________________________________________________________________________________ _______________________________________________________________________________________ _______________________________________________________________________________________ _______________________________________________________________________________________ _______________________________________________________________________________________ _______________________________________________________________________________________ _______________________________________________________________________________________ _______________________________________________________________________________________ _______________________________________________________________________________________ _______________________________________________________________________________________ _______________________________________________________________________________________ _______________________________________________________________________________________ _______________________________________________________________________________________ _______________________________________________________________________________________。
pidcad使用手册
深圳市维远泰克科技有限公司 版权所有 严禁非法复制
PIDCAD 用户手册
目录
概 述 .............................................................................4
第一章 PIDCAD 软件特点 ..............................................................5
第六章 工具条使用说明.............................................................. 14
一. 打开工具条 ................................................................................................................................... 14 二. 关闭工具条 ................................................................................................................................... 14 三. 移动工具条 .................................................................................................. 14
第七章 PIDCAD 菜单介绍 .............................................................15
《工人物语7:王国之路》食物物资生产循环详解

《工人物语7:王国之路》食物物资生产循环详解以下是我观察到的现象, 和我的推导结果, 推导过程太长, 就不写了.首先是我统计的工人物语7所有单位工作速度和跑步速度(目测估算值, 仅供参考):以1个仓库的正面宽度为距离单位上的1格, 以1个仓库的占地为面积单位上的1格:跑步速度(经过实践, 道路升级只提升工人的速度, 对军人等没有影响)高级道路每秒1格普通道路每秒0.5格工作周期建材生产线植树人 60秒伐木工 30秒锯木厂 30秒食物生产线养猪场 60秒猎人 60秒屠宰场 30秒渔夫 60秒麦田 30秒磨坊 30秒面包房 30秒矿藏生产线所有矿 30秒熔炼 30秒烧煤 30秒军事生产线养马 60秒商业生产线牧羊 30秒科技生产线啤酒 30秒其他水井 15秒所有民居 30秒注意这里不包含完成一个工作周期后工人到仓库放物资和拿物资的时间, 请自己根据工人的跑步时间判断最终消耗的时间;一. 从这张表可以得出的结论有:1. 香肠(高级食物)的生产:1) "猎人+屠宰场"模式- 如果不给猎人食物, 2个猎人才能供应1个屠宰场, 总产出只有1个香肠- 如果给猎人高级食物:- 1个猎人60秒可以供应1个屠宰场3个肉, 消耗1个香肠- 1个屠宰场60秒要消耗2个肉, 产出2个香肠(不算自己用的)- 总产出为每60秒生产1个香肠, 1个肉- 由此我们得到结论- 2个猎人都供应高级食物, 可以支持2个屠宰场, 每60秒可以产出2个香肠, 2个肉;- 除非1个猎人捕3个猎点, 否则猎物一定会断档, 所以猎场模式是一个中期循环, 没有长期效益;- 猎物耗尽后,拆除屠宰场, 猎人小屋取消食物供应, 只保留1个猎人作为后备产肉点;2) "养猪+屠宰场"模式- 养猪的产出更稳定, 经过实践, 在运输距离最小化的情况下, 1个给香肠的养猪场可以长期稳定地支持3个屠宰场运作;- 每60秒产出5个香肠, 消耗2个小麦, 2桶水;- 需要提供1口水井, 以及至少1片麦田, 注意麦田需要大约3格(3个仓库的面积)的空间耕作;- 实际操作中考虑到运输距离, 麦田的生产周期可能要35秒到40秒, 所以要2个麦田;- 注意这个模式需要至少8个香肠的初期储备, 否则会提示香肠不足;- 如果做2个养猪场, 供应6个屠宰场, 考虑到占地问题供应线不可避免地会拉长, 最后只能勉强实现对5个 屠宰场的供应, 一个60秒循环大约可以产出8个香肠, 也算很好了;养猪模式的主要问题是占地面积太大, 但产出也很可观:每分钟固定产出8个香肠带来的是:- 每分钟可以多生产2个武器;- 同时可以多生产2个金币;- 每分钟可以多生产4个煤块;- 每分钟可以多生产4个木材;- 每分钟可以多削4个模板;- 每分钟可以多生产4个铁块;- 每分钟可以多生产4个面包;- 这样一圈折腾完, 每分钟你还能另外积累下1个香肠.2. 面包和鱼的生产:1) 如果给渔夫香肠, 一个渔夫60秒可以产出3条鱼, 消耗1个香肠;注意如果没有科技的话, 渔点是一次性资源;2) 如果给面包房香肠, 一个面包师60秒可以产出6个面包, 消耗1个香肠;但是面包房需要配套的生产线, 包括一个麦田, 一个磨坊;总体来说普通食物的生产比高级食物的生产更难安排加速, 因为不像屠宰场那样可以通过"自产自用"节省一个资源, 所以可以考虑在冲科技的时候专门消耗一个香肠的产出来换成面包;3. 伐木:1) 理论上一个伐木工造成的破坏必须由2个植树人种树;2) 不能种田的地方也不能种树, 在荒地里放一个植树屋只会不停地看到感叹号.3) 能种树的地方就能种田.4) 所以可以把树砍完, 或者用声望解锁的技能把树全部摧毁, 然后把空地拿来种田.4. 从原料到终端产品, 尽可能集中在一个领地内生产, 比如铸剑场要设在有铁矿的地方, 铸币厂要设在有金矿的地方, 举个例子:一个领地有少量的树和猎物, 有一个金矿, 其他都是荒地:1) 造2个森林小屋, 第一个附1猎场, 1伐木场, 给香肠, 第二个附2植树屋;2) 造1个山脉小屋, 附1个金矿, 1个烧煤厂, 1个切换成地质学家的金矿;3) 造1个贵族民居, 附3个屠宰场, 1个铸币厂, 给香肠;4) 1猎场供应下屠宰场的工作效率达不到100%, 但是每分钟产出4个额外的香肠还是可以做到的,这4个香肠我们用来增加原木和金币的产量;5) 整个循环可以持续到猎物断档, 之后可以摧毁一个屠宰场和一个猎人小屋, 再把铸币厂, 屠宰场和烧煤厂切换成应需生产;6) 空间够的话可以另起一个山脉小屋和森林小屋, 山脉小屋全部用地质学家, 森林小屋出伐木场和锯木厂;7) 空间不够也没关系, 直接在已有的建筑上修改附属建筑就可以了;8) 这样整个领地就从金币产地转型成了建材产地;[pagesplitxx]二. 其他心得:1. 鼠标生产点上会有一个"Efficiency", 初始是50%, 这个的意思是过去的1000秒里工人有多少秒在工作, 90%就代表有10%的时间工人没在工作, 我们的目标是让每个生产点都100%工作;2. 搬运工一次最多搬3件东西;3. 如果指定仓库收集某样物资(仅限顶级仓库), 那么仓库的工人会主动出去搬物资回来, 但仅限于附近的仓库有货时;4. 如果仓库只对应一个生产点, 比如一个磨坊, 那么搬运工会努力保证这个仓库里至少有足够生产点工作2次的原材料(磨坊的话就是2份小麦), 这是放在搬运工最高优先级的任务之一;5. 在任何一条生产线满负荷运转之前, 先积累一些生产所需的物资, 这样可以避免刚开始满负荷运转的时候出现物资不足;三. 接下来是我从实践经验中得出的结论, 但还没有把这些结论重新运用到实践中去, 欢迎大家测试之后反馈结果1. 一个推导出来的结果:远程运输, 单位时间内运到的物资数量, 取决于运输线上各个仓库中, 相互间距离最长的那2个仓库;2. 由此进一步假设, 如果给一个生产点进行远距离供货, 比如给另一块领地的矿场提供高级食物, 那么:如果只有2个搬运工(1次搬6个肉), 给3个矿场搬运食物, 那么必须保证工人在途中每2个仓库之间往返(一来一去)的时间加起来不超过30秒(30秒后), 也就是说单程不超过15秒, 仓库间距最长不能超过7格(7个仓库的距离)3. 最后的结论是:1) 在合理规划建筑之后, 在人口可承受的范围内, 尽可能多造仓库, 仓库间距离越近越好;2) 如果有两个仓库之间距离特别长, 并且中间没有其他仓库, 那么这2个仓库都需要升级, 仓库间的道路也需要升级, 否则这2个仓库就会成为运输线上的薄弱环节, 限制你整条运输线的效率;3) 只要仓库间距合理, 连续运送物资的状态下(比如要运输60个物资):- 第1份物资的送达时间取决于起点仓库和终点仓库之间的距离;- 后续物资的送达时间则等于物资经过运输线上两个间距最长的仓库之间所用的时间;- 所以占领有木材和石头的领地后一定要就地建立生产线, 避免从很远的地方运材料, 耽搁新领地的建设;4) 主干道尽量升级, 缺石头可以派6个地质学家去挖一个存量为40的矿, 100%出石头;四. 最后说一句:理论总是很美, 实践总是很累, 花了一整天来写这篇文章, 觉得有用的朋友就顶一下吧, 多谢了!更新1:- 经过反复测试, 1个猎人在零距离运输的情况下, 可以勉强解决3个屠宰场的肉供应, 但达不到100%运转, 运转率大概是90%;- 就地解决肉肠供应线是最理想的情况, 但现实中有些领地空间小到连房子都盖不起, 这种情况下只能将这块领地作为原料供应点, 多起仓库来保证运输了;- 如果无法就地解决肉肠供应, 远程运输肉肠不可避免地会有效率上的降低, 这种情况下对长期生产的产业, 比如制衣, 比如保证有数量溢出的屠宰场供应肉肠, 比如3个屠宰场供应2个裁缝铺, 并且途中要保证运输效率;- 有大片森林的领地很多, 但有大片绿地的就很少, 所以可以有规划地进行毁林造田的道路, 在后期将猎人小屋摧毁转型成肉肠生产地;更新2:1. 士兵和商人可以通过中立地区, 将军可以通过中立地区撤退, 但是三者都不能通过敌占区.2. 不论是手动点撤退还是在战斗中被击败, 将军都会撤退到本次战斗前的出发地;3. 所以如果你的部队朝着一个方向突出太远, 结果被对手攻占了后方重要交通枢纽的话...4. 就会发生杯具...部队无法补充到将军那里, 将军也无法撤退到有兵营的领地...于是活活被困死在一块小地皮上...具体做法往下看5. 首先要让敌人放松警惕, 红圈是我军行动的出发地;6. 等待敌人进军偏远地区, 这里是蓝圈标注的地区, 如果我军一直紧逼在敌军领地旁边, 注意如果敌军是不会转向去进攻他处的;7. 然后迅速攻下中间的领地, 直到黄圈标注的地区, 这里是交通枢纽, 也是我们选定的伏击地点;8. 白圈圈出的几块领地, 右下方3座城构成了一个三角, 我们现在攻占了三角的左下角;9. 敌军这时候已经从偏远地区回援, 击败敌军, 敌人的将军就会沿原路撤退到白圈的右下角;10. 不要追击, 派另一个将军占领白圈顶角的领地, 这样就完成封锁了;11. 电脑被封锁以后不会出新的将军, 所以军事上就等于废掉了, 如果是和人打的话这些时间可以留1个将军带1矛兵封堵, 大部队迅速攻击其他领地;为什么要这么麻烦?1. 我军是外线作战, 部队补充困难, 巩固新占领地也很困难;2. 敌军是内线作战, 左上方就是首都, 很容易补兵, 如果打败敌军之后放任敌方的将军逃回, 在我军攻城的时候敌军很可能再次纠集部队来干扰, 一旦攻城失败, 进入长期作战, 对我军不利;更新3:经过实证,升级科技之后,1个伐木工对应1个植树工就可以实现可持续发展,具体没精力研究了。
【MineCraft】IndustrialCraft中文教程

工业 mod 介绍
申明:本人也是新手一个,只是把这几天的探索整合一下,方便刚刚接触 此 mod 的朋友,可能会有很多的漏洞和不完整之处,如有不对,请大家指出。 以下是我的主观体会:
工业时代,你需要使用各种新型设备来建设你的世界,当然,能源问题和资源问题是 必须考虑的。
以下是一个图解:
材料
工业 mod 中新增了很多新材料,通过这些材料,你可以进一步合成各种工业 mod 中的物品。
下面来介绍下各种发电设备:
•
常规发电机通过消耗煤炭等燃料发电。
•
水力发电机通过流动的水流发电,必须是流动的水通过电机才行。
•
风力发电机通过风能进行发电,注意风向不是一直不变的哦~
•
地热发电机通过岩浆发电(牛逼不)。
•
太阳能发电机个人认为最实用的发电机,只需要有阳光就行。(雨天就杯具
了··)
•
核反应堆发电效率是最高的,通过钨棒作为原料。(福岛啊福岛,好呀吗好地
方~)
•
钨棒是核反应堆的原料,通过冶炼钨获得。
将充电电池放入发电机可为其充电,没有电池进行充电时,发电机会向外辐射电能,此 时需要电缆进行传输,连接到用电器上。
Q:为什么我连接上了电缆用电器却不工作?
A:用电器需要一定电量启动,而在这过程中是不能使用用电器,需要等一等。(说 明书上的附录里有说明)
个人比较喜爱太阳能发电机,这里有一篇心得真正的最优太阳能摆放方法 (没有更好这是最好的了,有存档有图有真相)。
所有机器都必须要电力支持,你可以用电池供给或直接接上电缆
电池供电示意。电池必须先充满电。剩余电量那栏,会随着设备的工作而逐渐消 耗,雷电标志的红色会渐渐褪去。(电缆供电只要一直持续供电,剩余电量雷电 标志不会褪色~)
《这是我的战争》食物合成表一览

多个配方 三明治可以添加的东西 起司、培根、牛扒、肉饼、卷心菜、番茄、猪扒、芹菜 调料列表 加在菜上面可以提升心情和交易价值。 盐、番茄酱、肉酱、奶油(仅限蛋糕)、漂白水(角色使用后第二天会显 示自杀身亡,崩溃才能用)、花生酱、蜂蜜、黄油 蛋糕 需要一块奶油,一块面包,一块牛奶,4个鸡蛋。 交易价值高,能给4个人食用。 蔬菜汤 能给4个人食用。 土豆2个,芹菜1个,西兰花一个 培根番茄意大利面 番茄酱一个,意大利面一个,培根一个,一个燃料。 交易价值等于绷带。 新增食材 甜玉米粒、羊肉、羊排、鱼排、腌椰菜、水果、紫菜、米饭、咖喱、 新增罐头、罐装豆子、罐装牛肉、午餐肉罐头、金枪鱼罐头、沙丁鱼罐 头、罐装甜玉米(打开获得甜玉米粒)、罐装培根番茄意大利面、罐装炒饭 咖喱炒饭 咖喱2个,米饭一个,燃料2个,水2滴。 够两个人吃,可以变满足,交易价值略高于罐头 玉米浓汤 奶油一块,玉米粒1个,5滴水,够3个人喝,提升心情。 交易价值高于霰弹枪。 披萨 3个面包 ,3个培根,2个番茄,一块奶油。 够6个人吃,交易价值高于药品。 寿司
素食咖喱 咖喱2个,米饭一个,土豆2个,西兰花1个。 够3个人吃,可添加心情 咖喱鸡 鸡肉2个,咖喱2个,土豆1个,米饭一个。 够5个人吃,添加心情。 咖喱牛肉 咖喱2个,牛肉2个,米饭伊一个。 够4个人吃,可添加心情。 烧烤起司 起司1个,燃料2个。 新三明治 面包片,需要把面包切片。 可以放进三明治的 培根、火腿、牛肉、猪肉、鱼排、鸡肉、起司、花生酱、蜂蜜、卷心 菜、番茄、番茄酱 不推荐一次加太多。 甜品类 水果蛋糕 水果,面包,鸡蛋,奶油各一个。3个燃料。 够4个人吃,增加心情。 甜甜圈 面包一个,糖3个,奶油1个 燃料3个。 一次做4个,只能半饱,恢复心情。 逗游网——中国2亿游戏用户一致选择的”一站式“游戏服务平台
MCreator系列教程-第二章 导入材质.doc

MCreator系列教程——第二章导入材质
材质是制作MOD的重要组成部分,运用图像来具体的体现出这个物体,使玩家更加清晰易懂的明白你的意思。
但最重要的是,在使用MCreator制作MOD过程中,没有材质无法进行下一步的制作。
(观众:噗!这才是重点吧!)
这是我们今天的主角!
图标名称作用/功能
创建物品/方块材质创建物品/方块材质
导入物品/方块材质导入物品/方块材质
创建防具材质创建防具材质
导入防具材质导入防具材质
导入生物/GUI材质导入生物/GUI材质
导入MCSkin3D生物材质导入MCSkin3D生物材质
运行MCSkin3D 运行MCSkin3D
1.创建材质
我们就长话短说,简单介绍一下创建方块材质吧。
首先点击
MCreator就会打开它自带的无节操谁也看不懂之材质创建器
观众们恕我无能,其实我也不明白这玩意怎么弄- -
2.导入材质
这就是本期介绍的重点,使用程序自带的材质编辑器的编辑器进行编辑,比如Photoshop,画图软件等等之类的,非常方便和实用。
让我们点击
它会提示必须要16X16而且是png格式的材质
然后选择图片,导入。
然后它就会提示你导入到哪里?
如果你的材质是用于方块的,那点击Block
如果你的材质是用于物品的,那点击Item
本章到此结束啦,感谢大家的收看。
另外赠送,无节操材质
将上面那个16X16的图片保存下来就OK了。
EzCad2使用手册
I
版权所有©
EzCad 用户使用手册
3.6 转为曲线 ............................... 20 第四章 绘制菜单 ........................................................................................ 21
EzCad2 用户使用手册
由于软件升级所造成的实际操作方式、功能设置等,如有与本手册不 符之处,以软件为准。
目录
EzCad 用户使用手册
第一章 概述 .................................................................................................. 1 1.1 EzCad2 软件简介 .............................................................................. 1 1.1.1 软件安装 ............................................................................... 1 1.1.2 软件功能 ............................................................................... 1 1.1.3 界面说明 ............................................................................... 2 1.2 本手册说明 ...................................................................................... 3 1.2.1 内容安排 ............................................................................... 3 1.2.2 其他声明 ............................................................................... 3
屏通人机界面软件操作手册快速入门版
屏 通 人 机 界 面
软件操作手册 快速入门版0目 Nhomakorabea录
第一章 PM Designer触控大师软件简介...........................................................................................3 1.1 软件功能介绍 ..............................................................................................................................3 1.2 触控大师的安装...........................................................................................................................5 1.3 软件界面和语言选择 ...................................................................................................................8 1.4 新项目的建立...............................................................................................................................9 1.5 菜单和工具栏介绍 .....................................................................
M C合 成 表

M C合成表合成后合成前输入»输出使用介绍木材木头用作建筑材料,可以制作成许多东西物品。
任何形式的树块,都会拿到木头。
棍子木材可以合成火把,箭头,标志,梯子,围栏,处理工具和武器。
火把棍子+煤(或木炭)用于创建光。
也可以融化雪和冰。
物品合成台木材创建3x3的合成台炉鹅卵石可以冶炼矿物。
箱子木材用于存储。
将两个箱子排在一起有双倍的容量。
合成后合成前输入»输出使用介绍铁块金块钻石块青金石块铁金钻石青金石(染料)使用铁,金,钻石,蓝宝石合成可以摆设也可以储存建造的时候也可以加入使用。
萤石萤石粉用于创建光明。
可以融化雪与冰,可在水下也可以使用。
羊毛线作为建筑材料,可以使用染料着色。
这个合成是不建议的,因为羊毛,可以很容易地从羊获得。
TNT炸药火药+砂用于引起爆炸。
合成以后名称合成物品名称输入»输出使用介绍斧头棍子+木材或鹅卵石或铁或黄金或钻石用于砍木材相关的块,比手工快。
除了【木头半砖】镐棍子+木材或鹅卵石或铁或黄金或钻石用来挖矿石块,矿石,石头制品。
铲子棍子+木材或鹅卵石或铁或黄金或钻石用于挖泥土,草,沙,砾石,粘土块和雪比手快。
只可以用铲子来挖雪球。
石头木材鹅卵石砂岩砖石砖用于长的楼梯。
在顶部放上同样的砖块,将创建一个正常大小的双板块,木头半砖也可以放火。
锄头棍子+木材或鹅卵石或铁或黄金或钻石用于耕地,农场必用。
打火机铁+大=打火石制造火,发光桶铁用来【存放和运输】水,熔岩和牛奶。
指南针铁+红石带玩家找到出生点。
地图指南针+纸创建地区的卫星图片可以原来指引方向。
手表黄金+红石显示太阳和月亮的位置,测定时间。
钓鱼杆棍子+线用于捕鱼。
也可以用来拉小怪和其他实体。
剪刀铁用于收集树叶,草,藤蔓和羊毛。
拿羊毛的速度比手还快。
板楼梯木材砖鹅卵石石砖幽冥砖用于紧凑型楼梯。
雪块雪球作为建筑材料使用。
用于存储粘土球,或粘土块粘土作为建筑材料使用。
砖(块)粘土砖作为建筑材料使用。
石砖石头作为建筑材料使用。
人教版化学九年级上册第七单元课题2《燃料和热量》PPT课件
讨论:使燃料充分燃烧考虑的因素
有哪些?有什么意义?
1、燃烧时要有足够多的空气
2、燃料要与空气有足够大的接触面积
若燃烧不充分:产生的热量少, 浪费资源,同时产生大量的一氧化碳等 物质会污染空气。
快乐检测:
1.在我过农村,利用沼气可解决生活用燃料问题。沼 气的主要成分是( B) A.O2 B.CH4 C.H2 D.CO2 2.下列化工产品中,属于石油加工产品的是( A.煤气 B.柴油 C.煤焦油 D.煤气
2.甲烷的化学性质
——可燃性(点燃前先验纯) 实验现象:
①明亮的蓝色火焰;
②烧杯内壁有水雾;
③杯壁上澄清石灰水变混浊;
④放出热量。
CH4 + 2O2===CO2 + 2H2O
(明亮并呈蓝色)
点燃
注意:在点燃甲烷前也要检验 纯度 甲烷的爆炸极限为:4-15%之 间。
甲烷是最重要的矿物燃料,我国是 最早利用天然气的国家。在明朝就 有记载。
生活中经常使用的燃料有煤、石油 和天然气,我们常称它们为化石燃料。 因为它们都是由古代生物的遗骸经 一系列复杂变化而形成的。化石燃料是 不可再生能源。
1、煤的形成及其组成的主要元 素是什么? 煤是由古代植物遗体埋在地层下, 并在地壳中经过一系列非常复杂的 变化而形成的。
其主要成 分是碳元素, 还含有少量H、N、S、 O等元素及 无机矿物。
B
)
3.下列变化过程属于化学变化的是(
D
)
A.分离液态空气制氧气
B.分馏石油制汽油
D.将煤炼制成
C.制糖工业中用活性炭脱色制白糖 煤气
4.人类生活需要能量。下列能量主要由化学变化产 生的是( D ) A.电熨斗通电放出的热量 B.电灯通电发出的 光 C.水电站利用水力产生的电能 D.液化石油气燃烧 放出的热量 5.下列有关木炭、一氧化碳、甲烷燃烧的说法正确 的是( C ) A.燃烧时发生的都是化合反应 B.燃烧室都有蓝色 火焰 C.燃烧后都有CO2生成 D.点燃前都要检 查纯度
创造与魔法牛排食谱

创造与魔法牛排食谱
魔法牛排食谱
材料:
- 4块厚牛排
- 盐和胡椒适量
- 2汤匙橄榄油
- 4瓣大蒜,切碎
- 2汤匙新鲜迷迭香叶,切碎
- 2汤匙新鲜百里香叶,切碎
- 2汤匙牛油
- 2杯蘑菇,切片
- 1杯红酒
- 1杯牛肉高汤
- 2汤匙面粉
指导步骤:
1. 将牛排均匀地撒上盐和胡椒,轻轻按压使其沾附。
让牛排在室温下回暖至少30分钟。
2. 加热橄榄油在一个平底锅中,用中高火。
当油热了之后,将牛排放入锅中,每一边煎2分钟,直到两边都呈金黄色。
然后,用锡纸包裹好的牛排,放入烤箱中以150°C预热15分钟。
这样可以让牛排更加嫩滑。
3. 同时,加热牛油在另一个平底锅中,用中火。
加入蒜末,迷迭香和百里香,并搅拌至香味四溢。
4. 加入蘑菇片,并快速翻炒2分钟,直到变软。
5. 在锅中加入红酒和牛肉高汤。
调至中小火,煮沸约5分钟,然后将酱汁倒入搅拌机中,用高速搅拌,直到变得顺滑。
然后,在搅拌时逐渐加入面粉,直到酱汁变稠。
6. 将酱汁倒回锅中,继续加热,直到酱汁煮沸,并变得更浓稠。
这将是你的牛排酱。
7. 取出烤箱中的牛排,静置几分钟。
然后,用刀切开,将牛排和酱汁分装在盘子上。
8. 用蘑菇装饰牛排,并撒上迷迭香叶和百里香叶,即可享用你的魔法牛排。
提示:
可以配以烤蔬菜或意大利面搭配食用,增加色彩和口感的层次感。
此食谱也适合与红酒搭配品尝,增添美味。
食品加工操作单元

1.层流区 Re 2300
2.临界区 230 R 0e4000
3.光滑管紊流区 Re 4000
8
4.过渡区
Re
22.2
d
7
5.粗糙管紊流区:粗糙度起决定性作用。
1-4 远程阻力计算
1-4 局部阻力
阻力系数法
hf
u2 2g
1-4 局部阻力
当量长度法
hf
le
d
u2 2g
1-5 管路计算与流量测量
第一章 流体力学基础
本章学习目的与要求
通过学习本章内容,学生能够完成食品工厂设 计的管道设计与计算工作,能够完成泵与风机 的选型配套工作。
要求学生掌握实际流体与理想流体的区别,掌 握流体流动中各能量平衡方程的区别并能熟练运 用这些方程解决问题。
掌握流体参数的测量原理和方法,掌握流动阻 力计算方法和泵性能的计算方法。
管路计算
例题
解题步骤说明
❖ 确定流动状态 ❖ 确定沿程阻力系数和局部阻力系数 ❖ 计算能量总损失 ❖ 根据流动能量方程确定所需要的动力
1-5 流量测量
测速管(皮托管)
1-5 流量测量
孔板流量计
1-5 流量测量
文丘里流量计
p1
p1
p2
v1
v1
v2
Fig 1 Venturi flow
1-6 液体输送设备
1-3 流体流动能量平衡
稳定流动热力体系的概念
稳定流动体系的能量平衡
✓ 什么是稳定流动? ✓ 注意各参数间的差异
E1p1V1mgZ1mu12 2QW
E2
p2V2
mgZ2
mu22 2
几种常见的流体流动—换热器
qh2h1
我的世界食品工艺(DOC)

FoodCraft 说明书欢迎阅读FoodCraft 说明书。
本说明书将会介绍本Mod的玩法和特色。
目录:一、机器二、零件及材料三、植物四、食物辅料介绍五、主食介绍六、其他食品介绍七、饮料介绍FoodCraft 机器欢迎来到FoodCraft的世界,我在这里将介绍本Mod的机器。
一、碾磨机本机器是万物的开始,你第一个机器就必须是他。
合成配方:右键可以打开碾磨机GUI,左边的槽放需加工的物品,下面放燃料(煤、木炭、木板等),然后等待物品加工完后,就可以从右边拿出加工后的物品了。
碾磨机合成配方:二、平底锅本机器需要机器下方有火焰(即火方块)或灶炉。
合成配方:右键可以打开平底锅GUI,左边的槽放需加工的物品,机器下方点火,然后等待物品加工完后,就可以从右边拿出加工后的物品了。
平底锅合成配方:三、锅本机器需要机器下方有火焰(即火方块)或灶炉。
合成配方:右键可以打开锅GUI,上方4个格为放主料,下方8个格为放作料。
本机器需要在机器下方点火才能运作。
锅合成配方:四、高压锅同其他机器一样,是本Mod的核心. 合成配方:右键可以打开高压锅GUI,左上方3个格放需烹饪的物品,左下方带有”水桶”标志的格放水桶或纯净水。
中下方的格为燃料格。
右上的格为物品取出格。
本机器需要有水2升(两桶水,每做一个物品减少2升水)或以上,机器最多能容纳8升水。
并且有燃料的情况下运作。
高压锅合成配方:五、油炸机同其他机器一样,是本Mod的核心. 合成配方:右键可以打开油炸机GUI,左上方1个格放需烹饪的物品,左下方带有”油”标志的格放花生油。
中下方的格为燃料格。
右上的格为物品取出格。
本机器需要有油2升(两桶油,每做一个物品减少2升油)或以上,机器最多能容纳8升油。
并且有燃料的情况下运作。
油炸机合成配方:六、菜板同其他机器一样,是本Mod的核心. 合成配方:右键可以打开菜板GUI,左上方1个格放菜刀(警告!菜刀请务必最后放置!),中间3个格放物品。
sufer操作手册
§2 基本图形的绘制..................................................................................................................6
2.1 建立XYZ数据文件..............................................................................................................6 2.2 数据文件的网格化(Grid) ..............................................................................................6 2.3 绘制和设置等高线..............................................................................................................7
§3 图形绘制的技巧................................................................................................................17
MCreator系列教程-第一章 界面与操作
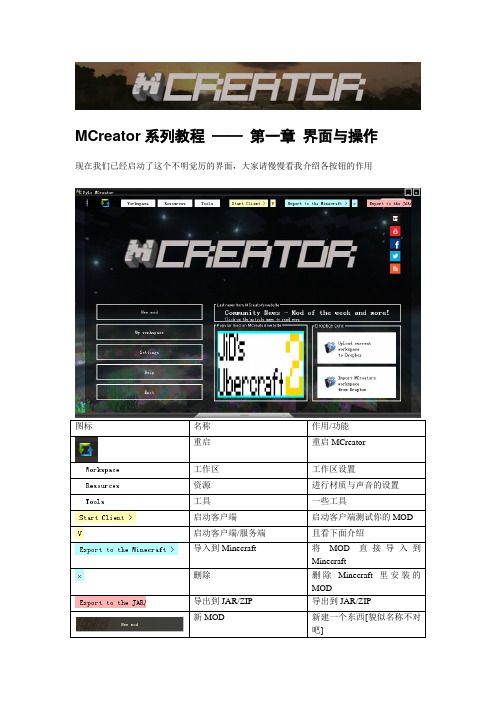
MCreator系列教程——第一章界面与操作现在我们已经启动了这个不明觉厉的界面,大家请慢慢看我介绍各按钮的作用图标名称作用/功能重启重启MCreator工作区工作区设置资源进行材质与声音的设置工具一些工具启动客户端启动客户端测试你的MOD启动客户端/服务端且看下面介绍导入到Minecraft 将MOD直接导入到Minecraft删除删除Minecraft里安装的MOD导出到JAR/ZIP 导出到JAR/ZIP新MOD 新建一个东西[貌似名称不对吧]我的工作区打开我现在设定的工作区[用于编程,类似于eclipse]设置账号的登陆与方块等ID的起始设定帮助打开MCreator的Wiki退出退出MCreator控制台[鼠标按住上拉打开] 查看控制台信息,分析MOD出错的地方。
Workspace图标名称作用/功能导出工作区mcr文件导出工作区mcr文件[类似于源代码,可以和别人分享]导入mcr文件导入mcr文件工作区选择选择不同的工作区,区分开别的MOD。
重命名当前工作区重命名当前工作区Resources图标名称作用/功能创建物品/方块材质创建物品/方块材质导入物品/方块材质导入物品/方块材质创建防具材质创建防具材质导入防具材质导入防具材质导入生物/GUI材质导入生物/GUI材质导入MCSkin3D生物材质导入MCSkin3D生物材质运行MCSkin3D 运行MCSkin3D添加自定义声音添加自定义声音添加自定义录制声音添加自定义录制声音添加自定义背景音乐添加自定义背景音乐Tools图标名称作用/功能创建配方创建合成/熔炼配方编译编译你的MOD编译源代码重新编译Minecraft的源代码运行工具作用不清楚,类似于CMD打开控制台打开控制台初始化MCreator 初始化MCreator开启Minecraft客户端测试开启Minecraft客户端测试开启Minecraft服务端测试开启Minecraft服务端测试Name 名称Block 方块Item 物品Tool 工具Food 食物Armor 防具Plant 植物Mob 生物Biome 生态群系Dimension 传送门/世界Gun 枪械Achievement 成就TX Block 基础方块Recipe 合成/冶炼Fuel 燃料Command 指令Creative tab 创造标签Fluid 流体Structure gen 建筑物Basic GUI 简单GUI Key Bind 按键OK 完成Cancel 取消这里我们就只介绍Block/Item ID’sName 作用/功能Starting ID for blocks (158+x) 设置方块的起始IDStarting ID for items (152+x) 设置物品的起始IDStarting ID for achievement (26+x) 设置成就的起始IDStarting ID for biomes (22+x) 设置生态群系的起始ID Starting ID for mobs (120+x) 设置生物的起始ID设置好了按Save保存本章教程到这里就结束了,更多关于界面与操作的信息请看一.五章下期将介绍:贴图与材质。
MCreator系列教程-第七章 食物和燃料
MCreator系列教程——第七章食物和燃料在上一章中,我们给MOD添加了工具和防具,接下来我们要继续给MOD添加一些有趣的东西——食物和燃料这次我们要添加的有:压缩饼干(Compressed biscuits)(我承认这是苏打饼干,本来是想做压缩饼干的!!!)和超科学煤(Super Science coal)。
我们来先做压缩饼干,首先点击New mod,选择Food[食物],然后名字输入Compressed biscuits。
点击OK进入下一步。
将材质君放进去,然后下一步。
Name 名称作用Name in GUI 在GUI上显示的名字在GUI上显示的名字Stack size 堆叠大小所谓的一组的最大数量Nutritional value 饱食度吃一个增加的鸡腿数量[1=半个鸡腿]Is food of dogs?这个食物是给狗吃的吗?把这个食物给狗吃Has effect of potion?是否拥有药水效果吃了会给予药水效果Potion type 药水效果类型吃了给予的药水效果,需勾选上面选项Food animation 吃的时候的效果Eat=吃,drink=喝,声音不同。
说实话看到这个食物是给狗吃的吗我突然想做一个狗饼干。
这就是我们的狗饼干……阿不!压缩饼干的设置啦。
然后点击Next进入到下一步。
事件继续无视,如果要看关于事件请看扩展二,点击Next下一步。
然后设置我们的压缩饼干的合成公式。
直接弄一个无序合成也可以。
然后就完成了我们的压缩饼干的制作啦。
接下来我们开始制作我们的超科学煤。
但是如果要制作燃料,需要先制作一个物品(作为燃料),这个同学们都学过了是吧。
合成公式如上,一个超科学球+一个煤。
同理,New mob,名字,选择Fuel[燃料]我们看到上面有个Power of fuel,这就是燃烧值的意思,计算方法是这样的。
它是以tick[游戏刻,即20tick=1s]为单位,而烧制每个物品的时间为10秒,故1600的燃料值可以烧8个物品。
GameMaker标准中文教程
入门篇GameMaker是一个很容易就可以开发你自己的电脑游戏的软件。
这一章介绍你想制作的游戏所需要的知识。
后面的章节会进一步讨论更多的功能,怎么发布你的游戏和介绍GameMaker的内建语言GML。
关于GameMaker的初级使用在下面的页面有介绍。
GameMaker制作原理在研究GameMaker之前,最好先摸索一下GameMaker的制作原理吧。
用GameMaker 做游戏都放在一个或多个房间里。
(房间是一个平台,不是3D的,但可以包含仿3D的图片。
)在这些房间里,你可以放置物体(可以在GameMaker里定义)。
经典的物体有墙、运动的小球、主角、怪物等。
有些物体(像墙)是静止的什么都不做。
另一些物体(例如主角)会响应玩家的输入(键盘、鼠标、手柄)而运动。
或者物体跟物体间也会产生某些反应。
例如,当主角遇到怪物的时候,主角会死亡。
在GameMaker中,物体是最重要的。
首先,大多数物体都需要一些图象来让它们显示于屏幕上。
这种图象叫做精灵图象。
一个精灵图象不单可以是一张图片,可以是一套动作的图片集,用于表达物体的动作效果。
这样,就可以达到像走动,转动等效果。
在游戏中,精灵图象在某些特殊的物体里是可以改变的。
(这样当物体向左或向右走时可以显示不同的图象。
)你可以在GameMaker里制作自己的精灵图象,或者导入一些图片素材。
物体会发生某些事。
这些事叫做事件。
当事件发生时,物体会执行相对应的动作。
物体可以发生很多事件并可以响应很多不同的动作。
例如,当物体创建时会发生一个创建事件。
(说精确一点是,物体中的某个具体对象被创建;物体相当于一个类,而对象就是类的一个抽象。
)例如,当一个球被创建时你可以给它一些运动动作,这样球就可以运动了。
当两个球相遇时,会发生碰撞事件。
在碰撞事件发生时,你可以给球一个动作,让它停止或者反向运动。
或者也可以产生音效。
GameMaker可以让你定义一些声音。
当玩家敲击键盘时,会产生一个键盘事件,物体会执行相应的动作,例如移动。
MCreator事件系列教程-第一章 事件的基础知识
MCreator事件系列教程-第一章事件的基础知识事件是一个很重要的组成部分,没有它,游戏就不会充满活力,例如我们在制作方块的结尾不是有关于事件的设定吗?事件是一种很有用的东西,我们大家一起来共同学习它。
事件分有两种类型,一种是普通事件,一种是触发事件。
从时间上来分,普通事件是在触发事件发生之后才发生的,也就是说,触发事件是普通事件的前提。
看起来比较难解释,触发事件是玩家在游戏操作过程中触发到事件,那么就执行普通事Name 作用普通事件——需要一定的触发条件出发,由触发条件事件操作Custom Code 自定义事件,如果你懂JA V A你可以自己制作事件Remove block 删除方块Add block 添加[放置?]选定的方块Explode 爆炸,你可以设置威力Strike Lightning 闪电[天谴]Spawn entity 生成实体Resize 重新调整方块大小[啥鸡巴玩意?]Print text 弹出信息Deal damage 造成伤害Set light value 设置亮度值Set resistance 设置抗暴值Play sound 播放声音Open browser 打开浏览器Play music 播放音乐Spawn particle 生成粒子Redstone power 发出或停止发出红石能量Set time 设置时间Set spawn 设置出生点Variable set 设置变量Spawn gem 生成方块Open crafting GUI 打开GUIAchievement get 给予成就Switch dimension for entity 传送到不同的世界降低物品耐久Damage Item触发条件事件——触发普通事件的事件,重要组成部分当方块被添加时[什么意思?]When block addedWhen neighbor block changes 当临近的方块更新时更仔细的内容请看事件(二)(我认为看到这里应该会得差不多了吧)可能没有事件二,请耐心等待。
我的世界枫树Mod烹饪和食物详细介绍
我的世界-枫树Mod烹饪和⾷物详细介绍
我的世界枫树M o d是⼀个农业系的模组,以枫树为主题,加⼊了新的植物,矿物,装饰⽅块,⾷物及烹饪⽅式等等。
今天⼩编为⼤家带来的是烹饪和⾷物的详细介绍。
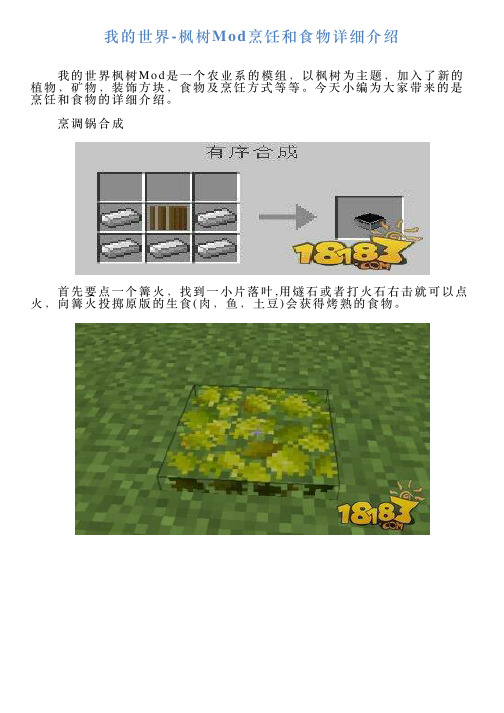
烹调锅合成
⾸先要点⼀个篝⽕,找到⼀⼩⽚落叶,⽤燧⽯或者打⽕⽯右击就可以点⽕,向篝⽕投掷原版的⽣⾷(⾁,鱼,⼟⾖)会获得烤熟的⾷物。
然后在⽕上架锅,就能看见提⽰已经有热源了。
红⾊部分为烹饪配⽅,可通过<>切换,配⽅中的蓝⾊/黄⾊框代表需要⽔/油。
蓝⾊部分⽤于添加⽔或者油,粉⾊部分显⽰是否有热源,绿⾊是放⼊烹饪原料的地⽅,黄⾊部分则是成品和进度条。
你很有想法,学做菜吧
其他⼀些⾷物及原料合成(虾与鱿鱼来⾃墨鱼掉落)
更多详情见N E I模组。
⾷物特效:
⿇婆茄⼦抗⽕3m i n
咖喱酱抗⽕3m i n
咖喱饭4颗⼼回复
咖喱猪排饭4颗⼼回复
蘑菇浓汤2颗⼼回复
⾼丽菜卷2颗⼼回复
涂酱的杂样煎饼4颗⼼回复
奶油烤菜8颗⼼回复
特殊篝⽕:
点燃落叶会产⽣篝⽕,左侧是打⽕⽯点燃的,颜⾊偏⽩。
右侧是燧⽯点燃的,偏橙⾊。
后者若在圆⽯,沙⼦,砂砾,⿊曜⽯,粘⼟块,灵魂沙上⽅燃烧,会有⼏率将它们变为⽯头,砂砾,沙⼦,煤矿,砖块,菌丝。
同时⽕焰熄灭消失。
逗游⽹——中国2亿游戏⽤户⼀致选择的”⼀站式“游戏服务平台。
- 1、下载文档前请自行甄别文档内容的完整性,平台不提供额外的编辑、内容补充、找答案等附加服务。
- 2、"仅部分预览"的文档,不可在线预览部分如存在完整性等问题,可反馈申请退款(可完整预览的文档不适用该条件!)。
- 3、如文档侵犯您的权益,请联系客服反馈,我们会尽快为您处理(人工客服工作时间:9:00-18:30)。
MCreator系列教程——第七章食物和燃料
在上一章中,我们给MOD添加了工具和防具,接下来我们要继续给MOD添加一些有趣的东西——食物和燃料
这次我们要添加的有:压缩饼干(Compressed biscuits)(我承认这是苏打饼干,本
来是想做压缩饼干的!!!)和超科学煤(Super Science coal)。
我们来先做压缩饼干,首先点击New mod,选择Food[食物],然后名字输入Compressed biscuits。
点击OK进入下一步。
将材质君放进去,然后下一步。
Name 名称作用
Name in GUI 在GUI上显示的名字在GUI上显示的名字
Stack size 堆叠大小所谓的一组的最大数量Nutritional value 饱食度吃一个增加的鸡腿数量[1=半
个鸡腿]
Is food of dogs?这个食物是给狗吃的吗?把这个食物给狗吃
Has effect of potion?是否拥有药水效果吃了会给予药水效果
Potion type 药水效果类型吃了给予的药水效果,需勾选
上面选项
Food animation 吃的时候的效果Eat=吃,drink=喝,声音不同。
说实话看到这个食物是给狗吃的吗我突然想做一个狗饼干。
这就是我们的狗饼干……阿不!压缩饼干的设置啦。
然后点击Next进入到下一步。
事件继续无视,如果要看关于事件请看扩展二,点击Next下一步。
然后设置我们的压缩饼干的合成公式。
直接弄一个无序合成也可以。
然后就完成了我们的压缩饼干的制作啦。
接下来我们开始制作我们的超科学煤。
但是如果要制作燃料,需要先制作一个物品(作为燃料),这个同学们都学过了是吧。
合成公式如上,一个超科学球+一个煤。
同理,New mob,名字,选择Fuel[燃料]
我们看到上面有个Power of fuel,这就是燃烧值的意思,计算方法是这样的。
它是以tick[游戏刻,即20tick=1s]为单位,而烧制每个物品的时间为10秒,故1600的燃料值可以烧8个物品。
而下面则是选择可以烧的物品。
我们把我们刚刚加入的超科学煤给放进去。
然后设定燃
烧值。
本期教程到这里就结束了,感谢大家的支持,我们下期再见。
