Grantech艾讯宏达工控机产品介绍
Grantech艾讯宏达工控机产品介绍汇编审批稿

G r a n t e c h艾讯宏达工控机产品介绍汇编YKK standardization office【 YKK5AB- YKK08- YKK2C- YKK18】Grantech艾讯宏达工控机产品介绍艾讯宏达科技有限公司,本着“来自台湾,立足中国”的思路不断发展,致力于为广大用户提供高品质工控产品和完善解决方案,并逐渐成长为工控机领域国内领先的专业制造商之一。
所谓IPC(Industrial Personal Computer)即“工控机”是一种即基于PC总线增强加固型的工业电脑,它可以作为一个工业控制器在工业环境中可靠运行。
其主要的组成部分为工业机箱、无源底板及可插入其上的各种板卡组成,如CPU卡、I/O卡等。
并采取全钢机壳、机卡压条过滤网,双正压风扇等设计及EMC技术以解决工业现场的电磁干扰、震动、灰尘、高/低温等问题。
工控机广泛应用于工业自动化、智能交通、轨道交通、金融自动化、多媒体播放、网络安全、电力、通讯、监控、医疗、军工等领域。
公司主要产品有:工业计算机(IPC)系列、嵌入式工业计算机(EPC)系列、嵌入式工业计算机(UFO)系列、无风扇工业平板电脑(UFP)系列、一体化工作站系列。
工业计算机(IPC)系列有:全长CUP卡:、工业母板、工业机箱与一体化工作站、工业底板、原装整机、工业便携机。
嵌入式工业计算机(EPC)系列:Mini-ITX、寸嵌入式主板、EPIC嵌入式主板、防火墙主板。
嵌入式无风扇计算机(UFO)系列:超薄型UFO6355H系列、通用型UFO6366H系列、扩展型UFO6377系列。
无风扇工业平板电脑(UFP)系列:寸平板电脑、寸平板电脑、15寸平板电脑、17寸平板电脑。
公司为客户提供的工控机产品多达数百种型号规格,详细资料请登录公司网页和公司产品手册。
以下是公司部分机型为您作详细介绍:工业计算机(IPC)参数配置表型号SYS7190VGA SYS71838VGA图样CPU LGA775, Intel Core 2 Extreme / Core2 Quad / Core 2 Duo /Pentium Dual-Core / Pentium EE / Pentium D /Pentium 4 / Celeron 400 with 45nm LGA775,Core2Duo/PentiumDual-Core/Pentium EE/PentiumD/Pentium 4/ Celeron DCPU主频最大支持最大支持前端总线800/1066/1333 MHZ 667/800/1066MHZ芯片组英特尔 Q35+ICH9DO 英特尔 945GC+ICH7最大缓存12MB L2 6MB L2最大内存DDR2 4GB DDR2 4GBBIOS AMI AMI显示芯片英特尔GMA 3100 英特尔GMA 950显存最大共享384MB 最大共享224MB显示接口VGA VGA网口1个或2个英特尔82573L千兆网卡1个或2个英特尔82573L千兆网卡声卡Realtek ALC662(可选) Realtek ALC662硬盘接口4*SATAII 1*IDE/2*SATAII磁盘阵列RAID 0/1/5/10 无软驱接口无无并口1*SPPE/ECP/EPP 1*SPPE/ECP/EPP串口1*RS232/422/485 1*RS232/422/485USB 6*USB 6*USBDigital I/O 无无红外线接口无无板载SSD 无无看门狗1~255秒1~255秒电源类型AT/ATX AT/ATX操作温度0℃----60℃0℃----60℃相对湿度10%----90%10%----90%尺寸(长*宽)338mm*122mm 338mm*122mm工业计算机(IPC)参数配置表型号SYS71943VGA SYS7193VGGA图样CPU LGA775,IntelCore2Quad/Core2 Duo/Celeron with 65nm/45nm Intel Core 2 Duo / Pentium D / Pentium 4 / Celeron DCPU主频最大支持前端总线800/1066/1333MHZ 800/1066/1333MHZ芯片组英特尔 G41+ICH7 英特尔 Q35+ICH9DO最大缓存12MB L2 12MB L2最大内存DDR3 8 GB DDR2 4GBBIOS AMI Phoenix-Award显示芯片英特尔GMA X4500 英特尔GMA 3100显存最大共享1024MB 最大共享384MB显示接口VGA VGA/24 BIT LVDS网口1*Realtgek RTL8110S 千兆网卡1个英特尔82573L千兆网卡声卡Realtek ALC662 Realtek ALC262硬盘接口4*SATA/1*IDE 4*SATAII磁盘阵列无RAID 0/1/5/10软驱接口无无并口1*SPPE/ECP/EPP 1*SPPE/ECP/EPP串口1*RS232 1*RS232/422/485 1*RS232 1*RS232/422/485USB 8*USB 6*USBDigital I/O 4-in 4-out 无红外线接口1 无板载SSD 无无看门狗1~255秒1~255秒电源类型AT/ATX ATX操作温度0℃----60℃0℃----60℃相对湿度10%----90%10%----90%尺寸(长*宽)338mm*126mm 338mm*126mm工业底板参数配置表型号GTB6022/6 GTB6022/8 GTB6022/13L GTB6022/14 图样插槽总数6 8 13 14PICMG 2 2 2 2PCI 4 4 4 4ISA 2 4 8 9电源接口AT/ATX AT/ATX AT/ATX AT/ATX尺寸132mm*258mm 220mm*260mm 316mm*260mm 317mm*260mm 可搭配机箱壁挂式机箱壁挂式机箱4U机箱4U机箱订购信息6槽PICMG工业底板8槽PICMG工业底板13槽PICMG工业底板14槽PICMG工业底板工业底板参数配置表型号GTB6023/5PE GTB6023/14GPE 图样插槽总数 5 14PICMG 1 1PCI-E*16 1 1PCI-E*4 0 0PCI-E*1 1 4PCI 2 7SATA接口 2 2USB接口 4 4电源接口24+4PIN ATX 24+4PIN ATX尺寸107mm*328mm 317mm*328mm可搭配机箱壁挂式机箱4U机箱订购信息5槽工业底板14槽PICMG工业底板工业计算机(IPC)工业母板参数配置表型号SYM76901VGGA SYM76836VGA-5P图样CPU LGA775 for Core 2 Quad/Core 2Duo/Pentium Dual/Celeron processor LGA1155 for Intel? 32nm Sandy Bridge i3/i5/i7 processor,FSB 5GT/sCPU主频最大支持最大支持前端总线800/1066/1333 MHZ 533/800MHZ芯片组英特尔 Q35+ICH9R 英特尔 945GC+ICH7 最大缓存12MB L2 2MB L2最大内存DDR2 8GB DDR2 4GBBIOS Phonenix-Award Phonenix-Award显示芯片英特尔GMA 3100 英特尔GMA 950显存最大共享384MB 最大共享224MB显示接口VGA/DVI-D VGA网口2* Realtek RTL8111B千兆网卡1* Realtek RTL8111B千兆网卡声卡Realtek ALC885 Realtek ALC662硬盘接口1*IDE/6*SATAII 4*SATAII磁盘阵列RAID 0/1/5/10 无软驱接口 1 1并口1*SPPE/ECP/EPP 1*SPPE/ECP/EPP串口2*RS232 2*RS232USB 12*USB 8*USBDigital I/O 4-IN 4-OUT 无红外线接口 1 1板载SSD 无无扩展槽1*PCI-E*16 5*PCI 1*PCI-E*16 5*PCI看门狗1~255秒1~255秒电源类型AT/ATX AT/ATX操作温度0℃----60℃0℃----60℃相对湿度10%----90%10%----90%尺寸(长*宽)ATX305mm*244mm ATX305mm*244mm工业计算机(IPC)工业机箱参数配置表型号GT6145 GT6150图样系统主板工业长板或工业母板工业长板或工业母板驱动空间2个寸,2个寸驱动空间2个寸,2个寸驱动空间底板支持13槽、14槽工业底板支持13槽、14槽工业底板风扇2个80mm风扇1个120mm风扇电源1个ATX标准2U PS/2 电源1个ATX标准2U PS/2 电源前面板1个电源开关,1个复位开关,2个USB电源指示灯,硬盘指示灯1个电源开关,1个复位开关,2个USB 电源指示灯,硬盘指示灯,系统电源显示。
艾雷斯科技工控产品

产品 5:ACS-4051VE
产品名 称: 产品型 号: 产品类 别:
ACS-4051VE
ACS-4051VE 嵌入式 PC104 板 卡系列
驱动下载
产品特点
● 网络接口:集成 1 个 INTEL 82562ET 和 1 个 82559ER(可选) ● 10/100M 自适应以太网控制器,RJ-45 接口
产品 3:ACS-6599
产品名 称: 产品型 号: 产品类 别:
ACS-6599 ACS-6599 网安主板
驱动下载
产品特点
采用 Intel? E7520 +6300ESB 芯片组 >支持 双 Intel?Xeon? 64 位处理器 >具备 8DDR2 内存扩展插槽,最大支持 16GB DDR2 400 的双通道内存架构 >具有 8 个 PCI-Express 接口的 Intel 82571EB 千兆位以太网接口 >一个 PCI_E X8 插槽 >一个 PCI_X 插槽 >一个 PCI 扩展槽 >多种存储介质选择:2 个串行 ATA(SATA)通道,2个IDE通道,1 个 Compact Flash (CF)卡插槽, 2 个 SCSI 接口 >支持 1-255 秒软件可编程看门狗计时器 性能参数: 优势: 处理器/高速缓存: 采用 socket604 mPGA 封装的至强处理器。 支持 1-2 颗英特尔? 至强? 处理器, 至强 64 位处理器具备 2MB 大容量二级缓存,支持超 线程 (HT) 技术、英特尔? 64 位内存扩展技术 1 和英特尔增强型 SpeedStep? 技术 2 可 与支持 64 位的操作系统和应用程序兼容;用较低的运作成本降低了功耗。 系统的前端总线 800M,运行频率为 2.8G-3.2G 的英特尔? 至强 64 位处理器。 板载设备: 芯片组:Intel? E7520 北桥芯片组,Intel?6300ESB 南桥芯片组 网络 板载显卡:ATI RAGE XL 显卡,板载 8M 显存 网络:采用 4 个 Intel?82571EB 芯片的 PCI-Express 千兆位以太网控制器 韧体芯片: SST49LF004A 4M bit Flash 芯片 超级 I/O: Winbond W83627 芯片;
迅鹏仪器仪表 二线制回路供电显示器使用说明书
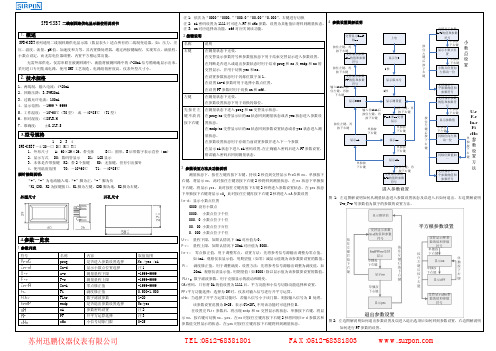
交替显示参数
键
PF的值和参数
显示版本号
符号 输入1111后按
住左键,再按
1秒
下右键
在参数设置状态下用于切换闪烁位。
显示0000
显示测量值
先 按 住 左 在测量状态下进入 prog 和 no 交替显示状态。 键 不 放 再 在 prog/no 交替显示后的 no 状态回到测量状态或者 yes 状态进入参数设
1.概述
2 按键说明
交替显示EndP 和no
上电
SPB-XSBT系列通用二线制回路供电显示器(数显表头)适合所有的二线制变送器,如:压力、差 名称
说明
压、温度、流量、pH 值、加速度和力等。其内置微处理器,通过两按键编程,实现零点、满量程、 右键
在测量状态下无效。
按住左键,再
按
按下右键
住
小数点设定,而无需电位器调整。内置平方根运算功能。
输入非1111后 按住左键,再
按住左键,再 按下右键
按下右键 ProG和no交替
按
按下右键
置状态。 在 endp/no 交替显示后的 no 状态回到参数设置状态或者 yes 状态进入测 量状态。
按住左键,再 按下右键
单独按 下右键
显示
单独按 下右键
住 左 键 后 按
在参数设置状态用于存储当前设置参数并进入下一个参数
3.型号规格
1 234
SPB-XSBT-4/20-□ D□ K□ T□ 1、外形尺寸 A:60×29×26,带壳体
B□:圆形,B 后带数字表示直径(mm)
2、显示方式 D0:数码管显示 D1: LCD 显示
3、本体是否带按键 K2:带 2 个按键 K0:无按键,但有引出插针
艾讯推出全新工业级实时控制器ICO-200

艾讯推出全新工业级实时控制器ICO-200持续致力于研发创新应用计算机平台的领导厂商- 艾讯股份有限公司(AXIOMTEK Co., Ltd.),为网络通讯、工业以及自动化等应用领域设计一系列解决方案;推出全新无风扇工业级远程实时控制器ICO-200。
板载超低功耗的AMD LX800 处理器,该款工业级嵌入式机箱提供智能型远程管理工具(R@Tools),具备实时监控、实时报警、实时维护救援、以及网络安全等强大的功能,通过有线或无线网络传输功能,更可达到高效的监控目的,并为远程管理设计了最佳的监控应用程序,适合应用于无人机房、工厂自动化、工业机械等多个应用领域。
超薄的ICO-200 采用智能型R@Tools 技术,内建实时监控、实时报警、实时维护救援、以及网络安全等强大功能的远程监控管理工具。
一旦遇到偶发的碰撞、过热或断线等意外事件,操作人员可通过控制器、在线查询、分析以及自动通报功能,对故障进行实时处理,将损失降至最低。
由于该机种具备远程管理的功能优势,可有效节省维护的人力成本及时间。
此外,ICO-200 提供非常安全的系统与允许授权的用户,并可透过因特网进行接收与控制。
ICO-200 通过RS-232/422/485 端口、高速USB 2.0 端口、以及局域网络端口等多元化接口,连接不同的控制装置,进行数据的存储,进而分析数据;同时可支持Windows? 与Windows? XPE 等主流的操作系统;主要产品特色-内置无风扇低功耗AMD LX800 处理器-支持远程R@Tools 工具,拥有实时监控、实时报警、实时维护救援、以及网络安全等强大功能-超轻薄迷你机身设计-采用Din 导轨的安装方式-具备CF 卡插槽、存储磁盘、Mini PCI 插槽等接口,易于安装及维护系统-支持Windows? 与Windows®XPE 等主流操作系统-机身尺。
艾讯宏达专题片分镜头脚本
“艾讯宏达”企业形象专题片
项目概述:
客户:艾讯宏达科技有限公司类别:影像专题宣传片
时长:约10分钟制作:电视磁带拍摄、非编、三维特技、特效合成
片名:以客为尊,追求卓越――艾讯宏达时间:2005年1月20日-----2005年2月28日
核心概念:
彰显“以客为尊、追求卓越”的企业精神、一个世界级的工业电脑专业制造商,一个高科技的汇集处,
以及一个新的国际“Non-PC”时代科技中心。
主广告诉求语:
“以客为尊、追求卓越”艾讯宏达。
中国最知名、最专业化的Non-PC产品供应商。
创作调性:
主张鲜明的理性诉求,积极的、数码时尚的、高效的、科技的、完善的、国际化的、气势磅礴的
泛美映画2005年1月。
宏达信诺 HXGE 系列智能网关 软件手册说明书

HXGE系列智能网关软件手册版本:V3.0声明本手册属于宏达信诺及授权许可者版权所有,保留一切权利,未经本公司书面许可,任何单位和个人不得擅自摘抄、复制本书内容的部分或全部。
由于产品版本升级或其他原因,本手册内容有可能变更。
宏达信诺保留在没有任何通知或者提示的情况下对本手册的内容进行修改的权利。
本手册仅作为使用指导,宏达信诺尽全力在本手册中提供准确的信息,但是宏达信诺并不确保手册内容完全没有错误,本手册中的所有陈述、信息和建议也不构成任何明示或暗示的担保。
目录目录 (2)第一章软件手册概述 (5)第二章系统架构及应用场景 (5)2.1. 系统架构 (6)2.2. 基于插件体系的服务架构 (6)2.3. 目前所支持的行业插件列表 (7)2.4. 常用物联网架构 (13)第三章软件目录介绍 (17)3.1. WINDOWS应用程序EXE的功能 (17)3.2. 文件夹说明 (18)第四章快速入门流程 (18)4.1. 采集系统在WINDOWS上运行 (19)4.2. 采集系统在LINUX网关上运行 (19)第五章使用HXGEBuild进行工程开发 (19)5.1. 工程管理 (20)5.1.1. 工程组 (22)5.1.2. 工程 (23)5.1.3. 工程模板 (25)5.2. 配置采集服务 (26)5.2.1. 采集的结构 (26)5.2.2. 创建通道 (27)5.2.3. 创建设备 (31)5.2.4. 创建数据标签 (34)5.2.5. 通道复制 (45)5.2.6. 设备复制 (46)5.3. 配置数据服务 (47)5.3.1. 创建数据服务通道 (48)5.3.2. 创建数据服务标签 (49)5.4. 使用系统变量 (54)5.5. 上传下载 (55)5.5.1 搜索要维护的网关 (56)5.6. 其他辅助功能 (65)5.6.1. 系统参数 (65)5.6.2. 本地运行 (65)5.6.3. 远程监视 (66)第六章使用HXGEView远程监视 (67)6.1. 搜索在线的网关IP (67)6.2. 添加节点 (68)6.3. 更新状态 (68)6.4. 删除节点 (68)6.5. 监视设备信息 (68)6.5.1. 查看采集通道属性 (69)6.5.2. 查看采集通道报文 (69)6.5.3. 查看采集设备数据 (70)6.5.4. 查看数据服务通道报文 (70)6.5.5. 常用工具 (71)6.5.6. 数值设定操作 (73)6.5.7. 查看日志 (73)第一章软件手册概述本手册旨在让使用者详细了解、掌握HXGE系列产品的软件操作方法,其产品系列包括物联网网关产品、工业级正向隔离网闸产品、电力双机热备通讯管理机,以及其他定制性的基于协议转换的软硬件产品。
ach580参数手册
ach580参数手册摘要:一、引言二、ACH580参数概述1.参数分类2.参数功能三、ACH580参数详解1.基本参数a.设备名称b.设备型号c.设备编号d.设备位置2.性能参数a.最大速度b.最小速度c.加速/减速时间d.负载能力3.操作参数a.操作模式b.操作员权限c.故障应对策略d.安全防护设置4.维护保养参数a.保养周期b.保养内容c.故障报警设置d.故障诊断接口四、ACH580参数设置与调整1.参数设置方法2.参数调整步骤3.注意事项五、ACH580参数在日常运行中的应用1.设备运行控制2.设备状态监控3.设备故障排查六、结论正文:一、引言随着现代工业自动化技术的不断发展,设备参数调整与应用已成为企业生产中不可或缺的一部分。
ACH580作为一种高性能的自动化设备,其参数设置与运用显得尤为重要。
本文将详细介绍ACH580参数手册,帮助读者更好地理解和应用ACH580设备。
二、ACH580参数概述1.参数分类ACH580设备参数主要分为四大类:基本参数、性能参数、操作参数和维护保养参数。
2.参数功能基本参数主要用于设备识别;性能参数决定设备运行性能;操作参数关乎设备操作安全性;维护保养参数则是保证设备长期稳定运行的关键。
三、ACH580参数详解1.基本参数(1)设备名称:标识设备唯一性,方便管理。
(2)设备型号:区分设备类型,便于选购配件。
(3)设备编号:便于设备信息化管理。
(4)设备位置:记录设备安装位置,方便现场查找。
2.性能参数(1)最大速度:设备最高运行速度。
(2)最小速度:设备最低运行速度。
(3)加速/减速时间:决定设备加速/减速过程中的平滑程度。
(4)负载能力:设备所能承受的最大负载。
3.操作参数(1)操作模式:设定设备操作方式,如手动/自动。
(2)操作员权限:划分操作员级别,保障设备安全。
(3)故障应对策略:设备发生故障时,自动采取措施。
(4)安全防护设置:预防潜在安全隐患。
GU331A控制器简介Harsen凯讯产品概述测量和显精品资料
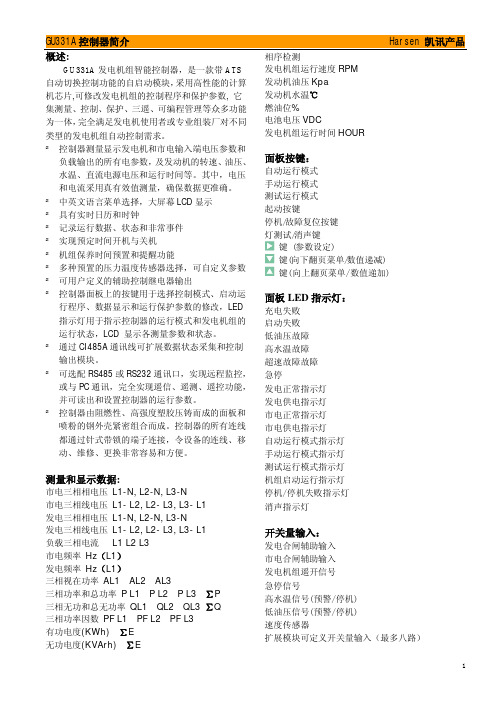
GU331A控制器简介 Harsen 凯讯产品概述:GU331A发电机组智能控制器,是一款带ATS 自动切换控制功能的自启动模块,采用高性能的计算机芯片,可修改发电机组的控制程序和保护参数, 它集测量、控制、保护、三遥、可编程管理等众多功能为一体,完全满足发电机使用者或专业组装厂对不同类型的发电机组自动控制需求。
²控制器测量显示发电机和市电输入端电压参数和负载输出的所有电参数,及发动机的转速、油压、水温、直流电源电压和运行时间等。
其中,电压和电流采用真有效值测量,确保数据更准确。
²中英文语言菜单选择,大屏幕LCD显示²具有实时日历和时钟²记录运行数据、状态和非常事件²实现预定时间开机与关机²机组保养时间预置和提醒功能²多种预置的压力温度传感器选择,可自定义参数²可用户定义的辅助控制继电器输出²控制器面板上的按键用于选择控制模式、启动运行程序、数据显示和运行保护参数的修改,LED指示灯用于指示控制器的运行模式和发电机组的运行状态,LCD 显示各测量参数和状态。
²通过CI485A通讯线可扩展数据状态采集和控制输出模块。
²可选配RS485或RS232通讯口,实现远程监控,或与PC通讯,完全实现遥信、遥测、遥控功能,并可读出和设置控制器的运行参数。
²控制器由阻燃性、高强度塑胶压铸而成的面板和喷粉的钢外壳紧密组合而成。
控制器的所有连线都通过针式带锁的端子连接,令设备的连线、移动、维修、更换非常容易和方便。
测量和显示数据:市电三相相电压L1-N, L2-N, L3-N市电三相线电压L1- L2, L2- L3, L3- L1发电三相相电压L1-N, L2-N, L3-N发电三相线电压L1- L2, L2- L3, L3- L1负载三相电流L1 L2 L3市电频率Hz(L1)发电频率Hz(L1)三相视在功率AL1 AL2 AL3三相功率和总功率P L1 P L2 P L3 ∑P三相无功和总无功率QL1 QL2 QL3 ∑Q三相功率因数PF L1 PF L2 PF L3有功电度(KWh) ∑E无功电度(KVArh) ∑E 相序检测发电机组运行速度RPM发动机油压Kpa发动机水温℃燃油位%电池电压VDC发电机组运行时间HOUR面板按键:自动运行模式手动运行模式测试运行模式起动按键停机/故障复位按键灯测试/消声键键(参数设定)键(向下翻页菜单/数值递减)键(向上翻页菜单/数值递加)面板LED指示灯:充电失败启动失败低油压故障高水温故障超速故障故障急停发电正常指示灯发电供电指示灯市电正常指示灯市电供电指示灯自动运行模式指示灯手动运行模式指示灯测试运行模式指示灯机组启动运行指示灯停机/停机失败指示灯消声指示灯开关量输入:发电合闸辅助输入市电合闸辅助输入发电机组遥开信号急停信号高水温信号(预警/停机)低油压信号(预警/停机)速度传感器扩展模块可定义开关量输入(最多八路)GU331A控制器简介 Harsen 凯讯产品控制继电器输出:油门控制输出起动控制输出直流充电器励磁输出发电机正常运行可定义辅助控制继电器输出(共3路)扩展模块可定义控制继电器输出(最多八路)其它参数:直流工作电源电压范围:12V/24V (8~35VDC连续)操作最大的工作电流:@12V 0.4A , @24V 0.2A交流输入电压:相电压10~300V AC RMS(交流频率≥40 Hz)交流输入频率:3~70HZ(电压≥10V)速度传感器输入频率:最大10000Hz速度传感器输入电压:1~70V AC油门/起动控制继电器输出10A/30VDC辅助继电器输出3A/30VDC运行环境温度-20~50℃储存环境温度-40~80℃典型接线图:负载(3P&N)外型尺寸图:操作面板W205mm×H156mm安装开孔口W186mm ×H137mm厚度D58.5mm(未连线)GU331A 控制器简介 Harsen 凯讯产品前面侧面后面。
台湾宏讯电脑操作说明书

九.模具读取及存储 ..................................................十、参数 .................................................................10-1参数1 .............................................. 10-2参数2 .............................................. 10-3参数3 ..............................................十一、归零资料画面................................................十二、版本/日期/时间设定画面 ............................ 十三、输出入检测...................................... 十四、系统压力检测画面 .................................. 十五、输出/输入检测分配 ................................. 十六、参数表............................................十八、机械手装设使用说明 ..................................... 附件一: ....................................................................一.操作面板使用说明:1-1.萤幕键盘:●键盘使用注意事项:(例如:压力140 ,流量99),游标将停止在该栏内不动,请重新输入。
,重新输入正确资料。
1-2.资料设定的存储:一、,并且满格游标会自动索引到下一个资料栏位。
ach580参数手册

ach580参数手册摘要:一、引言二、ACH580参数概述1.参数分类2.参数设置方法3.参数作用三、ACH580参数详细解析1.基本参数1) 设备名称2) 设备型号3) 设备编号2.功能参数1) 功能模块2) 功能参数设置3) 功能参数示例3.性能参数1) 性能指标2) 性能参数设置3) 性能参数优化四、ACH580参数调试与优化1.调试方法2.调试步骤3.优化策略五、ACH580参数应用案例1.案例一1) 应用场景2) 参数设置3) 应用效果2.案例二1) 应用场景2) 参数设置3) 应用效果六、总结与展望正文:一、引言作为一名职业写手,本文将为您详细解析ACH580参数手册,帮助您更好地理解和应用这款设备。
文章结构如下:首先介绍ACH580参数的概述,接着对ACH580的各项参数进行详细解析,然后讲解如何调试和优化参数,最后通过两个应用案例来说明ACH580参数在实际应用中的重要性。
二、ACH580参数概述1.参数分类ACH580参数可分为基本参数、功能参数和性能参数三类。
2.参数设置方法根据设备型号和功能模块,参照参数手册进行设置。
3.参数作用各类参数分别影响设备的命名、功能模块运行和性能指标。
三、ACH580参数详细解析1.基本参数(1)设备名称:用于标识设备的名称,方便管理。
(2)设备型号:表示设备的型号,便于区分和选购配件。
(3)设备编号:唯一标识一台设备,便于设备档案管理和故障排查。
2.功能参数(1)功能模块:根据设备类型,选择相应的功能模块。
(2)功能参数设置:根据实际需求,设置各功能模块的参数。
(3)功能参数示例:以实际应用场景为例,介绍如何设置功能参数。
3.性能参数(1)性能指标:反映设备的性能水平,如速度、精度等。
(2)性能参数设置:根据设备性能要求和实际工况,设置合适的性能参数。
(3)性能参数优化:针对设备性能瓶颈,提出优化建议。
四、ACH580参数调试与优化1.调试方法根据设备说明书,采用逐步排查法进行调试。
Grantech艾讯宏达工控机产品介绍

G r a n t e c h艾讯宏达工控机产品介绍Revised final draft November 26, 2020Grantech艾讯宏达工控机产品介绍艾讯宏达科技有限公司,本着“来自台湾,立足中国”的思路不断发展,致力于为广大用户提供高品质工控产品和完善解决方案,并逐渐成长为工控机领域国内领先的专业制造商之一。
所谓IPC (Industrial Personal Computer )即“工控机”是一种即基于PC总线增强加固型的工业电脑,它可以作为一个工业控制器在工业环境中可靠运行。
其主要的组成部分为工业机箱、无源底板及可插入其上的各种板卡组成,如CPU卡、I/O卡等。
并采取全钢机壳、机卡压条过滤网,双正压风扇等设计及EMC技术以解决工业现场的电磁干扰、震动、灰尘、高/低温等问题。
工控机广泛应用于工业自动化、智能交通、轨道交通、金融自动化、多媒体播放、网络安全、电力、通讯、监控、医疗、军工等领域。
公司主要产品有:工业计算机(IPC)系列、嵌入式工业计算机(EPC)系列、嵌入式工业计算机(UFO)系列、无风扇工业平板电脑(UFP)系列、一体化工作站系列。
工业计算机(IPC)系列有:全长CUP卡:、工业母板、工业机箱与一体化工作站、工业底板、原装整机、工业便携机。
嵌入式工业计算机(EPC)系列:Mini-ITX、寸嵌入式主板、EPIC嵌入式主板、防火墙主板。
嵌入式无风扇计算机(UFO)系列:超薄型UFO6355H系列、通用型UFO6366H系列、扩展型UFO6377系列。
无风扇工业平板电脑(UFP)系列:寸平板电脑、寸平板电脑、15寸平板电脑、17寸平板电脑。
公司为客户提供的工控机产品多达数百种型号规格,详细资料请登录公司网页和公司产品手册。
以下是公司部分机型为您作详细介绍:工业计算机(IPC)参数配置表型号SYS7190VGA SYS71838VGA图样CPU LGA775, Intel Core 2 Extreme / Core 2Quad / Core 2 Duo /Pentium Dual-Core /Pentium EE / Pentium D / Pentium 4 /Celeron 400 with 45nm LGA775,Core2Duo/PentiumDual-Core/Pentium EE/PentiumD/Pentium 4/ Celeron DCPU主频最大支持最大支持前端总线800/1066/1333 MHZ667/800/1066MHZ 芯片组英特尔 Q35+ICH9DO英特尔 945GC+ICH7最大缓存12MB L26MB L2最大内存DDR2 4GB DDR2 4GBBIOS AMI AMI显示芯片英特尔GMA 3100英特尔GMA 950显存最大共享384MB最大共享224MB显示接口VGA VGA网口1个或2个英特尔82573L千兆网卡1个或2个英特尔82573L千兆网卡声卡Realtek ALC662(可选)Realtek ALC662硬盘接口4*SATAII1*IDE/2*SATAII磁盘阵列RAID 0/1/5/10无软驱接口无无并口1*SPPE/ECP/EPP1*SPPE/ECP/EPP串口1*RS232/422/4851*RS232/422/485USB6*USB 6*USBDigital I/O无无红外线接口无无板载SSD无无看门狗1~255秒1~255秒电源类型AT/ATX AT/ATX操作温度0℃----60℃0℃----60℃相对湿度10%----90%10%----90%尺寸(长*宽)338mm*122mm338mm*122mm工业计算机(IPC)参数配置表型号SYS71943VGA SYS7193VGGA图样CPU LGA775,IntelCore2Quad/Core2 Duo/Celeron with 65nm/45nm Intel Core 2 Duo / Pentium D / Pentium 4 / Celeron DCPU主频最大支持前端总线800/1066/1333MHZ800/1066/1333MHZ芯片组英特尔 G41+ICH7英特尔 Q35+ICH9DO最大缓存12MB L212MB L2最大内存DDR3 8 GB DDR2 4GBBIOS AMI Phoenix-Award显示芯片英特尔GMA X4500英特尔GMA 3100显存最大共享1024MB最大共享384MB显示接口VGA VGA/24 BIT LVDS网口1*Realtgek RTL8110S 千兆网卡1个英特尔82573L千兆网卡声卡Realtek ALC662Realtek ALC262硬盘接口4*SATA/1*IDE4*SATAII磁盘阵列无RAID 0/1/5/10软驱接口无无并口1*SPPE/ECP/EPP1*SPPE/ECP/EPP串口1*RS232 1*RS232/422/4851*RS232 1*RS232/422/485 USB8*USB 6*USBDigitalI/O4-in 4-out无红外线接口1无板载SSD无无看门狗1~255秒1~255秒电源类型AT/ATX ATX操作温度0℃----60℃0℃----60℃相对湿度10%----90%10%----90%尺寸(长*宽)338mm*126mm338mm*126mm工业底板参数配置表型号GTB6022/6GTB6022/8GTB6022/13L GTB6022/14图样插槽总数681314PICMG2222PCI4444ISA2489电源接口AT/ATX AT/ATX AT/ATX AT/ATX尺寸132mm*258mm220mm*260mm316mm*260mm317mm*260mm 可搭配机箱壁挂式机箱壁挂式机箱4U机箱4U机箱订购信息6槽PICMG工业底板8槽PICMG工业底板13槽PICMG工业底板14槽PICMG工业底板工业底板参数配置表型号GTB6023/5PE GTB6023/14GPE 图样插槽总数514PICMG11PCI-E*1611PCI-E*400PCI-E*114PCI27SATA接口22USB接口44电源接口24+4PIN ATX24+4PIN ATX尺寸107mm*328mm317mm*328mm可搭配机箱壁挂式机箱4U机箱订购信息5槽工业底板14槽PICMG工业底板工业计算机(IPC)工业母板参数配置表型号SYM76901VGGA SYM76836VGA-5P图样CPU LGA775 for Core 2 Quad/Core 2Duo/Pentium Dual/Celeron processor LGA1155 for Intel 32nm Sandy Bridge i3/i5/i7 processor,FSB 5GT/sCPU主频最大支持最大支持前端总线800/1066/1333 MHZ533/800MHZ芯片组英特尔 Q35+ICH9R英特尔 945GC+ICH7最大缓存12MB L22MB L2最大内存DDR2 8GB DDR2 4GBBIOS Phonenix-Award Phonenix-Award显示芯片英特尔GMA 3100英特尔GMA 950显存最大共享384MB最大共享224MB显示接口VGA/DVI-D VGA网口2* Realtek RTL8111B千兆网卡1* Realtek RTL8111B千兆网卡声卡Realtek ALC885Realtek ALC662硬盘接口1*IDE/6*SATAII4*SATAII磁盘阵列RAID 0/1/5/10无软驱接口11并口1*SPPE/ECP/EPP1*SPPE/ECP/EPP串口2*RS2322*RS232USB12*USB 8*USBDigital I/O4-IN 4-OUT无红外线接口11板载SSD无无扩展槽1*PCI-E*16 5*PCI1*PCI-E*16 5*PCI看门狗1~255秒1~255秒电源类型AT/ATX AT/ATX操作温度0℃----60℃0℃----60℃相对湿度10%----90%10%----90%尺寸(长*宽)ATX305mm*244mm ATX305mm*244mm工业计算机(IPC)工业机箱参数配置表型号GT6145GT6150图样系统主板工业长板或工业母板工业长板或工业母板驱动空间2个寸,2个寸驱动空间2个寸,2个寸驱动空间底板支持13槽、14槽工业底板支持13槽、14槽工业底板风扇2个80mm风扇1个120mm风扇电源1个ATX标准2U PS/2 电源1个ATX标准2U PS/2 电源前面板1个电源开关,1个复位开关,2个USB电源指示灯,硬盘指示灯1个电源开关,1个复位开关,2个USB电源指示灯,硬盘指示灯,系统电源显示。
Ashcroft 产品说明书

224Consult factory for guidance in product selection Phone (203) 385-0217, Fax (203) 385-0602 or visit our web site at Process Code R ange & Temp.(2) Vac. 0-600 1000 2000- Material Limits in.H 2O psi psi 3000 °F psi B-Buna N 0 to 150 ● ● ● ●V-Viton 20 to 300 ● ● ●T-Tefl on 0 to 150● ● ● ●S-SS (6)(9)0 to 300 ● ● P -Monel (6)0 to 300 ● ●D escription/Maximum Electrical Ratings Code UL/CSA Listed10A,125/250 VacH General purpose 1/2A, 125 Vdc 1/4A, 250 VdcHermetically sealed J switch, general 11A, 125/250 Vac purpose5A, 30 VdcCodeSwitch ElementsSingle D ual UL/CSA Listed(PS) (PD) K (4) KK Narrow deadband 15A, 125/250 Vac F (4)FF Sealed environment 15A, 125/250 Vacproof15A, 125/250/480 VacG (5) GG General purpose 1/2A, 125 Vdc 1/4A, 250 VdcHermetically sealedP (3) PP switch, narrow 5A, 125/250 VacdeadbandHermetically sealedJ JJ switch, general 11A,125/250 Vacpurpose 5A, 30 Vdc Select: PPD N7 GG B 25 XK3 30 psi 1. Function: 2. Enclosure: 4. Actuator Seal: 5. Pressure Port: 6. Options (see pages 229-230): 7. Pressure Range (see page 227):Pressure and Differential Pressure Switches, Watertight and Explosion-Proof Enclosure, P-Series • S ingle or dual independently adjustable setpoints meet all setpoint requirements • U L, CSA listed lis (7)• Fixed or adjustable deadband • Readily available • S tandard pressure connection materials:Pressure psi ranges - 316L stainless steel Differential pressure ranges - Nickle plated brass (8)Pressure and differential inches of water ranges - Epoxy coated carbon steel This top-of-the-line Ashcroft oft pro- pr ®cess switch series includes many state-of-the-art features for safety and reliabil-ity in virtually all pro-cess applications.• D ie cast aluminum enclosure is standard with NEMA 4X (weather-proof, corrosion resistant) NEMA 7 (explosion-proof enclosure Class I, Div. 1 & 2, Groups B, C & D and Class II, Div. 1 & 2, Groups E, F & G). Dual chamber design allows set-point changes to be made safely even with power connected.PPA - Pressure control, single setpoint, adjustable deadband PPD - Pressure control, two independently adjustable setpoints, fi xed deadband PPS - Pressure control, single setpoint, fi xed deadband PDA - Differential pressure control, single setpoint, adjustable deadbandPDD - Differential pressure control, two inde- pendently adjustable setpoints, fi xed deadband PDS - Differential pressure control, single setpoint, fi xed deadbandN7 - N EMA 7/9, IP65, watertight, corrosionresistant and explosion proof Div. 1 & 2 See pages 229-230 See page 227 Order Code 25 14⁄ NPT Female 1⁄4 NPT Female and 06 12⁄ NPT Male Combination 07 12⁄ NPT Female 3. Switch Element: HERMETICALLY SEALED SWITCH We recommend hermetically sealed switch elements for improved reliability. The hermetically sealed switch provides uncompromising contact protection in harsh or corrosive environments. Features:• U L-recognized component, guide WSQ2, File E85076• A ll-stainless steel welded construction LOOK FOR THIS AGENCY MARK ON OUR PRODUCTS 1. These items are wetted by process fl uid.2. A mbient operating temperature limits –20 to 150°F , all styles. Setpoint shift of ±1% of range per 50°F temperature change is normal. Switches calibrated at 70°F reference.3. Estimated dc rating, 2.5A, 28 Vdc (not UL listed).4. Estimated dc rating, .4A, 120 Vdc (not UL listed).5. Not UL listed at 480 Vac.6. Available on pressure only.7. Refer to Option Table.8. O rder Option XUD, stainless steel process connection.9. On differential switches, stainless steel is available in 15, 30, 60 and 90 psid ranges only. Includes Tefl on O-ring and 316 SS connection.。
弘讯M8A英文说明书

PX255Standard HMI Controller & Software ManualStandard VersionTechmation Co., Ltd.9F, No.529 Chung Cheng RoadHsin-Tien City, Taipei HsienTaiwan, R.O.C.M8A HMI Controller & Software Manual, Standard VersionTechmation Co., Ltd. 2 PrefaceThis Controller & Software Manual for the Techmation M10C HMI Series (Standard Version) consists of two parts, the Operations Manual and the Reference Manual.Please refer to the Operations Manual for exact instructions on how to set up and program the machine‟s clamping unit, injection unit, production monitor and the printing and networking functions.For a detailed explanation of the HMI panel and panel keys as well as for the various HMI display screens please use the Reference Manual.Warning: For safety precautions and general machine operation and maintenance you must refer to the machine manufacturer‟s manual. This is essential to avoid serious injury to the machine operator and to prevent damage to the machine. Changing the machine setup and settings without proper care and knowledge can lead to damage to the machine.Liability: Techmation assumes no liability in any form for machine operation in connection with the use of this manual. It is your responsibility to ensure safe machine operations. Never operate the machine without proper tra ining and instructions. Read both manuals first (the machine manufacturer‟s manual and Techmations‟s Controller & Software manual) before attempting any operation of the machine .Please note that the information in this manual is subject to change without notice.For any further information, spare parts & services, documentation & product updates, general inquiries etc., please contact us at the following address:Techmation Co., Ltd.9F, No. 529, Chung Cheng RoadHsin-Tien City, TaipeiTaiwan, R.O.C.Phone: +886-2-2218 1686Fax: +886-2-2218 1766E-mail: t echtp@We hope you will find this manual helpful for your machine operations. In order to help us improve our products and documentation we encourage you to provide us with any feedback and suggestions for improvement you might have.This document remains our property and must not be copied without our written consent. Its contents may neither be made known to third parties nor be used for non-approved purposes. This manual is for internal use only.Copyright © 2000 by Techmation Co., Ltd., Taipei, Taiwan, R.O.CM10C HMI Controller & Software Manual, Standard VersionTable of ContentsPreface (2)1.Operations Manual (5)1.1Clamping Unit Setup (5)1.1.1Mould Height Adjustment (5)1.1.2Mold Closing and Mold Protection (6)1.1.3Mold Opening (7)1.1.4Ejector (8)1.1.5Air Blast (9)1.1.6Core(s) (10)1.2Injection Unit Setup (11)1.2.1Nozzle/Injection Unit (11)1.2.2Injection and Hold Pressure (12)1.2.3Charge (Plasticizing) and Suck-Back (13)1.2.4Heater (14)1.3Production Monitor Setup (15)1.4Other Functions and Settings (17)2.Control Panel (HMI) (18)2.1Control Panel and Keys (19)2.1.1Machine Control Panel Keys (19)2.1.2Machine Operating Mode Keys (20)2.1.3Mold Height Adjustment (20)2.1.4Manual Operation Mode Keys (21)2.1.5Mold Adjustment Keys (25)2.1.6Data Entry Keys (26)2.1.7Numerical Keys (26)2.1.8Text Input Keys (26)2.1.9Input Dialog Box Confirm/Cancel Keys (27)2.1.10Screen Selection Keys (28)2.2HMI Display (28)2.2.1Screen Selection (29)2.3Control Panel (29)2.4Clamp Settings (31)2.4.1Clamp open/close setting (31)2.4.2Clamp set (32)2.4.3Clamp PAR1 (33)2.5Injectio (34)2.5.1Injection Settings (34)2.5.2Inject Set (35)2.5.3Injection Settings Profile (36)2.5.4Injection Settings Profile (38)2.6Ejection (39)2.6.1Ejector Settings (39)2.6.2Air Blast Settings (40)2.7Core Settings (40)2.7.1Core A/B (41)2.7.2Core C/D (42)2.7.3Core FUNC (41)2.7.4Core PARA (43)2.8Nozzle Settings (42)Techmation Co., Ltd. 3M8A HMI Controller & Software Manual, Standard VersionTechmation Co., Ltd. 4 2.8.1 Nozzle/Mold Adjustmen (42)2.8.2 Nozzle/Mold FUNC (43)2.8.3 Nozzle/Mold PARA (43)2.9 Temperature Control (44)2.9.1 Temperature set (44)2.9.2 Temperature Settings (44)2.9.3 Temperature func (45)2.9.4 Temperature para (46)2.9.5 Heater Presetting (46)2.10 F ast set (46)2.11 A larm/Error Message Display Screen (48)2.12 M onitoring Settings (Automatic Alarm) (49)2.12.1 Monitoring Settings 1 (49)2.12.2 Monitoring Settings 2/3 (Production Parameter Comparison) (51)2.13 T ransducer Zero Point Reset (53)2.14 I /O Channel Diagnostics (54)2.14.1 Input Channel Diagnostics (PB) (54)2.14.2 Output Channel Diagnostics (PC) (55)2.14.3 I/O Channel Reassignment (56)2.14.4 Mold Set Database (57)2.14.5 Mold Save (58)2.14.6 Mold Read (59)2.14.7 Mold Delete (60)2.14.8 System Settings (61)2.15 V ersion (61)2.16 S ystem Parameter (62)2.16.1 System set (62)2.16.2 Data Base (63)2.16.3 System Reset (63)2.16.4 Other set (64)2.16.5 DA Adjutment ............................................................................................. 65 3. I/O Channel Index . (65)3.1 Input Channels (66)3.2 Output Channels (66)3.3 Parameter Index (67)3.3.1 Parameter 1 (67)3.3.2 Parameter 2 ................................................................................................. 71 4. Alarm/Error Message Index ........................................................................................ 74 5. Robot Installation (Optional) (77)M10C HMI Controller & Software Manual, Standard VersionTechmation Co., Ltd. 51. Operations ManualThe instructions within the Operations Manual assume that you are familiar with the HMI panel keys and the various HMI display screens. If you are not or you are looking for more information on any of the keys or display screens please refer to the appropriate section within the Reference Manual.1.1 Clamping Unit SetupWhen changing the mold follow the machine manufacturer‟s instr uctions at all times to avoid the possibility of serious injuries to the machine operators.After changing the mold you have to ensure that the mold and the nozzle/injection unit are properly aligned to avoid damage to the machine. In addition, you need to make sure all necessary hose connections to the mold have been properly established and the mold has been mounted securely.1.1.1Mould Height AdjustmentBefore installing the mold use the Mold Adjustment keys to adjust for mold thickness and to advance or retract core(s) if necessary.Press the Reduced Mold Height Adjustment Key to roughly adjust for a reduced mold height (reduced distance between moving and static platen) or the Increased Mold Height Adjustment Key to roughly adjust for an increased mold height (increased distance between moving and static platen).For continues platen movement press and hold the key. The platen will move slightly and stop. Keep thekey pressed and after a one-second delay the platenwill start to move continuously. Release the key tostop platen movement. If you press the key andrelease it immediately, the platen will move slightlyand stop, allowing for micro adjustments. You canrepeat this operation until the moving platen has reached the desired position.Turn the machine off and install the new mold.Once you have finished the installation of the newmold, close the safety gate, turn on the machine andpress the Manual Mold Height Adjustment On/OffKey once to activate the Manual Mold HeightAdjustment mode. Switch the HMI display to theOther Settings screen by pressing F7 (Other 1). Thisscreen allows you to change the speed and pressuresettings after the mold has been changed. If necessary,adjust the pressure, speed and position settings for thenew mold or load the mold set data.After adjusting the settings press the Manual MoldHeight Adjustment On/Off key again to close themold. While closing the mold the controller willexecute an automatic mold height adjustment until thenew settings are reached. Once the automaticadjustment has finished all machine operations willstop and the alarm will sound. This indicates that youcan now switch back to manual or automaticoperation modes. Please note that for safety reasons you have to switch to Manual mode first by pressing either the Manual Mold Height Adjustment On/Off key or the Manual key. If you wish to use any other mode, please change to the desired mode after you have switched to Manual mode.If you encounter any problems during the mold height adjustment press the Manual key for an emergency reset to stop the operation.M8A HMI Controller & Software Manual, Standard VersionTechmation Co., Ltd. 61.1.2Mold Closing and Mold ProtectionMold closing is executed in three phases: High Speed closing, Low Speed closing and High Pressure closing. For optimum productivity mold closing should be executed as fast as possible. However, to avoid damage to the mold and/or machine it is important to use correct settings to ensure appropriate mold protection. For this reason pay particular attention to the Slow Speed phase.Press the Manual key to activate the Manual mode.Switch the HMI display to the Clamp Settings screenby pressing F2 (Clamp).Set the Mold Opening Stroke . The Mold OpeningStroke is measured from the closed mold. Thereforethe Mold Opening Stroke position is “0” when the mold is in its closed position.Next enter the desired hydraulic speed and pressure settings for the three mold closing phases. You have to ensure that the settings allow for a smooth, jerk-free movement of the mold.Set the hydraulic speed for the Low Speed phase low enough to avoid damage to the mold in case a jammed part has remained in the mold. For the samereason set the lowest hydraulic pressure possible.To avoid damage to the mold the transition point forswitching between High Speed and Low Speed phaseshould be set before the position where the mold could come into possible contact with a jammed part. The transition point for switching from the LowSpeed to the High Pressure phase should be set atthe position where both parts of the mold are startingto touch to initiate the high pressure mold lock-up. To accelerate mold closing you can activate the differential high-speed mold closing option for theHigh Speed closing phase.After setting all mold closing parameters execute mold closing in Manual Mode to check for optimum machine performance. If you encounter any problems during the mold closing adjustment press the Manual key for an emergency reset to stop the operation.M10C HMI Controller & Software Manual, Standard VersionTechmation Co., Ltd. 71.1.3Mold OpeningMold opening is divided into three phases. The initial Slow Speed opening, an intermediate High Speed phase and a final Low Speed phase to slow down the mold before the opening end position is reached.Press the Manual key to activate the Manual mode. Switch the HMI display to the Clamp Settings screenby pressing F2 (Clamp).Verify the Mold Opening Stroke and adjust if necessary. The Mold Opening Stroke is measured from the closed mold. Therefore the Mold OpeningStroke position is “0” when the mold is in its closedposition.Next, enter the desired hydraulic speed and pressure settings for the three mold opening phases. You haveto ensure that the settings allow for a smooth, jerk-free movement of the mold.Set the hydraulic speed for the initial Low Speed phase low enough to allow for a smooth separation of the part from the mold.Adjust the transition point for switching from theinitial Low Speed phase to the intermediate High Speed phase accordingly. The transition point setting for switching from theintermediate High Speed phase to the second LowSpeed phase should allow the mold to slow downsufficiently before reaching the end position of the Mold Opening Stroke. This is necessary to avoid possible damage to the machine.In case you want to use a robot to retrieve the moldproduct at the end of the mold opening/production cycle you need to set the Auto Cycle Delay Time . Enter the time to elapse between the end of mold opening and the beginning of mold closing(indicating the start of the next production cycle).After setting all mold opening parameters execute mold opening in Manual Mode to check for optimum machine performance. If you encounter any problems during the mold opening adjustment press the Manual key for an emergency reset to stop the operation.M8A HMI Controller & Software Manual, Standard VersionTechmation Co., Ltd. 8 1.1.4EjectorThe ejector can be operated in three different modes to knock the finished product out of the mold at the end of mold opening. You can choose between the Hold , Count Number and the Vibration modes.The Hold mode is used during semi-automatic operation. The ejector moves forward according to the ejector settings and the product is dropped or taken out. After the safety gate has been opened and closed the next cycle will start.In Count Number mode the ejector is activated according to the Ejector and Ejection Count settings. This mode is usually used for automatic machine operation. It does not require the opening and closing of the safety door to continue the production cycle.If you use the Vibration mode the ejector movement is controlled by the Ejector and Ejection Count settings with the ejector vibrating at the end of the forward movement according to the Vibration setting set in the Parameter 2 screen (setting No. 6) before retracting again.Press the Manual key to activate the Manual mode.Switch the HMI display to the Ejection Settings screen by pressing F5 (Eject).First, set the Ejection Mode and Count. Please note,if you want to deactivate the ejector you can do soby setting the Ejection Count to “0”.The Eject Try Again function is used for the Photo Sensor auto operation mode. If the mold product cannot be knocked out completely, the alarm willsound and the ejector will be activated again. If themold product is then successfully knocked out themachine will resume normal operation; otherwise it will stop for trouble shooting.If the mold product has not been knocked outsuccessfully while in Photo Sensor auto operationmode and the Eject Try Again function is not activated, the alarm will sound and the machine will stop for ejection trouble shooting.The initial ejection is divided into two phases thatcan be controlled separately. Set the pressure, speed and transition position individually for each phase.Next, set the pressure and speed for the backwardmovement. The Backward Delay time allows you toset the time the ejector will stay in the forward end position before it is retracted.In addition, set the Backward end position for theejector retraction between repeated activation (in case of multiple ejector activation). Please note, the Backward end position is relative to the absoluteretraction end position that is used after final ejectoractivation and determined by the transducer zeropoint setting. If you require additional cooling of the mold product after mold opening, set the Ejector Activation DelayTime accordingly.After setting all ejection parameters activate the ejector in Manual Mode to check for optimum machine performance. If you encounter any problems during the ejection set-up press the Manual key for an emergency reset to stop the operation.M10C HMI Controller & Software Manual, Standard VersionTechmation Co., Ltd. 91.1.5Air BlastThe machine provides an air blast ejection option for the moving platen as well as for the stationary platen.Press the Manual key to activate the Manual mode. Switch the HMI display to the Ejection Settingsscreen by pressing F5 (Eject).First, set the Activation Time (duration of air blast) for each platen.Set then the corresponding Activation Position atwhich you want to activate the air blast. The Activation Position refers to the mold position (reached during mold opening) at which the air blastis activated.If necessary, set the Delay Time for activating the airblast (after the Activation Position has been reached)according to your preferences. In case you require additional cooling of the mold product after mold opening, set the Delay Time forthe air blast activation accordingly.After setting all air blast parameters activate the air blast in Manual Mode to check for optimum machine performance. If you encounter any problems during the air blast set-up press the Manual key for an emergency reset to stop the operation.M8A HMI Controller & Software Manual, Standard VersionTechmation Co., Ltd. 101.1.6Core(s)Depending on your setup your machine may be equipped with up to 3 cores (A, B and C). Each core is controlled separately. When setting up the core(s), you need pay close attention to make sure the settings will not cause damage to the core(s) and/or the mold. Since the cores are freely programmable it is impossible for the controller to prevent all possible settings errors.The two graphs on the right side of the Core Settings screen indicate the core movement in relation to mold closing (top) and opening (bottom).Press the Manual key to activate the Manual Mode .Switch the HMI display to the Core Settings screenby pressing F6 (Cores).First, choose for each core either the Core Mode ifyou want to use a regular core that is moved in andretracted hydraulically or the Unscrew Mode if yourmold requires threads created by unscrewing the inserted core. If the core is not needed set the Function value to “0”.Next, select the desired Control Mode to control thecore movement. In Core Mode you can use either Cycle Control or Time Control . In Unscrew Mode you can use Time Control or Count Control .Using Cycle Control allows you to control the coremovements by limit switches for end-position control (for insertion and retraction). At the pre-set point during the production cycle the core(s) will move in/out until the limit switch controlled end-position is reached. Please make sure the limitswitches are activated since deactivated switcheswill cause the machine to stop (if Cycle Control isselected). Time Control uses time settings for core insertion and retraction. At the pre-set position during theproduction cycle the core(s) are moved in/out for theset period of time. Therefore core movement (travel)is not controlled by end-position but by time. As aresult you will not be able to rely on the protectionof limit switches.Accordingly, in Unscrew Mode the Time Control is used to set the time core unscrewing is activated (e.g. for creating threads).Count Control uses the pre-set number of revolutions to control the unscrewing of the core at the set position during mold opening. To use Count Control you have to make sure a photo sensor for counting the revolutions is installed on the core driving gear.Please note that Count Control allows for higher precision than Time Control .Set the Pressure , Speed , Activation Time , Unscrew Count (if used) and Position values for moving in and retracting each core according to your needs.Unique to Core A is the possibility to activate Core Unscrewing a second time (2nd Uns .) at the end of the mold opening cycle. Please note that the second unscrewing can only use Count Control .After setting all core parameters activate the core(s) in Manual Mode to check for optimum machine performance. If you encounter any problems during the core set-up press the Manual key for an emergency reset to stop the operation.1.2Injection Unit Setup1.2.1Nozzle/Injection UnitDepending your requirements you can set up the nozzle/injection unit to retract after injection has finished. The controller offers you 3 different modes to choose from if nozzle/injection unit retraction is needed.Press the Manual key to activate the Manual mode.Switch the HMI display to the Other Settings screenby pressing F7 (Other 1). Array First, set the Retraction Mode(Sprue Back). TheAfter Charge mode (A. Chg.) retracts thenozzle/injection unit after charging (plasticizing) isfinished. The Before Opening mode (B. Opn.)initiates nozzle/ injection unit retraction before moldopening starts. If you want to retract thenozzle/injection unit after injection has finishedchoose the After Injection mode (A. Inj.). Setting thevalue to “0” will cause the nozzle and injection unitto stay in place (no retraction).Next, set the hydraulic pressure for nozzle/injectionunit Advance. Enter the hydraulic speed settings forthe corresponding High and Low Speed phases of thenozzle/injection unit Advance. During the forwardmovement the High-Speed settings are used until theset End Position is reached. Thereafter thenozzle/injection unit will move forward using theLow-Speed settings, until it has reached the finalinjection position.Enter the End Position for the Advance movement toset the transition point between High and Low-Speed.It is important to allow for a safety margin of at least20mm between the set End Position and the actualcontact point of nozzle and mold (at which the nozzlestops its forward movement and the injection begins).If the End Position is set too close to the contact pointof nozzle and mold the nozzle might not slow downenough before touching the mold. The result could bedamage to mold and/or nozzle.Please note that a position setting of “0” refers to the position reached at the end of maximum nozzle/injection unit retraction. As a result the Advance End Position is always greater than “0”.After setting all nozzle/injection unit parameters activate the nozzle/injection unit in Manual Mode to check for optimum machine performance. If you encounter any problems during the nozzle/injection unitset-up press the Manual key for an emergency reset to stop the operation.Techmation Co., Ltd.111.2.2 Injection and Hold PressureDepending on your machine set-up the Injection process is divided into 1 - 4 phases and Hold Pressure into 1 - 3 phases. The corresponding pressure - position graph of the current injection settings and the real-time values achieved during the current Injection/Hold Pressure cycle are display in the Injection Settings Profile. Press F4 (Profile) to access the Injection Settings Profile screen for a review of your settings.Activate the Manual Mode by pressing the Manualkey. Switch the HMI display to the Injection Settings Array screen by pressing F3 (Inject).First, choose the Hold Pressure Transition Mode.Ifthe Time mode is used the controller will switch toHold Pressure after the set injection time haselapsed. In case the Position mode has been selectedthe controller will switch to Hold Pressure after thelast set injection position has been reached. However,the set time is used as a backup to initiate the HoldPressure phase if for some reason the set transitionposition cannot be reached.Please note that you should always set the time limithigher than the usually required injection time. Thisavoids poor molding results due to possible resignfluidity variations (poor fluidity could require alonger than usual injection time). The transitionbetween each Hold Pressure phase is controlled bythe corresponding time settings and is not affectedby the Hold Pressure Transition Mode settings.It is possible to use a combination of pressure andtime settings to control the injection process bysetting the position value for the transition fromInjection to Pressure Hold to zero. In this case thefinal position will never be reached and the pre-setinjection time will be used as a backup. However,doing so will disable the monitoring of the currentinjection data and as a result you will not be able touse the injection cushion for monitoring the injectionprocess. Please refer to the Monitor Settings 1section of the reference manual for more informationon monitoring options.Next, set the hydraulic pressure and speed for eachof the Injection and Hold Pressure phases.Enter the Position settings for each of the Injection phases and the Time settings for each of the Hold Pressure phases.If cooling is needed at the end of Injection/Hold Pressure and before Charge (Plasticizing)/Suck-Back is initiated set the desired Delay Time before Charge value accordingly.After setting all Injection/Hold Pressure parameters activate Injection and Hold Pressure in Manual Mode to check for optimum machine performance. If you encounter any problems during the Injection/HoldPressure set-up press the Manual key for an emergency reset to stop the operation.12Techmation Co., Ltd.1.2.3Charge (Plasticizing) and Suck-BackCharge (Plasticizing) is divided into three phases. You can set the Backpressure and Speed for each phase individually. Suck-back is initiated at the end of Charge (Plasticizing) if required.Press the Manual key to activate the Manual mode. Array Switch the HMI display to the Injection Settingsscreen by pressing F3 (Inject).First, set the Charge (Plasticizing) values forBackpressure and Speed individually for each phase.Next, enter the Positions for the transition betweenthe three Charge (Plasticizing) phases.Choose the Suck-Back mode. Depending on theselected mode, Suck-Back will be controlled using thePosition or Time setting. Choose the value “0” forPosition contr ol and the value “1” for Time control.In addition, enter the Suck-back Speed andPosition/Time values. The same input field (below theSuck-Back Pressure and Speed settings) is used forboth, the Time and the Position settings. The fieldlabel will change according to the selected mode toindicate the required value.Set the Suck-back Position/Time value to “0” if noSuck-back is needed.If cooling is needed at the end of Injection/HoldPressure and before Charge (Plasticizing)/Suck-Backis initiated set the desired Delay Time before Chargevalue accordingly.In case cooling is needed after the completion ofCharge (Plasticizing)/Suck-Back and before the moldis opened enter the desired Cooling Time.After setting all Charge (Plasticizing)/Suck-Back parameters activate Charge (Plasticizing) and Suck-Back in Manual Mode to check for optimum machine performance. If you encounter any problems during theCharge (Plasticizing)/Suck-Back set-up press the Manual key for an emergency reset to stop the operation.Techmation Co., Ltd.131.2.4HeaterDepending on your machine set-up the barrel heater of the injection unit is equipped with up to 9 barrel heating zones. The temperature, cushion and timer is controlled separately for each of the barrel‟s heater bands. The right hand graph shows the current (actual) and set temperature for each barrel heating zone.Activate the Manual Mode by pressing the Manualkey. Switch the HMI display to the TemperatureSettings screen by pressing F8 (Temp). Array First, set the Temperature Mode(Keep Warm).Choose “0” if you want to keep the temperaturealways in the pre-set range regardless of the machineoperation. If set to “1” the heater will keep the barreltemperature at half the pre-set temperature duringtimes of inactivity.Next, set the temperature for the different barrelheating zones. The field below (Act. State) gives youa quick indication on the current heater status for thecorresponding barrel heating zone. The * indicatesthe current temperature is within the set range(cushion). The + indicates the current temperature isbelow the set range (cushion) and the heater hasbeen activated. The - indicates the currenttemperature is exceeding the set value and as a resultthe heater has been turned off.Please note that the heater will be turned offimmediately once the current temperature exceedsthe set value. For current temperatures below the setvalue heater activation depends on the setTemperature Cushion.To adjust the Temperature Cushion, please press F5(Para. 2) to go to the Parameter 2 screen. Adjust thecorresponding values within the second column. Acushion value of “20” for example would activatethe heater once the current temperature has droppedmore than 20º C below the set value.If you want to use the Timer for barrel pre-heating set the Timer Mode to “1” otherwise disable it by entering “0”. To program the barrel heater band activation set the time and day individually for each barrel heating zone.In case of temperature related malfunctions a “977”, …988” or “999” will be displayed in the Real Value field. A “977” refers to either a disconnected or malfunctioning D/A Temperature Card. The value “988”identifies either a problem with the Thermal Wire Interface or the corresponding Temperature Sensor. In case the current temperature is exceeding the normal temperature range (the current temperature is above 450º C) the value “999” will be displayed.After setting all Heater parameters run the machine in Manual Mode to check for optimum machine performance. If you encounter any problems during the Heater set-up press the Manual key for anemergency reset to stop the operation.14Techmation Co., Ltd.。
凯讯GU A控制器使用说明

本手册的符号说明警告:表示如果不采取适当的预防措施,潜在的危险情况可能会造成死亡、严重的人身伤害或重大的财产损失。
告诫:表示如果不采取适当的预防措施,潜在的危险情况会损坏设备。
注意:提供除警报或告诫以外的帮助信息。
警告:在安装、操作控制器时,请先阅读整个使用手册,或对该设备进行任何维护和调试,必需熟悉所有设备、安全规范及做好事前预防措施,否则可能造成人身伤害或相关设备损坏。
发动机或其他动力装置必须装配一个超速关机保护装置,以避免原动力装置的失控或损坏而造成人员伤亡或其他损害。
超速关机保护装置必须完全独立于动力装置的控制器系统,同时必须确认高水温和低油压关机保护装置是安全的、有效的。
告诫:在使用发电充电机或电池充电器的控制系统中,为了避免损坏控制器,在将供电电池与控制系统断开前,必须先关掉充电器。
控制器中包括静态感应部件,为避免损坏这些部件:严禁拆开控制器的后盖,并触摸印制电路板上的电子元件和导线。
目录1.概述 (4)2.控制器外形结构与连线 (5)3.操作面板 (8)4.安装指南 (9)5.控制与操作说明 (10)6.测量显示数据 (14)7.警告和停机故障 (14)8.参数设置 (18)9.LCD显示和菜单系统 (25)10.控制器启用前的准备工作 (28)11.技术参数 (28)1.概述:GU601A是发电机组的自动控制和安全保护模块。
可通过模块面板上的按键选择手动或自动控制模式,在手动模式时,可通过面板上的按键,手动开停发电机组;在自动模式时,通过预置的遥开开关输入信号来自动开停发电机组。
模块采用LCD显示发电机的运行状态和运行参数。
其主要特征:z采用微处理器为核心;z通过面板按键和LCD可以灵活设置运行保护参数;z测量显示发电机频率和电压,电池电压,发动机的油压、水温和运行时间等参数;z可程序设定发动机的油门类型(常闭型或常开型);z五路继电器控制输出,除油门和起动控制输出固定,其余可由用户自定义;z五路开关量输入,除油压和水温固定外,其余可由用户自定义;z内置多种油压和温度传感器类型供用户选择;z可选内置通讯口,通过PC进行参数设置;z所有连线都通过针式带锁的端子连接,令设备的连线、移动、维修、更换容易和方便。
台湾弘讯AK580电脑简介

人参健脾丸、藿香正气丸、参苓白术丸、附子理中丸、加味保和丸注塑机专用:台湾弘讯AK580型电脑简单介绍:台湾弘讯是注塑机电脑的专业制造商,是目前大中华地区最大的注塑机电脑配套商。
台湾弘讯电脑近几十年来已有十几个版本型号,AK580型电脑用于中小型注塑机的电控系统已有近10年的时间了,近10年来经过不断的完善,现在已经是功能强大,设计更加人性化,更加成熟的机型了。
主要功能介绍:一.控制部分:AK580型电脑采用主频40兆高速双CPU控制,控制与显示CPU相对独立,可靠性能大大加强,主控CPU的扫描周期仅为1ms,系统反应速度加快,机器的控制精度大大加强。
二.显示面板:AK580型电脑采用10.4寸的大型彩色显示屏,外观更加美观大方。
面板上有F1到F10共十组功能键,每个功能键具有2到4个功能页面,功能非常强大,注塑机的每个动作都有自己独立的显示画面,与之相关的功能都在其子画面中操作更加方便。
三.主要动作设定1.开锁模动作有三段或四段压力速度控制可选,使动作更加平稳可靠。
2.注射动作有六段压力速度控制可选,使产品工艺调整更加细化,提高产品的成型精度。
3.温度有五段控制可选,采用PID闭环控制,控制准确,温度设定范围最大可设定到450摄氏度。
完全满足产品成型的需要。
四.资料保密:1.设备的重要参数采用两级密码管理,防止轻易改动,改变了系统的性能,工艺资料具有资料锁防止操作人员任意修改成型资料。
影响生产。
五.画面显示:具有多种语言可自由切换。
六.方便维修:输入输出动作在显示屏上有独立的显示画面,并配有文字说明,方便维修检测。
主板动作输出点每个动作都有独立的发光二极管指示。
方便维修查找。
七.其他:1.内存可提供80套模具参数存储功能。
2.具有扩展联机功能。
YX-007-BT使用说明书
产品使用说明书Product Instruction产品型号:YX-007-BT Product Model:YX-007-BT天津市英讯科技有限公司目录一、认识设备Introduction of Equipment (3)1、设备部件清单List of Product (3)2、设备部件介绍Introduction of Equipment Units (4)二、使用操作说明Instructions (7)1、设备充电接线图Charging wiring diagram ofequipment (7)2、使用方法Usage method (8)三、设备现场布置安装范例Installation Example of Equipment Field Arrangement (9)1、布置方法Layout method (9)2、应该场合Applications (10)3、测试注意事项Testing and precaution (11)四、技术参数Technical Parameters (12)五、安全注意事项Safety Cautions (14)六、温馨提示Warm Warning (15)七、演示视频地址Website of Demo Video (15)一、认识设备Introduction of Equipment1、设备部件清单List of ProductYX-007-BT主机1台9V充电器1个2、设备部件介绍Introduction of Equipment Units YX-007-BT主机YX-007-BT host二、使用操作说明Instructions1、设备充电接线图Charging wiring diagram of equipment2、使用方法Usage method(1)将YX-007-BT电源开关功率调节旋钮顺时针旋转,工作电量指示灯亮起,设备开启,将手机麦克风(打电话话筒端)朝下放入防护盒中。
9.ATC230M10-IVA模块说明书

fide 二 型号命名 any Con 三 正常使用条件 p 户内使用,正常工作环境温度-10℃~+45℃,+50℃以上降功率输出,大于 60℃过温 m 关机。在设备停用期间,周围空气温度不低于-25℃,不高于+55℃; o日平均相对湿度不超过 95%,月平均相对湿度不大于 90%; C 运行地点无导电或爆炸尘埃,无腐蚀金属和破坏绝缘的气体或蒸汽;
tia 4.3 输出特性 ................................................................................................................2
4.4 保护与报警.............................................................................................................3 4.5 监控特性 ................................................................................................................3
e 五 工作原理及主要特点....................................................................................5 fid 5.1 工作原理 ................................................................................................................5
克朗斯电气知识

克朗斯电气知识XXXXXX。
XXX.XXX of the Diagram:1.Basic knowledge of XXX diagrams2.Krones Circuit DiagramPart 1: Diagram n Column - includes the drafting time。
XXX。
and XXX.Part 2: Diagram Lookup Column - provides n on the n ofXXX corresponding to the diagram.Part 3: Circuit n Diagram - XXX with the diagram using n from Part 2.Part 2 Enlarged View:Meanings of each part:A: Equipment - machine number KB: Project number - machine project number。
001 represents the first bookC: Mounting n - n of electrical components in the control。
XXXSKFKAKKKPVKRKSVPVRKASSSUSVTBBUVVSDXXXMain Control XXXFiller CarouselXXXTerminal Box Grouped Valves Terminal Box Ring Bowl Terminal Box Roll-On Sealer Grouped ValvesRinser CarouselControlGuardsRoll-On XXXXXXTransfer Grouped Valves XXXMachine TableXXX主控制柜Filler转台操作台阀站控制柜转塔旋盖机顶部电柜阀站电器部件Rinser转台机器旁边控制柜安全门旋盖机产品输送带中间转换阀组瓶盖浸泡杀菌机台底下的编码器,电机上图中,XXX代表主控制柜,1表示第一个D: Process-Unit。
- 1、下载文档前请自行甄别文档内容的完整性,平台不提供额外的编辑、内容补充、找答案等附加服务。
- 2、"仅部分预览"的文档,不可在线预览部分如存在完整性等问题,可反馈申请退款(可完整预览的文档不适用该条件!)。
- 3、如文档侵犯您的权益,请联系客服反馈,我们会尽快为您处理(人工客服工作时间:9:00-18:30)。
Grantech艾讯宏达工控机产品介绍艾讯宏达科技有限公司,本着“来自台湾,立足中国”的思路不断发展,致力于为广大用户提供高品质工控产品和完善解决方案,并逐渐成长为工控机领域国内领先的专业制造商之一。
所谓IPC(Industrial Personal Computer)即“工控机”是一种即基于PC总线增强加固型的工业电脑,它可以作为一个工业控制器在工业环境中可靠运行。
其主要的组成部分为工业机箱、无源底板及可插入其上的各种板卡组成,如CPU卡、I/O卡等。
并采取全钢机壳、机卡压条过滤网,双正压风扇等设计及EMC技术以解决工业现场的电磁干扰、震动、灰尘、高/低温等问题。
工控机广泛应用于工业自动化、智能交通、轨道交通、金融自动化、多媒体播放、网络安全、电力、通讯、监控、医疗、军工等领域。
公司主要产品有:工业计算机(IPC)系列、嵌入式工业计算机(EPC)系列、嵌入式工业计算机(UFO)系列、无风扇工业平板电脑(UFP)系列、一体化工作站系列。
工业计算机(IPC)系列有:全长CUP卡:、工业母板、工业机箱与一体化工作站、工业底板、原装整机、工业便携机。
嵌入式工业计算机(EPC)系列:Mini-ITX、寸嵌入式主板、EPIC嵌入式主板、防火墙主板。
嵌入式无风扇计算机(UFO)系列:超薄型UFO6355H系列、通用型UFO6366H系列、扩展型UFO6377系列。
无风扇工业平板电脑(UFP)系列:寸平板电脑、寸平板电脑、15寸平板电脑、17寸平板电脑。
公司为客户提供的工控机产品多达数百种型号规格,详细资料请登录公司网页和公司产品手册。
以下是公司部分机型为您作详细介绍:工业计算机(IPC)参数配置表型号SYS7190VGA SYS71838VGA图样CPU LGA775, Intel Core 2 Extreme / Core 2 Quad/ Core 2 Duo /Pentium Dual-Core / PentiumEE / Pentium D / Pentium 4 / Celeron 400with 45nm LGA775,Core2Duo/PentiumDual-Core/Pentium EE/PentiumD/Pentium 4/ Celeron DCPU主频最大支持最大支持前端总线800/1066/1333 MHZ667/800/1066MHZ 芯片组英特尔 Q35+ICH9DO英特尔 945GC+ICH7最大缓存12MB L26MB L2最大内存DDR2 4GB DDR2 4GBBIOS AMI AMI显示芯片英特尔GMA 3100英特尔GMA 950显存最大共享384MB最大共享224MB显示接口VGA VGA网口1个或2个英特尔82573L千兆网卡1个或2个英特尔82573L千兆网卡声卡Realtek ALC662(可选)Realtek ALC662硬盘接口4*SATAII1*IDE/2*SATAII磁盘阵列RAID 0/1/5/10无软驱接口无无并口1*SPPE/ECP/EPP1*SPPE/ECP/EPP串口1*RS232/422/4851*RS232/422/485USB6*USB 6*USBDigital I/O无无红外线接口无无板载SSD无无看门狗1~255秒1~255秒电源类型AT/ATX AT/ATX操作温度0℃----60℃0℃----60℃相对湿度10%----90%10%----90%尺寸(长*宽)338mm*122mm338mm*122mm工业计算机(IPC)参数配置表型号SYS71943VGA SYS7193VGGA图样CPU LGA775,IntelCore2Quad/Core2 Duo/Celeron with 65nm/45nm Intel Core 2 Duo / Pentium D / Pentium 4 / Celeron DCPU主频最大支持前端总线800/1066/1333MHZ800/1066/1333MHZ 芯片组英特尔 G41+ICH7英特尔 Q35+ICH9DO 最大缓存12MB L212MB L2最大内存DDR3 8 GB DDR2 4GBBIOS AMI Phoenix-Award显示芯片英特尔GMA X4500英特尔GMA 3100显存最大共享1024MB最大共享384MB显示接口VGA VGA/24 BIT LVDS网口1*Realtgek RTL8110S 千兆网卡1个英特尔82573L 千兆网卡声卡Realtek ALC662Realtek ALC262硬盘接口4*SATA/1*IDE4*SATAII磁盘阵列无RAID 0/1/5/10软驱接口无无并口1*SPPE/ECP/EPP1*SPPE/ECP/EPP串口1*RS232 1*RS232/422/4851*RS232 1*RS232/422/485USB8*USB 6*USBDigital I/O4-in 4-out无红外线接口1无板载SSD无无看门狗1~255秒1~255秒电源类型AT/ATX ATX操作温度0℃----60℃0℃----60℃相对湿度10%----90%10%----90%尺寸(长*宽)338mm*126mm338mm*126mm工业底板参数配置表型号GTB6022/6GTB6022/8GTB6022/13L GTB6022/14图样插槽总数681314PICMG2222PCI4444ISA2489电源接口AT/ATX AT/ATX AT/ATX AT/ATX尺寸132mm*258mm220mm*260mm316mm*260mm317mm*260mm 可搭配机箱壁挂式机箱壁挂式机箱4U机箱4U机箱订购信息6槽PICMG工业底板8槽PICMG工业底板13槽PICMG工业底板14槽PICMG工业底板工业底板参数配置表型号GTB6023/5PE GTB6023/14GPE 图样插槽总数514PICMG11PCI-E*1611PCI-E*400PCI-E*114PCI27SATA接口22USB接口44电源接口24+4PIN ATX24+4PIN ATX尺寸107mm*328mm317mm*328mm可搭配机箱壁挂式机箱4U机箱订购信息5槽工业底板14槽PICMG工业底板工业计算机(IPC)工业母板参数配置表型号SYM76901VGGA SYM76836VGA-5P图样CPU LGA775 for Core 2 Quad/Core 2Duo/Pentium Dual/Celeron processor LGA1155 for Intel?32nm Sandy Bridge i3/i5/i7 processor,FSB 5GT/sCPU主频最大支持最大支持前端总线800/1066/1333 MHZ533/800MHZ芯片组英特尔 Q35+ICH9R英特尔 945GC+ICH7最大缓存12MB L22MB L2最大内存DDR2 8GB DDR2 4GBBIOS Phonenix-Award Phonenix-Award显示芯片英特尔GMA 3100英特尔GMA 950显存最大共享384MB最大共享224MB显示接口VGA/DVI-D VGA网口2* Realtek RTL8111B千兆网卡1* Realtek RTL8111B千兆网卡声卡Realtek ALC885Realtek ALC662硬盘接口1*IDE/6*SATAII4*SATAII磁盘阵列RAID 0/1/5/10无软驱接口11并口1*SPPE/ECP/EPP1*SPPE/ECP/EPP串口2*RS2322*RS232USB12*USB 8*USBDigital I/O4-IN 4-OUT无红外线接口11板载SSD无无扩展槽1*PCI-E*16 5*PCI1*PCI-E*16 5*PCI看门狗1~255秒1~255秒电源类型AT/ATX AT/ATX操作温度0℃----60℃0℃----60℃相对湿度10%----90%10%----90%尺寸(长*宽)ATX305mm*244mm ATX305mm*244mm工业计算机(IPC)工业机箱参数配置表型号GT6145GT6150图样系统主板工业长板或工业母板工业长板或工业母板驱动空间2个寸,2个寸驱动空间2个寸,2个寸驱动空间底板支持13槽、14槽工业底板支持13槽、14槽工业底板风扇2个80mm风扇1个120mm风扇电源1个ATX标准2U PS/2 电源1个ATX标准2U PS/2 电源前面板1个电源开关,1个复位开关,2个USB电源指示灯,硬盘指示灯1个电源开关,1个复位开关,2个USB电源指示灯,硬盘指示灯,系统电源显示。
后面板工业后窗或商业后窗工业后窗或商业后窗扬声器1个扬声器1个扬声器尺寸483MM*427MM*177MM483MM*427MM*177MM材质高强度钢板,内部镀蓝锌高强度钢板,内部镀蓝锌颜色W-电脑白,T-黑色W-电脑白,T-黑色温度0°---50℃0°---50℃特点介绍:1:4U上架式智能型工业机箱;2:2个寸和2个寸驱动空间;3:支持13/14槽工业底板;4:支持工业母板; 5:ATX标准2UPS/2电源;6:机箱温度显示 7:机箱内部电压状态显示。
工业计算机(IPC)一体化工作站参数配置表型号GT6380S GT6368S 图样高度1U=寸=8U6U显示屏尺寸15寸寸分辨率1024*768800*600显示颜色262K262K亮度350cd/㎡350cd/㎡触摸屏规格五线电阻式五线电阻式寿命3000万次3000万次薄面键盘规格47个数据按键/16个功能键44个数据按键/20个功能键OSD菜单有有驱动空间3.5寸23寸无无风扇2个90mm风扇1个90mm风扇1个120mm风扇可选底板GTB6022/13L GTB6022/14GTB6022/8 GTB6020/8M/B Suport不支持不支持电源PS/2电源 350W1U 200W/250W尺寸482mm*394mm*3545mm482mm*394mm*3545mm加固型工业便携机(GPC)参数配置表型号GPC2015-5M GPC2017-7M图样液晶屏大小15” XGA TFT17”SXGA 液晶屏最大分辨率1024 x 7681280*1024适用主板Micro-ATX工业母板ATX工业母板最大扩充槽数57电源1U电源ATX电源驱动空间3*2*+2*超薄光驱10键盘/鼠标标准108键键盘,触控鼠标标准108键键盘,触控鼠标扬声器内置立体声扬声器内置立体声扬声器尺寸(宽*深*高)430mm x 290mm x 230mm430mm*340mm*250mm重量11Kg工作温度0°C~50°C0°C~50°C 嵌入式工业计算机(EPC)Mini-ITX参数配置表型号SYS76866VGGA-525-NM SYS76866VGA-525-DC图样CPU板载英特尔凌动 D525板载英特尔凌动 D525CPU主频前端总线667 MHZ667 MHZ芯片组英特尔 NM10英特尔 NM10最大缓存1MB L21MB L2最大内存DDR3 8GB DDR2 4GBBIOS AMI AMI显示芯片英特尔GMA 3150英特尔GMA 3150显存最大共享384MB最大共享384MB显示接口VGA/24bit LVDS VGA/24bit LVDS网口2*Realtek RTL8111DL千兆网卡2*Realtek RTL8111DL千兆网卡声卡Realtek ALC662Realtek ALC662硬盘接口2*SATAII4*SATAIIk,1*IDE磁盘阵列无RAID 0/1/0+1软驱接口无无并口1*SPPE/ECP/EPP1*SPPE/ECP/EPP串口6*RS2321*RS232/422/485USB7*USB 7*USBDigital I/O4-IN 4-OUT4-IN 4-OUT红外线接口无无板载SSD无无扩展槽1*PCI,1*MINI PCI-E1*PCI,1*MINI PCI-E看门狗1~255秒1~255秒电源类型AT/ATX AT/ATX操作温度0℃----60℃0℃----60℃相对湿度10%----90%10%----90%尺寸(长*宽)170mm*170mm170mm*170mm特点介绍:艾讯宏达提供各种规格嵌入式主板,包括:Mini-ITX主板、寸/4寸嵌入式主板、半长卡和PC/104等嵌入式主板。
