松下新款SD-PT1000面包机超值首发!完美复现手揉~
面包机的使用方法以及注意事项
面包机的使用方法以及注意事项相信很多人都喜欢吃面包,当自己用面包机做出面包的时候,这个过程一定是非常有乐趣的,那么,面包机怎么用呢?下面就来介绍下面包机的使用方法。
下面由店铺为大家整理的面包机的使用方法以及注意事项,希望对大家有帮助!面包机的使用方法1、清洗面包机的面包桶,直至干净清洁,将面包桶从面包机中取出,倒入已经搅拌好的水、牛奶或鸡蛋等液体,准备和面。
2、可根据自己口味选择,如果想做咸味的面包,则在面包桶的一角加入盐,如果喜欢甜味,就可在面包桶的另一角加糖。
3、加入作料后,将面粉倒入其中,并且使面粉把水面覆盖住。
4、先不要急于搅拌,要在面粉上挖一个小洞,倒入酵母粉,千万不要忘记要发酵这一步,否则会影响面包的制作。
5、一切准备就绪后,将面包桶安装到面包机上,并且可以连接插上电源。
6、选择程序,按照每款不同的面包机的程序使用,选择相应的发面程序,这样就可以等待发面,按下启动键,面包机开始揉面,制作面包额定程序正式开始。
7、面包机搅拌一段时间后会自动停下来,这时按住“启动/停止”键三秒钟,结束此程序。
否则面团会开始发酵的。
8、搅拌好后,加入软化的黄油,再次重复一次“发面团”程序,直到面团达到扩展状态。
9、有些面包机有特色的功能,例如预约功能等,可在里面加入芝麻、松仁或葡萄干等辅料,根据面包机而定。
使用面包机时有哪些注意事项很朋友在使用电子产品的时候,难免会遇到一些问题,一些不良的使用习惯可能会对机器造成一些损伤,面包机也是一样的,有时候因为一些操作使用环境等,可能会影响面包制作的质量,下面就简单的介绍一下使用面包机时有哪些注意事项。
1、在使用面包机的时候,面包机一定要放在平稳、干净、固定的表面使用;2、接通面包机电源后,按下“开关”功能键,烘烘完毕后,即可食用;3、在烧烤过程中,如果有什么意外,或其它的事情要停止面包机,按下取消按钮就可以停止烧烤。
4、遇到面包被卡住的时候,请注意,一定要先断开电源,再将面包取出,千万不要在通电的情况下使用金属等物品来取面包片。
松下 电烤箱 NU-DM300P 使用说明书
使用说明书电烤箱型号:仅家庭用使用前,请仔细阅读本说明书及保修证并妥善保管社内检查合格产品Т ʾ Ҭ η ԼKX305_00_20200716.indd 13第一章 安全使用注意事项 .............................................................4-5第二章 部件及功能 ........................................................................6-7第三章 使用方法 .........................................................................8-10第四章 清洁及保养 (10)第五章 故障分析及排除 (11)第六章 产品基础信息和装箱明细 (12)第七章 食品接触用信息 .................................................................13电烤箱产品的有害物质限制使用标识表 .. (14)尊敬的用户:为了便于您正确操作本机器,在使用前请仔细阅读本说明书。
请务必认真阅读第一章“安全使用注意事项”。
4 警告: 对可能导致人员危险、重伤、重大财产损失的风险要警惕;注意:对可能导致人员受伤或物品损害的风险要关注。
工作期间,产品前部、左右侧和上部等表面温度升高,标有“高温表面”符号的区域/表面,工作过程中会变烫,请注意避免烫伤。
1. 本产品仅供家庭使用,请勿作为其他用途。
2. 本产品不打算由存在肢体、感官或精神能力缺陷或缺少使用经验和知识的人(包括儿童)使用,除非有负责他们安全的人对他们进行与器具使用有关的监督或指导。
应照看好儿童,确保他们不玩耍本产品。
3. 打开包装后,请即刻将塑料袋放入垃圾桶,以免儿童玩耍,造成窒息的危险。
4. 使用时必须将包装材料全部取下,否则产品在工作过程中会导致火灾、烧伤等。
如何用面包机做出好吃的面包?求达人分享靠谱的食谱或配方!

如何用面包机做出好吃的面包?求达人分享靠谱的食谱或配方!(不定期更新配方)这些配方仅限于本人用的面包机型号,其他面包机请根据使用习惯选择程序和调整酵母用量。
【软式北海道吐司】(原料)高粉235克,白糖35克,盐3克,淡奶油75克,牛奶60克,蛋清35克,黄油15克,酵母3.5克。
(做法)1、除黄油酵母其他材料放入面包桶内,固体堆中间液体四周加入,选择菜单》面团》饺子》开始,揉15分钟程序停止。
2、放入黄油,酵母放入专用盒。
菜单选择》面包》软式》浅色,然后按开始。
用时4小时20分。
3、加料盒可加葡萄干、椰丝、蔓越莓等,选葡萄干》有即可。
这个方子做出来的吐司真的很软很香。
【炼乳吐司】农家面粉250克,盐3克,糖20克,炼乳50克,黄油20克,蛋液25克,牛奶90-95克,酵母3克。
黄油先加,软土司键,淡色。
【核桃黑芝麻吐司】农家面粉250克,黑芝麻粉(熟黑芝麻打粉)20克,糖15克,盐3克,黄油15克,水162克(换成牛奶172克),果料盒里装进一把核桃仁约40克,软吐司键,淡色!上图是第一次做的,做好后隔了一小时才记得拿出来,所以看到边烤得有点焦且厚,所以记得做好第一时间取出哦,第二次做出来真的很松软(偷懒没拍照)。
因为家人不喜欢吃核桃所以没加核桃,我是喜欢牛奶代替水,夏天的时候牛奶最好放冰霜里降降温。
【蔓越莓抹茶吐司】农家面粉250克,抹茶粉10克,糖16克,盐3克,黄油17克,牛奶172克,果料盒里装进一把蔓越莓约40克(没有提子换蔓越莓了),软吐司键,淡色!晚上拍的色差比较大(记得买把好点的面包刀。
)【20180201】更这几天天气真的太冻了,现在是完全只能依靠面包机了。
南方的冬天你们懂的。
现在面包配方常做原味的,单吃奶香味足也很松软,也可做三文治,吃之前记得先热一下。
原味配方:面粉250克,糖18-20克,盐2.5克,牛奶178克,无盐黄油18克,酵母3.5克(天气热可减少到3克),松下面包机软式吐司键,烤色淡。
汉密尔顿海滩全自动面包机使用说明书

2Other Consumer Safety InformationThe length of the cord used on this appliance was selected to reduce the hazards of becoming tangled in or tripping over a longer cord. If a longer cord is necessary, an approved extension cord may be used. The electri-cal rating of the extension cord must be equal to or greater than the rat-ing of the appliance. Care must be taken to arrange the extension cord so that it will not drape over the countertop or tabletop where it can be pulled on by children or accidentally tripped over.T o avoid an electrical circuit overload, do not use another high-wattage appliance on the same circuit with this appliance.IMPORTANT SAFEGUARDS1. Read all instructions.2. This appliance is not intended for use by persons (including children) with reduced physical, sensory, or mental capabilities, or lack of experience and knowledge, unless they are closely supervised and instructed concerning use of the appliance by a person responsible for their safety.3. Close supervision is necessary when any appliance is used by or near children. Children should be supervised to ensure that they do not play with the appliance.4. Do not touch hot surfaces. Use handles or knobs. Always use oven mitts to handle hot bread pan or hot bread.5. Do not put hand inside oven chamber after bread pan is removed. Heating unit will still be hot.6. To protect against electrical shock, do not immerse cord, plug, or breadmaker in water or other liquid.7. Unplug from outlet when not in use and before cleaning. Allow to cool before putting on or taking off parts, or before cleaning the appliance.8. Do not operate any appliance with a damaged supply cord, or after the appliance malfunctions or is dropped or damaged in any manner. All repairs must be conducted by the manufacturer, its service agent, or similarly qualified persons in order to avoid a hazard. Call the cus-tomer service number provided for further information on examina-tion, repair, or electrical or mechanical adjustments.9. The use of accessory attachments not recommended by the appli-ance manufacturer may cause injuries.10. Do not use outdoors.11. Do not let cord hang over edge of table or counter or touch hot sur-faces.12. Do not place on or near a hot gas or electric burner or in a heated oven.13. Extreme caution must be used when moving an appliance containinghot oil or other hot liquids.14. To disconnect, turn all controls off (O /STOP); then remove plugfrom wall outlet.15. Use extreme caution when removing bread pan.16. To turn breadmaker OFF, press and hold the START/STOP button for2 seconds. See “Control Panel” section for more information.17. Do not place eyes or face in close proximity with temperedglass viewing window, in the event that the safety glass breaks.18. Do not use appliance for other than intended use.19. Clean oven interior carefully. Do not scratch or damage heating ele-ment tube.20. CAUTION: Risk of Electric Shock. Cook only in removable Bread Pan.21. CAUTION: In order to avoid a hazard due to inadvertent resetting ofthe thermal cut-out, this appliance must not be supplied through an external switching device, such as a timer, or connected to a circuit that is regularly switched on and off by the utility.SAVE THESE INSTRUCTIONS!This product is intended for household use only.When using electrical appliances, basic safety precautions should always be followed to reduce the risk of fire, electric shock, and/or injury to persons, including the following:Program Cycles1. BasicFor white bread and mixed breads consisting mainly of basic bread flour.2. Basic TurboFor quick-bread recipes that do not use yeast for rising and instead may use baking powder or soda. Kneading, rising, and baking loaf in less time than for basic bread. This cycle takes about 1 hour and is for 1000g loaves only.3. WheatFor breads with heavy varieties of flour that require a longer phase of kneading and rising (whole wheat flour, rye flour). Bread will be more compact and heavy. Cycle starts with preheat. Does not start mixing immediately.4. Wheat TurboSame as Basic T urbo cycle. For whole grain quick-bread recipes that do not use yeast for rising and instead may use baking powder or soda. Kneading, rising, and baking loaf in less time than for wheat cycle. Bread will be more compact and heavy. This cycle takes about 1 hour and is for 1000g loaves only.5. FrenchFor light breads made from fine flour. Normally, the bread is fluffy and has a crispy crust. This is not a suitable setting for recipes requiring butter, margarine, or milk.6. French TurboSame as Basic T urbo cycle. For French-style quick bread recipes that do not use yeast for rising and instead may use baking powder or soda. Kneading, rising, and baking loaf in less time than for French cycle. Bread will be more compact and heavy. This cycle takes about 1 hour and is for 1000g loaves only.7. SweetFor breads with ingredients such as fruit juices, grated coconut,raisins, dry fruits, chocolate, or added sugar. Due to a longer rising phase, the bread will be light and airy. We recommend the Lightcrust setting.8. Y east-Free, Gluten-Free Bread MixFor yeast-free or gluten-free store-bought bread mixes, plus yeast-free recipes.9. RyeFor breads with rye flour that require a longer phase of kneading and rising. Bread will be more compact and heavy, but more moist thana whole grain bread. Cycle starts with preheat. Does not start mixingimmediately.10. Gluten-Free RecipeFor gluten-free bread recipes. Cycle starts with 8-minute preheat and will start mixing after that.11. DoughThis cycle prepares the yeast dough for buns, pizza crust, etc., to be baked in a conventional oven. There is no baking in this cycle.12. Artisan-Style DoughFor artisan-style bread recipes made with fresh herbs and organic flours. This cycle has a long rising time for fluffier loaves and acool temperature setting to create artisan-style flavors. This is not a suitable setting for recipes using sugars or fats. Full cycle is about5 hours.Bake Only – Additional SettingIdeal for when additional baking of breads is needed because a loaf is too light or not baked through. There is no kneading or resting.6Program Timetable and Settings Menus vary according to the various rising times, the number of kneads, and the temperature setting.Menu Type Crust Size PreheatKnead andFermentationBAKE TotalAutomatic Fruit andNut at Working afterMax KeepWarmDelay1BasicLight500gN/A 2 Hours 30Minutes45 Minutes 3 Hours 15 Minutes20 Minutes 1 Hour15 Hours750g50 Minutes 3 Hours 20 Minutes20 Minutes 1 Hour15 Hours1000g55 Minutes 3 Hours 25 Minutes20 Minutes 1 Hour15 Hours Medium500g45 Minutes 3 Hours 15 Minutes20 Minutes 1 Hour15 Hours750g50 Minutes 3 Hours 20 Minutes20 Minutes 1 Hour15 Hours1000g55 Minutes 3 Hours 25 Minutes20 Minutes 1 Hour15 Hours Dark500g45 Minutes 3 Hours 15 Minutes20 Minutes 1 Hour15 Hours750g50 Minutes 3 Hours 20 Minutes20 Minutes 1 Hour15 Hours1000g55 Minutes 3 Hours 25 Minutes20 Minutes 1 Hour15 Hours2Basic Turbo Medium1000g N/A35 Minutes33 Minutes 1 Hour 08 Minutes N/A 1 Hour N/A3WheatLight500g30 Min-utes3 Hours 15Minutes45 Minutes 4 Hours 30 Minutes44 Minutes 1 Hour15 Hours750g50 Minutes 4 Hours 35 Minutes44 Minutes 1 Hour15 Hours 1000g55 Minutes 4 Hours 40 Minutes44 Minutes 1 Hour15 HoursMedium500g45 Minutes 4 Hours 30 Minutes44 Minutes 1 Hour15 Hours 750g50 Minutes 4 Hours 35 Minutes44 Minutes 1 Hour15 Hours 1000g55 Minutes 4 Hours 40 Minutes44 Minutes 1 Hour15 HoursDark500g45 Minutes 4 Hours 30 Minutes44 Minutes 1 Hour15 Hours 750g50 Minutes 4 Hours 35 Minutes44 Minutes 1 Hour15 Hours 1000g55 Minutes 4 Hours 40 Minutes44 Minutes 1 Hour15 Hours7Menu Type Crust Size PreheatKnead andFermentationBAKE TotalAutomatic Fruit andNut at Working afterMax KeepWarmDelay4Wheat Turbo Medium1000g N/A33 Minutes35 Minutes 1 Hour 08 Minutes N/A 1 Hour N/A5FrenchLight500gN/A2 Hours 50Minutes52 Minutes 3 Hours 42 Minutes19 Minutes 1 Hour15 Hours750g56 Minutes 3 Hours 46 Minutes19 Minutes 1 Hour15 Hours 1000g60 Minutes 3 Hours 50 Minutes19 Minutes 1 Hour15 Hours Medium500g52 Minutes 3 Hours 42 Minutes19 Minutes 1 Hour15 Hours 750g56 Minutes 3 Hours 46 Minutes19 Minutes 1 Hour15 Hours 1000g60 Minutes 3 Hours 50 Minutes19 Minutes 1 Hour15 Hours Dark500g52 Minutes 3 Hours 42 Minutes19 Minutes 1 Hour15 Hours 750g56 Minutes 3 Hours 46 Minutes19 Minutes 1 Hour15 Hours 1000g60 Minutes 3 Hours 50 Minutes19 Minutes 1 Hour15 Hours6French Turbo Medium1000g N/A33 Minutes35 Minutes 1 Hours 08 Minutes N/A 1 Hour N/A7SweetLight500gN/A2 Hours 45Minutes44 Minutes 3 Hours 29 Minutes20 Minutes 1 Hour15 Hours750g47 Minutes 3 Hours 32 Minutes20 Minutes 1 Hour15 Hours 1000g50 Minutes 3 Hours 35 Minutes20 Minutes 1 Hour15 HoursMedium500g44 Minutes 3 Hours 29 Minutes20 Minutes 1 Hour15 Hours 750g47 Minutes 3 Hours 32 Minutes20 Minutes 1 Hour15 Hours 1000g50 Minutes 3 Hours 35 Minutes20 Minutes 1 Hour15 HoursDark500g44 Minutes 3 Hours 29 Minutes20 Minutes 1 Hour15 Hours 750g47 Minutes 3 Hours 32 Minutes20 Minutes 1 Hour15 Hours 1000g50 Minutes 3 Hours 35 Minutes20 Minutes 1 Hour15 Hours8Menu Type Crust Size PreheatKnead andFermentationBAKE TotalAutomatic Fruit andNut at Working afterMax KeepWarmDelay8Yeast-Free/Gluten-FreeBread MixMedium1000g N/A32 Minutes1 Hour 45Minutes2 Hours 08 Minutes18 Minutes22 Minutes15 Hours9Rye Medium1000g 30 Min-utes3Hours 5 Min-utes55 Minutes 4 Hours 30 Minutes N/A 1 Hour15 Hours10Gluten-Free Medium 750g8 Minutes1Hour 11 Min-utes1Hour 35Minutes2 Hours 54 Minutes17 Minutes 1 Hour15 Hours 10091Hour 40Minutes2:Hours 59 Minutes17 Minutes 1 Hour15 Hours11Dough N/A N/A N/A 1 Hour 30MinutesN/A 1 Hour 30 Minutes16 Minutes N/A15 Hours12ArtisanDoughN/A N/A N/A5 Hour 15MinutesN/A 5 Hours 15 Minutes36 Minutes N/A15 Hours13Bake N/A N/A N/A N/A 10 Minutes~1 Hour 30MinutesN/A N/A 1 Hour N/A*N/A mean no function.914Unplug unit and allow to coolTips: Bread BasicsT wo things can ensure a perfect loaf of bread: using fresh, quality ingredients and measuring them accurately.FlourAll-Purpose FlourFlour that contains no baking powder, suitable for “quick” breads or bread made with the Quick settings. Bread flour is better suited for yeast breads.Bread FlourBread flour is the most important ingredient of making bread andis recommended in most yeast-bread recipes. It has a high gluten content and can keep the size of the bread from collapsing after rising. Flour varies by region. For example, American flour is milled from hard spring wheat; Canadian flour is milled from hard winter wheat.Self-Rising FlourFlour that contains baking powder, used especially for making cakes. Do not use self-rising flour in combination with yeast.Whole-Wheat FlourWhole-wheat flour is ground from the entire wheat kernel. Bread made with all or part whole-wheat flour will have higher fiber and nutritional content. Whole-wheat flour is heavier and, as a result, loaves may be smaller in size and have a heavier texture.Other IngredientsEggEggs can improve bread texture and make the bread larger in size. The egg must be whisked in with the other liquid ingredients.SaltSalt is necessary to improve the bread flavor and crust color. It is also used to restrain yeast activity.Shortening, Butter, and Vegetable OilShortening and butter should be cut into small pieces before adding to liquid.SugarSugar is “food” for the yeast and also increases the sweet taste and color of bread. It is a very important element of making the bread rise. White sugar is normally used; however, brown sugar, powdered sugar, or cotton sugar may also be called for in some recipes.Water and Other Liquids (always added first)Water is an essential ingredient for making bread. Generally speaking, water should be at room temperature. Some recipes may call for milk or other liquids. Never use dairy with the Time Delay option.YeastY east is a living organism and should be kept in the refrigerator to remain fresh. It needs carbohydrates found in sugar and flour as nourishment.Y east used in breadmaker recipes will be sold under several different names: Bread machine yeast (preferred), active-dry yeast, and instant yeast.Before using, check the expiration date of the yeast. Return to refrigerator immediately after each use.IngredientsTipT o check whether the yeast is fresh and active:• Pour 1 cup (237 ml) hot tap water into the measuring cup.• Add 1 teaspoon (5 ml) white sugar and 1 tablespoon (15 ml) yeast.• Place the measuring cup in a warm place for about 5 minutes.• Fresh, active yeast will begin to bubble or “grow.” If it does not, theyeast is dead or inactive.13Frequently Asked QuestionsMay I use a sugar substitute in place of sugar?Sugar is necessary for the yeast to produce a light loaf with a good height. Results may vary with the type and amount of sugar substitute used. If you are going to use an artificial sweetener, choose one that is aspartame-based rather than saccharin-based.May I omit the salt or sugar from the recipe?No, both the sugar and salt play an important role in the breadmaking process. Salt prevents the yeast from overreacting and the bread from overrising. The combination of sugar, salt, and yeast is a key part of the breadmaking process. Remember that the total sugar and salt amounts are divided among all the slices, so the amount of sugar and salt per serving is small.When do I add raisins, nuts, etc., to the bread?This breadmaker has an automatic fruit and nut dispenser. Add your raisins or other add-ins to the dispenser when you add all your other ingredients into the breadmaker, and the machine will add in these items at the correct time for the cycle you have chosen.Can I open the lid while the breadmaker is operating?This breadmaker is designed with a window in the lid to let you watch your bread’s progress. Quick checks are OK in the early stages of kneading and to add ingredients when the beeper sounds. However, the temperature in the baking chamber adjusts for the Rising and Baking stages. Opening the lid during these steps could cause the loaf to fall or not bake properly. Sometimes condensation forms on the window after initial mixing and kneading. It usually disappears once the baking cycle starts so you should be able to get a clear view of your loaf.Can I use my favorite bread recipes in my breadmaker?Y es, but you will need to experiment to get the right proportion of ingredients. Become familiar with the unit and make several loaves of bread with recipes provided before you begin experimenting. Never exceed a total amount of 4 1/4 cups (1 L) of dry ingredients (that includes flours, oats, cornmeal, etc.). Use the recipes in this book to help determine the ratio of dry ingredients to liquid and amounts of yeast, sugar, salt, and butter/margarine to use.What will happen if I leave the bread in the bread pan after baking? This unit has a 60-minute Keep Warm cycle that lets you leave the bread in the pan for up to an hour after baking is complete. Once the warming cycle is over, it is best to remove the bread immediately or the bottom of your loaf will absorb moisture and become soggy.Can the recipe be cut in half?No, it is not recommended. The ingredient proportions work better in the full amounts.How can bread mixes be used in the machine and at what setting? The package instructions will list the amount of water and amountof yeast to use. Be sure to add liquid, then dry ingredients, followedby yeast. Do not allow the yeast to sit in the liquid. The bread type setting is dependent upon the type of bread mix being used (i.e., White bread uses the Basic bread setting; Sweet Bread setting is for use with dried fruit, cheese, or nuts; whole-wheat or multigrain should use the Whole Grain setting; Crust setting, either Light or Dark, is a personal preference). Do not use bread mixes that exceed 2-lb. (907-g) loaf size.151Unplug. Allow to cool completely.33其他用户安全信息此电器电源线的长度设计考虑减少长电源线缠绕或绊倒的危险。
面包机说明书
食谱中的用量不要超过:面包桶里:面团不要超过1.5千克,面粉不超过930克,酵母不要超过15克烘烤盘里:面团一次不超过450克,每一炉不超过280克面粉和6克酵母第一次使用1,先把面包机拿出来,放在一个平台上,把零件都拿出来,注意刀片,小心划伤。
2,把面包桶拿出来3,用湿布清洗面包盘后擦干,(第一次使用可能会有异味)安装搅拌器。
(揉面杆安装的相对,会增加捏合速度)4,把面包桶装进面包机里。
将电源线插上插座。
提示声后屏幕上回自动显示程序1和中等烤色。
第一次可做白面包来了解面包机的使用过程。
5,选择程序,每种面包都有不同的程序,需要手动操作来选择。
选择了一个程序后,后面的一系列步骤都会自动实行。
按菜单键选择程序,从1到16可通过连续按键选择,每种程序所需的时间都是自动选择。
配件面包重量的选择默认的重量设置值为1500g。
程序3,9,12,13,14,15,16不可以设置重量。
按下键选择重量—750g,1000g.1500g,指示灯显示您选择的重量。
程序1和二可选择两种重量,一种是大约400克一炉(4只长棍面包)显示750克。
另一种是800克一炉,显示1500克。
面包表面颜色的设置面包的默认颜色是中等颜色。
面包表面颜色可通过菜单键设置。
程序13,15,16不能设置成深色。
有三种颜色设置:淡色-中等颜色-深色。
如果需要更改设置,按住直到指示灯显示您所需要的设置开始/停止按下启动键启动所选择的程序,启动后屏幕上会显示相应的时间,接下来的操作会自动实行。
延时启动功能该功能可以让面包在规定时间做好,最长不超过15小时。
在选择好功能,重量,颜色后,你可以实行该操作,你选择的功能将延时开启。
该功能不适用于程序3,8,12,14,15,16.。
计算好你要启动功能时和设置时的时间差,机器会自动将其循环运行的持续时间加进去。
通过+,-键设置你算好的时间(+加-减)。
短按键可以每十分钟的加减时间,并且会有嘟声。
例如:现在是晚上8点,你想要你的面包明天早上七点做好。
面包机做面包的配方及面包机的使用方法经验汇总

(一)面包机做面包的配方:面包机做面包的配方,也就是在所选特定的面包程序下,规定所需原材料的份量和比例。
面包机必须有精准的食谱才能做出好吃的面包。
面包的主要原料分为面粉(或大米),水,糖,盐和酵母,常用辅助原料主要有鸡蛋,奶粉,果仁等。
原料以及辅料的选择和配比不同,则做出的面包的口味不同。
不同品牌的面包机食谱也大同小异。
(二)柏翠面包机使用指南1、有一些朋友按说明书上的配方来做面包,也不是很成功;在这里我要提醒大家:水和面的比例,和好面之后一定要成团,成为光滑的面团,这样才会发酵好的。
因为每个人的测量手法不一样,可能少许有些误差,可以按下面图中的成为“光滑的面团”来调整一下,这就可以了。
2、一般是不建议做快速面包的,因为此菜单的发酵程序时间太短了,要放很多酵母,这样一来造成做出来的面包没有拉丝感及口感很差。
3、有两点要特别提醒大家的:做面包的时候一定要用高筋面粉和即发酵母。
高筋面粉:蛋白质含量为12.5%—13.5%,常用来做面包或馒头面条,筋度较大。
中筋面粉:蛋白质含量为8.5%—12.5%,市场上最常见的面粉,适合做各种家常的面食、面条、饼;低筋面粉:低筋粉颜色较白蛋白质含量为8.5%以下,蛋白质含量低,麸质也较少,筋性弱适合用来做蛋糕,松糕,饼干等需要蓬松酥脆口感的西点。
酵母一定要使用即发酵母,普通酵母发酵时间长要3个小时以上,面包机的发酵在30分钟之内完成。
水的选择也要使用烧开过的冷却至常温的沸水,其碳酸钙的含量和酸碱性比较适合做面包。
(三)面包制作常见的问题解决办法:(四)新浪美食名博candey,柏翠面包机做面包经验指导用面包机做面包详细步骤图解:加入原材料至面包机---将面团揉至完全扩展阶段(3个揉面程序60分钟)---第一次发酵---排气整形---第二次发酵---烘烤(45分钟)面包机做面包方法经验总结:揉面一定要到位。
一定要选择3个和面程序,即需要60钟的和面时间,这样才能将面团揉到完全扩展阶段,和步骤1那样,拉出薄薄的膜最好,这样做出来的面包比较松软,口感比较好。
松下 自动制面包机 SD-P1000 使用说明书
(酵母容器)
操作部
葡萄干坚果容器(可脱卸式 P . 13)
排气口(左右)
上盖把手(左右)
本说明书中所述材料的“大1”是指“大计量匙1匙”的意思。
(大计量匙)(小计量匙)
约¾量的线约½量的线约¼量的线
葡萄干
●添加葡萄干等辅料(P . 5)
(下述)标准→浓→淡
●预约完成时间(倒数型)
• 在指定时间完成烘烤的“预约”
(拔掉电源插头时,液晶显示会消失。
)
显示当前菜单
上方图示显示所有文字和图标,实际使用时仅显示与当前菜单有关的内容。
握住开盖扣再打开
(为免从边缘溢出,周边留出
从近身开始挤出空气卷起来,接缝紧接缝朝下放入面包容器
关闭上盖,按下“开始”键
再次开始
出哔哔声后按下“取消”键,取出面包容器,冷却2分钟左右后。
Panasonic PT-F200系列投影仪产品介绍说明书

L o n g-L a s t i n g B r i g h t n e s s PT-F200NT U PT-F200ULCD ProjectorsA Bright Choice for New Installations and Replacement UseAuto R olling Filter (AR F) and Anti-Dust Design A Micro Cut Filter,a high-efficiency electrostatic filter,with superior dust-collecting performance combines with Panasonic’s original Auto RollingFilter and anti-dust design to minimize brightness loss due to dust accumulation.The projector automatically detects when dustaccumulates on the high-efficiency electrostatic filter and impairs performance.The affected section of the filter is wound into the casing,so the filter maintains its dust-catching capability.In developing the anti-dust design,Panasonic totally re-engineered the airflow path,from intake to exhaust,to create a cabinet that hermetically seals off the projector interior.This design and the Auto Rolling Filter team up to keep the air inside the projector dust-free at all times.ARF unitARF unitMicro Cut FilterA high-efficiency electrostatic filter in the air intake sec-tion traps dust particles that are 1 microns or larger.By capturing approximately 7 times as much dust as our pre-vious filters,it guards against optical blocks and reduces the penetration of dust into the interior to provide stable operation by preventing drops in brightness.1A D V A N C E D T E C H N O L O G I E S T H A T M A I N T A I N H I G HB R I G H T N E S S O V E R A L O N G E R S E R V IC E L I F EThe projector can also b e set on a shelf at the b ack of the room,greatly simplifying installation.Thanks to the wireless LAN function,you can set up a sys-tem using multiple PCs quickly and easily.The PT-F200N TU and PT-F200U are high-performance LCD projectors designed for use in fixed installations.Each model combines Panasonic’s original Auto Rolling Filter with an original lamp drive system to deliver crisp,bright images over extended periods of time and enable a 5,000-hour*1lamp replacement cycle.Each also offers outstanding installation flexibility,with 2x zoom lens,lens shift and wireless/wired LAN *2functions that accommodate everything from permanent ceiling-mounted use to simple placement on a shelf.Whether you're looking to install a new system or considering a replacement,Panasonic answers the call for projectors that provide long-lasting brightness,simple maintenance,and easy,casual use even in fixed installations.*1The value given above does not imply a guaranteed amount of time.The value may vary considerably depending on usage conditions.*2The PT-F200N TU only.2Original Lamp Drive System for Optimal Lamp Performance Lamps used in a projector require much higher precision than ordinary household lamps.Panasonic employs a number of new technologies—including an original lamp drive system—that help maintain optimal lamp performance for longer-lasting brightness.This has resulted in a 5,000-hour* lamp replacement cycle.*The value given above does not imply a guaranteed amount of time.The value may vary considerably depending on usage conditions.Daylight View 4 Technology: R emarkable Detail withDaylight View 4 technology.achieved with the new “EdgeEnhancer Control”and “GammaCurve Control.”Remarkable detail is provided and perceived brightness and contrast are enhanced,soimages appear crisp,vivid,3-dimen-sional and easy to see even in brightly lit rooms.Daylight View 4also includes a built-in ambient lightsensor that automatically detects room brightness and adjustsoperation accordingly.Wide 2x Zoom and Horizontal/Vertical Lens Shift Give You More Installation FlexibilityEach can project a 120-inch image (diagonal) from any distance between 11.8 feet (3.6 m) and 23.6 feet (7.2 m).In new installa-tions,this lets you accommodate a wide range of room sizes andshapes.And when replacing existing projectors,the new 2x zoom greatly expands your installation flexibility.Wired LAN: Web Browser Control/Monitoring,E-Mail Message Alert (PT-F200NTU)Anybody can operate the PT-F200N TU by remote control or moni-tor its status over a LAN network,because it is all done using the computer’s familiar web browser.Furthermore,the projector sends an e-mail message to notify the operator when an error hasoccurred,or a lamp needs to be replaced.PJLink ™compatibility (PT-F200NTU)The LAN terminals support PJLink ™class 1 connection.Control with the same specifications is also possiblewhen used in a multi-projector sys-tem with projectors of another brand.Direct Power OffBecause the cooling fan keeps operating until the lamp is cooled,you can turn off the room’s main power without waiting for the projector to cool down.Easy Lamp R eplacement from the R ear For easier maintenance,you can replace the lamp from the rear.The lamp is easilyreplaced even after the projector is installed on the ceiling.3* There is no actual change in the rated brightness or contrast ratio. Simulated image with Daylight View 4 turned on.Detail,depth,brightness and con-trast over the entire image are enhanced.Simulated image with Daylight View 4 turned off.Overall contrast appears lower,and images in dark areas are blackened.C O N V E N I E N T F E A T U R E SF O RF I X E D I N S T A L L A T I O NEasy Wireless Projection from Multiple PCsWith the PT-F200N TU’s wireless capability,you don’t need cables to connect a PC.That means it’s easy to bring in a laptop (with a wireless LAN function) and deliver a smooth,hassle-free presenta-ral mode)•Picture mode selection (standard/dynamic/natural)•Blackboard mode allows you to project images onto an ordinary classroom or conference room blackboard •Shutter function for image/sound muting •Selectable 17-language onscreen menuSecurity anchor 4Wireless Manager Control Panel (Launcher)To begin wireless projection,simply use the control panel (launcher) displayed in the PC window.PT-F200NTUPT-F200UD VE R S A T IModelPower supplyPower consumption LCD panel Panel sizeDisplay method Drive method PixelsPixel configuration Lens LampProjection size ColorsBrightness *Center-to-corner uniformity *Contrast ratio *R esolution (R GB)Scanning frequency RGB YP B P RS-Video/VideoOptical axis shift *Keystone correction range On-screen menuInstallationBuilt-in speakers TerminalsCOMPUTER 1 IN COMPUTER 2 IN/COMPUTER 1 OUT COMPONENT IN VIDEO IN S-VIDEO INAUDIO IN (COMPUTER 1) AUDIO IN (COMPUTER 2)AUDIO IN (COMPONENT/VIDEO/S-VIDEO)AUDIO OUT SERIAL REMOTE LAN Power cord length Cabinet materialDimensions (W x H x D)*WeightOperating environment Temperature Humidity Wireless LAN StandardOperation range *Infrastructure modeAd-hoc modeWireless R emote Control Unit Power supply Operation range *Dimensions (W x H x D)WeightSupplied AccessoriesPT-F200NTU 100–240 V AC,50/60 Hz330 W (Approx.3.5 W in standby mode with fan stopped)0.7˝ (17.78 mm) diagonal (4:3 aspect ratio)Transparent LCD panel (x 3,R/G/B)Active matrix786,432 (1,024 x 768) x 3,total of 2,359,296 pixels StripeManual zoom (1:1–1:2),manual focus,F 1.7–2.6,f 21.6–43.0 mm 250 W UHM™ lamp33–300 inches/838–7,620 mm diagonally (4:3 aspect ratio)Full color (16,777,216 colors)3,500 lumens 80%400:1 (full on/full off)1,024 x 768 pixels*Horizontal:15–91 kHz,Vertical:50–85 Hz 480i (525i):f H 15.75 kHz; f V 60 Hz 576i (625i):f H 15.63 kHz; f V 50 Hz 480p (525p):f H 31.5 kHz; f V 60 Hz 576p (625p):f H 31.25 kHz; f V 50 Hz 720/60p (750/60p):f H 45 kHz; f V 60 Hz 720/50p (750/50p):f H 37.5 kHz; f V 50 Hz 1080/60i (1125/60i):f H 33.75 kHz; f V 60 Hz 1080/50i (1125/50i):f H 28.125 kHz; f V 50HzNTSC,NTSC4.43,PAL-M,PAL60:f H 15.75 kHz; f V 60 Hz PAL,SECAM,PAL-N:f H 15.63 kHz; f V 50 Hz Vertical:±50%,horizontal:±32%Vertical:±30°17 languages:English,French,German,Spanish,Italian,Korean,Russian,Chinese,Japanese,Swedish,Norwegian,Danish,Portuguese,Polish,Hungarian,Czech,and Thai Front/rear ceiling/desk (menu selection)4 cm (round),x 1,3.0 W (monaural) output power D-sub HD 15-pin x 1D-sub HD 15-pin x 1(input/output selectable using on-screen menu)RCA pin x 3RCA pin x 1Mini DIN 4-pin x 1M3 (stereo) x 1M3 (stereo) x 1RCA pin (L,R) x 1M3 (stereo) x 1 (variable)D-sub 9-pin x 1 (RS-232C)D-sub 9-pin x 1RJ-45x 1,10BASE-T/100BASE-TX/1000BASE-T 2 m (6´7˝)Molded plastic (PC+ABS)432 x 124.5 x 319 mm (17˝ x 4-29/32˝ x 12-9/16˝)6.2 kg (13.7 lbs.)0°–40°C (32°–104°F)20%–80% (no condensation)IEEE802.11b/gApprox.30 m (98´5˝)WPA-PSK (TKIP/AES),128/64-bit WEP 128/64-bit WEP3 V DC (AA battery x 2)Approx.10 m (32.8 feet) when operated from directly in front of the signal receptor48 x 163 x 24.5 mm (1-7/8˝ x 6-13/32˝ x 31/32˝)117 g (4.2 oz) (including batteries)•Power cord•Power cord secure lock •Wireless remote control •Batteries for remote control •Safety wire rope•Wireless Manager ME 4.5(CD-ROM)PT-F200U –––PT-F200NTU1-07DEC30K Printed in Japan.Ple a se cont a ct P a n a sonic or your de a ler for a demonstr a tion.Projector s G lobal Web S ite: http://p a n a sonic.co.jp/p a vc/glob a l/projectorPanasonic Projector Systems Company,Unit of Panasonic Corporation of North America /projectors Headquarters3 Panasonic Way, 4B-9Secaucus, NJ 07094888-411-1996Panasonic Canada Inc.5770 Ambler Drive Mississauga, Ontario Canada L4W 2T3905 624 5010Weights and dimensions shown are approximate.Specifications are subject to change without notice.Product availability differs depending on region and country.This product may be subject to export control regulations.UHM is a trademark of Matsushita Electric Industrial Co.,Ltd.Intel and Pentium are registered trade-marks of Intel Corporation.Windows is either a registered trademark or trademark of Microsoft Corporation in the United States and/or other countries.All other trademarks are the property of their respective trademark owners.Projection images simulated.(C) 2006 Panasonic Projector Systems Company is a Unit Companyof Panasonic Corporation of N orth America.All rights reserved.(C) 2006 Matsushita Electric Industrial Co,Ltd.All rights reserved.SpecificationsReplacement lamp unit ET-LAF100Replacement filter unit ET-RFF100Ceiling mount bracket for high ceilings ET-PKF100H Ceiling mount bracket for low ceilings ET-PKF100SProjection Distance (4:3)Project s ize (diagonal)Height from the edge of s creento center of len s (H)Min (wide)Projection di s tance (L)Max (telephoto)////////////////////////////////////0.84 m 1.02 m 1.52 m 2.03 m 2.54 m 3.05 m 3.81 m 5.08 m 7.62 m–1.2 m 1.8 m 2.4 m 3.0 m 3.6 m 4.5 m 6.0 m 9.1 m1.9 m2.4 m3.6 m4.8 m 6.0 m 7.2 m 9.0 m 12.1 m 18.1 m0.25 m 0.30 m 0.46 m 0.61 m 0.76 m 0.91 m 1.14 m 1.52 m 2.29 m0 –0 –0 –0 –0 –0 –0 –0 –0 –33˝40˝60˝80˝100˝120˝150˝200˝300˝–3.8´5.8´7.8´9.8´11.8´14.8´19.8´29.8´6.4´7.8´11.7´15.7´19.7´23.7´29.6´39.6´59.5´0 –0 –0 –0 –0 –0 –0 –0 –0 –0.8´1.0´1.5´2.0´2.5´3.0´3.7´5.0´7.5´Options*1:Measurement,measuring conditions,and method of notation all comply with ISO 21118 international standards.*2:Input signals that exceed this resolution will be converted to 1,024 x 768 pixels.*3:Shift range is limited during simultaneous horizontal and vertical shifting.*4:Including protruding parts.*5:Operation range differs depending on the environment.All information included here i s valid a s of December 2007.。
天际面包机的操作方法

天际面包机的操作方法
天际面包机的操作方法如下:
1. 首先,将天际面包机放置在平稳的台面上,并连接电源。
2. 打开面包机的盖子,将要烤制的面包放入面包机的烤盘中。
可以根据个人口味选择放入1到4片面包。
3. 根据需要选择面包的烘烤模式。
大多数天际面包机都配备了不同的烤模式,如烤面包、烤面包片(只烤一面)、烤面包片(两面烤)、解冻等。
根据面包的类型和口感需求,选择相应的模式。
4. 确定面包的烤色程度。
面包机通常具有可调节的烤色程度控制按钮或旋钮,可以根据个人喜好选择面包的烤色程度。
5. 关闭面包机的盖子,并按下开始按钮或旋钮。
面包机会开始自动烘烤。
6. 在面包机烘烤过程中,可以随时打开盖子检查面包的烤制状态。
如果需要,可以根据个人喜好翻转面包片,以均匀烘烤两面。
7. 在面包机完成烘烤后,它通常会发出声音或自动停止加热。
此时,可以打开盖子,将烤好的面包取出。
8. 注意安全,烤好的面包会很热,请使用防烫手套或工具将面包取出。
9. 关闭面包机的电源,并等待它完全冷却后再进行清洁和存放。
请注意,以上步骤仅为一般操作方法,具体操作步骤可能会因不同的天际面包机型号而有所不同。
在使用之前,强烈建议阅读天际面包机的用户手册并按照其提供的操作指南进行操作。
松下新款SD-PT1000面包机超值首发!完美复现手揉~

松下新款SD-PT1000面包机超值首发!完美复现手揉~松下的厨房小家电们一向以髙颜值和超强实力让无数厨娘心甘情愿为之斩手,尤其是松下的面包机,更是以便捷多功能征服人心,多少人的早晨都是闻着松下面包机里的面包香醒来的呢~厨友@任冉Srivatsa 用这款面包机做的【布里欧修吐司】这款新品SD-PT1000面包机不仅延续了之前的髙颜值,更在功能上有了强大的飞跃。
它独创的变频技术,能通过“无极变速”自由切换揉面速度,面团就像手揉的一样。
且看下厨房美食达人@王光光光光是怎么用它玩转花样面包的吧~松下新款SD-PT1000面包机超详细测评by 王光光光光当知道有新款松下面包机能试用的时候可高兴啦~ 因为我对松下小家电的印象都挺好的,之前用松下103用了一年半,几乎平均两天就要用一次,使用率还蛮高的,小103也还是特别的给力,从来没有坏过。
所以这次我对功能多多的PT1000也很有信心,用了几天试了几个功能,做面包做点心都很顺手,成品很好吃。
而且它拥有静音和变频设计,可以模拟手揉,揉面时真的超级静悄悄,不偷偷去看都听不到它已经开始揉面了,揉好的面团我也测试过,薄膜坚韧通透棒棒的。
图片来自厨友@王光光光光先看下面包机外形,从2012年开始松下就延续着这种高高的迷你小洗衣机造型,底部的加厚防滑硅胶垫像四个小脚,高大上之余又增添了一些小小的呆萌感,使整个面包机看起来特别可爱,金色和白色的配色也很和谐,配上它的造型整体显得简单大方。
图片来自厨友@王光光光光顶部前面的是显示屏和操作面板,选择很多,可以根据你所喜欢的面包效果来选择,比如说外皮颜色和口感可以用烤色键来选择浅色还是普通色或者深色。
时和分的按键是时间设计键,调整到正确的时间后无论选择面包机的哪个功能都能显示出当完成制作时的时间是几时几分,清晰明了。
图片来自厨友@王光光光光侧面是一个电池容器,PT1000这个独有的功能可以精确记录当前时间和上一次所使用的面包设定时间,不管放不放电池,对烤面包都没有影响。
柏翠面包机使用方法
柏翠面包机使用方法
1. 准备面团。
按照面包机配方中的材料比例准备好面团,注意水温和面团松紧程度。
将面团放入面包机内。
2. 确定程序。
选择相应的程序,这取决于你要制作的面包种类和重量。
面包机一般有基础面包、全麦面包、法式面包、甜点面包等多种程序。
3. 开始制作。
按下开始键,面包机开始工作。
面包机内设有混合、发酵、成型和烘烤等阶段,相应的操作会自动完成。
4. 取出面包。
当面包制作完成时,面包机会发出提醒声。
使用保温手套将面包机内的面包取出来,放在烤网上晾凉。
5. 清洁面包机。
面包机内部和面包盘需要定期清洁,避免积累太多面团残渣影响制作效果和卫生。
将面包机拆解,用清洁剂和湿布擦拭干净即可。
注意事项:
1. 操作前先阅读说明书,遵循使用规则。
2. 面包机在工作时会发出噪音,不能将其放在睡眠区或者影响他人休息的地方。
3. 面包机内部是电器,要避免进水或者使用湿手使用。
4. 打开面包机前,先停止其工作,避免意外发生。
5. 面包机内发生故障时,不能自行拆卸修理,需要找专业人员。
松下PPF100面包机怎么样评测为健康早餐护航
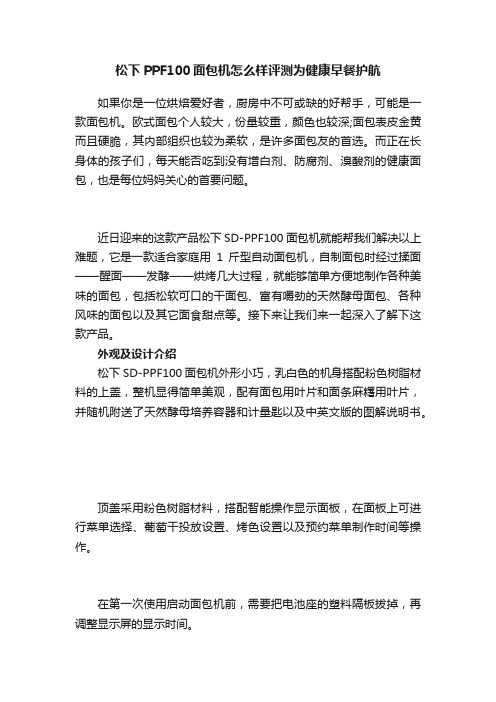
松下PPF100面包机怎么样评测为健康早餐护航如果你是一位烘焙爱好者,厨房中不可或缺的好帮手,可能是一款面包机。
欧式面包个人较大,份量较重,颜色也较深;面包表皮金黄而且硬脆,其内部组织也较为柔软,是许多面包友的首选。
而正在长身体的孩子们,每天能否吃到没有增白剂、防腐剂、溴酸剂的健康面包,也是每位妈妈关心的首要问题。
近日迎来的这款产品松下SD-PPF100面包机就能帮我们解决以上难题,它是一款适合家庭用1斤型自动面包机,自制面包时经过揉面——醒面——发酵——烘烤几大过程,就能够简单方便地制作各种美味的面包,包括松软可口的干面包、富有嚼劲的天然酵母面包、各种风味的面包以及其它面食甜点等。
接下来让我们来一起深入了解下这款产品。
外观及设计介绍松下SD-PPF100面包机外形小巧,乳白色的机身搭配粉色树脂材料的上盖,整机显得简单美观,配有面包用叶片和面条麻糬用叶片,并随机附送了天然酵母培养容器和计量匙以及中英文版的图解说明书。
顶盖采用粉色树脂材料,搭配智能操作显示面板,在面板上可进行菜单选择、葡萄干投放设置、烤色设置以及预约菜单制作时间等操作。
在第一次使用启动面包机前,需要把电池座的塑料隔板拔掉,再调整显示屏的显示时间。
扣住粉色容器盖的开盖扣,就可以轻松打开容器盖放入葡萄干和酵母等辅料。
果料投放口为葡萄干、坚果容器,用户可以事先放入自己喜欢的辅料(放入容器的总量不可超过100g,比以往产品增大了1.8倍),酵母容器可添加干酵母。
制作不同的面包,或者是在不同温度下投放果料和酵母的时间都会有所不一样,松下SD-PPF100面包机能够智能地判断准确投放时间,自动投料,免去用户烦恼。
松下SD-PPF100面包机在两个位置采用了把手设计,一个是机身两侧,方便提取整个面包机,另外一处则是在上盖两侧,便于开合上盖。
机身四周设有多个排气口,在面包机运作过程中能够及时散热。
松下SD-PPF100面包机面包容器涂层为氟素涂层,具有出众的导热效力,使得面包在烘烤时热量更加集聚。
松下SD-RBM1001面包机中文说明书
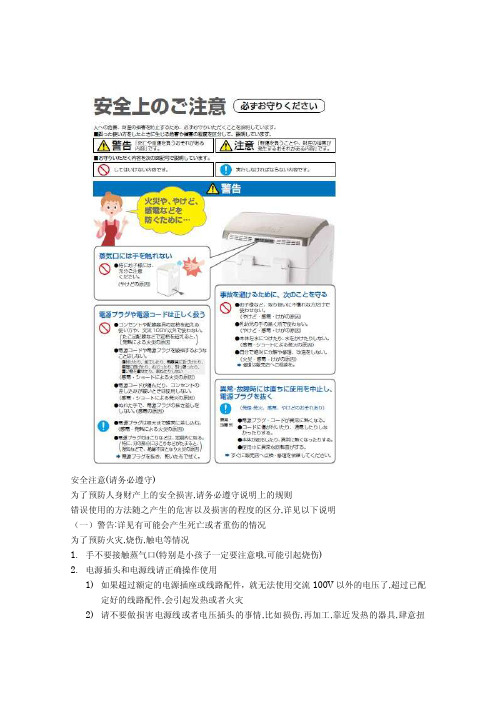
安全注意(请务必遵守)为了预防人身财产上的安全损害,请务必遵守说明上的规则错误使用的方法随之产生的危害以及损害的程度的区分,详见以下说明(一)警告:详见有可能会产生死亡或者重伤的情况为了预防火灾,烧伤,触电等情况1.手不要接触蒸气口(特别是小孩子一定要注意哦,可能引起烧伤)2.电源插头和电源线请正确操作使用1)如果超过额定的电源插座或线路配件,就无法使用交流100V以外的电压了,超过已配定好的线路配件,会引起发热或者火灾2)请不要做损害电源线或者电压插头的事情,比如损伤,再加工,靠近发热的器具,肆意扭曲,,任意拉扯,重物压住,过分约束等不要做。
(引起触电,震动,火灾的原因)3)电源线损伤,插座缓慢入电的情况下不要使用(引起触电,震动,火灾的原因)4)湿手请不要拔下电源插头(引起触电的原因)5)必须要做的事情:保证电源插头彻底插入(否则会引起触电,发热,火灾)6)电源插头的灰尘等,定期去除(特别注意插头芯丸积存的灰尘,湿气等,会引起接触不良或者火灾)7)拔下电源插头,用干净的布擦拭3.为了避免事故,请遵守以下规则1)不要让小孩或者使用错误的安装方法安装机器(会引起烧伤,触电,受伤)2)请放在婴幼儿的手够不着的地方(会引起烧伤,触电,受伤)3)本体里浸水的时候,不要再加水(引起触电,震动,火灾的原因)4)请绝对不要自己分解,修理,改造机器(引起火灾,触电,受伤)如果要修理请联系售卖处4.出现异常,故障的情况下请立即中止使用,拔下电源插头(可能出现燃烟发火,触电,受伤的情况)异常故障的案例:1)电源插头,电源线异常发热2)电源插头损伤,通电不畅3)主机变形,异常发热4)使用过程中出现异常的回音出现以上情况,请立刻去售卖处检查修理(二)注意:详见有可能产生轻伤或者损害财产的情况为了预防火灾,烧伤,触电等情况1.使用中或者使用后请注意烧伤情况1)不要接触面包盒或者主机,排气口,库内,电热器,盖子内侧等高温部位(会引起烧伤)取出面包盒的时候务必使用连指手套,不要使用湿的手套,热度会传染到手上,引起烫伤2)使用过后冷却再清洗(否则引起烧伤)2.以下场合请不要使用1)不要放在地毯等容易发热的物品上(产生火灾的原因)2)不安定的场合下或者盖上桌布(机器掉落或者引起火灾)发烫的面包盒,请注意放置的场所3)粉末,油脂类,灰尘等容易踩滑的场所(主机滑落掉下的原因)去除粉末,放置距离10cm以上的高度4)靠近墙壁或者家具的话放置的时候保持5cm的距离(变形,变色的原因)3.电源插头正确操作使用1)拔下电源插头的时候,务必拿着电源插头(触电,震动等发火的原因)2)使用之外的情形下,务必把电源插头从插座里拔出来(触电漏电,火灾的原因)4.遵守以下的规则1)(米,粉,水等)材料的计量和菜单的设定,请正确的执行(素材从面包盒中飞散,溢出的时候,电热器会发热烧焦,冒烟,会引起故障)(三)使用上的注意1.贴菜单标签的时候,注意不要堵住排气口,不要和盖子上面的警告标签重合(引起故障,变形的原因)2.不要放置在湿气重的地方或者离火比较近的地方(引起故障,变形的原因)3.使用过程中不要打开盖子(会影响面包出笼的营养质量)机器操作的时候不要手动放入材料,去除遗落下的粉末4.不要拿抹布盖在机器盖子上(引起故障,变形的原因)5.温度感知器,电热器,盖子内侧,请不要施与强力(引起故障,变形的原因)各部分的名称以及操作方法初次使用的时候,面包盒子,面包羽翼,附属品请清洗干净1.蒸気口:蒸汽口2.排気口:排气口3.指をかけて開ける:用手指打开4.電源プラグ:电源插头5.電源コード:电源线6.コードケース:电线柜子7.ふた:盖子8.レーズンナッツ容器:装葡萄干和坚果容器9.ふた開け部:盖子打开的部位(左右)10.グルテンイースト容器:装面筋和酵母容器11.米パンケース(黒色):大米面包盒(黑色)12.排気口(左右):排气口(左右)小麦パンケース:小麦面包盒米パン羽根:大米面包羽翼小麦パン羽根:小麦面包羽翼めんもち羽根:面,年糕羽翼操作部液晶显示内容表示菜单的变化1.メニュー:菜单选择显示按钮2.レーズン:葡萄干等素材放入的按钮3.焼き色:烘烤颜色的变化显示按钮4.時分:预约出笼时间;核计现在时间:设定调理时间的按钮5. 予約:预约出笼时间的按钮6. スタート:开始调理和预约的操作按钮7.取消:重新操作按此键,开始后机器操作中止了长按此键机器操作的按钮附属品(各一个)1.計量カップ:计量杯(液体专用)2.生種容器:原料容器3.ミトン:连指手套4.スプーン:汤匙5.大スプーン:大汤匙(约3/4的量度线)6.小スプーン:小汤匙(约1/2的量度线)7.グルテン用スプーン:面筋专用汤匙8.洗浄ブラシ:清洁刷子9.メニューラベル:菜单标签(贴在一下子就可以看到的地方)各部分的名字以及使用方法葡萄干坚果容器取下的方法:在上面挪动拉出容器安装的方法:将葡萄干坚果容器的▷符号对准盖子上的横线,然后按照图中箭头指示的方向,先将容器退到盖子里面,再向下拉一点,使◁符号对准▶符号,这时会发出轻微的“kaqi”声就装好了。
面包机第一次使用注意事项
面包机第一次使用注意事项面包机第一次使用注意事项面包机作为一种现代化的厨房电器设备,可以让我们在家中轻松制作出美味的面包。
然而,在第一次使用面包机之前,有一些注意事项需要我们了解和遵守,以确保我们能够正确地操作面包机,并且获得最好的使用效果。
以下是使用面包机的一些建议和注意事项。
1. 阅读说明书:在第一次使用面包机之前,我们应该仔细阅读和理解面包机的使用说明书。
说明书会告诉我们如何正确地使用面包机,并提供一些实用的技巧和建议。
2. 清洁面包机:在使用面包机之前,我们应该确保面包机是清洁的。
我们可以使用温水和洗洁精清洗面包机的外壳和内部组件。
请注意不要将电插头浸入水中,以免发生电击。
确保面包机在彻底干燥后才进行使用。
3. 检查面包机配件:在第一次使用面包机之前,我们应该检查面包机的配件是否完整。
这些配件通常包括面包机的钩子、面包盖、测量杯和配料盖等。
确保这些配件在使用前都是完好无损的。
4. 选择适当的配料:在制作面包时,我们应该选择适当的配料。
通常,面包机需要使用面粉、酵母、水、盐和糖。
我们应该根据自己的口味和健康需求来选择面粉的种类,例如全麦面粉或白面粉。
此外,我们还可以根据个人喜好添加一些其他配料,如干果、坚果或香料等。
5. 确定面包机容量:在使用面包机制作面包之前,我们应该了解面包机的容量。
面包机的容量通常以面包的重量为单位(以克为单位)。
根据面包机的容量,我们可以选择适当的面粉和其他配料的数量,以确保面包能够均匀地烘烤。
6. 适当测量配料:在使用面包机之前,我们应该准确地测量配料的数量。
使用面包机配备的测量杯可以帮助我们准确地测量面粉、水和其他配料的数量。
过多或过少的配料可能会影响面包的口感和质量。
7. 遵循程序:在使用面包机制作面包时,我们应该按照面包机的程序进行操作。
通常,面包机会提供不同的程序和选项,如和面、发酵、烘烤等。
我们应该按照面包机的程序进行操作,并设置合适的时间和温度。
8. 不要打开盖子:在制作面包的过程中,我们不应该随意打开面包机的盖子。
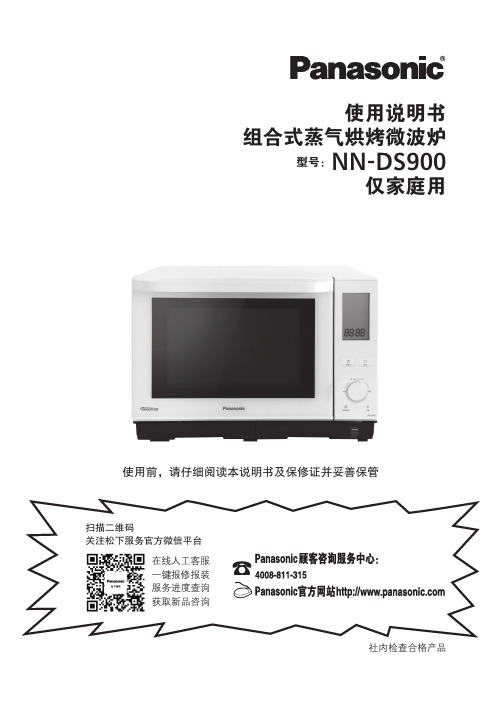
松下 组合式蒸气烘烤微波炉 NN-DS900 使用说明书
微波火力设定
选择变频微波
(第 21-22 页)
按1次
选择烹调火力
按1次
设定时间
按1次
微波解冻设定
选择变频微波
(第 25 页)
按1次
选择 300 W
按1次
设定时间
按1次
变频解冻设定 (第 24 页)
选择编号“6”
按1次
炉腔除味 ........................................................................................................... 49 蒸气加热器清洁................................................................................................. 50 柠檬酸清洗........................................................................................................ 51 炉腔清洁 ........................................................................................................... 52 微波炉加热原理........................................................................................................ 53 食物的特性 ............................................................................................................... 53 烹调技巧................................................................................................................... 54 微波解冻建议时间 .................................................................................................... 55 再加热食谱建议时间................................................................................................. 56 常用食谱烹调建议时间 ............................................................................................. 57 微波炉的保养 ...................................................................................................... 58-59 要求修理服务之前 ............................................................................................... 60-61 产品中有害物质或元素名称及含量 ........................................................................... 62 食品接触用信息........................................................................................................ 62 规格.......................................................................................................................... 63
100全麦面包pt1000面包机

减脂期间拒绝白米白面,面包机再次拯救烘焙手残星人!不加黄油、牛奶和白砂糖的100%的全麦面包做起来!
用料
全麦粉
250g
水
125g蜂蜜35gFra bibliotek橄榄油
20g
盐
2g
酵母
3g
燕麦
一大把
100全麦面包pt1000面包机的做法
1
燕麦放入辅料盒,酵母投入酵母盒。其余食材放进面包桶。选择普通搅拌和粗搅拌都可以。按下8号全麦面包键即可。
燕麦烤过半熟再做面包口味更佳~
2
观察面包机全麦面包模式在发酵阶段启动多次揉面程序排气,烤出来的组织和口感真的特别全麦。皮脆心韧,特别赞!全麦面包的模式不可以选择烤色,成色如图,略有些深,倒也是更有全麦的感觉了呢。
3
切面图可见全麦的组织就是这样大孔洞的才对呢,加入了燕麦更加健康,吃起来的时候略有坚果风味。
4
搭配减脂餐一级棒!
小贴士
- 1、下载文档前请自行甄别文档内容的完整性,平台不提供额外的编辑、内容补充、找答案等附加服务。
- 2、"仅部分预览"的文档,不可在线预览部分如存在完整性等问题,可反馈申请退款(可完整预览的文档不适用该条件!)。
- 3、如文档侵犯您的权益,请联系客服反馈,我们会尽快为您处理(人工客服工作时间:9:00-18:30)。
松下新款SD-PT1000面包机超值首发!完美复现手揉~
松下的厨房小家电们一向以髙颜值和超强实力让无数厨娘心甘情愿为之斩手,尤其是松下的面包机,更是以便捷多功能征服人心,多少人的早晨都是闻着松下面包机里的面包香醒来的呢~厨友@任冉Srivatsa 用这款面包机做的【布里欧修吐司】
这款新品SD-PT1000面包机不仅延续了之前的髙颜值,更在功能上有了强大的飞跃。
它独创的变频技术,能通过“无极变速”自由切换揉面速度,面团就像手揉的一样。
且看下厨房美食达人@王光光光光是怎么用它玩转花样面包的吧~松下新款SD-PT1000面包机超详细测评
by 王光光光光当知道有新款松下面包机能试用的时候可高兴啦~ 因为我对松下小家电的印象都挺好的,之前用松下103用了一年半,几乎平均两天就要用一次,使用率还蛮高的,小103也还是特别的给力,从来没有坏过。
所以这次我对功能多多的PT1000也很有信心,用了几天试了几个功能,做面包做点心都很顺手,成品很好吃。
而且它拥有静音和变频设计,可以模拟手揉,揉面时真的超级静悄悄,不偷偷去看都听不到它已经开始揉面了,揉好的面团我也测试过,薄膜坚韧通透棒棒的。
图片来自厨友@王光光光光先看下面包机外形,从2012年开始松下就延续着这种高高的迷你小洗衣机造型,底部的加厚防滑硅胶垫像四个小脚,高大上之余又增添了一些小小的呆萌感,使整个面包机看起来特别可爱,金色和白色的配色也很和谐,配上它的造型整体显得简单大方。
图片来自厨友@王光光光光顶部前面的是显示屏和操作面板,选择很多,可以根据你所喜欢的面包效果来选择,比如说外皮颜色和口感可以用烤色键来选择浅色还是普通色或者深色。
时和分的按键是时间设计键,调整到正确的时间后无论选择面包机的哪个功能都能显示出当完成制作时的时间是几时几分,清晰明了。
图片来自厨友@王光光光光侧面是一个电池容器,PT1000这个独有的功能可以精确记录当前时间和上一次所使用的面包设定时间,不管放不放电池,对烤面包都没有影响。
图片来自厨友@王光光光光打开顶盖,有辅料容器和酵母容器,把需要添加的辅料和酵母放置在这里,面包机会自动添加到面团中去,这两个智能设计在使用过程中都显示出很大的作用,酵母的智能投放可以避免一般普通面包机从一开始就加入酵母,出现面团还未揉好就开始发酵破坏面
包最终口感的情况,在天热时这种情况较容易发生。
图片来自厨友@王光光光光辅料投放后还能选择搅拌的速度,粗搅拌的速度很适合葡萄干红豆粒这样比较大颗的材料,能保证他们被充分裹进面团的同时,不会因为搅拌而破坏它们本身的形状,使烤出来的面包更好看也更有口感,普通搅拌则适合芝麻、亚麻籽一类的比较小且不容易搅碎的食材。
图片来自厨友@王光光光光右侧有25个菜单的编号,分了三大类,面包、甜品、面团。
面包的菜单对比我之前用的103增加了一键庞多米、60分钟快速面包、北海道香浓面包、布里欧修、米粉面包、天然酵母面包,感觉选择一下变得更加丰富了。
一键庞多米功能还得到了日本知名的面包书浅田和宏的大力赞扬(浅田和宏就是我之前超级推荐的《学做面包的顶级入门书》的作者之一。
)还有天然酵母面包现在也特别受欢迎,搭配16号生种天然酵母。
厨友@肉星星用这款面包机做的【巧克力庞多米】面团模式会让制作天然酵母面包变得更加上手~甜品的菜单对比103则更显丰富了,除了蛋糕外都是新菜单。
我暂时只试做了麻糬功能,不得不说真的很好用很方便,生糯米无需浸
泡直接加入按下麻糬键后等时间一到就是超级Q弹的麻糬出现。
厨友@王光光光光用这款面包机做的麻薯最后的面团菜单,除了面包面团和饺子皮面团之外都是103没有的,其中的15和16号都是给天然酵母面包准备的,发现松下这款面包机对天然酵母面包做了一个全面的搭载,目的应该是让更多的个人和家庭更方便顺利的接触到更好的面包而设计。
厨友@0夏天0 用这款面包机做的【天然酵母海苔贝果】总的来说,我个人感觉103较适合比较忙碌的上班族使用,1000除了涵盖103的功能之外,也更适合平常喜欢面包,愿意用面包机去试着做出更多口感、不同种类面包的人群使用。
容量方面,不管是在单身、情侣还是一家三口都足够使用。
一次做好的面包1~2天就能吃完,常常都能吃到新鲜面包也是件幸福的事呀。
图片来自厨友@王光光光光接着打开上盖是热力反射面板,能快速提高面包顶部的温度。
图片来自厨友@王光光光光打开后面包机内壁上有一个高热
敏感温元件,通过它将烘烤时机器内的温度传送到控制芯片中能保证烘烤时的温度平衡。
图片来自厨友@王光光光光面包桶一次可做一个1斤的面包,和我平常用450g模具做吐司的份量差不多,大多的面包配方都能直接使用无需转换。
内部的涂层是远红外热效氟素涂层,和顶部的热力反射面包一起在烘烤时发挥作用,导热更快烤出颜色均匀的表皮。
我做了菠萝面包和软式面包都能感觉到确实颜色均匀,口感方面菠萝面包偏中烧色有点甜有点脆~而软式面包我选择了浅烧色烤出来超级柔软~ 可以根据自己的喜好随意选择烧色非常棒。
图片来自厨友@王光光光光面包机的背面和侧面都有很多散热控,全方位的散热可以延长电机的使用寿命。
图片来自厨友@王光光光光配件中的粉色天然酵母培养容器感觉挺好看,杯身上的刻度方便观察天然酵母发酵的状态。
图片来自厨友@王光光光光还有一个量勺和两个搅拌叶片,前面一个是面团/麻糬用叶片,还有一个是面包用叶片,分工明确哇~
图片来自厨友@王光光光光最后看一下我试验的几个菜单出来的成品吧~第一个是黑芝麻麻糬~ 口感我很喜欢~ 软Q 弹~
厨友@王光光光光用这款面包机做的麻薯面团
厨友@王光光光光用这款面包机做的麻薯第二个是蓝莓吐司,用了菠萝面包的程序,表皮脆里带点儿甜,内部柔软香甜~
厨友@王光光光光用这款面包机做的【蓝莓吐司】最后是使用软式面包做的黑麦黑加仑吐司~ 这个吐司我选择了浅烧色粗搅拌,葡萄干颗粒完整很有口感,面包则从里软到外是一个十足的软妹纸~
厨友@王光光光光用这款面包机做的【黑麦黑加仑吐司】最后我想说1000这么多的菜单每一个都很吸引我,试过的又每一个都很满意,再加上之前的蒸烤箱和103我真是一次又一次唧唧复唧唧的被松下圈了无数次粉
╥╯^╰╥========测评结束分割线========看完@王光光光光的测评是不是特别长草?!除了做面包特别厉害,还可以做果酱、巧克力、英式茶饼等各种美食,它还是一台能制作天然酵母的面包机哦!一键制作奶香浓郁、
口感细腻绵密的庞多米只要四步!现在就跟厨友@肉星星一起试试吧~用料:
高筋面粉250g
水130g
淡奶油50g
砂糖18g
盐4g
黄油25g
酵母4g
葡萄干(可选)30g做法:
1. 全部材料放入面包桶,酵母放入酵母盒。
添加物根据喜好选择即可,请勿添加过大过坚硬的食材。
2. 不需要过筛面粉,不需要手动排气整形,预约时间到了面包完美出炉。
在烤网上晾至温热。
3. 切片保存。
这次选择了标准烤色,比淡色面包边略厚一些,可以整圈的撕下来吃!
4.目前做过的庞多米最喜欢这一款!奶香浓郁,绵软有弹性。
看面包组织也能想象口感吧,拉丝还蛮厉害的呢!。
