c读写配置文件
C#ConfigurationManager多个配置文件读取问题

C#ConfigurationManager多个配置⽂件读取问题之前写了篇的⽂章,后来在实际使⽤过程中,将⼀些需要修改的参数顺⼿就写到了配置⽂件App.config⾥⾯。
然后直接F5运⾏项⽬,想着调试下看看程序是否正常运⾏,这⼀试就试出问题了,ConfigurationManager.AppSettings.Get("message")获取不到参数。
ConfigurationManagerConfigurationManager是⼀个提供对客户端应⽤程序配置⽂件访问的静态类,此类不能被继承。
使⽤此类需要先将System.Configuration.dll引⽤到项⽬中来,具体的使⽤⽅式建议查看。
回顾⼀下上⽂项⽬的⽬录结构,在⼀个解决⽅案中有两个项⽬分别为TaskWindowsService(Windows服务项⽬)和WindowsServiceClient(服务管理winform程序)。
他们都有各⾃的App.config⽂件。
接下来我们做⼀个测试:1. 各个项⽬的App.config中分别添加如下代码<appSettings><add key="message" value="this is TaskWindowsService"/></appSettings><appSettings><add key="message" value="this is WindowsServiceClient"/></appSettings>ps:(两个配置⽂件都有了,总不⾄于读不到数据了吧~)2. 在TaskWindowsService中引⽤System.Configuration.dll,并使⽤ConfigurationManager读取配置⽂件,记录到⽇志中public static void ConfigTest(){LogHelper.Log(ConfigurationManager.AppSettings.Get("message"));}3. 运⾏WindowsServiceClient并调⽤ConfigTest()⽅法public Form1(){InitializeComponent();SkpDomain.ConfigTest();}4. 注册并启动TaskWindowsService在服务启动时调⽤ConfigTest()⽅法protected override void OnStart(string[] args){SkpDomain.ConfigTest();}看⼀下输出的⽇志,好玩的东西来了。
C语言读取写入ini配置文件的方法实现

C语⾔读取写⼊ini配置⽂件的⽅法实现⽬录⼀、了解什么是INI⽂件?⼆、INI⽂件的格式三、解析上述⽂件四、测试如下⼀、了解什么是INI⽂件?ini ⽂件是Initialization File的缩写,即初始化⽂件,这是⽤来配置应⽤软件以实现不同⽤户的要求。
⼆、INI⽂件的格式INI⽂件由节、键、值组成。
⼀个简单的的INI⽂件例⼦如下:[Setting]INIT_FLAG=0;VOLUME=1;LANGUAGE=1;如上例⼦,[Setting]就是节,=号左边的值是键,=号右边的是值。
三、解析上述⽂件/*ini.h*/#ifndef INI_H#define INI_H#include <stdio.h>#include <string.h>int GetIniKeyString(char *title,char *key,char *filename,char *buf);int PutIniKeyString(char *title,char *key,char *val,char *filename);#endif /*INI_H*//*ini.c*/#include <stdio.h>#include <string.h>/** 函数名: GetIniKeyString* ⼊⼝参数: title* 配置⽂件中⼀组数据的标识* key* 这组数据中要读出的值的标识* filename* 要读取的⽂件路径* 返回值:找到需要查的值则返回正确结果 0* 否则返回-1*/int GetIniKeyString(char *title,char *key,char *filename,char *buf){FILE *fp;int flag = 0;char sTitle[64], *wTmp;char sLine[1024];sprintf(sTitle, "[%s]", title);if(NULL == (fp = fopen(filename, "r"))) {perror("fopen");return -1;}while (NULL != fgets(sLine, 1024, fp)) {// 这是注释⾏if (0 == strncmp("//", sLine, 2)) continue;if ('#' == sLine[0]) continue;wTmp = strchr(sLine, '=');if ((NULL != wTmp) && (1 == flag)) {if (0 == strncmp(key, sLine, strlen(key))) { // 长度依⽂件读取的为准sLine[strlen(sLine) - 1] = '\0';fclose(fp);while(*(wTmp + 1) == ' '){wTmp++;}strcpy(buf,wTmp + 1);return 0;}} else {if (0 == strncmp(sTitle, sLine, strlen(sTitle))) { // 长度依⽂件读取的为准flag = 1; // 找到标题位置}}}fclose(fp);return -1;}/** 函数名: PutIniKeyString* ⼊⼝参数: title* 配置⽂件中⼀组数据的标识* key* 这组数据中要读出的值的标识* val* 更改后的值* filename* 要读取的⽂件路径* 返回值:成功返回 0* 否则返回 -1*/int PutIniKeyString(char *title,char *key,char *val,char *filename){FILE *fpr, *fpw;int flag = 0;char sLine[1024], sTitle[32], *wTmp;sprintf(sTitle, "[%s]", title);if (NULL == (fpr = fopen(filename, "r")))return -1;// 读取原⽂件sprintf(sLine, "%s.tmp", filename);if (NULL == (fpw = fopen(sLine, "w")))return -1;// 写⼊临时⽂件while (NULL != fgets(sLine, 1024, fpr)) {if (2 != flag) { // 如果找到要修改的那⼀⾏,则不会执⾏内部的操作wTmp = strchr(sLine, '=');if ((NULL != wTmp) && (1 == flag)) {if (0 == strncmp(key, sLine, strlen(key))) { // 长度依⽂件读取的为准flag = 2;// 更改值,⽅便写⼊⽂件sprintf(wTmp + 1, " %s\n", val);}} else {if (0 == strncmp(sTitle, sLine, strlen(sTitle))) { // 长度依⽂件读取的为准flag = 1; // 找到标题位置}}}fputs(sLine, fpw); // 写⼊临时⽂件}fclose(fpr);fclose(fpw);sprintf(sLine, "%s.tmp", filename);return rename(sLine, filename);// 将临时⽂件更新到原⽂件}上述两个函数是简单的解析函数,因为ini⽂件有很多种解析⽅式,根据不同的需求解析也不同所以要进⾏修改⽐如我的注释符号是 “ ;”,所以我需要修改并且根据实际功能需求也可以进⾏进⼀步的封装四、测试如下ini样本⽂件/*test.ini*/[city]beijing = hello-beijingshanghai = hello-shanghai#information[study]highschool = xxxxuniversity = yyyytest.c程序/*test.c*/#include "ini.h"#include <stdio.h>int main(int argc, char const *argv[]){char buff[100];int ret;ret = GetIniKeyString("city","beijing","./test.ini",buff);printf("ret:%d,%s\n",ret,buff);ret = GetIniKeyString("study","highschool","./test.ini",buff);printf("ret:%d,%s\n",ret,buff);ret = PutIniKeyString("study","highschool","zzzz","./test.ini");printf("put ret:%d\n",ret);ret = GetIniKeyString("study","highschool","./test.ini",buff);printf("ret:%d,%s\n",ret,buff);return 0;}结果如下:ret:0,hello-beijingret:0,xxxxput ret:0ret:0,zzzz相应的test.ini的study段highschool项变成了zzzz.这⾥还要注意,section使⽤中⽂字符可能会⽆法识别!到此这篇关于C语⾔读取写⼊ini配置⽂件的⽅法实现的⽂章就介绍到这了,更多相关C语⾔读取写⼊ini 内容请搜索以前的⽂章或继续浏览下⾯的相关⽂章希望⼤家以后多多⽀持!。
c++中读取ini文件
在VC++中读写INI文件在VC++中读写INI文件在我们写的程序当中,总有一些配置信息需要保存下来,以便完成程序的功能,最简单的办法就是将这些信息写入INI文件中,程序初始化时再读入.具体应用如下:一.将信息写入.INI文件中.1.所用的WINAPI函数原型为:其中各参数的意义:LPCTSTR lpAppName 是INI文件中的一个字段名.LPCTSTR lpKeyName 是lpAppName下的一个键名,通俗讲就是变量名.LPCTSTR lpString 是键值,也就是变量的值,不过必须为LPCTSTR型或CString型的.LPCTSTR lpFileName 是完整的INI文件名.2.具体使用方法:设现有一名学生,需把他的姓名和年龄写入 c:\stud\student.ini 文件中.此时c:\stud\student.ini文件中的内容如下:[StudentInfo]Name=张三3.要将学生的年龄保存下来,只需将整型的值变为字符型即可:二.将信息从INI文件中读入程序中的变量.1.所用的WINAPI函数原型为:DWORD GetPrivateProfileString(LPCTSTR lpAppName,LPCTSTR lpKeyName,LPCTSTR lpDefault,LPTSTR lpReturnedString,DWORD nSize,LPCTSTR lpFileName);其中各参数的意义:前二个参数与 WritePrivateProfileString中的意义一样.lpDefault : 如果INI文件中没有前两个参数指定的字段名或键名,则将此值赋给变量.lpReturnedString : 接收INI文件中的值的CString对象,即目的缓存器.nSize : 目的缓存器的大小.lpFileName : 是完整的INI文件名.2.具体使用方法:现要将上一步中写入的学生的信息读入程序中.执行后 strStudName 的值为:"张三",若前两个参数有误,其值为:"默认姓名".3.读入整型值要用另一个WINAPI函数:UINT GetPrivateProfileInt(LPCTSTR lpAppName,LPCTSTR lpKeyName,INT nDefault,LPCTSTR lpFileName);这里的参数意义与上相同.使用方法如下:三.循环写入多个值,设现有一程序,要将最近使用的几个文件名保存下来,具体程序如下:1.写入:CString strTemp,strTempA;int i;int nCount=6;file://共有6个文件名需要保存for(i=0;i {strTemp.Format("%d",i);strTempA=文件名;file://文件名可以从数组,列表框等处取得.::WritePrivateProfileString("UseFileName","FileName"+strTemp,strTempA,"c:\\usefile\\usefile.ini");}strTemp.Format("%d",nCount);::WritePrivateProfileString("FileCount","Count",strTemp,"c:\\usefile\\usefile.ini");file://将文件总数写入,以便读出.2.读出:nCount=::GetPrivateProfileInt("FileCount","Count",0,"c:\\usefile\\usefile.ini");for(i=0;i {strTemp.Format("%d",i);strTemp="FileName"+strTemp;::GetPrivateProfileString("CurrentIni",strTemp,"default.fil",strTempA.GetBuffer(MAX_PATH),MAX_PATH,"c:\\usefile\\usefile.ini");file://使用strTempA中的内容.}补充四点:1.INI文件的路径必须完整,文件名前面的各级目录必须存在,否则写入不成功,该函数返回 FALSE 值.2.文件名的路径中必须为 \\ ,因为在VC++中, \\ 才表示一个 \ .3.也可将INI文件放在程序所在目录,此时 lpFileName 参数为: ".\\student.ini".4.从网页中粘贴源代码时,最好先粘贴至记事本中,再往VC中粘贴,否则易造成编译错误,开始时我也十分不解,好好的代码怎么就不对呢?后来才找到这个方法.还有一些代码中使用了全角字符如:<,\等,也会造成编译错误.。
C语言读取INI配置文件
C语言读取INI配置文件Ini.h#pragma once#include"afxTempl.h"class DLLPORT CIni{private:CString m_strFileName;public:CIni(CString strFileName) :m_strFileName(strFileName){}public://一般性操作:BOOL SetFileName(LPCTSTR lpFileName); //设置文件名CString GetFileName(void); //获得文件名BOOL SetValue(LPCTSTR lpSection, LPCTSTR lpKey, LPCTSTR lpValue, bool bCreate = true); //设置键值,bCreate是指段名及键名未存在时,是否创建。
CString GetValue(LPCTSTR lpSection, LPCTSTR lpKey); //得到键值.BOOL DelSection(LPCTSTR strSection); //删除段名BOOL DelKey(LPCTSTR lpSection, LPCTSTR lpKey); //删除键名public://高级操作:int GetSections(CStringArray& arrSection); //枚举出全部的段名int GetKeyValues(CStringArray& arrKey, CStringArray& arrValue, LPCTSTR lpSection); //枚举出一段内的全部键名及值BOOL DelAllSections();};/*使用方法:CIni ini("c:\\a.ini");int n;/*获得值TRACE("%s",ini.GetValue("段1","键1"));*//*添加值ini.SetValue("自定义段","键1","值");ini.SetValue("自定义段2","键1","值",false);*//*枚举全部段名CStringArray arrSection;n=ini.GetSections(arrSection);for(int i=0;i<n;i++)TRACE("%s\n",arrSection[i]);*//*枚举全部键名及值CStringArray arrKey,arrValue;n=ini.GetKeyValues(arrKey,arrValue,"段1");for(int i=0;i<n;i++)TRACE("键:%s\n值:%s\n",arrKey[i],arrValue[i]); *//*删除键值ini.DelKey("段1","键1");*//*删除段ini.DelSection("段1");*//*删除全部ini.DelAllSections();*/Ini.cpp#include"StdAfx.h"#include"Ini.h"#define MAX_ALLSECTIONS 2048 //全部的段名#define MAX_SECTION 260 //一个段名长度#define MAX_ALLKEYS 6000 //全部的键名#define MAX_KEY 260 //一个键名长度BOOL CIni::SetFileName(LPCTSTR lpFileName){CFile file;CFileStatus status;if (!file.GetStatus(lpFileName, status))return TRUE;m_strFileName = lpFileName;return FALSE;}CString CIni::GetFileName(void){return m_strFileName;}BOOL CIni::SetValue(LPCTSTR lpSection, LPCTSTR lpKey, LPCTSTR lpValue, bool bCreate) {TCHAR lpTemp[MAX_PATH] = { 0 };//以下if语句表示如果设置bCreate为false时,当没有这个键名时则返回TRUE(表示出错)//!*&*none-value*&!* 这是个垃圾字符没有特别意义,这样乱写是防止凑巧相同。
c语言读取文件内容
c语言读取文件内容C语言读取文件内容。
在C语言中,我们经常需要读取文件的内容进行处理,比如配置文件、日志文件等。
下面我们就来学习一下如何在C语言中读取文件内容。
首先,我们需要使用C语言中的文件操作函数来打开文件。
我们可以使用fopen函数来打开一个文件,语法如下:```c。
FILE fopen(const char filename, const char mode);```。
其中,filename是要打开的文件名,mode是打开文件的模式,比如"r"表示只读,"w"表示只写,"a"表示追加写入等。
fopen函数会返回一个指向FILE类型的指针,我们可以通过这个指针来操作文件。
接下来,我们可以使用fgets函数来逐行读取文件内容,语法如下:```c。
char fgets(char str, int n, FILE stream);```。
其中,str是一个指向字符数组的指针,n是要读取的最大字符数,stream是指向FILE类型的指针。
fgets函数会读取文件中的一行内容,并将其存储到str指向的字符数组中。
另外,我们也可以使用fscanf函数来按照指定的格式来读取文件内容,语法如下:```c。
int fscanf(FILE stream, const char format, ...);```。
fscanf函数可以按照指定的格式从文件中读取内容,并将其存储到对应的变量中。
比如,我们可以使用%f来读取一个浮点数,%d来读取一个整数等。
在读取文件内容之后,我们需要使用fclose函数来关闭文件,以释放资源,语法如下:```c。
int fclose(FILE stream);```。
fclose函数会关闭由stream指向的文件,并释放相关的资源。
总结一下,我们可以通过fopen函数打开文件,然后使用fgets或者fscanf函数来读取文件内容,最后使用fclose函数关闭文件。
c读取配置文件的方法
c读取配置文件的方法在C语言中,读取配置文件是一项非常常见的任务。
配置文件通常包含了程序运行时需要的各种参数和设置,因此读取配置文件是程序启动时必须完成的任务之一。
本文将介绍如何使用C语言读取配置文件。
我们需要了解配置文件的格式。
配置文件通常是一个文本文件,其中包含了一系列的键值对。
每个键值对由一个键和一个值组成,中间用等号连接。
例如:```key1=value1key2=value2key3=value3```在C语言中,我们可以使用标准库中的fopen函数打开配置文件。
例如:```cFILE *fp = fopen("config.ini", "r");```这里我们打开了一个名为config.ini的文件,并以只读模式打开。
接下来,我们可以使用标准库中的fgets函数逐行读取配置文件。
例如:```cchar line[256];while (fgets(line, sizeof(line), fp)) {// 处理每一行}```这里我们定义了一个长度为256的字符数组line,然后使用fgets 函数逐行读取配置文件。
fgets函数的第一个参数是一个字符数组,用于存储读取到的行;第二个参数是字符数组的长度;第三个参数是文件指针,用于指定要读取的文件。
接下来,我们需要解析每一行的键值对。
我们可以使用标准库中的strtok函数将每一行按照等号分割成键和值。
例如:```cchar *key = strtok(line, "=");char *value = strtok(NULL, "=");```这里我们使用strtok函数将line按照等号分割成两个部分,分别是键和值。
strtok函数的第一个参数是要分割的字符串;第二个参数是分割符,这里是等号。
strtok函数会返回分割后的第一个部分,我们可以使用NULL作为第一个参数来获取分割后的第二个部分。
VC6.0 MFC 读写配置文件

MFC读写ini配置文件Email:liping_xiong@1.新建头文件如:ini.h,在编辑区域粘贴以下内容://///////////////////////////////////////////////////////////////////////// ini.h: interface for the Cini class.#if !defined(AFX_OPINI_H__CE3F8B7B_1ACA_46CC_A91C_F8E23FA9B063__INCLUDED _)#define AFX_OPINI_H__CE3F8B7B_1ACA_46CC_A91C_F8E23FA9B063__INCLUDED_#if _MSC_VER > 1000#pragma once#endif // _MSC_VER > 1000#include <afxwin.h>class Cini{public:static DWORD ReadString (char *section, char * key, char stringtoread[], char * filename);static BOOL WriteString(LPCTSTR section, LPCTSTR key,char* stringtoadd, char*filename);Cini();virtual ~Cini();};#endif// !defined(AFX_OPINI_H__CE3F8B7B_1ACA_46CC_A91C_F8E23FA9B063__INCLUDED_)2.新建资源文件如:ini.cpp,在编辑区域黏贴以下内容://///////////////////////////////////////////////////////////////////////// ini.cpp: implementation of the Cini class.#include "stdafx.h"#include "ini.h"///////////////////////////////////////////////////////////////////////////Cini类的构造函数和析构函数Cini::Cini(){}Cini::~Cini(){}///////////////////////////////////////////////////////////////////////////写字符串到INI文件,GetLastError()函数用于返回写入失败void error(LPSTR lpszFunction){CHAR szBuf[80];DWORD dw = GetLastError();sprintf(szBuf, "%s failed: GetLastError returned %u\n",lpszFunction, dw);MessageBox(NULL, szBuf, "Error", MB_OK);ExitProcess(dw);}BOOL Cini::WriteString(LPCTSTR section, LPCTSTR key, char *stringtoadd, char *filename) {CHAR FilePath[255];GetModuleFileName(NULL,FilePath,255);(strrchr(FilePath,'\\'))[1] = 0;strcat(FilePath,filename);return ::WritePrivateProfileString(section,key,stringtoadd,FilePath);}///////////////////////////////////////////////////////////////////////////从INI文件中读取字符串DWORD Cini::ReadString(char *section, char * key, char stringtoread[], char * filename) {CHAR FilePath[255];GetModuleFileName(NULL,FilePath,255);(strrchr(FilePath,'\\'))[1] = 0;strcat(FilePath,filename);return ::GetPrivateProfileString(section, key,NULL,stringtoread,255,FilePath);}3.当程序加载的时候读配置文件:首先要在应用程序文件头部引用ini.h头文件如下:#include "ini.h"找到OnInitDialog()函数,在其下黏贴如下代码:// 保存ini各项值数组char szOption1[MAX_PATH];char szOption2[MAX_PATH];char szOption3[MAX_PATH];// 读取ini各项值Cini::ReadString("配置信息", "选项1", szOption1, "test.ini");Cini::ReadString("配置信息", "选项2", szOption2, "test.ini");Cini::ReadString("配置信息", "选项3", szOption3, "test.ini");m_strEdit1.Format("%s",szOption1);m_strEdit2.Format("%s",szOption2);m_strEdit3.Format("%s",szOption3);UpdateData(FALSE);说明:m_strEdit1,m_strEdit2,m_strEdit2是三个文本框对象的实例4.当卸载(关闭)程序的时候写配置文件;找到DestroyWindow()函数,在其下黏贴如下代码:UpdateData(TRUE);CString str1 = m_strEdit1;CString str2 = m_strEdit2;CString str3 = m_strEdit3;char *p1 = str1.GetBuffer(str1.GetLength()+1);char *p2 = str2.GetBuffer(str2.GetLength()+1);char *p3 = str3.GetBuffer(str3.GetLength()+1);Cini::WriteString("配置信息", "选项1", p1, "test.ini");Cini::WriteString("配置信息", "选项2", p2, "test.ini");Cini::WriteString("配置信息", "选项3", p3, "test.ini");说明:m_strEdit1,m_strEdit2,m_strEdit2是三个文本框对象的实例附工程视图及运行结果:Ini头文件Ini资源文件引用头文件引用头文件用户文件、应用程序文件对话框加载关闭对话框配置文件里的记录。
vc读写配置文件方法
vc 用函数读写INI配置文件ini文件(即Initialization file),这种类型的文件中通常存放的是一个程序的初始化信息。
ini文件由若干个节(Section)组成,每个Section由若干键(Key)组成,每个Key可以赋相应的值。
读写ini文件实际上就是读写某个的Section中相应的Key的值,而这只要借助几个函数即可完成。
一、向ini文件中写入信息的函数1. 把信息写入系统的win.ini文件BOOL WriteProfileString(LPCTSTR lpAppName, // 节的名字,是一个以0结束的字符串LPCTSTR lpKeyName, // 键的名字,是一个以0结束的字符串。
若为NULL,则删除整个节LPCTSTR lpString // 键的值,是一个以0结束的字符串。
若为NULL,则删除对应的键)2. 把信息写入自己定义的.ini文件BOOL WritePrivateProfileString(LPCTSTR lpAppName, // 同上LPCTSTR lpKeyName, // 同上LPCTSTR lpString, // 同上LPCTSTR lpFileName // 要写入的文件的文件名。
若该ini文件与程序在同一个目录下,也可使用相对//路径,否则需要给出绝度路径。
)如:::WriteProfileString("Test","id","xym");//在win.ini中创建一个Test节,并在该节中创建一个键id,其值为xym::WritePrivateProfileString("Test","id","xym","d:\\vc\\Ex1\\ex1.ini" );//在Ex1目录下的ex1.ini中创建一个Test节,并在该节中创建一个键id,其值为xym//若Ex1.ini文件与读写该文件的程序在同一个目录下,则上面语句也可写为:::WritePrivateProfileString("Test","id","xym",".\\ex1.ini");需要注意的是,C系列的语言中,转义字符'\\'表示反斜线'\'。
c语言文件读写

c语言文件读写从文件编码的方式来看,文件可分为ASCII码文件和二进制码文件两种。
ASCII文件也称为文本文件,这种文件在磁盘中存放时每个字符对应一个字节,用于存放对应的ASCII码。
ASCII码文件可在屏幕上按字符显示。
二进制文件是按二进制的编码方式来存放文件的。
二进制文件虽然也可在屏幕上显示,但其内容无法读懂。
C系统在处理这些文件时,并不区分类型,都看成是字符流,按字节进行处理。
输入输出字符流的开始和结束只由程序控制而不受物理符号(如回车符)的控制。
因此也把这种文件称作“流式文件”。
1、文件的打开与关闭文件在进行读写操作之前要先打开,使用完毕要关闭。
所谓打开文件,实际上是建立文件的各种有关信息,并使文件指针指向该文件,以便进行其它操作。
关闭文件则断开指针与文件之间的联系,也就禁止再对该文件进行操作。
在C语言中,文件操作都是由库函数来完成的。
在本章内将介绍主要的文件操作函数。
在stdio.h文件中,有结构体类型FILE。
typeof struct{ short level; /*缓冲区“满”或“空”的程度*/unsigned flags; /*文件状态标志*/char fd; /*文件描述符*/unsigned char hold; /*如无缓冲区不读取字符*/short bsize; /*缓冲区的大小*/unsigned char *buffer; /*数据缓冲区的位置*/unsigned ar *curp; /*指针、当前的指向*/unsigned istemp; /*临时文件、指示器*/short token; /*用于有效性检查*/} FILE;可以定义文件类型数组,例如:FILE f[5];可以定义文件类型指针,例如:FILE *fp;——fp指向某一个文件的结构体变量。
如果有n个文件,一般应设n个指针变量,使它们分别指向n个文件,以实现对文件的访问。
1.1 文件的打开(fopen函数)fopen()函数用来打开一个文件,其调用的一般形式为:文件指针名=fopen(文件名,使用文件方式);其中,“文件指针名”必须是被说明为FILE 类型的指针变量;“文件名”是被打开文件的文件名;“使用文件方式”是指文件的类型和操作要求;“文件名”是字符串常量或字符串数组。
CC++关于如何读写ini配置文件(小结)

CC++关于如何读写ini配置⽂件(⼩结)我们可能经常⽤到配置⽂件ini⽂件来获取或者保存参数信息,在VC中其函数中主要⽤到的有:读取1. 读取字符DWORD GetPrivateProfileString(LPCTSTR lpAppName, // INI⽂件中的⼀个字段名[节名]可以有很多个节名LPCTSTR lpKeyName, // lpAppName 下的⼀个键名,也就是⾥⾯具体的变量名LPCTSTR lpDefault, // 如果lpReturnedString为空,则把个变量赋给lpReturnedStringLPTSTR lpReturnedString, // 存放键值的指针变量,⽤于接收INI⽂件中键值(数据)的接收缓冲区DWORD nSize, // lpReturnedString的缓冲区⼤⼩LPCTSTR lpFileName // INI⽂件的路径);2. 读取整型值 (返回值为读到的整)UINT GetPrivateProfileInt(LPCTSTR lpAppName, // INI⽂件中的⼀个字段名[节名]可以有很多个节名LPCTSTR lpKeyName, // lpAppName 下的⼀个键名,也就是⾥⾯具体的变量名INT nDefault, // 如果没有找到指定的数据返回,则把个变量值赋给返回值LPCTSTR lpFileName // INI⽂件的路径);写⼊1. 写⼊字符BOOL WritePrivateProfileString(LPCTSTR lpAppName, // INI⽂件中的⼀个字段名[节名]可以有很多个节名LPCTSTR lpKeyName, // lpAppName 下的⼀个键名,也就是⾥⾯具体的变量名LPCTSTR lpString, // 键值,也就是数据LPCTSTR lpFileName // INI⽂件的路径);2. 写⼊整型读写INI⽂件时相对路径和绝对路径都可以,根据实际情况选择 "..\\IniFileName.ini" // 这样的为相对路径 "D:\\IniFileName.ini" // 这样的为绝对路径MAX_PATH:是微软最⼤路径占的字节所设的宏 写⼊的ini⽂件分为:节、键名、键值 举个栗⼦: // XX.ini [串⼝配置] 波特率=19200有了理论,再看看实践的demo:写INI⽂件:LPTSTR lpPath = new char[MAX_PATH];strcpy(lpPath, "D:\\IniFileName.ini");WritePrivateProfileString("LiMing", "Sex", "Man", lpPath);WritePrivateProfileString("LiMing", "Age", "20", lpPath);WritePrivateProfileString("Fangfang", "Sex", "Woman", lpPath);WritePrivateProfileString("Fangfang", "Age", "21", lpPath);delete [] lpPath;INI⽂件如下:[LiMing]Sex=ManAge=20[Fangfang]Sex=WomanAge=21读INI⽂件:TCHAR FPath[128];::GetCurrentDirectory(MAX_PATH, FPath);strcat(FPath, ".\\Config.ini");CFile ConfigFile;if(!ConfigFile.Open(FPath, CFile::modeCreate||CFile::modeRead, NULL)){AfxMessageBox("打开Config.ini配置⽂件失败!!!");return FALSE;}ConfigFile.Close();LPTSTR lpPath = new char[MAX_PATH];LPTSTR LiMingSex = new char[6];int LiMingAge;LPTSTR FangfangSex = new char[6];int FangfangAge;strcpy(lpPath, "..\\IniFileName.ini");GetPrivateProfileString("LiMing", "Sex", "", LiMingSex, 6, lpPath);LiMingAge = GetPrivateProfileInt("LiMing", "Age", 0, lpPath);GetPrivateProfileString("Fangfang", "Sex", "", FangfangSex, 6, lpPath);FangfangAge = GetPrivateProfileInt("Fangfang", "Age", 0, lpPath);delete [] lpPath;配置⽂件中经常⽤到ini⽂件,在VC中其函数分别为:写⼊.ini⽂件:bool WritePrivateProfileString(LPCTSTR lpAppName,LPCTSTR lpKeyName,LPCTSTR lpString,LPCTSTR lpFileName);读取.ini⽂件:DWORD GetPrivateProfileString(LPCTSTR lpAppName,LPCTSTR lpKeyName,LPCTSTR lpDefaut,LPSTR lpReturnedString,DWORD nSize,LPCTSTR lpFileName);读取整形值:UINT GetPrivateProfileInt(LPCTSTR lpAppName,LPCTSTR lpKeyName,INT nDefault,LPCTSTR lpFileName);其中个参数的意思:LPCTSTR lpAppName ------- INI⽂件中的⼀个字段名LPCTSTR lpKeyName -------- lpAppName 下的⼀个键名,也就是⾥⾯具体的变量名LPCTSTR lpString ---------是键值,也就是变量的值,必须为LPCTSTR或CString类型LPCTSTR lpFileName --------完整的INI⽂件路径名LPCTSTR lpDefaut ----------如果没有其前两个参数值,则将此值赋给变量LPSTR lpReturnedString --------接收INI⽂件中的值的CString对象,即接收缓冲区DWORD nSize ------接收缓冲区的⼤⼩例⼦:CString StrName,Strtemp;int nAge;StrName = "jacky";nAge = 13;WritePrivateProfileString("Student","Name",StrName,"c:\\setting.ini");结果:(INI⽂件中显⽰如下:)[Student]Name=jacky读取:CString SName;GetPrivateProfileString("Student","Name","DefaultName",SName.GetBuffer(MAX_LENGTH),MAX_LENGTH,"c:\\setting.ini");结果:SName = "jacky";这⾥需要注意点就是⽤完GetBuffer函数后⼀定要释放(⽤SName.ReleaseBuffer()函数),不然后⾯再⽤到SName 的其他⼦函数就会失灵。
c读取配置文件的方法
c读取配置文件的方法在C语言中读取配置文件是非常常见的操作,它可以方便地管理程序的一些参数和选项,让程序更加灵活和易于维护。
下面是一些常见的方法:1. 使用标准库函数fopen和fscanf这是最常见的方法之一,使用标准库函数fopen和fscanf来逐行读取配置文件中的内容。
具体实现步骤如下:a. 使用fopen打开配置文件,获取文件指针。
b. 使用fscanf读取每一行的内容,根据具体的配置格式进行解析。
c. 关闭文件指针。
示例代码:FILE *fp;char buf[1024];int value;fp = fopen('config.ini', 'r');if (fp == NULL){printf('Cannot open config file.');return -1;}while (fgets(buf, sizeof(buf), fp) != NULL){if (sscanf(buf, 'key=%d', &value) == 1){// 解析成功,使用读取到的值进行后续操作printf('value=%d', value);}}fclose(fp);2. 使用ini配置文件解析库ini配置文件解析库是一个专门用来解析ini配置文件的库,它能够快速、简单地读取和修改ini文件中的配置项。
具体实现步骤如下:a. 下载并安装ini解析库。
b. 使用ini_parse函数读取配置文件。
c. 使用ini_get函数获取配置项的值。
示例代码:#include 'ini.h'int handler(void* user, const char* section, const char* name,const char* value)if (strcmp(section, 'config') == 0 && strcmp(name, 'key') == 0){// 获取配置项的值int* pvalue = (int*)user;*pvalue = atoi(value);}return 1;}int main(){int value;if (ini_parse('config.ini', handler, &value) < 0){printf('Cannot open config file.');return -1;}printf('value=%d', value);return 0;3. 使用XML配置文件解析库XML配置文件解析库是一个专门用来解析XML格式的配置文件的库,它能够解析复杂的XML文件,并且提供了灵活的配置项操作方式。
linux下C程序--读取配置文件--ini格式
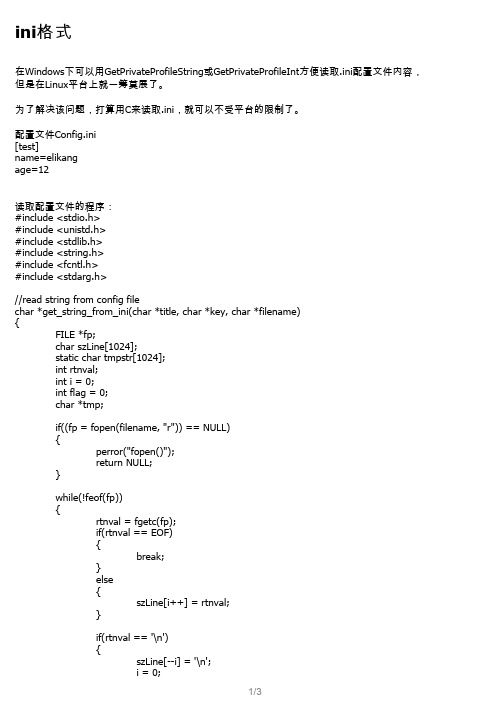
ini格式
在Windows下可以用GetPrivateProfileString或GetPrivateProfileInt方便读取.ini配置文件内容, 但是在Linux平台上就一筹莫展了。 为了解决该问题,打算用C来读取.ini,就可以不受平台的限制了。 配置文件Config.ini [test] name=elikang age=12
break; } else {
szLine[i++] = rtnval; } if(rtnval == '\n') {
szLine[--i] = '\n'; i = 0;
1/3
tmp = strchr(szLine, '='); if((tmp != NULL) && (flag == 1)) {
if(strstr(szLine, key) != NULL) {
//comment if('#' == szLine[0]); else if('/' == szLine[0] && '/' == szLine[1]); else {
//local key position strcpy(tmpstr, tmp+1); fclose(fp); return tmpstr; } } } else { strcpy(tmpstr, "["); strcat(tmpstr, title); strcat(tmpstr, "]"); if(strncmp(tmpstr, szLine, strlen(tmpstr)) == 0) { //encounter title flag = 1; } } } } fclose(fp); return ""; } int get_int_from_ini(char *title, char *key, char *filename) { return atoi(get_string_from_ini(title, key, filename)); } int main(int argc, char **argv) { char name[1024]; int age = 0; memset(name, 0, sizeof(name)); age = get_int_from_ini("test", "age", argv[1]); strcpy(name, get_string_from_ini("test", "name", argv[1])); //puts(name); printf("%s", name); printf("age = %d\n", age); }
CC++读写文本文件、二进制文件的方法

CC++读写⽂本⽂件、⼆进制⽂件的⽅法⼀:⽬的掌握C语⾔⽂本⽂件读写⽅式;掌握C语⾔⼆进制⽂件读写⽅式;掌握CPP⽂本⽂件读写⽅式;掌握CPP⼆进制⽂件读写⽅式;⼆:C语⾔⽂本⽂件读写1. ⽂本⽂件写⼊//采⽤C模式对Txt进⾏写出void TxtWrite_Cmode(){//准备数据int index[50] ;double x_pos[50], y_pos[50];for(int i = 0; i < 50; i ++ ){index[i] = i;x_pos[i] = rand()%1000 * 0.01 ;y_pos[i] = rand()%2000 * 0.01;}//写出txtFILE * fid = fopen("txt_out.txt","w");if(fid == NULL){printf("写出⽂件失败!\n");return;}for(int i = 0; i < 50; i ++ ){fprintf(fid,"%03d\t%4.6lf\t%4.6lf\n",index[i],x_pos[i],y_pos[i]);}fclose(fid);}2. ⽂本⽂件读取//采⽤C模式对Txt进⾏读取void TxtRead_Cmode(){FILE * fid = fopen("txt_out.txt","r");if(fid == NULL){printf("打开%s失败","txt_out.txt");return;}vector<int> index;vector<double> x_pos;vector<double> y_pos;int mode = 1;printf("mode为1,按字符读⼊并输出;mode为2,按⾏读⼊输出;mode为3,知道数据格式,按⾏读⼊并输出\n");scanf("%d",&mode);if(mode == 1){//按字符读⼊并直接输出char ch; //读取的字符,判断准则为ch不等于结束符EOF(end of file)while(EOF!=(ch= fgetc(fid)))printf("%c", ch);}else if(mode == 2){char line[1024];memset(line,0,1024);while(!feof(fid)){fgets(line,1024,fid);printf("%s\n", line); //输出}}else if(mode == 3){//知道数据格式,按⾏读⼊并存储输出int index_tmp;double x_tmp, y_tmp;while(!feof(fid)){fscanf(fid,"%d%lf%lf\n",&index_tmp, &x_tmp, &y_tmp);index.push_back(index_tmp);x_pos.push_back(x_tmp);y_pos.push_back(y_tmp);}for(int i = 0; i < index.size(); i++)printf("%04d\t%4.8lf\t%4.8lf\n",index[i], x_pos[i], y_pos[i]);}fclose(fid);}三:C语⾔⼆进制⽂件读写1. ⼆进制⽂件写⼊//采⽤C模式写⼆进制⽂件void DataWrite_CMode(){//准备数据double pos[200];for(int i = 0; i < 200; i ++ )pos[i] = i ;//写出数据FILE *fid;fid = fopen("binary.dat","wb");if(fid == NULL){printf("写出⽂件出错");return;}int mode = 1;printf("mode为1,逐个写⼊;mode为2,逐⾏写⼊\n");scanf("%d",&mode);if(1==mode){for(int i = 0; i < 200; i++)fwrite(&pos[i],sizeof(double),1,fid);}else if(2 == mode){fwrite(pos, sizeof(double), 200, fid);}fclose(fid);}2.⼆进制⽂件读取//采⽤C模式读⼆进制⽂件void DataRead_CMode(){FILE *fid;fid = fopen("binary.dat","rb");if(fid == NULL){printf("读取⽂件出错");return;}int mode = 1;printf("mode为1,知道pos有多少个;mode为2,不知道pos有多少个\n"); scanf("%d",&mode);if(1 == mode){double pos[200];fread(pos,sizeof(double),200,fid);for(int i = 0; i < 200; i++)printf("%lf\n", pos[i]);free(pos);}else if(2 == mode){//获取⽂件⼤⼩fseek (fid , 0 , SEEK_END);long lSize = ftell (fid);rewind (fid);//开辟存储空间int num = lSize/sizeof(double);double *pos = (double*) malloc (sizeof(double)*num);if (pos == NULL){printf("开辟空间出错");return;}fread(pos,sizeof(double),num,fid);for(int i = 0; i < num; i++)printf("%lf\n", pos[i]);free(pos); //释放内存}fclose(fid);}四:C++⽂本⽂件读写1. ⽂本⽂件写⼊//采⽤CPP模式写txtvoid TxtWrite_CPPmode(){//准备数据int index[50] ;double x_pos[50], y_pos[50];for(int i = 0; i < 50; i ++ ){index[i] = i;x_pos[i] = rand()%1000 * 0.01 ;y_pos[i] = rand()%2000 * 0.01;}//写出txtfstream f("txt_out.txt", ios::out);if(f.bad()){cout << "打开⽂件出错" << endl;return;}for(int i = 0; i < 50; i++)f << setw(5) << index[i] << "\t" << setw(10) << x_pos[i] <<"\t" <<setw(10)<< y_pos[i] << endl;f.close();}2.⽂本⽂件读取//采⽤CPP模式读取txtvoid TextRead_CPPmode(){fstream f;f.open("txt_out.txt",ios::in);//⽂件打开⽅式选项:// ios::in = 0x01, //供读,⽂件不存在则创建(ifstream默认的打开⽅式)// ios::out = 0x02, //供写,⽂件不存在则创建,若⽂件已存在则清空原内容(ofstream默认的打开⽅式)// ios::ate = 0x04, //⽂件打开时,指针在⽂件最后。
C#读取配置文件内容

C#读取配置⽂件内容1.读取appsettings.json 1)配置⽂件{"Logging": {"LogLevel": {"Default": "Warning"}},"AllowedHosts": "*","ConnectionStrings": {"test": "xxxxxxx"},"CustomSettings": {"test": "xxxxx"}} 2)读取⽅法public class ConfigHelper{private static IConfigurationRoot builder;static ConfigHelper(){builder = new ConfigurationBuilder().AddInMemoryCollection().SetBasePath(Directory.GetCurrentDirectory()).AddJsonFile("appsettings.json", optional: true, reloadOnChange: false).Build();}public static string GetConnectionString(string connName) =>builder.GetConnectionString(connName);public static string GetCustomSettings(string keyName) =>builder.GetSection("CustomSettings")[keyName];}若出现 "ConfigurationBuilder”未包含“SetBasePath”的定义"的错误,解决⽅法如下:nuget 引⽤以下包Microsoft.Extensions.ConfigurationMicrosoft.Extensions.Configuration.FileExtensionsMicrosoft.Extensions.Configuration.JsonMicrosoft.Extensions.Configuration.Abstractions 3)调⽤string test1= ConfigHelper.GetCustomSettings("test")string test2= ConfigHelper.GetConnectionString("test")2.读取App.config⽂件中的appSettings信息 1)配置⽂件<?xml version="1.0" encoding="utf-8" ?><configuration><startup><supportedRuntime version="v4.0" sku=".NETFramework,Version=v4.7.2" /></startup><appSettings><add key="test" value="xxxx" /></appSettings></configuration> 2)读取⽅法// 第⼀种public static string GetAppsettings(string key) => ConfigurationManager.AppSettings[key];GetAppsettings("test")// 第⼆种private static System.Configuration.AppSettingsReader reader = new System.Configuration.AppSettingsReader(); reader.GetValue("test", typeof(String)).ToString()。
C#中读写INI配置文件

C#中读写INI配置文件
在作应用系统开发时,管理配置是必不可少的。
例如数据库服务器的配置、安装和更新配置等等。
由于Xm l的兴起,现在的配置文件大都是以xml文档来存储。
比如Visual 自身的配置文件Mashine.config,的配置文件Web.Config,包括我在介绍Rem oting中提到的配置文件,都是xm l的格式。
传统的配置文件ini已有被xml文件逐步代替的趋势,但对于简单的配置,ini文件还是有用武之地的。
ini文件其实就是一个文本文件,它有固定的格式,节Secti on的名字用[]括起来,然后换行说明key的值:
[section]
key=value
如数据库服务器配置文件:
DBServer.ini
[Server]
Nam e=localhost
[DB]
Nam e=NorthWind
using using using using
nam {
{
} }
Section参数、Key参数和IniFilePath不用再说,Value参数表明key的值,而这里的NoText 对应API函数的def参数,它的值由用户指定,是当在配置文件中没有找到具体的Value时,就用NoTex t的值来代替。
C#读写config配置文件

C#读写config配置⽂件⼀:使⽤ConfigurationManager①:添加System.configguration②:引⽤空间③:config配置⽂件配置节A:⾃定义配置B:数据源配置<addname="kyd"connectionString=“server=.;database=UFDATA_999_2017;user=sa;pwd=123”/> </connectionStrings>1C:普通配置⼆:Config⽂件读写1.依据连接串名返回字符串A:界⾯B:后台代码private void button1_Click(object sender, EventArgs e){//指定config⽂件读取string file = System.Windows.Forms.Application.ExecutablePath;System.Configuration.Configuration config = ConfigurationManager.OpenExeConfiguration(file); string connectionString =config.ConnectionStrings.ConnectionStrings[“sql1”].ConnectionString.ToString(); MessageBox.Show( connectionString);}2.更新连接字符串A:界⾯B:后台代码private void button2_Click(object sender, EventArgs e){//////更新连接字符串//////连接字符串名称///连接字符串内容///数据提供程序名称//指定config⽂件读取string file = System.Windows.Forms.Application.ExecutablePath;Configuration config = ConfigurationManager.OpenExeConfiguration(file);bool exist = false; //记录该连接串是否已经存在//如果要更改的连接串已经存在if (config.ConnectionStrings.ConnectionStrings["sql1"] != null){exist = true;}// 如果连接串已存在,⾸先删除它if (exist){config.ConnectionStrings.ConnectionStrings.Remove("sql1");}//新建⼀个连接字符串实例ConnectionStringSettings mySettings =new ConnectionStringSettings("sql1", "Data","AA");// 将新的连接串添加到配置⽂件中.config.ConnectionStrings.ConnectionStrings.Add(mySettings);// 保存对配置⽂件所作的更改config.Save(ConfigurationSaveMode.Modified);// 强制重新载⼊配置⽂件的ConnectionStrings配置节ConfigurationManager.RefreshSection("connectionStrings");}1234567891011121314151617181920213.exe.confing⽂件中的appSettings配置节的valueA:界⾯B:后台代码private void button3_Click(object sender, EventArgs e){string file = System.Windows.Forms.Application.ExecutablePath;Configuration config = ConfigurationManager.OpenExeConfiguration(file);foreach (string key in config.AppSettings.Settings.AllKeys){if (key == “key1”){MessageBox.Show(config.AppSettings.Settings[“key1”].Value.ToString());}}}4.exe.confing⽂件中的appSettings配置节增加⼀对键值对A:界⾯B:后台代码private void button4_Click(object sender, EventArgs e){string file = System.Windows.Forms.Application.ExecutablePath;Configuration config = ConfigurationManager.OpenExeConfiguration(file);bool exist = false;foreach (string key in config.AppSettings.Settings.AllKeys){if (key == “key1”){exist = true;}}if (exist){config.AppSettings.Settings.Remove(“key1”);}config.AppSettings.Settings.Add(“key1”, “5555”);config.Save(ConfigurationSaveMode.Modified);ConfigurationManager.RefreshSection(“appSettings”);}⽅法2:⼀、配置⽂件概述:应⽤程序配置⽂件是标准的 XML ⽂件,XML 标记和属性是区分⼤⼩写的。
C#读取和写入配置文件

C#读取和写⼊配置⽂件使⽤.Net2.0中的ConfigurationManager可以⽅便的实现对配置app.config的读取和写⼊。
ConfigurationManager默认没有⾃动载⼊项⽬,使⽤前必须⼿动添加,⽅法如下:项⽬->引⽤->添加引⽤->选择System.configuration1.使⽤ConfigurationManager读配置⽂件我们可以将简单的配置内容放到app.config中的appSettings节点中如下:<appSettings><add key="GPRS.Port1" value="5002"/><add key="GPRS.Port2" value="5003"/><add key="GPRS.Port3" value="5004"/></appSettings>然后在程序中使⽤ConfigurationManager.AppSettings["GPRS.Port1"]来读取GPRS.Port1的值2.使⽤ConfigurationManager写配置⽂件如何想要把修改过的GPRS.Port1的值存放回app.config,可以使⽤下⾯的代码System.Configuration.Configuration config = ConfigurationManager.OpenExeConfiguration(ConfigurationUserLevel.None); config.AppSettings.Settings["GPRS.Port1"].Value = “xxxxx”;config.Save(ConfigurationSaveMode.Modified);ConfigurationManager.RefreshSection("appSettings");//重新加载新的配置⽂件。
c#通用配置文件读写类与格式转换(xml,ini,json)

c#通⽤配置⽂件读写类与格式转换(xml,ini,json).NET下编写程序的时候经常会使⽤到配置⽂件。
配置⽂件格式通常有xml、ini、json等⼏种,操作不同类型配置⽂件需要使⽤不同的⽅法,操作较为⿇烦。
特别是针对同时应⽤不同格式配置⽂件的时候,很容易引起混淆。
如果使⽤⼀个统⼀的⽅法对其进⾏操作,岂不美哉。
技术⽅案思路很简单,就是使⽤⼀个基类将配置⽂件的内容抽象出来,不同配置⽂件有不同的实现,对外统⼀调⽤⽅法。
最开始,打算⾃⼰写⼀个,后来对⽐ini与xml的时候(最开始没有把json考虑进来,⾃⼰⽤它来做配置⽂件的项⽬较少),发现xml完全可以替代ini⽂件的描述,直接⽤xml不是更好?于是⽅案就变成了⽤xml作为最基础的数据对象,其他配置⽂件转换成xml进⾏操作。
XDocument VS XmlDocment不解释,直接看图。
ini <-> xmlini⽂件构造⽐较简单,常见的ini有以下⼏条规范:注释以;开头,⼀直到⾏尾;类别项⽤[]包围,占据⼀整⾏;类别项下可以有多个配置项,直到下⼀个类别项或EOF结束;配置项格式:key=valueini格式是⼆级配置结构:类别>key。
通过类别和key就可以唯⼀获得⼀个值。
public static XDocument ToXml(this string[] iniStr){//ini没有根节点是不能直接转成xml的。
XDocument xdoc = new XDocument(new XElement("G" + Guid.NewGuid().ToString("N")));XElement node = xdoc.Root;foreach (var line in iniStr){var cline = line.Trim();if (string.IsNullOrWhiteSpace(cline)) continue;switch (line[0]){case ';':node.Add(new XComment(cline.Substring(1)));break;case '[':node = new XElement(cline.Substring(1, line.Length - 2));xdoc.Root.Add(node);break;case '\r':break;default:int index = cline.IndexOf('=');if (index < 1){throw new InvalidOperationException("Property does not contains '=' operator");}node.Add(new XElement(cline.Substring(0, index).Trim(), cline.Substring(index + 1)));break;}}return xdoc;}ini适合⽐较简单的配置读取,⽂件可读性强,读写也简单;⽽xml具有多级结构,复杂,还有dtd,xslt什么的,相对来说⽐较全⾯。
如何在C++中实现文件的读取和写入

如何在C++中实现文件的读取和写入在C++中实现文件的读取和写入是非常常见的操作。
文件的读取和写入操作在实际开发中被广泛应用,无论是处理文本文件、配置文件、日志文件或者其他数据存储,都会涉及到文件的读取和写入操作。
在本文中,我们将学习如何在C++中实现文件的读取和写入操作,同时探讨一些常见的技巧和注意事项。
1.文件读取操作在C++中,可以使用fstream类来实现文件的读取操作。
fstream类是C++标准库中用于文件操作的一个重要类,它包含在头文件<fstream>中。
在使用文件读取操作之前,需要先打开文件,然后可以通过流操作符(<<)将文件内容读取到变量中。
下面是一个简单的文件读取示例:```cpp#include <iostream>#include <fstream>using namespace std;int main() {//打开文件ifstream file("example.txt"); //定义一个变量用于存储文件内容string content;//读取文件file >> content;//输出文件内容cout << content << endl;//关闭文件file.close();return 0;}```在上面的示例中,首先我们使用ifstream类打开了一个名为example.txt的文件。
然后使用流操作符(>>)将文件内容读取到一个名为content的变量中,最后输出了文件内容。
除了使用流操作符(>>)来读取文件内容之外,还可以使用getline()方法来逐行读取文件内容。
下面是一个使用getline()方法的示例:```cpp#include <iostream>#include <fstream>using namespace std;int main() {//打开文件ifstream file("example.txt");//定义一个变量用于存储文件内容string line;//逐行读取文件while (getline(file, line)) {//输出每一行文件内容cout << line << endl;}//关闭文件file.close();return 0;}```在上面的示例中,我们首先使用ifstream类打开了一个名为example.txt的文件。
- 1、下载文档前请自行甄别文档内容的完整性,平台不提供额外的编辑、内容补充、找答案等附加服务。
- 2、"仅部分预览"的文档,不可在线预览部分如存在完整性等问题,可反馈申请退款(可完整预览的文档不适用该条件!)。
- 3、如文档侵犯您的权益,请联系客服反馈,我们会尽快为您处理(人工客服工作时间:9:00-18:30)。
MSXML2::IXMLDOMDocumentPtr pDoc;MSXML2::IXMLDOMElementPtr xmlRoot ;// 创建DOMDocument对象HRESUL T hr = pDoc.CreateInstance(__uuidof(MSXML2::DOMDocument40));if ( ! SUCCEEDED(hr)){MessageBox( " 无法创建DOMDocument对象,请检查是否安装了MS XML Parser 运行库! " );return ;}// 根节点的名称为Book// 创建元素并添加到文档中xmlRoot = pDoc -> createElement((_bstr_t) " Book " );// 设置属性xmlRoot -> setA ttribute( " id " ,( const char * )m_strId);pDoc -> appendChild(xmlRoot);MSXML2::IXMLDOMElementPtr pNode;// 添加“author”元素pNode = pDoc -> createElement((_bstr_t) " A uthor " );pNode -> Puttext((_bstr_t)( const char * )m_strA uthor);xmlRoot -> appendChild(pNode);// 添加“Title”元素pNode = pDoc -> createElement( " Title " );pNode -> Puttext(( const char * )m_strTitle);xmlRoot -> appendChild(pNode);// 保存到文件// 如果不存在就建立,存在就覆盖pDoc -> save( " d://he.xml " );------------------------------------------------------------------------------------------------------------------------------------------------MSXML2::IXMLDOMDocumentPtr pDoc;HRESUL T hr;hr = pDoc.CreateInstance(__uuidof(MSXML2::DOMDocument40));if (FA ILED(hr)){MessageBox( " 无法创建DOMDocument对象,请检查是否安装了MS XML Parser 运行库! " );return ;}// 加载文件pDoc -> load( " d://he.xml " );MSXML2::IXMLDOMNodePtr pNode;// 在树中查找名为Book的节点," // "表示在任意一层查找pNode = pDoc -> selectSingleNode( " //Book " );MSXML2::DOMNodeType nodeType;// 得到节点类型pNode -> get_nodeType( & nodeType);// 节点名称CString strName;strName = ( char * )pNode -> GetnodeName();// 节点属性,放在链表中MSXML2::IXMLDOMNamedNodeMapPtr pA ttrMap = NULL;MSXML2::IXMLDOMNodePtr pA ttrItem;_variant_t variantvalue;pNode -> get_attributes( & pA ttrMap);long count;count = pA ttrMap -> get_length( & count);pA ttrMap -> get_item( 0 , & pA ttrItem);// 取得节点的值pA ttrItem -> get_nodeTypedV alue( & variantvalue);m_strId = ( char * )(_bstr_t)variantvalue;// 添加整个文档的根节点void A ddRootNode( CString strRootNode , CString strText = ""){m_pElement = m_pDoc->createElement( (LPCTSTR)strRootNode );m_pElement ->put_text( _bstr_t( (LPCTSTR)strText) );m_pDoc->appendChild( m_pElement );}三种最流行的开放源码 XML 库是 expat、libxml 和 Xerces。
这三者都是跨平台的,每一种都充当 XSLT 库实现的基础,一旦满足了基本 XML 需要之后,它就会给您一条成长途径。
●expat 是 James Clark 创始的开放源码面向事件的 XML 解析库。
他已经将该项目转让给了 SourceForge 中的一个小组。
有一个 SAX 封装器可供使用。
在许多项目中都可以找到 expat 解析器,如开放源码浏览器 Mozilla、XSLT 处理器 Transformiix 和 RDF 工具 repat。
●libxml 为类似于 SAX 和 DOM 的操作提供了双重方式 API。
它支持对 DTD 的验证,并且在 Gnome 的 XSLT 处理器libxslt中使用。
libxml 经过重写,已作为 libxml(2) 发布,也许还称为libxml2。
这个库的用户应该确保他们拥有了当前版本。
●Xerces 是非常坚固的、拥有大量文档的库,它充当 IBM alphaWorksXML 4C 库的基础。
Xerces 还用于 Apache XSLT 处理器 Xalan 中。
Xerces 支持 DOM、SAX,以及对 DTD 的验证。
最新版本读取并解释了部分“W3C XML 模式推荐”(打算到 2001 年底实现完整的XML 模式支持)。
附:C/C++ 开发人员的解析器库供应商事件文档特点许可证本机与 SAX-带有本机 API 和LGPL(免费)expat JamesClark/expat 小组SAX 封装器的、非常快速的推模型解析器。
libxml Gnome SAX DOM非常强壮;SAX与 DOM 封装器;执行 DTD 验证LGPL(免费)MSXML Microsoft SAX DOM Win32 的Microsoft XML库EULA(免费)Xerces ApacheSoftwareFoundation SAX DOM执行 SAX 及DOM 级别 1 和2;DTD 验证;增加的XML 模式Apache(免费)XTL Vivid Creations SAX DOM带 SAX 和 DOM的基于 STL 的XML 工具箱商业RXP爱丁堡大学-本机验证以 C 编写的了解名称空间的XML 解析器GPL(免费)XML 4C IBMalphaWorks SAX DOM IBM 发起的Xerces 的变体Apache(免费)Oracle XDK 8i Oracle SAX DOM Oracle 主办的用于 C++ 的 XML工具箱非商业Pull Parser Extreme! Lab-本机印地安那大学发起的用于 C++ 的轻量型 XML 工具箱非商业XMLBooster PhiDaNiSoftware -本机解析器发生器,生成 C 源码解析器商业-------------------------------------------------------Boost读取XML配置文件-----------------------------------------------------------------------------------------------------------前两天因工作需要写了个xml配置脚本解析的功能类,虽说有N种方式可以实现,但考虑到Boost库在此方面的易操作性(虽支持不够健全,如Unicode支持等)所以封装了一下,具体如下://CProcessXmlConfigFile.h(此类由Dll导出)#i nclude "stdafx.h"#pragma once#i nclude <boost/noncopyable.hpp>#i nclude <boost/property_tree/ptree.hpp>#i nclude <boost/property_tree/xml_parser.hpp>#i nclude <boost/tuple/tuple.hpp>#i nclude <boost/shared_ptr.hpp>#i nclude <list>#i nclude "header.h"#define MA X_PA NLIST_NUM 9 //默认面板个数#define MA X_FNA ME_LEN 256 //文件名长度宏using namespace boost::property_tree;typedef ptree xmlParser;typedef vector<string> panNames_t;typedef boost::shared_ptr<string> sh_pstr;typedef boost::tuples::tuple<sh_pstr, size_t, sh_pstr> node_t;typedef std::list<node_t > ptree_nodes_t;//////////////////////////////////////////////////////////////////////////class AFX_EXT_CLA SS CProcessXmlConfigFile :private boost::noncopyable{public:virtual ~CProcessXmlConfigFile(void);//获取类唯一实例的静态方法static CProcessXmlConfigFile& instance(const string& xmlfile);//|=======================================|//| 以下为设置xml文件的各方法 |//|=======================================|void getPanListInfo(void);void getTreeInfoOfPan(PanIndex _index);inline panNames_t getPanList(void) const { return m_panobj; }inline ptree_nodes_t getPtreeNodeList(void) const { return m_ptreeobj; }private:CProcessXmlConfigFile(const string& xmlfile);//合理性验证方法[_index:面板索引]bool ICanWork(PanIndex _index);//加载文件[xml文件名<含路径>]bool loadfile(const string& xmlfile);//递归遍历节点目录树函数[nodepath:节点路径<分割符为'/'>]void recursive_print(const string& nodepath);private:xmlParser m_parser; //xml文件解析对象panNames_t m_panobj;//存储面板对象列表//存储当前面板下的树节点对象列表ptree_nodes_t m_ptreeobj;};//CProcessXmlConfigFile.cpp#i nclude "StdA fx.h"#i nclude "ProcessXmlConfigFile.h"#i nclude <iostream>// #i nclude <boost/foreach.hpp>#i nclude <boost/format.hpp>#i nclude <boost/typeof/typeof.hpp>#i nclude <boost/make_shared.hpp>// #i nclude <boost/ref.hpp>// #i nclude <boost/program_options/detail/convert.hpp>// #i nclude <boost/program_options/detail/utf8_codecvt_facet.hpp>// #i nclude <windows.h>// #i nclude <stdlib.h>using namespace std;using namespace boost;//参数默认值..const int iDefaultInt = 0;const string strNullString = "";const char chflag = '/';const string strPan = "doc/pans/pan";const string strflag = "<xmlattr>";const wstring win32_dir_splitchar = L"\\";//////////////////////////////////////////////////////////////////////////CProcessXmlConfig:CProcessXmlConfigFile(const string& xmlfile) {loadfile(xmlfile);m_panobj.clear();m_panobj.reserve(MA X_PA NLIST_NUM);CProcessXmlConfig:~CProcessXmlConfigFile(void){}CProcessXmlConfigFile& CProcessXmlConfig:instance(const string& xmlfile) {static CProcessXmlConfigFile _instance(xmlfile);return _instance;}void CProcessXmlConfig:getPanListInfo( void ){//开始获取.//首先获取总面板节点个数assert(m_parser.get_optional<int>("doc.pans.<xmlattr>.glcount"));//循环获取各节点名称string str = "";auto_t(child, m_parser.get_child("doc.pans"));for (auto_t(t, child.begin()); t != child.end(); ++t){str = t->first;if (str.find("pan") == string::npos)continue;m_panobj.push_back(t->second.data());}}void CProcessXmlConfig:getTreeInfoOfPan( PanIndex _index ){//防御性设计if (!ICanWork(_index))return;//..format fmt("%s-%d");fmt % strPan % _index;m_ptreeobj.clear();recursive_print(fmt.str());}bool CProcessXmlConfig:ICanWork( PanIndex _index ){return (_index >= ST_PhysicalCharacteristics && _index <= ST_Report);}bool CProcessXmlConfig:loadfile(const string& xmlfile){//防御性设计if (xmlfile.empty())return false;//..try//获取当前应用程序路径..wstring strPath(L"");{TCHA R currPath[MA X_FNA ME_LEN+1] = {0};GetModuleFileName(NULL, currPath, MA X_FNA ME_LEN);TCHA R *psz = _tcsrchr(currPath, '\\');if (psz){*psz = '\0'; //取出程序所在的目录lstrcat(currPath, win32_dir_splitchar.c_str());strPath = currPath;}}//加载配置文件.string xmlfilePath = WideToA SCII(strPath.c_str()) + xmlfile;// std::locale oldLocale;// std::locale utf8Locale(oldLocale,// new boost::program_options::detail::utf8_codecvt_facet());read_xml(xmlfilePath, m_parser, xml_parser::no_comments);}catch(std::exception& e){A fxMessageBox(A SCIIToWide(e.what()).c_str());return false;}return true;}//递归遍历xml节点目录树函数..void CProcessXmlConfig:recursive_print( const string& nodepath ){if (nodepath.empty())return;static size_t nproc = 0; //记录递归层次[测试留用]//..string strKey, strKey_, str;auto_t(node, m_parser.get_child(ptree::path_type(nodepath, chflag))); //获取节点信息for (auto_t(pt, node.begin()); pt != node.end(); ++pt){strKey = pt->first;if (strKey.find(strflag) != string::npos)continue;str = pt->second.data();// for (size_t i = 0; i < nproc; ++i)// cout << "\t";// cout << strKey << " = " << (str.empty() ? "empty" : str);//////////////////////////////////////////////////////////////////////////strKey_ = nodepath + "/" + strKey + "/" + strflag;auto_t(attr, m_parser.get_child(ptree::path_type(strKey_, chflag)));//获取节点属性信息for (auto_t(tt, attr.begin()); tt != attr.end(); ++tt){string atkey = tt->first;size_t atnval = tt->second.get_<int>();m_ptreeobj.push_back(make_tuple(sh_pstr(new string(strKey)), atnval, sh_pstr(str.empty() ? new string("empty") : new string(str))));// cout << " <" << atkey << ":" << atnval << ">" << endl;strKey = nodepath + "/" + pt->first;if (atnval > 0) //若子节点数目不止一个则递归遍历{++nproc;recursive_print(strKey);}}}--nproc;// cout << "*****************************************\n";}//主程序文档类中用到了CViewTree来动态加载节点,具体调用如下:instance =&CProcessXmlConfig:instance(xmlfile);BOOST_A SSERT(instance);//获取面板名称列表.instance->getPanListInfo();szPanName = instance->getPanList();if (szPanName.empty())return;// BOOST_FOREA CH(panNames_t::_type& p, szPanName)// A fxMessageBox(CString(p.c_str()));for (size_t i = 0; i < szPanName.size(); ++i){// 首先生成树CViewTree * ptree = new CViewTree;if (!ptree)return;//......FillClassView();//......}FillClassView()方法主体如下:{//防御性设计if (m_objtree.empty())return;if (m_nindex < 0 || m_nindex >= m_objtree.size())return;shared_wnd_ptr pTreeView = m_objtree[m_nindex];if (NULL == pTreeView)return;////////////////////////////////////////////////////////////////////////////加载配置文件并读取配置数据..{//获取当前面板树节点集合信息.BOOST_A SSERT(instance);instance->getTreeInfoOfPan(m_pIndex);ptree_nodes_t ptreenodes = instance->getPtreeNodeList();if (ptreenodes.empty())return ;//动态生成树节点..{int nsub = 0;HTREEITEM item, pitem;std::stack<HTREEITEM> S;S.push(pitem);BOOST_FOREA CH(node_t& node, ptreenodes){size_t n = node.get<1>();string strV al = *node.get<2>();if (strV al.empty() || !pare("empty"))continue;if (nsub > 0){pitem = S.empty() ? NULL : S.top();item = pTreeView->InsertItem(CString(strV al.c_str()), pitem); }else{if (!S.empty()) S.pop();pitem = S.empty() ? NULL : S.top();item = pTreeView->InsertItem(CString(strV al.c_str()), pitem); }if (0 == n) --nsub;else{nsub = n;S.pus。