非常详细的头带耳机作业指导书
Bose SoundTrue 环耳音乐头戴式耳机使用指南说明书

目录欢迎使用 (5)部件 (5)耳机的佩戴方法 (6)连接至您的设备 (6)在设备中使用该耳机 (6)耳机控件 (6)基本功能 (7)媒体播放功能 (7)折叠耳罩 (8)重新安装耳罩垫 (8)故障诊断 (9)清洁耳机 (9)更换零件和配件 (9)4 - 简体中文使用耳机简体中文 - 7基本功能提高音量按下并释放 + 按钮。
降低音量按下并释放 – 按钮。
接听呼叫当您收到来电时,按下并释放 Answer/End 按钮即可接听。
结束呼叫按下并释放 Answer/End 按钮。
拒绝接听来电按住 Answer/End 按钮 2 秒钟,然后释放。
切换至来电或等候接听的呼叫并保持当前来电处于等候接听状态进行呼叫时,按一下 Answer/End 按钮。
再次按下并释放可切换回第一个呼叫。
切换至来电或等候接听的呼叫并结束当前呼叫进行呼叫时,按住 Answer/End 按钮 2 秒钟,然后释放。
使用声音控件按住 Answer/End 按钮。
有关此功能的兼容性和使用信息,请参阅设备用户指南。
媒体播放功能播放或暂停歌曲或视频按下并释放 Answer/End 按钮。
向前跳过连续两次快速按下并释放 Answer/End 按钮。
向后跳过连续三次快速按下并释放 Answer/End 按钮。
使用耳机故障诊断如果您在使用耳机时遇到任何问题,请根据下面的故障诊断说明尝试解决。
如果仍需帮助,请联系 Bose®客户服务处。
问题措施无声音或仅一个耳罩内有声音• 确保音频线的两端连接牢固。
• 试试另一个音频设备。
低音失真• 确保两侧耳罩垫均牢固固定。
耳罩垫变形• 在自然位置下,高密度耳罩泡沫在数分钟后会恢复其最初的形状。
麦克风没有接收到声音• 确保您使用的是兼容设备• 确保音频线已牢固地连接至您的设备。
• 确保麦克风未被阻塞或遮盖。
麦克风位于 Answer/End 按钮的背面。
(您可以看到麦克风处有个小的开口)设备对遥控器按钮的按压操作无反应• 确保音频线已牢固地连接至您的设备。
头戴式耳机检验标准

C
耳机头环左右错位超出耳机前罩 5mm
C
左右耳机上、下位置偏差超过 5mm
C
耳机接收信号后,出现碰圈声或异常声
B
耳机接收信号后,声音沙哑
B
耳机接收信号后,声音时大时小,时有时无
B
传声器接收送话后,声音失真、无声音
B
传声器接收送话后,声音时大时小,时有时无
B
耳机和外置话筒接插时,干扰比较大或无声音
B
耳机无声、单声、左右声音大小明显差异
扯不脱落、断裂。
4.1.8 传声器转动支架在 120 度范围内转动灵活,无过松或过紧现象。并且不能有 360 度转
动。
内置嗽叭无氧化,纸盆无破裂。
4.2 结构尺寸:
4.2.1 各结构尺寸应符合样品和装配要求。
4.2.2 耳机头环左右错位不能超出耳机前罩 5mm。
4.2.3 左右耳机的上、下位置偏差不超过 5mm。
拟制
审核
批准
广东步步高电子工业有限公司电脑电玩厂
BBK ELECTRONICS CORP., LTD
作业指导书
文件编号 版本号
标题
头戴式耳机检验作业指导
生效日期
页
次
年月日 第 页共 页
序号 1
2 3
检验项 目
外观
结构尺 寸
电气性 能
附表 缺陷内容
判定
包装标识错误,字迹模糊
C
来料与样版不相符
B
线体烫伤、损坏、芯线外露、破皮
4.3.2 用音乐磁带、英语带进行放音时,声音纯正、音质丰富,声音无沙哑、时大时小,时有
时无现象。
4.3.3 给传声器送话应正常工作,声音无失真、时大时小、时有时无现象。
Bose 头戴型耳机说明书

English - 3C ontentsPlease complete and retain for your records:The serial and model number can be found on the original shipping carton and on the warranty card.Serial number ________________________________________________________________________Model number _______________________________________________________________________Purchase date _______________________________________________________________________We suggest you keep your receipt with this owner’s guide.About your Bose ® SoundTrue ® Ultra in-ear headphones ............................................... 4Unpacking .............................................................................................................................. 5Connecting to your device ................................................................................................. 6Using the headphones with your device .. (6)Headphone controls .................................................................................................... 6Basic functions ............................................................................................................. 7Media playback functions ........................................................................................... 7Importance of proper fit (8)Fitting the headphones to your ear .......................................................................... 8Changing the ear tips .................................................................................................. 9Removing the headphones ........................................................................................ 9Adjusting for comfort and stability .. (10)Using the adjustment slider ...................................................................................... 10Using the clothing clip ................................................................................................ 10Using a single earpiece ................................................................................................ 10Troubleshooting ................................................................................................................... 11Cleaning .................................................................................................................................. 12Limited warranty (12)Samsung Galaxy is a trademark of Samsung Electronics Co., Ltd.Android is a trademark of Google Inc.Using the headphones4 - EnglishAbout your Bose ® SoundTrue ® Ultra in-ear headphonesThe Bose ® SoundTrue ® Ultra in-ear headphones offer a combination of lifelike audio performance and comfortable fit not available from most conventional headphones.Features• Enjoy your music with deep, clear sound and full immersion.• Exclusive TriPort ® technology delivers natural-sounding lows, even at higher volumes.• Inline microphone and remote for easy switching between calls and music with Samsung Galaxy devices and select Android devices.• StayHear ® tips keep your headphones comfortably in place.• Engineered and tested for lasting quality and durability.• Carrying case stores and protects headphones.• Available in different colors to fit your style.Using the headphonesEnglish - 7Basic functionsIncrease volume Press and release the + button.Decrease volume Press and release the – button.Answer a callWhen you receive an incoming call, press and release the Answer/End button to answer.End a callPress and release the Answer/End button.Decline an incoming callPress and hold the Answer/End button for about two seconds, then release.Switch to an incoming or on-hold call and put the current call on-hold While on a call, press and release the A nswer/End button once. Press andr elease again to switch back to the first call.Switch to an incoming or on-hold call and end the current call While on a call, press and hold the Answer/End button for about two seconds, then release.Use voice controlPress and hold the Answer/End button. For more information on voice control, refer to your device user’s guide.Media playback functionsPlay or pause a song or video Press and release the Answer/End button.Skip forward Press and release the Answer/End button twice quickly.Skip backwardPress and release the Answer/End button three times quickly.。
【自整理】蓝弦R 8声道8喇叭头戴式蓝牙耳机使用方法说明
【自整理】蓝弦R 8声道8喇叭头戴式蓝牙耳机使用方法说明主要是播放音乐时的耳机按键操作。
不详写手机和电脑上的操作的部分。
未测试电话和音乐的转换,而且感觉说明书里这块也比较详细===============================▲说明书按键错误▲旁边中间的键才是MP3开关键,有开机符号旁边上方的键才是EQ键,有音符符号。
只适用于插卡模式的音乐风格切换旁边下方的键才是MP3播放模式和有线模式的切换键,有双向箭头符号(但我似乎没法用这个键)这三个键下方有TF卡槽,说明书未标出。
===================================●未插USB线★蓝牙模式-蓝灯【开启】即播放功能总开机,长按功能键,发出开机音乐。
默认蓝牙模式,闪蓝灯。
如已有配对手机,则自动配对,发出配对音乐。
【配对】1总开机后继续长按功能键,进入蓝牙配对模式,发出配对模式音乐,蓝灯恒亮。
2手机或电脑操作连接。
连上后蓝灯两下两下闪。
【关闭】即播放功能总关机,长按功能键,发出关机音乐。
★插卡模式-绿灯即说明书中的MP3播放模式。
【开启】1长按功能键(总开机,进入蓝牙)。
或者已处在蓝牙模式,则必须暂停歌曲2按长MP3开关键,进入MP3播放模式,闪绿灯。
在已插入有歌曲的TF卡的情况下,如变绿灯后就松手,则默认播放;如长按更久,听到另一声系统音再松手,则默认暂停(但我不是每次都有本事听到)。
在还未插入TF卡情况下,此时插入,即插即放【关闭】1长按MP3开关键,退出MP3播放模式,回到蓝牙模式,可以蓝牙听歌2长按功能键,总关机。
或者直接长按功能键,总关机。
【播放/暂停】短按MP3开关键。
播放时绿灯闪烁,暂停时绿灯恒亮★有线模式-绿灯即说明书中的LINE-IN模式在未插入TF卡时才可以实现(操作基本同插卡模式)【开启】1长按功能键(总开机,进入蓝牙)。
或者已处在蓝牙模式,则必须暂停歌曲2按长MP3开关键,进入MP3播放模式,闪绿灯。
Gjby头戴式耳机CA—022说明书
Gjby头戴式耳机CA—022说明书
gjby蓝牙耳机说明手册
1、首次使用,尽量让耳机充上2-4个小时左右,以后充2小时即可,说明书上也是这么说的,最好不要超过4小时,有的论坛说一定要充24
个小时是没有根据的,这么小个耳机,充24个小时,有些过于夸张。
2、点击手机设置中的蓝牙设置,选择“开启”,完成。
这就打开了
手机的蓝牙支持功能。
3、在蓝牙耳机关闭状态,按住耳机多功能键MFB3秒以上,待耳机上
的指示蓝灯亮起(1,注意是常亮,配对过程一直常亮,不是闪烁或不亮2,也有部分设备为红蓝交替闪烁),此时蓝牙耳机已处于可被查找状态。
4、打开手机上的蓝牙选项,进行查找,成功搜索到耳机后会在清单
上显示蓝牙耳机名字和型号,点击确认。
5、在手机上输入密码(一般是0000),也有些没有密码,耳机指示灯
快速闪烁,即配对成功。
6、点击蓝牙耳机名称项:MOTOROLA HS850,打开,选择绑定。
完成,手机就与蓝牙耳机连接上了。
此时手机可能有类似连上ub的“叮咚”提
示音,关闭蓝牙耳机时,也可能会有类似提示音,据此可以判断蓝牙耳机
与手机是否已正常连接。
贝尔金耳机头戴式耳机使用说明(一)
贝尔金耳机头戴式耳机使用说明(一)
贝尔金耳机头戴式耳机使用说明
概述
•贝尔金耳机头戴式耳机是一款高品质的音频设备,适用于各种场景和设备。
•本说明将详细介绍耳机的功能、使用方法以及注意事项。
功能与特点
•高保真音质:贝尔金耳机头戴式耳机采用先进的音频技术,提供高保真的音质体验。
•舒适佩戴:耳机采用舒适的耳罩设计,可长时间佩戴而不感觉不适。
•轻便便携:耳机采用轻量化设计,方便携带和存储。
•多功能按键:耳机上配有多功能按键,可方便地控制音量、播放/暂停等操作。
使用方法
1.打开耳机包装,取出耳机并展开耳罩。
2.将耳机插入音频设备的耳机插孔,确保插入牢固。
3.确保音频设备已打开,并调整音量至适宜的水平。
4.轻轻将耳机佩戴在头部上,使耳罩紧贴耳朵。
5.按需进行音量调节、播放/暂停等操作,可使用耳机上的多功能
按键完成。
注意事项
•长时间佩戴耳机时,建议适时休息并减少音量以保护听力。
•不要将耳机折叠过度或施加过大压力,以免损坏耳机。
•避免将耳机与液体接触,以免导致内部损坏。
•当不使用耳机时,应将其存放在干燥、通风的地方,避免阳光直射。
以上是贝尔金耳机头戴式耳机的使用说明,希望能帮助您更好地使用这款优质的音频设备。
如有任何问题,请及时联系客服。
头戴式耳机使用说明
头戴式耳机使用说明购买头戴式耳机后,为了能够正确使用并享受高质量的音乐体验,这份使用说明将帮助您快速上手。
1. 头戴式耳机的组成部分头戴式耳机通常由以下几个组成部分构成:- 塑料或金属制成的头带,用于将耳机固定在头部;- 两个耳罩,用于包裹耳朵并提供音频隔离;- 一根连接头带和耳罩的可调节支架;- 一根连接耳机和音频源的线缆;2. 耳机的连接将耳机与音频设备连接的步骤如下:- 确保音频设备处于关机或静音状态;- 将耳机插头的3.5mm端连接到音频设备的耳机插孔或音频输出端口上;- 插入耳机插头的另一端到耳机的耳机插孔上,通常位于耳机的一侧,可以根据标示进行插入。
3. 佩戴头戴式耳机正确佩戴头戴式耳机有助于提供舒适的音乐体验,并确保音频的最佳效果:- 将头带轻轻地放在头顶,确保耳罩对准双耳;- 调节支架的长度,使耳罩与耳朵紧密贴合但不给耳朵施加过度的压力;- 可根据需要调整耳罩的旋转角度,以获得更好的音频隔离效果。
4. 使用耳机控制按钮若耳机具备控制按钮,您可以使用它们来调节音量、控制音频播放以及接听电话:- 音量调节:根据需要使用耳机上的音量加减按钮来调整音量大小;- 音频控制:根据耳机的设计,使用播放/暂停按钮来控制音频的播放与暂停;- 电话接听:如果您的耳机配有内置麦克风,可以通过按住接听按钮来接听来电。
5. 耳机的保养与存储保养与存储耳机有助于延长其使用寿命和音质:- 定期清洁耳罩和头带,可使用柔软的布抹去灰尘和污垢;- 避免将耳机折叠或弯曲过度,以免损坏连接线;- 当不使用耳机时,将其放入耳机包或盒子中,避免暴露在尘埃和潮湿的环境中。
请按照上述使用说明操作头戴式耳机,以便最大限度地享受清晰、深邃的音乐和声音效果。
如果遇到任何问题或需要进一步的帮助,请参考附带的产品说明书或联系客户服务部门。
祝您享受愉快的音乐之旅!。
Hi-X25BT 专业无线蓝牙
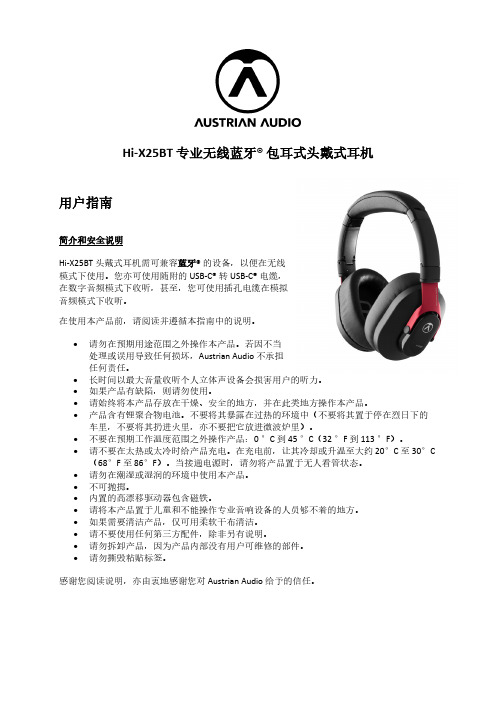
Hi-X25BT 专业无线蓝牙® 包耳式头戴式耳机用户指南简介和安全说明Hi-X25BT 头戴式耳机需可兼容蓝牙®的设备,以便在无线模式下使用。
您亦可使用随附的 USB-C® 转 USB-C® 电缆,在数字音频模式下收听,甚至,您可使用插孔电缆在模拟音频模式下收听。
在使用本产品前,请阅读并遵循本指南中的说明。
•请勿在预期用途范围之外操作本产品。
若因不当处理或误用导致任何损坏,Austrian Audio 不承担任何责任。
•长时间以最大音量收听个人立体声设备会损害用户的听力。
•如果产品有缺陷,则请勿使用。
•请始终将本产品存放在干燥、安全的地方,并在此类地方操作本产品。
•产品含有锂聚合物电池。
不要将其暴露在过热的环境中(不要将其置于停在烈日下的车里,不要将其扔进火里,亦不要把它放进微波炉里)。
•不要在预期工作温度范围之外操作产品:0 °C 到 45 °C(32 °F 到 113 °F)。
•请不要在太热或太冷时给产品充电。
在充电前,让其冷却或升温至大约 20°C 至 30°C (68°F 至 86°F)。
当接通电源时,请勿将产品置于无人看管状态。
•请勿在潮湿或湿润的环境中使用本产品。
•不可抛掷。
•内置的高漂移驱动器包含磁铁。
•请将本产品置于儿童和不能操作专业音响设备的人员够不着的地方。
•如果需要清洁产品,仅可用柔软干布清洁。
•请不要使用任何第三方配件,除非另有说明。
•请勿拆卸产品,因为产品内部没有用户可维修的部件。
•请勿撕毁粘贴标签。
感谢您阅读说明,亦由衷地感谢您对 Austrian Audio 给予的信任。
操作 Hi-X25BT:电源开启/关闭按住右耳罩底部的开启/关闭按钮 2 秒,直至 Hi-X25BT 以一句亲切的“电源开启”欢迎您,且蓝色 LED 开始闪烁。
如果仍有可用连接,它将自动连接到您之前连接的设备,并通过指示“已连接”来确认这一点,即 LED 变为持续发出蓝色光。
Sennheiser HD 25 和 HD 25 SP 头戴耳机说明书
Cat. No. 502105 502188 502104 502102 502103
EAN 40 44156 02099 0 40 44156 02379 3 40 44156 02098 3 40 44156 02096 9 40 44156 02097 6
UPC 6 15104 13214 6 6 15104 13570 3 6 15104 13213 9 6 15104 13211 5 6 15104 13212 2
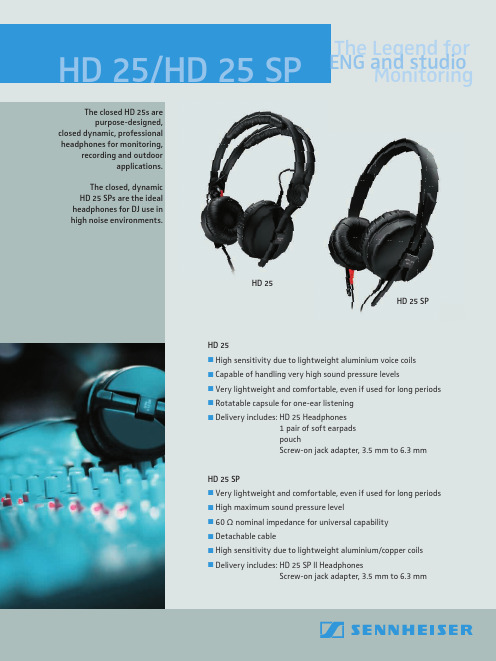
HD 25/HD 25 SP ETNhGe aLMneogdnesinttodurdfinioogr
The closed HD 25s are purpose-designed,
closed dynamic, professional headphones for monitoring,
recording and outdoor applications.
Headphones
HD 25
Transducer principle
dynamic, closed
Ear coupling
supra-aural
Frequency response (headphones)
16 – 22,000 Hz (- 3 dB)
Nominal impedance
70 O (HD 25-1 II)
The closed, dynamic HD 25 SPs are the ideal headphones for DJ use in high noise environments.
HD 25
HD 25 SP
HD 25 High sensitivity due to lightweight aluminium voice coils Capable of handling very high sound pressure levels Very lightweight and comfortable, even if used for long periods Rotatable capsule for one-ear listening Delivery includes: HD 25 Headphones
Bluetooth头戴式耳机Plantronics Voyager 815用户手册说明书

BLUETOOTH ®HEADSETBedienungsanleitung Brugervejledning ¹Æã»Â²¸»¿ØƱúêGuía del usuario KäyttöopasGuide de l'utilisateur Guida dell'utenteGebruikershandleiding Brukerhåndboka)NSTRUKCJAĺU YTKOWANIA Manual do Utilizador'HIDĺDEĺUTILIZAREРуководство пользователяSnabbstarthandbokBruksanvisning +ULLANàMĺ+àLAVUZUUser GuideTABLE OF CONTENTSWelcome 3 What is Bluetooth? 3 Package Contents & Features 4 Charging 5 Pairing 6 Custom Fit 8 Headset Controls 11 Indicators 13 Range 13 Hands-Free Features 14 Multipoint (Using more than one Bluetooth device) 15 Optional Accessories 16 Troubleshooting 17 Product Specifications 18 T echnical Assistance 18I WELCOmEThank you for choosing the Plantronics Voyager™ 815 headset. To get the most from your new headset, we recommend that you take the following steps:Read this User Guide, including all the safety information at the end of this guide, before you use your headset.If you need assistance, please do the following:Follow the steps in the “Troubleshooting” section on page 17.Contact the Plantronics Technical Assistance Center at /support.Visit /productregistration to register your headset online so we can provide you with the best possible service and technical support.NOTE: If you are considering returning the product, please contact the TechnicalAssistance Center first.1. .••.WhAT iS Bluetooth ?Bluetooth wireless technology provides a way for devices to communicate with each other using short-range radio frequency instead of wires. Any two Bluetooth devices can communicate as long as they both have Bluetooth turned on, are within range and have been paired—a quick “handshake” that connects the two devices.Bluetooth range is up to 33 feet (10 metres). Obstructions, such as walls or other electronic devices, can cause interference or shorten the effective range. For optimal performance, place your headset and phone on the same side of your body.PACkAgE CONTENTS & FEATurESCall control button (on/off)Mute microphone button Volume up/down Extendable boomMicrophone port Ear loop stabiliser Noise-isolating ear buds (small, medium and large)AC charger 100 – 240 V1. . . .5.6.7.8.I ChArgiNgBefore you use your headset for the first time, charge it for at least 1 hour. It takes approximately 3 hours to fully charge your headset.Connect the charger cable to the headset.Plug the charger into a power outlet.While your headset is charging the indicator glows red. When yourheadset is fully charged, the indicator turns off.CHECk THE CHARGE LEvELWhen your headset is on, simultaneously press and hold the call control button and the volume down button for about two seconds. The indicator flashes red to show the charge level.1..Battery Level Red FlashesPAiriNgPairing is the process of introducing your headset to your phone. Before using your headset for the first time, you must pair it with your Bluetooth phone. Normally you only need to pair your headset with your phone once. To see a demo of the pairing process, visit /easytopair.QuICkPAIR™ TECHNOLOGyYour new headset includes Plantronics QuickPair technology to simplify the Bluetooth setup process. The first time you turn your headset on, your headset automatically enters pairing mode for 10 minutes. Once paired successfully, your headset stays on for instant use.If not successfully paired after 10 minutes, your headset automatically powers off. When you turn the headset on again, it automatically goes into pairing mode until successfully paired with a Bluetooth phone. To pair your headset for the first time:Turn ON the Bluetooth feature on your phone.TIP: For most phones, select Settings/Tools > Connections > Bluetooth > On.Press and hold the call control button to turn on your headset. (The indicator flashes red/blue to show that the headset is on and in pairing mode.)TIP: If you don’t see the red/blue flash, press and hold the call control button to turn your headset off, and then press and hold the call control button again until you see the red/blue e the commands on your phone to locate your headset.TIP: For most phones, select Settings/Tools > Connections > Bluetooth > Search > 8XXPlantronics. See your phone’s user guide for more information.When prompted for the passkey, enter 0000.When pairing is successful, the red/blue indicator on your headset turns off. Y our headset is now connected and ready to use.1. . ..1SubSEQuENT PAIRINGIf you’ve already paired your headset with another device, follow these steps:Turn ON the Bluetooth feature on your phone.TIP: For most phones, select Settings/Tools > Connections > Bluetooth > On. See your phone’s user guide for more information.Turn the headset off by pressing and holding the call control button until the indicator turns red and then turns off.Turn the headset back on by pressing and holding the call control button until the indicator flashes red/blue. The headset remains in pairing mode for 3 e the commands on your phone to locate your headset.TIP: For most phones, select Settings/Tools > Connections >Bluetooth > Search > 8XXPlantronics. See your phone’s user guide for more information.When prompted for the passkey, enter 0000.When pairing is successful, the indicator on your headset turns off. Your headset is now connected and ready to use.1. . . .5.CuSTOm FiTThe Plantronics Voyager 815 headset comes with three sizes of noise-isolating ear buds. We recommend that you try all three ear buds to find the one that fits snugly in your ear. For added comfort and stability, you can add the optional small or large ear loop.TIPS: For optimum performance and a secure and comfortable fit, the headset should sit snugly in your ear canal with the microphone pointing towards the corner of your mouth.If the ear bud is too big or too small, the headset may not stay in your ear or you may have difficulty hearing.PuT ON THE HEAdSETHold the headset with the boom pointing directly at your cheekbone and the ear bud placed comfortably in your ear canal.Gently twist the headset downwards while pressing it into your ear canal.TIP: For optimal voice clarity, point the boom towards the corner of your mouth. The ear bud should be fully seated to the speaker post to ensuresecure attachment.ear canal. The ear bud should seal but not be forced down the ear canal. If the ear bud becomes lodged in the ear canal, seek medical attention immediately.••1. .CHOOSE AN EAR bud THAT fITSWhen the ear bud fits properly, it should be sealed in your ear so that you feel a slight amount of resistance when you remove the headset from your ear.Remove the headset from your ear.Gently twist the ear bud while pulling it off the speaker post.Press a different ear bud onto the speaker post with the stem side of the ear bud facing downwards.1. ..uSE THE OPTIONAL EAR LOOP STAbILISERFor increased stability, you can attach the optional small or large ear loop stabiliser.TIP: You can attach the ear loop stabiliser on either side of your headset, so that you can wear the headset on your right or left ear.Insert the ear loop tab into the slot on the underside of the headset until you feel it click into place.Guide the loop behind your ear.Gently twist headset downwards while pressing it into your ear.TIP: To remove the ear loop stabiliser from your headset, gently pull the ear loop straight out of its slot.1. ..CuSTOm FiTE N E I Action StepsAdjust volumeDuring an active call, press the volume button:WARNING: Do not use headphones/headsets at high volumes for an extendedperiod of time. Doing so can cause hearing loss. Always listen at moderate levels. See /healthandsafety for more information on headsets and hearing.TIPSIf you’re wearing the headset, you hear ascending tones when the power turns on and descending tones when the power turns off.When you receive a call, your phone may ring before your headset rings. Wait until you hear the ring in your headset to press the call control button and answer the call.To reject a call and send the caller to voice mail, press the call control button for about 2 seconds.If your phone supports voice-dialling, see “Hands-Free Features” on page 14 and the instructions that came with your phone.When mute is on, a low tone plays every 60 seconds.•••••iNdiCATOrSI Action Light ToneCharging Solid red NoneFully charged None NoneLow battery 3 red flashes every 10 seconds 3 high tonesevery 10 secondsPairing Flashes red and blue 1 low tonePaired Flashes blue 1 low toneTurning on Solid blue for 2 seconds Ascending tonesStandby None NoneIncoming call 3 blue flashes every 2 seconds 3 low tones every2 secondsCall in progress 1 blue flash every 2 seconds NoneMissed call 3 purple flashes every 10 seconds NoneOut of range None 1 high toneBack in range None 1 low toneTurning mute on None 1 low-high toneMute is active None 1 low tone every60 secondsUnmute None 1 high-low toneTurning off Solid red for 4 seconds Descending tones NOTE:To turn off the online indicator, see “Headset Controls” on page 11.rANgETo maintain a connection, keep your headset within 33 feet (10 metres) ofthe Bluetooth device. If there are obstacles between your headset and the device you may experience interference. For optimal performance, placeyour headset and phone on the same side of your body.As you move out of range, audio quality degrades. When you are far enoughaway to lose the connection, you hear a high tone in the headset. Theheadset attempts to reconnect after 30 seconds. If you move back in range later, you can manually reconnect by pressing the call control button.NOTE: Audio quality is also dependent upon the device with which the headset ispaired.hANdS-FrEE FEATurESIf your phone and your wireless service provider both support hands-free operation, you can use the following features:Action StepsRedial the last number you called Double-click the call control button. You hear 2 low tones after the second press.Voice activated dialing When the headset is on, press and hold the callcontrol button for about 2 seconds until you hear1 low tone.Reject a call When your headset rings, press and hold the callcontrol button for about 2 seconds until you hear1 long low tone.AddITIONAL fEATuRESAction StepsTransfer a call from your headset to your phone While a call is in progress, press and hold the call control button until you hear a low tone.Transfer a call from your phone to your headset While a call is in progress, quickly press and release the call control button. You will then hear a low tone.Enable/Disable online indicators Press and hold mute for 2 seconds. Headset will flash blue 4 times. Repeat action to activate online indicators. Headset will flash blue 2 times.NOTE: When the online indicator is disabled, other indicators, such as low battery and missed call, still function.muLTiPOiNT (uSiNg mOrE ThAN ONE Bluetooth dEViCE)Plantronics Voyager 815 supports multipoint technology, which allows you to stay connected with two different Bluetooth audio devices. Use one headset between two different mobile phones.PAIRING ANOTHER BLUETOOTH dEvICERepeat the pairing steps with the new device. See “Subsequent Pairing” on page 7 for instructions.ANSWERING A CALLAn incoming call from either phone rings through to your headset. To answer a call, briefly press the call control button.uSING LAST NuMbER REdIAL ANd vOICE-ACTIvATEd dIALINGThe headset initiates a call on the device you most recently used to make an outgoing call. To use the second phone, initiate the call using the controls on the second phone. The second phone forms a link with the headset.ANSWERING A CALL WHILE TALkING ON THE OTHER dEvICEPress the call control button once to hang up the existing call, and then press the call control button again to answer the new call from the other phone.••OPTiONAL ACCESSOriESAvAILAbLE fOR PuRCHASE76777-01Vehicle power charger 76772-01AC charger 100-240 V76775-01Ear loop stabiliser (M/L)76776-01Ear bud replacement pack(S, M, L)To order, please contact your Plantronics supplier or go to .77069-01Ear loop stabiliser (S)76016-01USB charging cableI TrOuBLEShOOTiNgProblem SolutionMy headset does not work with my phone.Ensure that the headset is fully charged.Make sure headset is paired with the phone you are trying to use. Headset was not in discovery mode when mobile phone menu selections were made. See “Pairing” on page 6. Incorrect menu selections were made on your mobile phone. See “Pairing” on page 6.My phone did not locate the headset.Turn both your phone and headset off and on, and then repeat the pairing process on page 6.I could not enter my passkey.Turn both your phone and headset off and on, and then repeat the pairing process on page 6.I cannot hear caller/dial tone.The headset is not turned on. Press the call control button for approximately 2 seconds until you hear a tone or see the indicator glow blue.Y our headset is out of range. Move the headset closer to the phone or Bluetooth device. See “Range” on page 13.Y our headset battery is drained. Charge your battery using the AC charger. See “Charging” on page 5.The listening volume is too low. Press the volume up button to increase the sound you hear in the headset.Make sure the ear bud fits properly. See “Custom Fit”on page 9.Audio quality is poor.Make sure that you have a proper seal on the ear bud. See “Custom Fit” on page 9.Callers cannot hear me.Mute is turned on. Press the mute button.Y our headset is out of range. Move the headset closer to the phone or Bluetooth device. See “Range” on page 13.The ear buds do not fit my ear.Try a different size ear bud. See “Custom Fit” on page 9. Remove the ear bud from your headset and then wash the ear bud in warm soapy water. When the ear bud is complete-ly dry, put it back on your headset.My headset falls out of my e the ear loop stabiliser for increased lateral support. See “Use the optional ear loop stabiliser” on page 10.Try a different size ear bud. For a proper fit, the ear bud should create a seal. When the ear bud fits properly, you should feel a slight amount of resistance when you remove the headset from your ear. See page 9 for instructions on choosing an ear bud.My ear bud needs to be cleaned.Remove the ear bud from the headset and wash it in warm soapy water and rinse thoroughly. When the ear bud is completely dry, put it back on your headset.PrOduCT SPECiFiCATiONSTalk time*battery enables up to 7 hoursStandby time*battery enables up to 160 hoursRange up to 33 feet (10 metres)Headset weight11 gramsBattery type Lithium ionCharge time 3 hours for full chargeVersion Bluetooth 2.0 + EDR (Enhanced Data Rate) Bluetooth profiles:Headset Profile (HSP) for talking on the phone.Hands-free Profile (HFP) for talking on the phoneand operating the phone.* Performance dependent on battery and may vary by device. TEChNiCAL ASSiSTANCEThe Plantronics T echnical Assistance Center (TAC) is ready to assist you. Visit us on the web at /support. Y ou can also call the T echnical Assistance Center for accessibility information: 0800 410 014 in UK and 1800 551 896 in Republic of Ireland.Plantronics Inc345 Encinal StreetSanta Cruz, CA 95060 USATel: (800) 544-4660Plantronics LtdWootton Bassett, UKTel: 0800 410014Plantronics IrelandCitywest Business CampusDublin 24Office: +353 (0)1 4693725Service ROI: 1800 551 896© 2007 Plantronics, Inc. All rights reserved. Plantronics, the logo design, Plantronics Voyager, QuickPair, and Sound Innovation are trademarks or registered trademarks of Plantronics, Inc. The Bluetooth® word mark and logos are owned by the Bluetooth SIG, Inc. and any use of such marks by Plantronics, Inc. is under license.Patents U.S. 5,210,791; 6,903,693 and Patents Pending.。
Sennheiser HD 600 头戴式耳机说明书

1 DC Power Input Jack.
2 Stereo/Mono Switch. Stereo position preserves Left/Right signals throughout system. Mono position mixes Left/Right signals together.
The Galaxy Audio warranty policy is to repair and return defective merchandise. Items under warranty may be replaced at no charge if deemed un-repairable by the Galaxy Audio technician. Proof of purchase may be required to verify warranty status. Customer will be responsible for shipping charges to repair facility, repaired product will be returned shipping prepaid by Galaxy Audio. Freight charges will not be reimbursed. Credit for defective warranty merchandise must have authorization from the Galaxy Audio main office before credit will be issued and will be subject to applicable restock and replacement charges. A twenty (20%) restock fee will apply to warranty items returned for credit. The cost of replacement parts to bring the item back to “like new” condition will also be deducted from credit for warranty items
德能 AH-GC25W 无线头戴式耳机 操作说明书
AH-GC25W 无线头戴式耳机操作说明书准备拆开包装4特点5音质5功能5通话6部件名称与功能7充电/电池状态8佩戴10切换音频提示11连接方法蓝牙操作13配对13连接13 1 :首次连接至耳机142 :重新连接已配对的设备16同时连接多个蓝牙设备(多点功能)17通过USB连接至计算机19操作聆听音乐20使用蓝牙连接收听音乐20使用音频线收听音乐22通过USB在计算机上收听音乐23通话操作25拨打电话25接听来电25结束通话25使用呼叫等待功能26忽略来电26通话时,从耳机切换至手机26其他操作27关闭电源27信息28蓝牙设备上的音频播放和电话通话28删除配对信息28故障诊断故障诊断29电源无法开启/电源自动关闭29设备无法充电29不发出声音30声音失真、出现噪音或中断30使用蓝牙无法播放媒体31无法打电话32附录使用注意事项33弃置耳机34商标信息34规格35感谢您购买本产品。
为了确保正确操作,在使用该产品前请仔细阅读本操作说明书。
拆开包装使用本设备之前,检查是否不缺少所有的这些组件。
特点音质0此耳机兼容各种编码,包括高音质的aptX HD、AAC和SBC编码。
这些耳机自动为您的蓝牙设备(智能手机或平板电脑)选择高级兼容编码,因此让您可以欣赏高级无线传输的声音。
功能0通过将本耳机连接至您的蓝牙设备,您可以在无线模式下欣赏音乐。
可以使用耳机对配对的音频设备执行播放操作和音量调整。
0在不允许使用蓝牙或电池电量耗尽的情况下,使用随附的线缆,可以连接到未配备蓝牙的音频设备。
随附的带遥控麦克风的音频线兼容在播放设备上操作和通话。
0使用随附的USB电缆连接到计算机,即可畅享从您的计算机播放的高音质音乐。
即使耳机正在充电,也可以从您的计算机播放音乐,因此您可以尽情欣赏音乐,而无需担心电池电量耗尽。
通话0您还可以通过将这些耳机配对到兼容蓝牙的手机上进行免提通话。
配备Qualcomm® cVc TM技术,可抑制回声,从而实现低噪音通话。
Shure TH53 TwinPlex 双向头戴耳机用户指南说明书

TH53™TwinPlex Omnidirectional HeadsetThe Shure Omnidirectional TwinPlex Headset, TH53, user guide.Version: 3 (2019-H)Table of ContentsTH53TwinPlex™ Omnidirectional Headset3 General Description3 Features 3 Model Variations Key 4 Care and Maintenance4 Adjusting the Headband and Microphone4 Reversing the Boom 7 Attaching the Windscreen7 Using the Collar Clip8Accessories8Replacement Parts 9 Threaded Mount Instructions 10 Wiring and Termination 10 Typical Wiring Table11 Converting LEMO to TA4F 12TA5F Wiring for Lectrosonics Bodypacks (Servo Biased Wiring) 12MTQG Connector Assembly 13 Specifications13 Frequency Response 15 Certifications15•◦◦•◦◦•◦◦◦TH53TwinPlex Omnidirectional HeadsetGeneral DescriptionThe Shure TwinPlex omnidirectional headset offers exceptional sound quality and the lightest, most comfortable fit for a variety of applications. The TwinPlex dual-diaphragm technology yields extraordinary, off-axis response, and low self-noise while delivering life-like, exceptional clarity and robust low frequency response, free of digital interference. The cable itself is ultra quiet and has been tested to be the longest-lasting, most dependable cable in its class. The innovative clutch system quickly allows adjustment of length and pitch of the boom arm for optimal placement and a stable fit while the ultralight frame virtually is weightless for extended comfort and wear.The TwinPlex series features the most extensive accessories and connector options to date. TwinPlex not only meets premium market-leading expectations, they exceed them.FeaturesExceptional sound quality from the all new TwinPlex dual-diaphragm elementRobust low frequency response with flat top end Best in class specifications and dynamic range Durability beyond the competitionExclusive, double helix cable technology with redundant groundingNano-coated, interchangeable frequency caps for reduced sweat out and moisture resistance Ultra lightweight, fully adjustable headset frameQuickly adjust length and pitch of the boom arm without bending Easily switch between left or right positioningComfort earhook sleeves allow for extended wear™™◦••••Headset frame can adjust down to the smallest child's headHigh RF immunity for use with today's digital wireless systemsPaintable cables allow for discreet placement in professional theater applicationsInterchangeable frequency response caps offer adjustable flat or presence responsesAvailable in a variety of color and connector offeringsModel Variations KeyNote: Not all model variations are available. Refer to /twinplex for the most up to date offerings.Care and MaintenanceThe TwinPlex lavalier dual-diaphragm has a nanocoating which rejects the build-up of grit from sweat and water. It is designed to withstand being blown out with a can of air for quick clean-up.Adjusting the Headband and Microphone➀ Adjust headband width➁ Adjust the earhooks andboom angle➂ Unscrew the clutch to adjust boom height and length➃ Bend boom arm into place. Adjust position1.2.3.➄ Select flat or presencecapReversing the BoomThe microphone boom can be positioned on the left or right side of the head.Unscrew the clutch to loosen the boom arm.Push down and snap out the boom arm.Snap into the other side and tighten in place.Attaching the WindscreenUsing the Collar ClipAccessoriesReplacement PartsDescription Black Tan Cocoa1Foam Windscreen RPM40WS/B RPM40WS/T RPM40WS/C 2Frequency Caps, Flat Response RPM40FC/B RPM40FC/T RPM40FC/C Frequency Caps, Presence Response RPM40PC/B RPM40PC/T RPM40PC/C3Microphone Boom Arm and Cable As-sembly, Lemo ConnectorRPM53B/O-LEMORPM53T/O-LEMORPM53C/O-LEMO Microphone Boom Arm and Cable As-sembly, MTQG ConnectorRPM53B/O-MTQGRPM53T/O-MTQGRPM53C/O-MTQG Microphone Boom Arm and Cable As-sembly, No ConnectorRPM53B/O-NCRPM53T/O-NCRPM53C/O-NC Microphone Boom Arm and Cable As-sembly, MicroDot ConnectorRPM53B/O-MDOTRPM53T/O-MDOTRPM53C/O-MDOT4Cable Flex RPM53B-CF RPM53T-CF RPM53C-CF 5Cable Headset Clip RPM53B-CC RPM53T-CC RPM53C-CCDescription Black Tan Cocoa6Headset Frame RPM53B-HF RPM53T-HF RPM53C-HF7Collar Clip RPM40STC/B (Black),RPM40STC/W (White)RPM40STC/TRPM40STC/C8Connector WA430 (MTQG), WA416 (LEMO) 9Threaded TA4F/MTQG Collar WA44510XLR Preamplifier RPM400TQG (TA4F to XLR), RPM400LEMO (LEMO to XLR)11Clear Earhook Sleeve RPM50ES Storage Case RPM50CASEThreaded Mount InstructionsWiring and Termination Typical Wiring TableSeries CableConstructionElectrical DesignPolarityReplacementConnectorFor UseWithWiring Line Art (From Solder Side)TH53-MTQG 1.6mmcablewith 2conductors, 2shieldwiresandshield3-Wire(SourceFollower)PositivewithrespecttogroundWA430All ShureTA4F BodypacksRed wire: Bias(2)Blue wire: Audio(3)Shield wire: Ground(1)Shield: Ground (Shell)TH53-LEMO 1.6mmcablewith 2conductors, 2shieldwiresandshield2-Wire(CommonSource)NegativewithrespecttogroundWA416Shure Lemobodypacks(ADX1-Lemo, ShureUR1M-Lemo,ULXD1-Lemo),SennheiserSK5212,LectrosonicsSSM, andothersRed wire: Audio/Bias(3)Blue wire: Not connectedShield wire: Ground(1)TH53-NC 1.6mmcablewith 2conductors, 2shieldwiresandshield2-Wire(CommonSource)NegativewithrespecttogroundLEMO:WA416,ShureTQG/TA4F:WA430,LectrosonicsTA5F:WA435TerminationDependentRed wire: Audio/BiasBlue wire: Not connectedShield wire: GroundShield: Ground (Shell)Converting LEMO to TA4FSeries CableConstructionElectrical DesignPolarityReplacementConnectorFor UseWithWiring Line Art (From Solder Side)TH53-LEMO 1.6mmcablewith 2conductors, 2shieldwiresandshield2-Wire(CommonSource)NegativewithrespecttogroundShureTQG/TA4F:WA430TerminationDependentShield wire: Ground(1)Red wire: Audio/Bias(3)Blue wire: Not connected8.25kΩ Resistor between pin 2 and 3Shield: Ground(Shell)TA5F Wiring for Lectrosonics Bodypacks (Servo Biased Wiring)Series CableConstructionElectrical DesignPolarityReplacementConnectorFor UseWithWiring Line Art (From Solder Side)TH53-MTQG 1.6mmcablewith 2conductors, 2shieldwiresandshield3-Wire(SourceFollower)PositivewithrespecttogroundWA435LectrosonicsTA5F bodypacksRed wire: Bias(3)Blue wire: Audio(5)Shield wire: Ground(1)Shield: Ground(Shell)Jumper between 2 and4TH53-LEMO, TH53-NC 1.6mmcablewith 2conductors, 2shieldwiresandshield2-Wire(CommonSource)NegativewithrespecttogroundWA435LectrosonicsTA5F bodypacksRed wire: Audio/Bias(3)Blue wire: Not connectedShield wire: Ground(1)Shield: Ground(Shell)Jumper between 2 and4MTQG Connector AssemblyExploded ViewNote:Make sure to solder the shield to ground collar.Assembled ViewSpecificationsAll specification values are based on using a typical bodypack with 5 V bias input or the RPM400MTQG preamplifier. When using the RPM400LEMO amplifier, refer to the RPM400LEMO specifications. Microphone CapsuleDual-Diaphragm, Prepolarized CondenserPolar PatternOmnidirectionalFrequency Response20 Hz to 20 kHzSensitivity-45.0 dBV (5.62 mV )at 1 kHz [1][2]Self-Noise, A-Weighted, Equivalent Acoustical24.5 dB SPLASignal-To-Noise Ratio 69.5 dBOutput Clipping Level3.0 dBV ,1 kHz at 1% THD, typicalMaximum SPL 142.0 dB SPL ,1 kHz at 1% THD, typicalDynamic Range117.5 dB typicalMicrophone Current Draw120 to 240 µA, typicalBias VoltageRecommended Operating Voltage5 V DCHousingMolded ABSPolarityMTQGPositive pressure on diaphragm produces positive voltage on pin 3 with respect to pin 1LEMO, NC, MDOTPositive pressure on diaphragm produces negative voltage on pin 3 with respect to pin 1.Cable Diameter1.6 mmCable LengthMTQG, LEMO, MDOT 66 in. (1.67 m )NC96 in. (2.43 m )Net WeightBoom arm with cable 12.0 g (0.42 oz.)Headset frame6.0 g (0.21 oz.)All specifications measured with a 48 Vdc phantom power supply. The microphone operates at lower voltages, but with slightly decreased headroom and sensitivity.1 Pa=94 dB SPL[3][4][1][2]S/N ratio is the difference between 94 dB SPL and equivalent SPL of self noise, A-weightedTHD of microphone preamplifier when applied input signal level is equivalent to cartridge output at specified SPLDimensionsA BCDE Cable LengthCable Diameter Microphone Length Microphone DiameterBoom Length TH53-MTQG, TH53-MDOT, TH53-LEMO 66 in. (1.67M) 1.6MM19MM5.6MM13.6CMTH53-NC96 in. (2.43M)1.6MM 19MM 5.6MM 13.6CMFrequency Response[3][4]CertificationsThis product meets the Essential Requirements of all relevant European directives and is eligible for CE marking. The CE Declaration of Conformity can be obtained from: /europe/complianceAuthorized European representative:Shure Europe GmbHHeadquarters Europe, Middle East & AfricaDepartment: EMEA ApprovalJakob-Dieffenbacher-Str. 1275031 Eppingen, GermanyPhone: +49-7262-92 49 0Fax: +49-7262-92 49 11 4Email:*************。
Plantronics Voyager 510 USB Bluetooth 头戴式耳机用户指南说明书

Plantronics VoYaGEr ™ 510-UsBBLUETOOTH ® HEADSET SySTEmUSER GUIDEPACKAGE CONTENTSHeadset (front and side view) PerSonoCall® software CD WELCOMEThis User Guide provides instructions on the setup and usage of the Plantronics Voyager 510 USB Bluetooth headset system. Before getting started, please review the safety booklet included in your package. For additional help, service or support information, refer to the product warranty card or visit .FEATURES CHARGINGHorizontal boom adjustmentCall control buttonCharge connectionNoise-cancelling microphone with WindSmart® technology USB chargingStatus indicator lightPAIRINGPowering headsetPairing headset with Bluetooth phoneon or off.The indicator light flashes blue when the headset is on. The indicator light will flash red when PAIRINGPairing headsetNOTE: The headset and USB Bluetooth adapter are paired to each other at the factory. However, if you have purchased a USB Bluetooth adapter separately, or if you wish to use a replacement headset with your existing adapter, the units must be paired.INSTALLING PERSONOCALL ® SOFTWAREPlantronics PerSonoCall ® software provides the link between your Bluetooth headset and compatible softphone applications on your computer. PerSonoCall software provides the ability to remotely detect and answer/end a call from your softphone application via the headset call control button.In addition, PerSonoCall provides some basic configuration and status information about the system. See page 10 for more details.Check the PerSonoCall compatibility list at /personocall for the most current information on softphone compatibility. If your softphone is not currently supported by PerSonoCall, please refer to page 14.1. With the CD inserted, go to the PerSonoCall main screen and click on “Install the PerSonoCall Software”.: No headset detected : Headset detected, no radio link to USB Bluetooth adapter : Headset detected and radio link to USB Bluetooth adapter active : Headset detected and radio link to USB Bluetooth adapter is locked onCurrent Status screen INSTALLING PERSONOCALL SOFTWARERight-click on the headset system tray icon and choose “Options”. This will bring up the PerSonoCall Basic Options and Current Status screens.Basic Options screenReplacing the ear tipRotate the microphone horizontally and vertically as illustrated, to select for left or right ear wearing. The illustration shows conversion from right to left ear wearing. Reverse the procedure to convert from left to right ear wearing.Slide the headset over and behind your ear. Press gently towards your ear for a snug fit. Adjust the microphone position so that it is directed towards your mouth.Inserting a new ear tipADJUSTING FITWearing the headsetTo make a call , press the call control button to take the softphone off the hook. You should hear a dial tone.To answer or end a call , press the call control button.When using PerSonoCall, the radio link between the headset and the USB Bluetooth adapter will only be active during a call. This is the default setting intended to preserve the battery life of the headset. However, you may wish to have the radio link active when not on a call so you can listen to other audio sources, such as streaming audio on your PC. You can lock the radio link on in two ways:• Basic Options screen—check the box for "Lock headset radio link on"—see page 10.• Right click on system tray icon—and choose "Lock radio link on".NOTE: Locking the radio link on for extended periods of time will significantly reduce the USING YOUR HEADSETAdditional featuresOnly with mobile phoneAnswering/ending/making calls with PerSonoCall on softphoneRedialling last numberTo activate last number redial, double-click the call control button. You will Switching a call from phone to headset To switch an active call from your phone to your headset, briefly press the call The Voyager 510-USB headset has multipoint technology which allows you to switch seamlessly between two audio devices. You can answer a call from either your PC-based softphone or your mobile phone by pressing the call control button. The headset must be paired to both devices and then to enable this functionality, see "Allow call control button to toggle the headset’s radio link" on the Basic Options screen on page 10.Multipoint versatilityINDICATOR LIGHTSBluetooth device Connected to headset Flashes blue USING YOUR HEADSETTo adjust the listen or speak volume of the softphone, please refer to the softphone user documentation.TROUBLESHOOTING FOR VOYAGER 510-USB• Lower the listen volume on your softphone until the distortion disappears.• If the distortion is still present, lower the listen volume control on the computer.• Adjust volume on headset. See page 16.• Speak volume is too high. Lower the speak volume on your softphone until the noise disappears. If the noise is still present, lower the microphone volume control on the computer.Sound in headset is distorted. I can hear echo in headset.I can hear too much background conversation or noise.• Check compatibility list on / personocall to ensure your softphone is compatible for remote answer and disconnect.• Headset battery needs to be charged. See page 5.• Headset is not paired to the USB Bluetooth adapter. See page 8.• When a PC goes into standby or hibernation, the USB Bluetooth adapter is no longer powered on. Ensure your PC is in an active state.• Ensure PerSonoCall software is installed My Voyager headset does not work with the softphone I am using on my PC (I cannot answer or disconnect from the headset call button).ProblemSolutionProblemSolutionTECHNICAL ASSISTANCEVisit our web site at /support for technical support including frequently asked questions, compatibility and accessibility information. The Plantronics Technical Assistance Center (TAC) is also ready to assist you on 0800 410 014.Plantronics Ltd Wootton Bassett, UK Tel: 0800 410 014Plantronics B.V. Hoofddorp, Nederland Tel: 0800 752 6876 (NL) 00800 752 687 66 (BE/LUX)Plantronics Sarl Noisy-le-Grand, France Plantronics Acoustics Italia Srl Milano, Italia Numero Verde: 800 950 934Plantronics Iberia, S.L. Madrid, España Tel: 902 415 191 +34 91 640 47 44 (ES) Tel: 800 844 517 (PT)。
作业指导书XY-PODS耳机
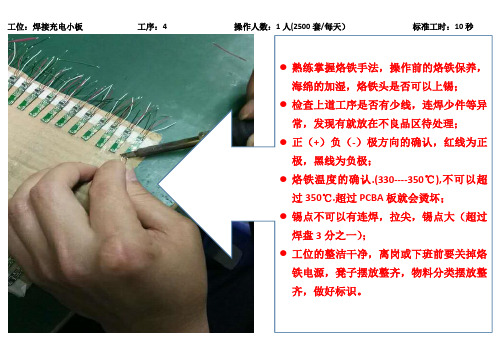
工位:焊接充电小板工序:4 操作人数:1人(2500套/每天)标准工时:10秒●熟练掌握烙铁手法,操作前的烙铁保养,海绵的加湿,烙铁头是否可以上锡;●检查上道工序是否有少线,连焊少件等异常,发现有就放在不良品区待处理;●正(+)负(-)极方向的确认,红线为正极,黑线为负极;●烙铁温度的确认.(330----350℃),不可以超过350℃.超过PCBA板就会烫坏;●锡点不可以有连焊,拉尖,锡点大(超过焊盘3分之一);●工位的整洁干净,离岗或下班前要关掉烙铁电源,凳子摆放整齐,物料分类摆放整齐,做好标识。
●检查电镀尾塞是否有电镀不良,查看上道工序是否有不良异常,有不良异常请放到不良品区待修;●安装是否到位,安装到位才可以点胶水;●点胶水注意不要点到外面,胶水要点的均匀;●工位需要保持整洁,干净,物料的分类标识;●胶水下班后需要放回冰箱冷藏。
●检查上道工序是否有异常,有异常请放不良品区待修;●装板不要卡住线材,五根线要全部无交叉出在壳外面;●尾塞安装要有方向,正极方向根据样板操作;●左耳(L)装左边的板,右耳(R)装右边的板,一定不可以装混板;●装板要检查是否有少线问题,发现有少线就不可以安装;●不良品与良品的区分。
●检查线够不够数,触摸片加锡是否饱满;●焊触摸片的线头不可以漏在外面,确保触摸点焊接牢固;●焊锡时不可以烫到外壳。
●检查触摸片焊接牢固;●贴触摸片时尽量往下贴,上线是遮喇叭网的一半;●贴触摸片的四个角压实,中间用筷子压两道,确保触摸片接触道。
●●检查触摸片是否贴好;●检查是否有四根线,没有四根线就是不良品,需要修理处理;●焊点不可以与喇叭金属外壳短路,短路就会有声音小,杂音异常;●焊点要牢固,不可以漏线头;●喇叭是否要分正负极,如果要区分请在打点的极性焊正极。
●检查喇叭是否焊接良好,有不良放在不良品区待修●检查电池是否有少数,断极耳,电池鼓包,漏液等异常停止使用,请品质部检验过后在上线生产焊接●焊接时先焊正极,再焊负极,不会产生火花问题。
Sound Blaster EVO USB 娱乐头戴式耳机说明书
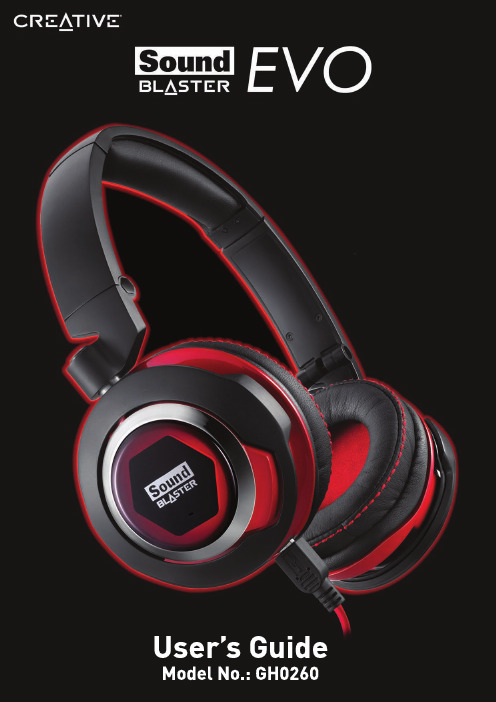
U s e r’s G u i d e M o d e l N o.:G H0260Congratulations!Package ChecklistMinimum System Requirements2.287 Note:Overview OR213451-Adjustable Headband 2-Volume Control 3-Multifunction Button (for calls and playback)4-4-Pole Analog Jack 5-MicroUSB PortFlexible Connection OptionsCable to your PC/MacCable*to your Soundcardnot includedUsing Your Sound Blaster EVO USB 1.2.3.Step1:Connect your headsetConnecting to a Computer(USB Digital Mode)Note:device(for Mac only)1.Preferences and click Sound.2.Blaster EVO USB in both the Output and Input tabs.Connecting to a Mobile Device (4-Pole Analog Mode)Note:and the Multifunction button function in4-Pole Analog Mode.analog cable and the USB cable are connected to the same device(such as on aUSB cable connection is prioritized unless manually configured otherwise.Step2: Install the Software Note:1.2.3.4.5.6.7.1.2.3.4.5.6.7.Step3:Use ItWearing the HeadsetAdjusting the VolumeIn USB digital mode,the Volume Control on the headset cup can beused to adjust your headset volume to a comfortable level.You canalso adjust the volume via the software or the built-in volumesettings on your computer.CAUTION:Do not listen to audio on your headset at high volumes for prolongedperiods of time to avoid impairing your hearing.Usage ScenariosPlaying Music or MoviesDialog Plus feature brings out the dialog in movies for maximum clarity,while the SBX Bass the low frequency tones and gives the extra impact for a dramatically improved soundThe SBX Surround enhances your movie or music playback by producing virtual speakers above and below you,creating an immersive audio experience.1.or Pause Musicthe Multifunction button once to play music and again to pause it.Similarly,tap on the same to resume.2.Volumethe volume control to increase or decrease the music level.Not applicable in4-Pole Analog Mode.Answering and Ending CallsAnswerDeclinemic technology will be automatically enabled.The Voice Focus feature is able to pick up your while the Noise Reduction effect eliminates unwanted background noise from both ends You may choose to morph your voice with special effects with the Voice FX too!1.or End a Callthere's an incoming call from your mobile device while you are listening to music,the music out and the ringtone will gradually be heard.the Multifunction button once to answer the call,and tap on the same button again to end it.will resume after the call has ended.headset is connected to a computer,click on the answer call button prompted on the computer to enter voice communication.st Numberthe Multifunction button twice to redial the last called number.This feature may vary depending on your phone and is not available in USB Digital Mode.3.Voice Commandvoice command(e.g.Siri),press and hold the Multifunction button for3seconds to the function.This feature may vary depending on your phone and is not available in USB Digital Mode.Using the Software Note:a number of configurations that help you control the basic functions of your software enhancement configurations that can be made to heighten yourClick each of the menu bars to expand the configurations available.Using the Sound Blaster EVO Control PanelManaging Your Profiles1.Profile menu to view the SBX Profile screen.2.desired profile from the screen.changes to the active profile,1.button to modify the profile you have selected.2.through the various other menu options of the Sound Blaster EVO Control Panel andconfigurations as desired.Configuring your general settingsthe top of the and the theEnhancing the Audio-SBX Pro Studio1.next to one or more of the available enhancements to enable it.2.level of enhancements to be applied individually.3.to play the demo video to test your configurations.4.if necessary.5.to save the adjusted settings or Reset to restore default settings.includes a number of enhancements for movies and gaming,elevating your movie and to the next level.These include:-provides immersion control to enhance the natural sense of audio depth and by creating virtual surround sound channels.Stereo content or multi-channel will sound as if its coming from all sides while voices remain centered in front andand timbre is preserved.-restores the natural dynamic range that is lost when music files(iTunes and gets compressed.This makes the music sound as good as the artist originally intended, an enhanced level of realism for movies and games.-fills in the missing low frequency tones and gives the extra impact for a better enter-experience.Consumers no longer have to tolerate a lack of bass in speakers as thetechnology dramatically improves the sound experience even in the absence of aVolume-addresses the problem of abrupt volume level changes during playbacksongs by continously measuring volume automatically,applying gain and atten-to compensate for any changes.Plus-enhances the voices in movies for clearer dialog,allowing the listener to dialog over the rest of the soundtrack and over ambient noise in the listening envi-Enhancing the Microphone-CrystalVoice™1.recording device and adjust its microphone volume using the volume slider.2.checkbox next to one or more of the available enhancements to enable it.3.and speak into your microphone to listen to your voice with the selected presetsReadjust if necessary.helps you hear and be heard clearly by all participants of the conference, noisy background distortions and unclear communication that disrupts your online experience.The various enhancements available include:FX™-enables the alteration of voice with a variety of effects which can be used the tone of a voice,create interesting accents or even allow someone to sound like adifferent person.Noise Reduction-enables the speaker to be heard clearly over background constantly monitoring the environment and eliminating unwanted noise that interferesconversation.Focus-creates a zone and suppresses noise outside it to enable the speaker be heard with amazing clarity.Multiple microphones are used to focus,enhance thevoice,and eliminate sounds outside the zone.Note:Focus feature will be turned on automatically at all times.Equalizer Settingssettings,go to the SBX Profile screen and select a profile.Click Edit and then .To adjust and apply an equalizer preset,1.EQ checkbox to enable the use of the equalizer.2.drop down menu,select the preset to use.3.vertical slider bars to achieve your desired level.4.to save the changes to the active preset or to a new preset.any user created equalizer presets by selecting the preset from the drop downDelete.Note:equalizer presets cannot be deleted.Headphones SettingsNote:to listen to audio with the selected configuration.Mixer SettingsAdvanced FeaturesPlaying GamesRestoring Audio Effects in Games with Creative ALchemy71.2.3.Note:General Specifications Connectivity5500SBX Pro Studio Technology CrystalVoice TechnologyTroubleshootingWhat do the LED statuses mean?The onboard audio chipset seems to be in conflict with Sound Blaster EVO USB. No sound from the headset.There is clipping/distortion during audio playback.Some features are disabled when playing certain games.Additional Guide for Windows Usersstereo cable bundle allows you to connect your headset to your iPhone /Android some phone /tablet's 4-pole female jack has different configuration and this support if the configuration is different from the jack (bundled)as illustrated below:(a) Audio Left (b) Audio Right(c) Microphone(d) Groundto connect your headset to an MP3Player,you will need to check if the its 4-pole female jack is compatible.Safety Informationis used at high volume.Set the volume to a safevolume of sound that may sound normal but can beringing in your ears or muffled speech,stop listening andvolume,the less time is required before your hearing couldto protect your hearing:headphone at high volume.out noisy surroundings.people speaking near you.Find out more about your headset by clicking on the Resources Link.。
Samson SR880 闭环工作室头戴耳机说明书
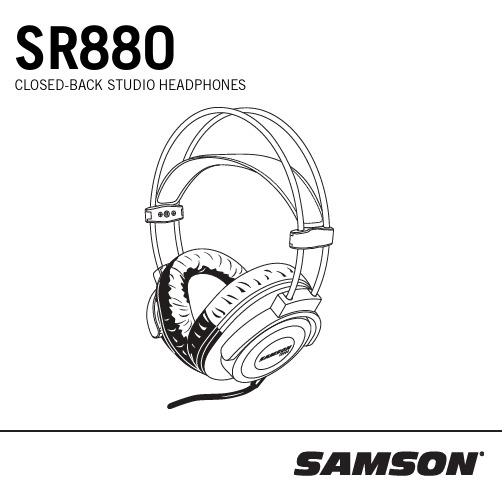
SR880 CLOSED-BACK STUDIO HEADPHONESSafety PrecautionsWARNING! This product is capable of causing permanent damage to your hearing if used at excessive volumes!To protect your hearing, the Samson SR880 headphones should always be used at as low a volume as possible. We recommend that you stringently follow the guidelines established by the U.S. Occupational Safety Health Administration (OSHA) regarding maximum time exposure at various sound pressure levels:•Don’t use this product for more than 8 hours at 90 dB SPL •Don’t use this product for more than 4 hours at 95 dB SPL •Don’t use this product for more than 2 hours at 100 dB SPL •Don’t use this product for more than 1 hour at 105 dB SPL •Don’t use this product for more than 1/2 hour at 110 dB SPL •Don’t use this product for more than 15 minutes at 115 dB SPL • Don’t operate at listening levels of greater than 120 dB SPL!Pay attention to what your ears are telling you! Ringing is a sign that you have set the gain levels too high and that damage may result. We recommend that you consult with a qualified audiologist if you exhibit ringing or any other symptoms.© 2020 v1.2 Samson Technologies Corp.I f you want to dispose this product, do not mix it with general household waste. There is a separate collection system for used electronic products in accordance with legislation that requires propertreatment, recovery and recycling.Private household in the 28 member states of the EU, in Switzerland and Norway may return their usedelectronic products free of charge to designated collection facilities or to a retailer (if you purchase asimilar new one).For Countries not mentioned above, please contact your local authorities for a correct method ofdisposal.By doing so you will ensure that your disposed product undergoes the necessary treatment, recovery andrecycling and thus prevent potential negative effects on the environment and human health.IntroductionCongratulations on purchasing your new Samson SR880 Closed-Back Studio Headphones! The SR880 Closed-Back Studio Heapdhones offer complete sonic clarity, breadth and balance, ideal for any music lover. Comfortable and durable, the SR880’s provide a secure fit, a dynamic and detailed listening experience and exceptional bass response.We recommend you record your serial number in the space provided below for future reference.Serial number: _________________________Date of purchase: _________________________With proper care your SR880 headphones will operate trouble free for many years. Should your unit ever require servicing, a Return Authorization (RA) number must be obtained before shipping your unit to Samson. Without this number, the unit will not be accepted. Please call Samson at 1-800-3SAMSON (1-800-372-6766) for an RA number prior to shipping your unit. Please retain the original packing materials and, if possible, return the unit in the original carton. If you purchased your Samson product outside the United States, please contact your local distributor for warranty information and service.Highlights• Exceptional bass response with clear mids and highs• Over-ear, closed-back design with protein leather earpads• Large 50mm neodymium drivers• Adjustable headband• 20Hz-20kHz frequency response• 32 Ω Impedance• 1/4” adapter includedSR880 C losed-Ba ck Studio Headpho nesSpecificationsDriver type DynamicType Closed-BackDriver Unit 50 mm Neodymium magnetFrequency response 20 Hz - 20 kHzImpedance 32 ΩSensitivity 97dB @ 1kHz/1mWConnector G old-plated 1/8” (3.5 mm) stereo mini connectorwith gold-plated 1/8” (3.5 mm) to 1/4” (6.3 mm)adapterClamping Force 5NCable 8.25’ (2.5 m) longWeight 8.64 oz (245 g)Specifications subject to change without notice.Samson Technologies Corp.278-B Duffy AveHicksville, NY 11801。
Sennheiser 飞行头戴耳机说明书

Via an audio cable, you can connect a mobile telephone to the following aviation headsets from Sennheiser:y HMEC 460(audio cable is included in the delivery)y HMEC 46-BV-K(audio cable is available as an accessory; for details, please refer to the user manual of the headset)Connecting a mobile telephone (see A)The 2.5 mm jack socket ³ allows you to connect a mobile telephone. For this purpose, the NoiseGard™ active noise compensation must be switched on and the microphone connector must be connected to the aircraft radio/intercom.Connect the audio cable to the 2.5 mm jack socket ³ on the operating control and to the corresponding jack socket on your mobile telephone ·.You can adjust the volume of the mobile telephone via the headset’s operating control. However, the functions of the mobile telephone cannot be controlled via the headset’s operating control.̈Operate your mobile telephone as usual and observe theinstructions of the manufacturer.So far the following mobile telephone models have been tested and found to operate correctly with the HMEC 460and HMEC 46-BV-K headsets:LG y VX8300Motorola y all models Sony Ericsson y K 700i y T 610Sprinty Pocket PC 6700This list is continuously updated as new mobile telephones are successfully tested. Sennheiser cannot make a declara-tion with respect to mobile telephones which have not yet been tested.General notes (see B)Not all mobile telephones feature a 2.5 mm jack socket. We therefore recommend that you purchase a suitable adapter » from a specialist mobile telephone accessory re-tailer. Sennheiser does not accept responsibility/liability for the suitability, function or incorrect function of these adap-ters.Sennheiser does not accept liability for damage arising from abuse or misuse!Danger of accident due to reduced attention!Making telephone calls or operating the mobile telephone limits your attention and may cause accidents.During flight operation, do not use the headsetfor telephone calls!CAUTION!Cell Phone CompatibilitySennheiser electronic GmbH & Co. KG 30900 Wedemark, Germany Phone +49 (5130) 600 0Fax +49 (5130) 600 300。
- 1、下载文档前请自行甄别文档内容的完整性,平台不提供额外的编辑、内容补充、找答案等附加服务。
- 2、"仅部分预览"的文档,不可在线预览部分如存在完整性等问题,可反馈申请退款(可完整预览的文档不适用该条件!)。
- 3、如文档侵犯您的权益,请联系客服反馈,我们会尽快为您处理(人工客服工作时间:9:00-18:30)。
发行单位:工程部
保存年限: 至文件失效 表单编号:AE-RD-010機型AH-801工站组装作業內容生效日期2013-7-3版本V0
2.用自制工具将导线均匀放置于头带条的线槽内。
3.自检作业是否正确完成。
注意事
項
制作Eric 審 核批准1.如图1所示,导线尾端预留长度一致,相差不可超过20MM。
3.导线不可露出线槽边,头夹卡位处不可有导线外漏现象。
1.检查塑胶头带条和导线特性是否OK,NG品挑出。
****电子有限公司
作 業 指 導 書 WEIQIN WORK INSTRUCTION
固定导线二、作業内容
一、圖示作业完成时间
预 计 产 量
2.如图3、4所示,作业NG,需要自检修复。
1234
NG NG OK。
