第10章 JAX-RS概述
Java探索之Feign入门使用详解

Java探索之Feign⼊门使⽤详解⼀,简介Feign使得 Java HTTP 客户端编写更⽅便。
Feign 灵感来源于Retrofit、JAXRS-2.0和WebSocket。
Feign最初是为了降低统⼀绑定Denominator到HTTP API的复杂度,不区分是否⽀持Restful。
Feign旨在通过最少的资源和代码来实现和HTTP API的连接。
通过可定制的解码器和错误处理,可以编写任意的HTTP API。
Maven依赖:<!-- https:///artifact/flix.feign/feign-core --><dependency><groupId>flix.feign</groupId><artifactId>feign-core</artifactId><version>8.18.0</version><scope>runtime</scope></dependency>⼆,为什么选择Feign⽽不是其他你可以使⽤ Jersey 和 CXF 这些来写⼀个 Rest 或 SOAP 服务的java客服端。
你也可以直接使⽤ Apache HttpClient 来实现。
但是 Feign 的⽬的是尽量的减少资源和代码来实现和 HTTP API 的连接。
通过⾃定义的编码解码器以及错误处理,你可以编写任何基于⽂本的 HTTP API。
Feign⼯作机制Feign通过注解注⼊⼀个模板化请求进⾏⼯作。
只需在发送之前关闭它,参数就可以被直接的运⽤到模板中。
然⽽这也限制了Feign,只⽀持⽂本形式的API,它在响应请求等⽅⾯极⼤的简化了系统。
同时,它也是⼗分容易进⾏单元测试的。
三,Feign使⽤简介3.1,基本⽤法基本的使⽤如下所⽰,⼀个对于canonical Retrofit sample的适配。
RESTEasy入门经典
RESTEasy是JBoss的开源项目之一,是一个RESTful Web Services框架。
RESTEasy的开发者Bill Burke同时也是JAX-RS的J2EE标准制定者之一。
JAX-RS 是一个JCP制订的新标准,用于规范基于HTTP的RESTful Web Services的API。
我们已经有SOAP了,为什么需要Restful WebServices?用Bill自己的话来说:"如果是为了构建SOA应用,从技术选型的角度来讲,我相信REST比SOAP更具优势。
开发人员会意识到使用传统方式有进行SOA架构有多复杂,更不用提使用这些做出来的接口了。
这时他们就会发现Restful Web Services的光明之处。
"说了这么多,我们使用RESTEasy做一个项目玩玩看。
首先创造一个maven1的web 项目Java代码1.mvn archetype:create -DgroupId=org.bluedash \2.3.-DartifactId=try-resteasy -DarchetypeArtifactId=maven-archetype-webapp准备工作完成后,我们就可以开始写代码了,假设我们要撰写一个处理客户信息的Web Service,它包含两个功能:一是添加用户信息;二是通过用户Id,获取某个用户的信息,而交互的方式是标准的WebService形式,数据交换格式为XML。
假设一条用户包含两个属性:Id和用户名。
那么我们设计交换的XML数据如下:Java代码1.<user>2. <id>1</id>3. <name>liweinan</name>4.</user>首先要做的就是把上述格式转换成XSD2,网上有在线工具可以帮助我们完成这一工作3,在此不详细展开。
使用工具转换后,生成如下xsd文件:Java代码1.<?xml version="1.0" encoding="utf-8"?>2.<xsd:schema attributeFormDefault="unqualified" elementFormDefault="qualified"3.version="1.0" xmlns:xsd="/2001/XMLSchema">4. <xsd:element name="user" type="userType" />5. <xsd:complexType name="userType">6. <xsd:sequence>7. <xsd:element name="id" type="xsd:int" />8. <xsd:element name="name" type="xsd:string" />9. </xsd:sequence>10. </xsd:complexType>11.</xsd:schema>有了xsd文件,我们便可以使用JDK自带工具的xjc将xsd转换成为Java的Class。
使用Eclipse开发基于SpringBoot+JAX-RS的Restful服务
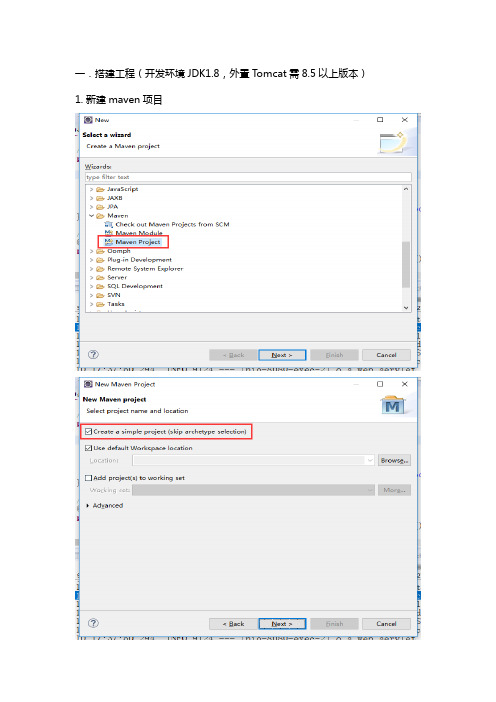
一.搭建工程(开发环境JDK1.8,外置Tomcat需8.5以上版本)1.新建maven项目2.修改pom文件,内容如下:<project xmlns="/POM/4.0.0" xmlns:xsi="/2001/XMLSchema-instance" xsi:schemaLocation="/POM/4.0.0 /xsd/maven-4.0.0.xsd"><modelVersion>4.0.0</modelVersion><groupId>springboot.jaxrs</groupId><artifactId>RestWS</artifactId><version>0.0.1-SNAPSHOT</version><parent><groupId>org.springframework.boot</groupId><artifactId>spring-boot-starter-parent</artifactId><version>2.3.0.RELEASE</version></parent><dependencies><!-- Web应用依赖:主要用来进行Web应用开发 --><dependency><groupId>org.springframework.boot</groupId><artifactId>spring-boot-starter-web</artifactId><!-- 排除Web依赖提供的Tomcat容器,由下面的Tomcat依赖提供Tomcat容器 --><exclusions><exclusion><groupId>org.springframework.boot</groupId><artifactId>spring-boot-starter-tomcat</artifactId></exclusion></exclusions></dependency><!-- 模板引擎依赖:主要用来提供@Controller和html页面等的访问 --><dependency><groupId>org.springframework.boot</groupId><artifactId>spring-boot-starter-thymeleaf</artifactId></dependency><!-- RESTful服务依赖:主要用来提供Jersey RESTful Web服务框架的支持 --><dependency><groupId>org.springframework.boot</groupId><artifactId>spring-boot-starter-jersey</artifactId></dependency><!-- Tomcat容器依赖:主要用来提供编译和测试时的Tomcat支持,打war包时不会包含到lib --><dependency><groupId>org.springframework.boot</groupId><artifactId>spring-boot-starter-tomcat</artifactId><scope>provided</scope></dependency><!-- 测试组件依赖:用来提供单元测试的支持 --><dependency><groupId>org.springframework.boot</groupId><artifactId>spring-boot-starter-test</artifactId><!-- 排除JUnit4的包,只引入JUnit5的包 --><exclusions><exclusion><groupId>org.junit.vintage</groupId><artifactId>junit-vintage-engine</artifactId></exclusion></exclusions></dependency></dependencies><build><!-- 打包后的文件名 --><finalName>springboot</finalName><plugins><!-- SpringBoot打包插件,指定main方法的类 --><plugin><groupId>org.springframework.boot</groupId><artifactId>spring-boot-maven-plugin</artifactId><configuration><mainClass>com.springboot.SpringBootRun</mainClass> </configuration></plugin></plugins></build></project>3.新建一个springboot.jaxrs的包,并建一个SpringBootRun类package springboot.jaxrs;import org.springframework.boot.SpringApplication;import org.springframework.boot.autoconfigure.SpringBootApplication; import org.springframework.boot.builder.SpringApplicationBuilder;importorg.springframework.boot.web.servlet.support.SpringBootServletInitializer;@SpringBootApplicationpublic class SpringBootRun extends SpringBootServletInitializer {//通过外置Tomcat启动SpringBoot项目@Overrideprotected SpringApplicationBuilder configure(SpringApplicationBuilder builder) {// TODO Auto-generated method stubreturn builder.sources(SpringBootRun.class);}//通过内置Tomcat启动SpringBoot项目public static void main(String[] args) {SpringApplication.run(SpringBootRun.class, args);}}4.新建一个RestConfig类package springboot.jaxrs;import javax.ws.rs.ApplicationPath;import org.glassfish.jersey.server.ResourceConfig;import org.springframework.context.annotation.Bean;import org.springframework.context.annotation.Configuration;import org.springframework.web.cors.CorsConfiguration;import org.springframework.web.cors.UrlBasedCorsConfigurationSource; import org.springframework.web.filter.CorsFilter;@Configuration@ApplicationPath("/services")public class RestConfig extends ResourceConfig {//注册服务public RestConfig() {//1.自动扫描com.springboot下面的服务packages("springboot.jaxrs");//2.手动注册服务//register(HelloWorldService.class);//register(TestService.class);System.out.println("WADL地址:http://localhost:8080/RestWS/services/application.wadl");}//添加跨域访问服务:只开放了WS访问,没有开放@Controller访问@Beanpublic CorsFilter corsFilter() {CorsConfiguration corsConfiguration = new CorsConfiguration();corsConfiguration.addAllowedOrigin("*"); // 1 设置访问源地址corsConfiguration.addAllowedHeader("*"); // 2 设置访问源请求头corsConfiguration.addAllowedMethod("*"); // 3 设置访问源请求方法UrlBasedCorsConfigurationSource source = new UrlBasedCorsConfigurationSource();source.registerCorsConfiguration("/ws/**", corsConfiguration); // 4 设置允许访问的地址过滤return new CorsFilter(source);}}5.新建一个springboot.jaxrs.controller的包,并建一个PagesController类package springboot.jaxrs.controller;import org.springframework.stereotype.Controller;import org.springframework.web.bind.annotation.CrossOrigin;import org.springframework.web.bind.annotation.RequestMapping;import org.springframework.web.bind.annotation.RequestMethod;import org.springframework.web.bind.annotation.ResponseBody;@CrossOrigin(origins = "*",maxAge = 3600)//如果想让@Controller允许跨域访问可以加上@CrossOrigin@Controller@RequestMapping("/pages")public class PagesController {@ResponseBody@RequestMapping(value = "/say", method = RequestMethod.GET)public String index() {return"Hello World";}@RequestMapping("/main")public String mainPage() {return"main";}}6.新建一个springboot.jaxrs.entity的包,并新建User类package springboot.jaxrs.entity;public class User {private String name;//姓名private String idNo;//身份证private String password;//密码public User(String name,String idNo,String password) { = name;this.idNo = idNo;this.password = password;}//重写HashCode方法,让程序判断身份证号码相同为同一个对象@Overridepublic int hashCode() {// TODO Auto-generated method stubreturn idNo.hashCode();}//重写equals方法,让程序判断身份证号码相同为同一个对象@Overridepublic boolean equals(Object obj) {// TODO Auto-generated method stubif(obj instanceof User){User user = (User) obj;return this.idNo.equals(user.getIdNo());}else {return false;}}@Overridepublic String toString() {// TODO Auto-generated method stubreturn"[name:"+name+",idNo:"+idNo+",password:"+password+"]";}public String getName() {return name;}public String getIdNo() {return idNo;}public void setIdNo(String idNo) {this.idNo = idNo;}public void setName(String name) { = name;}public String getPassword() {return password;}public void setPassword(String password) {this.password = password;}}7.新建一个springboot.jaxrs.webservice包并新建UsersService类package springboot.jaxrs.webservice;import java.util.HashMap;import java.util.Map;import javax.inject.Singleton;import javax.ws.rs.Consumes;import javax.ws.rs.DELETE;import javax.ws.rs.GET;import javax.ws.rs.POST;import javax.ws.rs.PUT;import javax.ws.rs.Path;import javax.ws.rs.PathParam;import javax.ws.rs.Produces;import javax.ws.rs.core.MediaType;import javax.ws.rs.core.Response;import javax.ws.rs.core.Response.Status;import com.fasterxml.jackson.core.JsonProcessingException;import com.fasterxml.jackson.databind.ObjectMapper;import er;@Path("/ws/users")@Singleton//设置为单例,要不然userMap每次都会new一个新的public class UsersService {Map<String,User> userMap = new HashMap<>();@GET@Path("/getAllUser")@Produces(value=MediaType.APPLICATION_JSON) //JSON方式返回public Response getAllUser() {try {String userJson = new ObjectMapper().writeValueAsString(userMap);return Response.status(Status.OK).entity(userJson).build();} catch (JsonProcessingException e) {// TODO Auto-generated catch blocke.printStackTrace();returnResponse.status(Status.OK).entity("{\"error\":\""+e.toString()+"\"}").build();}}@GET@Path("/{userid}/get")@Consumes(value=MediaType.APPLICATION_JSON) //JSON方式接受请求@Produces(value=MediaType.APPLICATION_JSON) //JSON方式返回public Response getById(@PathParam("userid") String userid) {try {String userJson = newObjectMapper().writeValueAsString(userMap.get(userid));return Response.status(Status.OK).entity(userJson).build();} catch (JsonProcessingException e) {// TODO Auto-generated catch blocke.printStackTrace();returnResponse.status(Status.OK).entity("{\"error\":\""+e.toString()+"\"}").build();}}@POST@Path("/{userid}/update")public Response update(@PathParam("userid") String userid, User user) { if(user.getName()!=null)userMap.get(userid).setName(user.getName());//if(user.getIdNo()!=null)//userMap.get(userid).setIdNo(user.getIdNo());if(user.getPassword()!=null)userMap.get(userid).setPassword(user.getPassword());String output = userid + " 属性修改成功!";return Response.status(Status.OK).entity(output).build();}@PUT@Path("/{userid}/addOrReplace")@Consumes(value=MediaType.APPLICATION_JSON) //JSON方式接受请求@Produces(value=MediaType.TEXT_PLAIN) //纯文本方式返回public Response addOrReplace(@PathParam("userid") String userid, User user) { try {userMap.put(userid,user);return Response.status(Status.OK).entity("增添用户成功,用户信息:"+user.toString()).build();}catch(Exception e) {return Response.status(Status.OK).entity("增添用户失败,错误信息:"+e.toString()).build();}}@DELETE@Path("/{userid}/delete")public Response delete(@PathParam("userid") String userid) {userMap.remove(userid);String output = userid + " 删除成功!";return Response.status(Status.OK).entity(output).build();}}8.在src/main/resources建立一个application.properties文件server.servlet.context-path=/RestWS9.至此,工程已经搭建完毕,可以直接运行SpringBootRun的main方法启动程序10.也可以把pom.xml文件的打包类型改为<packaging>war</packaging>用外置Tomcat运行(必须要Tomcat 8.5或以上版本)二.使用Java编写客户端进行访问测试(使用Junit5进行单元测试)11.在src/test/java新建一个junittest包并新建UserTest类,然后直接执行:右键->Run As->Junit Test即可,无需手动启动SpringBootRun服务package junittest;import .URI;import javax.ws.rs.client.ClientBuilder;import javax.ws.rs.client.Entity;import javax.ws.rs.client.WebTarget;import javax.ws.rs.core.MediaType;import javax.ws.rs.core.Response;import org.junit.jupiter.api.BeforeEach;import org.junit.jupiter.api.Test;import org.junit.jupiter.api.MethodOrderer;import org.junit.jupiter.api.Order;import org.junit.jupiter.api.TestMethodOrder;import org.springframework.boot.test.context.SpringBootTest;import org.springframework.context.annotation.Description;import springboot.jaxrs.SpringBootRun;import er;@TestMethodOrder(MethodOrderer.OrderAnnotation.class)//搭配@Order可以实现按顺序执行,但是@Test一定要使用JUnit5的注解才起作用@SpringBootTest(classes = SpringBootRun.class, webEnvironment = SpringBootTest.WebEnvironment.DEFINED_PORT)//指定了程序入口SpringBootRun和使用默认端口,执行JUnit Test的时候会自动启动项目,无需手动启动项目public class UserTest {private URI uri;private User user;@BeforeEachpublic void init() throws Exception {uri = new URI("http://127.0.0.1:8080/RestWS/services/ws/users");user = new User("xiaohong","ID0001","123456");}@Test@Order(1)@Description("添加或替换用户")public void addOrUpdateTest() {System.out.println("==================================1==================== ================");WebTarget target =ClientBuilder.newClient().target(uri).path("/"+user.getIdNo()+"/addOrReplace");Response res =target.request().accept(MediaType.TEXT_PLAIN).put(Entity.entity(user, MediaType.APPLICATION_JSON));System.out.println("状态码:"+res.getStatus());if (res.getStatus() != 200) {throw new RuntimeException("Failed : HTTP error code : "+res.getStatus());}String output = res.readEntity(String.class);System.out.println(output);System.out.println("======================================================= ===============");}@Test@Order(2)@Description("获取单个用户")public void getByIdTest() {System.out.println("==================================2==================== ================");WebTarget target =ClientBuilder.newClient().target(uri).path("/"+user.getIdNo()+"/get");Response res =target.request().accept(MediaType.APPLICATION_JSON).get();System.out.println("状态码:"+res.getStatus());if (res.getStatus() != 200) {throw new RuntimeException("Failed : HTTP error code : "+res.getStatus());}String output = res.readEntity(String.class);System.out.println(output);System.out.println("======================================================= ===============");}@Test@Order(3)@Description("修改用户")public void updateTest() {System.out.println("==================================3==================== ================");user.setName("小红");WebTarget target =ClientBuilder.newClient().target(uri).path("/"+user.getIdNo()+"/update");Response res =target.request().accept(MediaType.TEXT_PLAIN).post(Entity.entity(user, MediaType.APPLICATION_JSON));System.out.println("状态码:"+res.getStatus());if (res.getStatus() != 200) {throw new RuntimeException("Failed : HTTP error code : "+res.getStatus());}String output = res.readEntity(String.class);System.out.println(output);System.out.println("======================================================= ===============");}@Test@Order(4)@Description("获取全部用户")public void getAllUserTest() {System.out.println("==================================4==================== ================");WebTarget target =ClientBuilder.newClient().target(uri).path("/getAllUser");Response res =target.request().accept(MediaType.APPLICATION_JSON).get();System.out.println("状态码:"+res.getStatus());if (res.getStatus() != 200) {throw new RuntimeException("Failed : HTTP error code : "+res.getStatus());}String output = res.readEntity(String.class);System.out.println(output);System.out.println("======================================================= ===============");}@Test@Order(5)@Description("删除用户")public void deleteTest() {System.out.println("==================================5==================== ================");WebTarget target =ClientBuilder.newClient().target(uri).path("/"+user.getIdNo()+"/delete");Response res =target.request().accept(MediaType.APPLICATION_JSON).delete();System.out.println("状态码:"+res.getStatus());if (res.getStatus() != 200) {throw new RuntimeException("Failed : HTTP error code : "+res.getStatus());}String output = res.readEntity(String.class);System.out.println(output);System.out.println("======================================================= ===============");}}三.使用html页面访问Restful服务12.在src/main/resources里新建static文件夹,再在static文件夹新建js,pages 2个文件夹,然后js文件夹引入axios.min.js,vue.min.js。
JAXRS 1.0规范

JSR311 JAX-RS 1.0规范目录1. 概览 (4)2. Applications (4)2.1. 配置 (4)2.2. 发布 (4)3. 资源(Resources) (4)3.1. 资源类 (5)3.1.1. 生命周期和环境 (5)3.1.2. 构造函数 (5)3.2. 字段和属性 (5)3.3. 方法 (6)3.3.1. 可见性 (6)3.3.2. 参数 (7)3.3.3. 返回类型 (7)3.3.4. 异常 (8)3.3.5. HEAD和OPTIONS请求 (8)3.4. URI 模板(URI Templates) (9)3.4.1. 子资源 (9)3.5. 声明所支持的媒体类型(Declaring Media Type Capabilities) (10)3.6. 注释继承 (11)3.7. 请求与资源方法之间的映射 (11)3.7.1. 请求预处理 (12)3.7.2. 请求匹配 (12)3.7.3. 将URI模板转换成规则表达式 (15)3.8. 决定响应的媒体类型 (16)4. 提供者(Providers) (18)4.1.生命周期与环境 (18)4.1.1. 构造函数 (18)4.2.实体提供者(Entity Providers) (18)4.2.1.Message Body Reader (18)4.2.2. Message Body Writer (19)4.2.3.声明所支持的媒体类型 (19)4.2.4.标准实体提供者 (20)4.2.5.编码转换 (20)4.2.6.内容编码 (20)4.3.上下文提供者(Context Providers) (20)4.3.1.声明所支持的媒体类型 (21)4.4.异常映射提供者(Exception Mapping Providers) (21)5.上下文(Context) (21)5.1.并发 (21)5.2.上下文类型 (21)5.2.1.URIs和URI模板 (21)5.2.2.Headers (22)5.2.3. 内容协商和前置条件 (22)5.2.4.安全上下文 (24)5.2.5.Providers (25)6.环境 (25)6.1.Servlet容器 (25)6.2.Java EE容器 (25)6.3.其它 (25)7.运行时委托(Runtime Delegate) (25)7.1.配置 (26)附录A:注释汇总 (27)附录B:HTTP Header支持 (28)1. 概览2. ApplicationsJSR-311应用程序由一个或多个Resource,以及零个或多个Provider构成。
Java RESTful Web Service实战(第2版

读书笔记
粗略看完,覆盖面广,最大的感受是java web写起来非常笨重,人生苦短。
深刻解读JAX-RS的标准和API设计;Jersey的使用要点和实现原理,以及基于REST的Web服务的设计思想和 原则自第1版发行后,Jersey的版本由2.9更新到了2.22.2,此间REST服务得到了更广泛的认可和使用。
搞技术的人,是停不下来的。时而要开疆拓土,学习和研究新的知识点,弥补自己的技术债;时而要运筹帷 幄,将知识点梳理成线,编织成;时而要深耕细作,面对当下要攻坚的业务所对应的知识点,深入研究、反复实 践、勤于思考、勇于交流。
安全性是指外系统对该接口的访问,不会使服务器端资源的状态发生改变;幂等性(idempotence)是指外 系统对同一REST接口的多次访问,得到的资源状态是相同的。
10.1身份认证 10.2资源授权
10.3认证与授权实 现
10.4 JAX-RS2实现
10.5 REST服 务与OAuth2
10.6本章小结
10.1.1基本认证 10.1.2摘要认证 10.1.3表单认证 10.1.4证书认证
10.2.1容器管理权限 10.2.2应用管理权限
10.3.1基本认证与JDBCRealm 10.3.2摘要认证与UserDatabaseRealm 10.3.3表单认证与DataSourceRealm 10.3.4 Form认证和JAASRealm 10.3.5证书认证与UserDatabaseRealm
1.2.1 REST式的Web服务 1.2.2对比RPC风格 1.2.3对比MVC风格
1.3.1 JAX-RS2标准 1.3.2 JAX-RS2的目标 1.3.3非JAX-RS2的目标 1.3.4解读JAX-RS元素
jaxrscxf的实现与集成

jaxrscxf的实现与集成依赖本文基于cxf2.7.0,需要在前面的例子中加入对jaxrs的依赖:Xml代码<dependency><groupId>org.apache.cxf</groupId><artifactId>cxf-rt-frontend-jaxrs</artifactId><version>2.7.0</version> </dependency> 由于2.7.0是采用jax-rs2.0版本,即JSR339,默认会引入:Java代码<dependency><groupId>javax.ws.rs</groupId><artifactId>javax.ws.rs-api</artifactId><version>2.0-m10</version></dependency>当然对于之前的版本,基于jsr311。
需要在pom中手动加入:1.0或1.1版本Java代码<dependency><groupId>javax.ws.rs</groupId><artifactId>jsr311-api</artifactId><version>1.1.1</version></dependency>整合这里主要考虑一下几种整合方式,更多见这里编程式发布server在CXF中与JAX-WS一样,提供了JAXRSServerFactoryBean 作为工厂服务类来编程式发布资源类Java代码JAXRSServerFactoryBean sf = new JAXRSServerFactoryBean(); //Bind one or more resources sf.setResourceClasses(CustomerService.class, AnotherService.class); // JAX-RS默认是每个请求会实例,这样修改为单例sf.setResourceProvider(CustomerService.class, new SingletonResourceProvider(new CustomerService()));sf.setAddress("http://localhost:9000/"); BindingFactoryManager manager =sf.getBus().getExtension(BindingFactoryManager.class); JAXRSBindingFactory factory = new JAXRSBindingFactory(); factory.setBus(sf.getBus());manager.registerBindingFactory(JAXRSBindingFactory.JAXRS _BINDING_ID, factory); sf.create();spring当然这里说的与spring整合少不了与web容器的整合,首先需要在web.xml中添加CXF的servlet监听请求路径:Xml代码<servlet><servlet-name>CXFServlet</servlet-name><servlet-class>org.apache.cxf.transport.servlet.CXFServle t</servlet-class><load-on-startup>5</load-on-startup></servlet> <servlet-mapping><servlet-name>CXFServlet</servlet-name><url-pattern>/*</url-pattern></servlet-mapping>下面介绍两种spring的配置,这也是通用的jaxrs命名空间这是一个最简单的配置:Xml代码<?xml version="1.0" encoding="UTF-8"?> <beansxmlns="/schema/beans"xmlns:xsi="/2001/XMLSchema-instance" xmlns:jaxrs="/jaxrs"xsi:schemaLocation="/schema/beans/schema/beans/spring-beans.xs d /jaxrs/schemas/jaxrs.xsd"><import resource="classpath:META-INF/cxf/cxf.xml" /> <import resource="classpath:META-INF/cxf/cxf-servlet.xml" /> <jaxrs:server id="customerService" address="/jaxrs"> <jaxrs:serviceBeans> <ref bean="restPathService1"/></jaxrs:serviceBeans> </jaxrs:server> <bean id="restPathService1"class="org.ws.server.cxf.chap3.cxf.server.CustomerService"/> </beans>当然在jaxrs:server中可以加入其他节点,具体可参考/schemas/jaxrs.xsdspring bean也可以使用普通的bean配置,只是需要作为JAXRSServerFactoryBean实例的属性:Xml代码<?xml version="1.0" encoding="UTF-8"?> <beansxmlns="/schema/beans" xmlns:xsi="/2001/XMLSchema-instance" xsi:schemaLocation="/schema/beans/schema/beans/spring-beans.xs d"> <importresource="classpath:META-INF/cxf/cxf.xml" /><import resource="classpath:META-INF/cxf/cxf-servlet.xml" /> <beanclass="org.apache.cxf.jaxrs.JAXRSServerFactoryBean"init-method="create"> <propertyname="address" value="/jaxrs"/><property:serviceBeans> <ref bean="restPathService1" /></property:serviceBeans> </bean><bean id="restPathService2"class="org.ws.server.cxf.chap3.cxf.server.AnotherService"/> </beans>数据绑定(Data Bindings)CXF对JAX-RS的数据绑定与之前的一样,需要选择相应的绑定类型,如需要加入JAXB对XML的处理:Xml代码<dependency><groupId>org.apache.cxf</groupId><artifactId>cxf-rt-databinding-jaxb</artifactId><version>${cxf.version}</version></dependency>这也是CXF对JAX-RS的默认编码类型,因此我们在采用XML作为传输时只需要做简单的处理:资源类中的一个方法:Java代码@GET @Path("/meth1")@Produces({ MediaType.APPLICATION_XML }) public User meth1() { return new User(1, "robin", "123"); }其中User作为返回需要以XML的格式传输,最简单的处理只需要在:Java代码@XmlRootElement(name = "user") public class User { private Integer id; private String username; private String password;当然更多操作需要了解再介绍对JSON格式的处理,由于CXF默认支持是依赖Jettison通常我们更喜欢Jackson。
基于JAX-RS规范的webService入门

基于JAX-RS规范的webService⼊门1、WebService概述1.1、什么是WebService?WebService(WEB服务)能够快捷和⽅便地综合结合各种系统、商务和任何应⽤平台。
利⽤最新的WebService标准能够使任何软件系统和系统之间的应⽤互通互联,⽅便⽽且廉价。
2、WebService的三个规范:Java中共有三种WebService规范,分别是Jax-WS(操作过于繁琐)、Jax-RS、JAXM&SAAJ(废弃)3、Apache的CXFApache CXF = Celtix + Xfire,开始叫Apache CeltiXfire,后来改名为Apache CXF了,以下简称CXF。
Apache CXF是⼀个开源的web service 框架,CXF帮助您构建和开发web service,它⽀持多种协议,如SOAP1.1,2 XML/HTTP、RESTful或者CORBA。
RESTful:⼀种风格⽽不是⼀个协议。
它理念上是⽹络上的所有事务都被抽象化为资源,每个资源对应⼀个唯⼀的资源标识符。
灵活部署:可以运⾏在Tomcat,Jboss,Jetty(内置),webLogic上⾯。
4、基于JAX-RS规范的⼊门4.1、JAX-RS介绍JAX-RS是⼀个是Java编程语⾔接⼝,被设计⽤来简化使⽤REST架构的应⽤程序开发JAX=RS API使⽤Java编程语⾔的注解来简化RESTful web Service的开发。
开发⼈员使⽤JAX-RS的注解修饰Java编程语⾔的类⽂件来定义资源和能够应⽤在资源上的⾏为。
JAX-RS的注解是运⾏时的注解,因此运⾏的映射会为资源⽣成辅助类和其他的辅助⽂件。
包含JAX-RS资源类的Java EE应⽤程序中资源时被配置好的。
辅助类和辅助⽂件是⽣成的,资源通过被发布到Java EE 服务器上来公开给客户端。
下表列出了JAX-RS定义的⼀些Java注解以及怎样使⽤他们的简要的描述。
JAX-RS 2.0:REST 式 Web 服务 API 中新增的和值得关注的功能

JAX-RS 注解(续)
注解
@PathParam @QueryParam @CookieParam @HeaderParam @FormParam @MatrixParam
目的
绑定来自 URI 的值,例如 @PathParam(“id”) 绑定查询名称的值/查询值,例如 @QueryParam(“name”) 绑定 cookie 的值,例如 @CookieParam(“JSESSIONID”) 绑定 HTTP 标头的值,例如 @HeaderParam(“Accept”) 绑定 HTML 表单的值,例如 @FormParam(“name”) 绑定矩阵参数的值,例如 @MatrixParam(“name”)
7版权所有© 2012,Oracle 和/或其关联公司。保留所有权利。
JAX RS 2.0 客户端 API
8版权所有© 2012,Oracle 和/或其分支机构。保留所有权利。
插入幻灯片 13 中的保护政策分类等级
客户端 API
动机
HTTP 客户端库太低级 利用 JAX-RS 1.x API 中的提供商/概念
19版权所有© 2012,Oracle 和/或其关联公司。保留所有权利。
通用配置
public interface Configurable { Configuration getConfiguration(); Configurable property(String name, Object value); Configurable register(...); } public interface Configuration { Set<Class> getClasses(); Map<Class,Integer> getContracts(Class componentClass); Set<Object> getInstances(); Map<String,Object> getProperties(); Object getProperty(String name); Collection<String> getPropertyNames(); boolean isEnabled(Feature feature); boolean isRegistered(Object component); ...
Jersey注解学习笔记
RESTful Web Service的生命周期:第一种:默认request,不使用注解默认情况下,rest服务的生命周期== request的生命周期,请求过后立即消毁,所以默认情况下rest服务类是线程安全的。
第二种:application,使用@Singleton注解使用@Singleton注解此时,所以这时rest服务的生命周期== 应用服务器生命周期第三种:session,使用@PerSession注解。
还有一种生命周期就是@PerSession,每一个session请求,就产生一个rest资源实例,直到这个session消毁,这个rest资源才会消失。
自动装配注解:1. Autowire 默认是按类型匹配@ Autowire2 .如果你要修改Autowire 按名称匹配可以@Autowired@Qualifier("persionDao") ,如果在beans.xml中没有发现有这个名字的bean,则会有异常3. @Autowired(required=true) @Qualifier("persionDao"), 表示这个bean必须注入值,不然报错到目前,学习到3种bean的注入方式:@Produces注解表示类或者方法返回的MIME数据类型。
有几种格式如下:可以一次注解两种或多种的MIME类型,格式如:{"application/xml", "application/json"}这表示两者都可以使用,但是选择的时候一般会选择前者,即application/xml,因为它第一次出现。
@Consumes:HTTP Methods:行(如果存在),而忽略反应实体(如设置)。
对于股权的允许响应头将被设置为支持的HTTP方法所定的资源。
此外网队将返回一个WADL文件,说明该资源。
@PathParam:一种资源的方法的参数可能会附加说明参数为基础的注解从请求中提取信息。
JAX-WS使用教程

JAX-RS入门

JAX-RS入门第一节、基础简介JAX-RS是一套用java实现REST服务的规范,提供了一些标注将一个资源类,一个POJOJava 类,封装为Web资源。
标注包括:@Path,标注资源类或方法的相对路径@GET,@PUT,@POST,@DELETE,标注方法是用的HTTP请求的类型@Produces,标注返回的MIME媒体类型@Consumes,标注可接受请求的MIME媒体类型@PathParam,@QueryParam,@HeaderParam,@CookieParam,@MatrixParam,@FormParam,分别标注方法的参数来自于HTTP请求的不同位置,例如@PathParam来自于URL的路径,@QueryParam来自于URL的查询参数,@HeaderParam来自于HTTP请求的头信息,@CookieParam来自于HTTP请求的Cookie。
目前JAX-RS的实现包括:Apache CXF,开源的Web服务框架。
Jersey,由Sun提供的JAX-RS的参考实现。
RESTEasy,JBoss的实现。
Restlet,由Jerome Louvel和Dave Pawson开发,是最早的REST框架,先于JAX-RS出现。
Apache Wink,一个Apache软件基金会孵化器中的项目,其服务模块实现JAX-RS规范(以上来自:/wiki/JAX-RS)装备本文使用的工具有:Eclipse-jee-heliosJava-1.6.0_26apache-tomcat-6.0.30SoapUI-3.6使用到的外部jar包有(必须的部分,需要加到Web容器中)neethi-3.0.2.jarjsr311-api-1.1.1.jarcxf-bundle-2.6.0.jar使用到的外部jar包有(可选的部分,当且仅当作为一个独立的application运行时)jetty-http-7.5.4.v20111024.jarjetty-io-7.5.4.v20111024.jarjetty-server-7.5.4.v20111024.jarjetty-util-7.5.4.v20111024.jarjetty-continuation-7.5.4.v20111024.jarwsdl4j-1.6.2.jar准备(以下例子来自:Oreilly - RESTful Java with JAX-RS (12-2009) (A TTiCA).pdf)创建工程为了后续顺利进行,首先在eclipse上先创建一个Dynamic Web Project,完成以后,一个符合war结构的工程目录会自动生成,之后可以很简单的导出为war文件,其中需要把以下jar 包放到/WebContent/WEB-INF/lib 里:neethi-3.0.2.jarjsr311-api-1.1.1.jarcxf-bundle-2.6.0.jar另外,在工程目录下,新建一个lib 文件夹用来存放以下可选的jar包:jetty-http-7.5.4.v20111024.jarjetty-io-7.5.4.v20111024.jarjetty-server-7.5.4.v20111024.jarjetty-util-7.5.4.v20111024.jarjetty-continuation-7.5.4.v20111024.jarwsdl4j-1.6.2.jar最后一步就是把所有这9个jar都加到工程的build path里去,这样工程就准备好了。
Java-JAX-RS依赖项注入

Java-JAX-RS依赖项注入我已经使用Spring Rest完成了项目.现在,我们有一个小型休息项目,并计划与Jersey JAX-RS一起使用.我是新手,因此推荐SO和其他博客来成功实现具有依赖项注入的Rest api.有以下代码.AppConfig.javaimport javax.ws.rs.ApplicationPath;import javax.ws.rs.core.Application;@ApplicationPath("/")public class AppConfig extends Application {@Overridepublic Set<Class<?>> getClasses() {System.out.println("AppConfig");final Set<Class<?>> s = new HashSet<Class<?>>();s.add(Controller.class);s.add(AppFeature.class);return s;}}AppBinder.javaimport org.glassfish.hk2.utilities.binding.AbstractBinder;public class AppBinder extends AbstractBinder {@Overrideprotected void configure() {System.out.println("AppBinder");bind(ReflectionService.class).to(ReflectionService.class);}AppFeature.javaimport javax.ws.rs.core.Feature;import javax.ws.rs.core.FeatureContext;public class AppFeature implements Feature {@Overridepublic boolean configure(FeatureContext context) { System.out.println("AppFeature");context.register(new AppBinder());return true;}}Controller.java@Path("/")public class Controller {@InjectService service;public Controller(){System.out.println("Controller created");}// other methods}Service.java@Singletonpublic class Servicepublic Service(){System.out.println("Service instance created");}// other methods我假设Controller和Service的每个实例都是在Tomcat 8服务器启动时创建的,并且依赖项注入已完成.但是在启动过程中,将其放在控制台上INFO: Registering the Jersey servletapplication, namedcom.sample.auto2.AppConfig, at theservlet mapping /*, with theApplication class of the same name.AppConfigAppConfigNov 15, 2016 12:22:20 PMorg.glassfish.jersey.server.ApplicationHandler initializeINFO: Initiating Jersey application,version Jersey: 2.6 2014-02-1821:52:53…AppFeatureAppBinderNov 15, 2016 12:22:21 PMorg.apache.catalina.startup.HostConfig deployDirectory每次,我们发送一个请求,在控制台中得到关注Service instance createdController created我的问题>服务,每当我们发送一个http请求;它在每个请求中创建实例还是只是调用构造函数?>为什么AppConfig中的System.out被调用两次?>是否有更好的方法来设置我的小型项目,该项目没有任何数据库访问权限并且只有三个发布端点?编辑:根据@Harikrishnan提供的链接,为Controller类添加了@Singleton.现在,构造函数仅调用一次(在第一个请求时-为什么在服务器启动期间不!).但是,为什么Service类构造函数会在每个请求上调用(在将@Singleton添加到Controller之前),即使它是单例的呢?另外,其他问题仍然存在.编辑2:谢谢@peeskillet.所以这些对我来说是结果.>这在第一次请求时仅调用一次构造函数bind(ReflectionService.class).to(ReflectionService.class).in(Si ngleton.class);bind(Controller.class).to(Controller.class).in(Singleton.class);>这给http请求错误bind(ReflectionService.class).to(ReflectionService.class).in(I mmediate.class);ng.IllegalStateException: Could not find an active context for org.glassfish.hk2.api.Immediate没关系,因为>这在服务器启动时称为构造函数,仅一次bind(new ReflectionService()).to(ReflectionService.class);bind(new Controller()).to(Controller.class);>这样,启动时就完成了注入,但是http请求上却出现404错误. (在AppBinder中配置了控制器,然后在AppConfig中配置了) @ApplicationPath("/")public class AppConfig extends ResourceConfig {public AppConfig() {register(new AppBinder());}}>就像您所说的那样,它可以运行!@ApplicationPath("/")public class AppConfig extends ResourceConfig { public AppConfig() {register(new AppBinder());register(Controller.class);}}最后,这些都是我所需要的public class AppBinder extends AbstractBinder {@Overrideprotected void configure() {bind(new ReflectionService()).to(ReflectionService.class); bind(new Controller()).to(Controller.class);}}@ApplicationPath("/")public class AppConfig extends ResourceConfig { public AppConfig() {register(new AppBinder());register(Controller.class);}}解决方法:Service,Controller constructors isbeing called whenever we send an httprequest; does it create instances in eachrequest or just calling constructor?不幸的是,@ Singleton在使用AbstractBinder绑定时没有任何作用.我们需要明确地说应该是单身bind(ReflectionService.class).to(ReflectionService.class).in(Si ngleton.class);默认行为是“每次查询”范围,这意味着每次请求服务时都会创建一个新实例(at the very first request –Why notduring server startup!!)这就是它的工作方式.还有一个InstantScope,它将使它在启动时创建bind(ReflectionService.class).to(ReflectionService.class).in(I mmediateScope.class)或者,您可以使用实例代替类,它将自动成为单例bind(new ReflectionService()).to(ReflectionService.class)Service,Controller constructors isbeing called whenever we send an httprequest; does it create instances in eachrequest or just calling constructor?这是默认行为.每个请求的资源类的新实例.如前所述,如果只需要一次实例,则将其标记为@SingletonWhy System.out in AppConfig iscalled twice?不确定,可能只是引导程序上的Jersey内部处理所需的Is there a better way for setting up mysmall project, which does not have any dbaccess and only three post endpoints?设置很好,但是如果使用Jersey,则应使用ResourceConfig(应用程序扩展)类而不是Application@ApplicationPath("/")public class AppConfig extends ResourceConfig {public AppConfig() {register(new AppBinder());register(Controller.class);}}这样,您无需将AppBinder包装在AppFeature中.泽西岛已经知道如何处理AppBinder来源:。
JAX-RS之上传文件

今天学习的是jax-rs中的上传文件.1 首先要包含的是resteasy-multipart-provider.jar这个文件2) 之后是简单的HTML FORM<html><body><h1>JAX-RS Upload Form</h1><form action="rest/file/upload" method="post"enctype="multipart/form-data">Select a file : <input type="file" name="uploadedFile" size="50" /><input type="submit" value="Upload It" /></form></body></html>3 代码如下,先列出,再讲解:import java.io.File;import java.io.FileOutputStream;import java.io.IOException;import java.io.InputStream;import java.util.List;import java.util.Map;import javax.ws.rs.Consumes;import javax.ws.rs.POST;import javax.ws.rs.Path;import javax.ws.rs.core.MultivaluedMap;import javax.ws.rs.core.Response;import mons.io.IOUtils;import org.jboss.resteasy.plugins.providers.multipart.InputPart; importorg.jboss.resteasy.plugins.providers.multipart.MultipartFormDataInput;@Path("/file")public class UploadFileService {private final String UPLOADED_FILE_PATH = "d:\\";@POST@Path("/upload")@Consumes("multipart/form-data")public Response uploadFile(MultipartFormDataInput input) { String fileName = "";Map<String, List<InputPart>> uploadForm =input.getFormDataMap();List<InputPart> inputParts =uploadForm.get("uploadedFile");for (InputPart inputPart : inputParts) {try {MultivaluedMap<String, String> header = inputPart.getHeaders();fileName = getFileName(header);//convert the uploaded file to inputstreamInputStream inputStream =inputPart.getBody(InputStream.class,null);byte [] bytes =IOUtils.toByteArray(inputStream);//constructs upload file pathfileName = UPLOADED_FILE_PATH + fileName;writeFile(bytes,fileName);System.out.println("Done");} catch (IOException e) {e.printStackTrace();}}return Response.status(200).entity("uploadFile is called, Uploaded file name : " + fileName).build();}/*** header sample* {* Content-Type=[image/png],* Content-Disposition=[form-data; name="file";filename="filename.extension"]* }**///get uploaded filename, is there a easy way in RESTEasy?private String getFileName(MultivaluedMap<String, String> header) {String[] contentDisposition =header.getFirst("Content-Disposition").split(";");for (String filename : contentDisposition) {if ((filename.trim().startsWith("filename"))) {String[] name = filename.split("=");String finalFileName =name[1].trim().replaceAll("\"", "");return finalFileName;}}return "unknown";}//save to somewhereprivate void writeFile(byte[] content, String filename) throws IOException {File file = new File(filename);if (!file.exists()) {file.createNewFile();}FileOutputStream fop = new FileOutputStream(file);fop.write(content);fop.flush();fop.close();}}这里,用户选择了文件上传后,会URL根据REST的特性,自动map到uploadFile方法中,然后通过:Map<String, List<InputPart>> uploadForm = input.getFormDataMap();List<InputPart> inputParts = uploadForm.get("uploadedFile");找出所有的上传文件框(可以是多个),然后进行循环工作:首先是获得每个文件头的HEADER,用这个MultivaluedMap<String, String> header = inputPart.getHeaders();然后在header中取出文件名,这里使用的方法是getFileName,另外写了个方法:private String getFileName(MultivaluedMap<String, String> header) {String[] contentDisposition =header.getFirst("Content-Disposition").split(";");for (String filename : contentDisposition) {if ((filename.trim().startsWith("filename"))) {String[] name = filename.split("=");String finalFileName =name[1].trim().replaceAll("\"", "");return finalFileName;}}return "unknown";}这里,比较麻烦,要获得header,比如header是如下形式的,然后要再提取其中的文件名:Content-Disposition=[form-data; name="file";filename="filename.extension"]最后用writeFile写入磁盘.真麻烦呀,还是用spring mvc好.2MultipartForm 的例子, MultipartForm 中,将上传的文件中的属性配置到POJO中,例子为:FileUploadForm 类,这个POJO类对应上传的文件类.import javax.ws.rs.FormParam;import org.jboss.resteasy.annotations.providers.multipart.PartType; public class FileUploadForm {public FileUploadForm() {}private byte[] data;public byte[] getData() {return data;}@FormParam("uploadedFile")@PartType("application/octet-stream")public void setData(byte[] data) {this.data = data;}}处理部分就简单多了,可以这样:Path("/file")public class UploadFileService {@POST@Path("/upload")@Consumes("multipart/form-data")public Response uploadFile(@MultipartForm FileUploadForm form) {String fileName = "d:\\anything";try {writeFile(form.getData(), fileName);} catch (IOException e) {e.printStackTrace();}System.out.println("Done");return Response.status(200).entity("uploadFile is called, Uploaded file name : " + fileName).build();}即可.但总的感觉,REST有点蛋疼,上传个文件,用SPIRNG MVC或者其他方法都可以了,还用REST这个方法?。
java webservice 面试题
java webservice 面试题Java Web Service 是一种基于 SOAP(Simple Object Access Protocol)和 WSDL(Web Services Description Language)的技术,用于实现分布式系统之间的通信。
在面试中,Java Web Service 经常成为面试官提问的一个热门话题。
本文将介绍一些常见的 Java Web Service 面试题,并为每个问题提供详细的解答。
一、什么是 Web Service?Web Service 是一个软件系统,它使用 SOAP 作为其通信协议,并由 WSDL 描述其功能。
它的主要目的是在不同的应用程序之间提供互操作性,使得这些应用程序能够相互通信和交换数据。
二、SOAP 是什么?SOAP 是一种简单的面向消息的协议,用于在 Web Service 之间进行通信。
它使用 XML 来进行消息的封装和传输。
SOAP 消息由 SOAP Envelope、SOAP Header 和 SOAP Body 组成,其中 Envelope 是必需的,而 Header 和 Body 是可选的。
三、WSDL 是什么?WSDL 是 Web Services Description Language 的缩写,它是一种用于描述 Web Service 的语言,基于 XML。
WSDL 文件描述了 Web Service 的接口、数据类型和消息结构等信息,允许客户端了解如何与 Web Service 进行交互。
四、 JAX-WS 和 Apache Axis2 之间有什么区别?JAX-WS(Java API for XML Web Services)和 Apache Axis2 都是用于实现 Web Service 的 Java 框架。
两者之间的区别如下:1. JAX-WS 是 Java 标准的一部分,而 Apache Axis2 是一个开源项目。
Find security bugs学习笔记V10
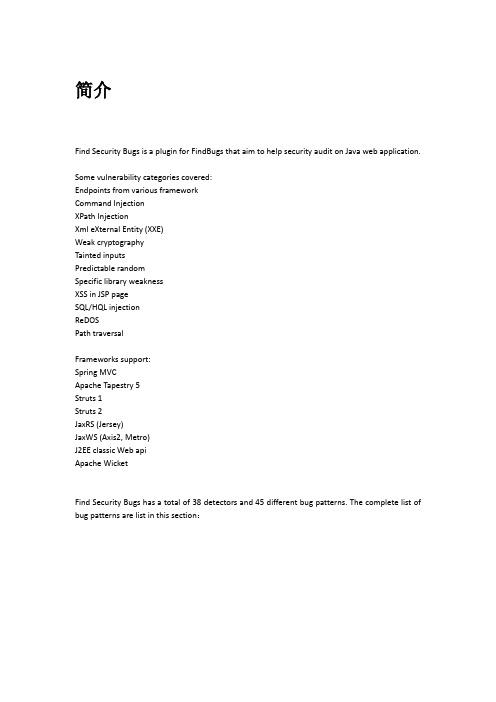
简介Find Security Bugs is a plugin for FindBugs that aim to help security audit on Java web application.Some vulnerability categories covered:Endpoints from various frameworkCommand InjectionXPath InjectionXml eXternal Entity (XXE)Weak cryptographyTainted inputsPredictable randomSpecific library weaknessXSS in JSP pageSQL/HQL injectionReDOSPath traversalFrameworks support:Spring MVCApache Tapestry 5Struts 1Struts 2JaxRS (Jersey)JaxWS (Axis2, Metro)J2EE classic Web apiApache WicketFind Security Bugs has a total of 38 detectors and 45 different bug patterns. The complete list of bug patterns are list in this section:FindBugsExperience with FindBugs(Google的FindBugs实践)•Google FindBugs Fixit: Google has a tradition of engineering fixits, special days where they try to get all of their engineers focused onsome specific problem or technique for improving the systems atGoogle. A fixit might work to improve web accessibility, internaltesting, removing TODO's from internal software, etc.In 2009, Google held a global fixit for UMD's FindBugs tool a staticanalysis tool for finding coding mistakes in Java software. The focusof the fixit was to get feedback on the 4,000 highest confidence issues found by FindBugs at Google, and let Google engineers decide which issues, if any, needed fixing.More than 700 engineers ran FindBugs from dozens of offices. Morethan 250 of them entered more than 8,000 reviews of the issues. Areview is a classification of an issue as must-fix, should-fix,mostly-harmless, not-a-bug, and several other categories. More than75% of the reviews classified issues as must fix, should fix or I willfix. Many of the scariest issues received more than 10 reviews each.Engineers have already submitted changes that made more than 1,100 of the 3,800 issues go away. Engineers filed more than 1,700 bugreports, of which 600 have already been marked as fixed Workcontinues on addressing the issues raised by the fixit, and onsupporting the integration of FindBugs into the software development process at Google.The fixit at Google showcased new capabilities of FindBugs thatprovide a cloud computing / social networking backdrop. Reviews of issues are immediately persisted into a central store, where they canbe seen by other developers, and FindBugs is integrated into theinternal Google tools for filing and viewing bug reports and forviewing the version control history of source files. For the Fixit,FindBugs was configured in a mode where engineers could not seereviews from other engineers until they had entered their own; afterthe fixit, the configuration will be changed to a more openconfiguration where engineers can see reviews from others withouthaving to provide their own review first. These capabilities have allbeen contributed to UMD's open source FindBugs tool, although afair bit of engineering remains to prepare the capabilities for general release and make sure they can integrate into systems outside ofGoogle. The new capabilities are expected to be ready for generalrelease in Fall 2009.Eclipse中使用Find Security Bugs作为find bugs的插件独立使用Find bugs:测试WebGaot,找到16个安全问题:没有插件功能:下载最新的安装插件发现42个安全问题:注意添加servlet相关jar包,否则提示:从findbugs命令行调用file:///C:/findbugs/doc/manual/running.html#commandLineOptionsC:\findbugs\bin>findbugs -textuiNo files to be analyzedUsage: findbugs [general options] -textui [command line options...] [jar/zip/class files, directories...]General options:-jvmArgs args Pass args to JVM-maxHeap size Maximum Java heap size in megabytes (default=768)-javahome <dir> Specify location of JREGeneral FindBugs options:-project <project> analyze given project-home <home directory> specify FindBugs home directory-pluginList <jar1[;jar2...]> specify list of plugin Jar files to load-effort[:min|less|default|more|max] set analysis effort level-adjustExperimental lower priority of experimental Bug Patterns-workHard ensure analysis effort is at least 'default'-conserveSpace same as -effort:min (for backward compatibility) -showPlugins show list of available detector plugins-userPrefs <filename> user preferences file,/path/to/project/.settings/ for Eclipse projectsOutput options:-timestampNow set timestamp of results to be current time-quiet suppress error messages-longBugCodes report long bug codes-progress display progress in terminal window-release <release name> set the release name of the analyzed application -experimental report of any confidence level including experimental bug patterns-low report warnings of any confidence level-medium report only medium and high confidence warnings [default] -high report only high confidence warnings-maxRank <rank> only report issues with a bug rank at least as scary as that provided -dontCombineWarnings Don't combine warnings that differ only in line number -sortByClass sort warnings by class-xml[:withMessages] XML output (optionally with messages)-xdocs xdoc XML output to use with Apache Maven-html[:stylesheet] Generate HTML output (default style sheet is default.xsl) -emacs Use emacs reporting format-relaxed Relaxed reporting mode (more false positives!)-train[:outputDir] Save training data (experimental);output dir defaults to '.' -useTraining[:inputDir] Use training data (experimental); input dir defaults to '.' -redoAnalysis <filename> Redo analysis using configureation from previous analysis -sourceInfo <filename> Specify source info file (line numbers for fields/classes) -projectName <project name> Descriptive name of project-reanalyze <filename> redo analysis in provided file-output <filename> Save output in named file-nested[:true|false] analyze nested jar/zip archives (default=true)Output filtering options:-bugCategories <cat1[,cat2...]> only report bugs in given categories-onlyAnalyze <classes/packages> only analyze given classes and packages; end with .* to indicate classes in a package, .- to indicate a package prefix -excludeBugs <baseline bugs> exclude bugs that are also reportedin the baseline xml output-exclude <filter file> exclude bugs matching given filter-include <filter file> include only bugs matching given filter-applySuppression Exclude any bugs that match suppression filter loaded from fbp fileDetector (visitor) configuration options:-visitors <v1[,v2...]> run only named visitors-omitVisitors <v1[,v2...]> omit named visitors-chooseVisitors <+v1,-v2,...> selectively enable/disable detectors-choosePlugins <+p1,-p2,...> selectively enable/disable plugins-adjustPriority <v1=(raise|lower)[,...]> raise/lower priority of warnings for given visitor(s) Project configuration options:-auxclasspath <classpath> set aux classpath for analysis-auxclasspathFromInput read aux classpath from standard input-sourcepath <source path> set source path for analyzed classes-exitcode set exit code of process-noClassOk output empty warning file if no classes are specified-xargs get list of classfiles/jarfiles from standard input rather than command line-cloud <id> set cloud id-cloudProperty <key=value> set cloud property-bugReporters <name,name2,-name3> bug reporter decorators to explicitly enable/disable-printConfiguration print configuration and exit, without running analysis-version print version, check for updates and exit, without running analysis输出结果C:\findbugs\bin>findbugs -textui结果输出到命令行C:\findbugs\bin>findbugs -textui -xml -output C:\test1.xml -project C:\findsecuritybugs\结果输出到xml文件…<BugInstance type="MS_PKGPROTECT" priority="2" abbrev="MS"category="MALICIOUS_CODE"><Class classname=""><SourceLine classname=""/></Class><Field classname="" name="FAULT_ATTR_NAMES" signature="[Ljava/lang/String;" isStatic="true"><SourceLine classname=""/></Field><SourceLine classname="" startBytecode="297" endBytecode="297"/></BugInstance>…C:\findbugs\bin>findbugs -textui -xml:withMessages -output C:\test2.xml -project加入详细的问题信息…<BugInstance type="MS_PKGPROTECT" priority="2" abbrev="MS" category="MALICIOUS_CODE" instanceHash="73a7bbfbf7151d8c9ae6d553296fbe10" instanceOccurrenceNum="0" instanceOccurrenceMax="0" rank="18" cweid="218"><ShortMessage>Field should be package protected</ShortMessage><LongMessage> should be package protected</LongMessage><Class classname="" primary="true"><SourceLine classname=""><Message>In <Unknown></Message></SourceLine><Message>In class </Message></Class><Field classname="" name="FAULT_ATTR_NAMES" signature="[Ljava/lang/String;" isStatic="true" primary="true"><SourceLine classname=""><Message>In <Unknown></Message></SourceLine><Message>Field </Message></Field><SourceLine classname="" startBytecode="297" endBytecode="297"><Message>In <Unknown></Message></SourceLine></BugInstance>…C:\findbugs\bin>findbugs -textui -html -output C:\test3.html -project C:\findsecuritybugs\输出html格式的结果仅扫描安全类问题:C:\findbugs\bin>findbugs -textui -html -output C:\test4_filter.html -project C:\ findsecuritybugs\:<FindBugsFilter><Match><Bug category="SECURITY" /></Match></FindBugsFilter>指定find security bugs插件C:\findbugs\bin>findbugs -textui -html -output C:\test4_filter.html -project C:\findsecuritybugs\WebGaot.fbp -include C:\findsecuritybugs\myfilter.xml -pluginList规则分析(案例– WebGoat)Find security bugs支持的规则:Find Security Bugs has a total of 38 detectors and 45 different bug patterns.DMI_CONSTANT_DB_PASSWORD: Hardcoded constant database passwordThis code creates a database connect using a hardcoded, constant password. Anyone with access to either the source code or the compiled code can easily learn the password.COMMAND_INJECTION: Command InjectionThe api highlight is used to executed system command. If unfiltered input is passed to this api, it can lead arbitrary command execution.ReferenceOWASP : Command InjectionPREDICTABLE_RANDOM: Predictable Pseudo Random Generator (PRG)The use of a predictable random value can lead to vulnerability in those contexts:CSRF tokenpassword reset token (sent by email)or any other secret valueA quick fix would be to replace the instanciation of by .ReferencesCracking Random Number Generators - Part 1 (http://jazzy.id.au)CERT: MSC02-J. Generate strong random numbersCWE-330: Use of Insufficiently Random ValuesPATH_TRAVERSAL_IN: Potential Path traversal (read file) A file is open to read its content. The path given is a dynamic parameter.If unfiltered parameter is pass to this file API, content from an arbitrary path could be read.This detector identify potential path transversal. In many case, the construct file path is not control by the user. If it is the case, this bug instance can be ignored.ReferencesWASC : Path TraversalOWASP : Path TraversalCAPEC-126: Path TraversalCWE-99: Improper Control of Resource Identifiers ('Resource Injection')PATH_TRAVERSAL_OUT: Potential Path traversal (write file)The class selected is use to open a file handle using a dynamic parameter.If unfiltered input is pass to this function, content could be writen to an arbitrary path.ReferencesWASC-33 : Path TraversalOWASP : Path TraversalCAPEC-126: Path TraversalCWE-99: Improper Control of Resource Identifiers ('Resource Injection')REDOS: ReDOSReDOS stands for Regular expression Denial of Service. The regular expression (RegEx) identify may take a large amount of time when analysing certain strings.For example the following RegEx, the input "aaaaaaaaaaaaaaaaX" will cause the RegEx engine to analyse 65536 different paths.[1] Example taken from OWASP reference^(a+)+$Therefore, it is possible that a single request cause a large amount of computation on the server side.ReferencesSebastian Kubeck's Weblog: Detecting and Preventing ReDoS Vulnerabilities[1] OWASP : Regular expression Denial of ServiceUNVALIDATED_REDIRECT: Unvalidated Redirect Unvalidated request is a vulnerability that facilitate fishing attack.Scenario1. A user is requested to visit the malicious url :2. The user is redirect to a fake login. (/fake/login)3. The user enter his credentials.4. He is redirect to the original website.This is attack is plausible because most users don't double check the url after the redirection. Also, redirection to authenticate are very common.Counter measuresWhite list URLs (if possible)Validate that the beginning of the URL is part of white listReferencesWASC-38 : URL Redirector AbuseOWASP Top 10 A10: Unvalidated Redirects and ForwardsUNENCRYPTED_SOCKET: Unencrypted socketThe communication started will not be encrypted. The traffic could be red by an attacker intercepting the communication.Plain socket (Clear text communication):Socket soc = new Socket("",80);SSL Socket (Secure communication):Socket soc = ().createSocket("", 443);ReferenceOWASP : Insufficient Transport Layer ProtectionWASC-04 : Insufficient Transport Layer ProtectionWEAK_MESSAGE_DIGEST: Weak MessageDigestThe algorithm used is not a recommended MessageDigest.The NIST recommended to use either SHA-1, SHA-224*, SHA-256, SHA-384 or SHA-512.* SHA-224 algorithm is not provided by SUN provider.ReferenceNIST Approved AlgorithmsXXE: XML parsing vulnerable to XXE attacksXml External Entity attacks can occurs when the XML parsers support XML entities and received user input as XML content.Risk 1: Expose local file content (XXE : Xml eXternal Entity)<?xml version="1.0" encoding="ISO-8859-1"?><!DOCTYPE foo [<!ELEMENT foo ANY ><!ENTITY xxe SYSTEM "file:///etc/passwd" > ]><foo>&xxe;</foo>Risk 2: Denial of service (XEE : Xml Entity Expansion)<?xml version="1.0" encoding="UTF-8" ?><!DOCTYPE s [<!ENTITY x "OVERLONG_CONTENT_HERE_WITH_MORE_THAN_10^5_CHARACTERS">]><foo>&x;&x;[...]</foo>ReferencesCERT: IDS10-J. Prevent XML external entity attacksOWASP : Testing for XML Injection: XML Generic Entity Expansion: XML External Entity DOSSQL_PREPARED_STATEMENT_GENERATED_FROM_NONCO NSTANT_STRING: A prepared statement is generated from a nonconstant StringThe code creates an SQL prepared statement from a nonconstant String. If unchecked, tainted data from a user is used in building this String, SQL injection could be used to make the prepared statement do something unexpected and undesirable.SQL_NONCONSTANT_STRING_PASSED_TO_EXECUTE: Nonconstant string passed to execute method on an SQL statementThe method invokes the execute method on an SQL statement with a String that seems to be dynamically generated. Consider using a prepared statement instead. It is more efficient and less vulnerable to SQL injection attacks.规则扩展基于FindBugs进行规则扩展代码质量管理平台整合Find Security的方法1、平台提供界面,以FindBugs的fbp项目文件为模板编辑维护项目信息fbp后缀XML格式包括项目名称、AUT的jar包路径、源码路径fbp项目文件<-->后台数据库存储例:<Project projectName="TestWebGoat"><Jar>.\webgaot\aut\webgoat5.0</Jar><AuxClasspathEntry>..\programfiles\myeclipse\common\plugins\com.genuitec.eclipse.j2eedt.core_10.0.0.me20 1110301321\data\libraryset\ee_6\bean-validator.jar</AuxClasspathEntry><AuxClasspathEntry>..\programfiles\myeclipse\common\plugins\com.genuitec.eclipse.j2eedt.core_10.0.0.me20 1110301321\data\libraryset\ee_6\javax.annotation.jar</AuxClasspathEntry><AuxClasspathEntry>..\programfiles\myeclipse\common\plugins\com.genuitec.eclipse.j2eedt.core_10.0.0.me20 1110301321\data\libraryset\ee_6\javax.ejb.jar</AuxClasspathEntry><AuxClasspathEntry>..\programfiles\myeclipse\common\plugins\com.genuitec.eclipse.j2eedt.core_10.0.0.me20 1110301321\data\libraryset\ee_6\javax.enterprise.deploy.jar</AuxClasspathEn try><AuxClasspathEntry>..\programfiles\myeclipse\common\plugins\com.genuitec.eclipse.j2eedt.core_10.0.0.me20 1110301321\data\libraryset\ee_6\javax.jms.jar</AuxClasspathEntry><AuxClasspathEntry>..\programfiles\myeclipse\common\plugins\com.genuitec.eclipse.j2eedt.core_10.0.0.me20 1110301321\data\libraryset\ee_6\javax.management.j2ee.jar</AuxClasspathEntr y><AuxClasspathEntry>..\programfiles\myeclipse\common\plugins\com.genuitec.eclipse.j2eedt.core_10.0.0.me20 1110301321\data\libraryset\ee_6\javax.persistence.jar</AuxClasspathEntry> <AuxClasspathEntry>..\programfiles\myeclipse\common\plugins\com.genuitec.eclipse.j2eedt.core_10.0.0.me20 1110301321\data\libraryset\ee_6\javax.resource.jar</AuxClasspathEntry><AuxClasspathEntry>..\programfiles\myeclipse\common\plugins\com.genuitec.eclipse.j2eedt.core_10.0.0.me20 1110301321\data\libraryset\ee_6\javax.security.auth.message.jar</AuxClasspa thEntry><AuxClasspathEntry>..\programfiles\myeclipse\common\plugins\com.genuitec.eclipse.j2eedt.core_10.0.0.me20 1110301321\data\libraryset\ee_6\javax.security.jacc.jar</AuxClasspathEntry> <AuxClasspathEntry>..\programfiles\myeclipse\common\plugins\com.genuitec.eclipse.j2eedt.core_10.0.0.me20 1110301321\data\libraryset\ee_6\javax.servlet.jar</AuxClasspathEntry><AuxClasspathEntry>..\programfiles\myeclipse\common\plugins\com.genuitec.eclipse.j2eedt.core_10.0.0.me20 1110301321\data\libraryset\ee_6\javax.servlet.jsp.jar</AuxClasspathEntry> <AuxClasspathEntry>..\programfiles\myeclipse\common\plugins\com.genuitec.eclipse.j2eedt.core_10.0.0.me20 1110301321\data\libraryset\ee_6\javax.servlet.jsp.jstl.jar</AuxClasspathEnt ry><AuxClasspathEntry>..\programfiles\myeclipse\common\plugins\com.genuitec.eclipse.j2eedt.core_10.0.0.me20 1110301321\data\libraryset\ee_6\javax.transaction.jar</AuxClasspathEntry> <AuxClasspathEntry>..\programfiles\myeclipse\common\plugins\com.genuitec.eclipse.j2eedt.core_10.0.0.me20 1110301321\data\libraryset\ee_6\jaxb-api-osgi.jar</AuxClasspathEntry><AuxClasspathEntry>..\programfiles\myeclipse\common\plugins\com.genuitec.eclipse.j2eedt.core_10.0.0.me20 1110301321\data\libraryset\ee_6\jsf-api.jar</AuxClasspathEntry><AuxClasspathEntry>..\programfiles\myeclipse\common\plugins\com.genuitec.eclipse.j2eedt.core_10.0.0.me20 1110301321\data\libraryset\ee_6\jsf-impl.jar</AuxClasspathEntry><AuxClasspathEntry>..1110301321\data\libraryset\ee_6\jsr311-api.jar</AuxCla sspathEntry><AuxClasspathEntry>..\programfiles\myeclipse\common\plugins\com.genuitec.eclipse.j2eedt.core_10.0.0.me201110301321\data\libraryset\ee_6\jstl-impl.jar</AuxClasspathEntry><AuxClasspathEntry>..\programfiles\myeclipse\common\plugins\com.genuitec.eclipse.j2eedt.core_10.0.0.me20 1110301321\data\libraryset\ee_6\mail.jar</AuxClasspathEntry><AuxClasspathEntry>..\programfiles\myeclipse\common\plugins\com.genuitec.eclipse.j2eedt.core_10.0.0.me20 1110301321\data\libraryset\ee_6\webservices-api-osgi.jar</AuxClasspathEntry ><AuxClasspathEntry>..\programfiles\myeclipse\common\plugins\com.genuitec.eclipse.j2eedt.core_10.0.0.me20 1110301321\data\libraryset\ee_6\weld-osgi-bundle.jar</AuxClasspathEntry><AuxClasspathEntry>.\webgaot\aut\webgoat5.0\webroot\web-inf\lib\axis-ant.ja r</AuxClasspathEntry><AuxClasspathEntry>.\webgaot\aut\webgoat5.0\webroot\web-inf\lib\axis.jar</A uxClasspathEntry><AuxClasspathEntry>.\webgaot\aut\webgoat5.0\webroot\web-inf\lib\catalina.ja r</AuxClasspathEntry><AuxClasspathEntry>.\webgaot\aut\webgoat5.0\webroot\web-inf\lib\commons-col lections-3.1.jar</AuxClasspathEntry><AuxClasspathEntry>.\webgaot\aut\webgoat5.0\webroot\web-inf\lib\commons-dig ester.jar</AuxClasspathEntry><AuxClasspathEntry>.\webgaot\aut\webgoat5.0\webroot\web-inf\lib\commons-dis covery-0.2.jar</AuxClasspathEntry><AuxClasspathEntry>.\webgaot\aut\webgoat5.0\webroot\web-inf\lib\commons-log ging-1.0.4.jar</AuxClasspathEntry><AuxClasspathEntry>.\webgaot\aut\webgoat5.0\webroot\web-inf\lib\ecs-1.4.2.j ar</AuxClasspathEntry><AuxClasspathEntry>.\webgaot\aut\webgoat5.0\webroot\web-inf\lib\idb.jar</Au xClasspathEntry><AuxClasspathEntry>.\webgaot\aut\webgoat5.0\webroot\web-inf\lib\j2h.jar</Au xClasspathEntry><AuxClasspathEntry>.\webgaot\aut\webgoat5.0\webroot\web-inf\lib\jaxrpc.jar< /AuxClasspathEntry><AuxClasspathEntry>.\webgaot\aut\webgoat5.0\webroot\web-inf\lib\jta-spec1_0 _1.jar</AuxClasspathEntry><AuxClasspathEntry>.\webgaot\aut\webgoat5.0\webroot\web-inf\lib\log4j-1.2.8 .jar</AuxClasspathEntry><AuxClasspathEntry>.\webgaot\aut\webgoat5.0\webroot\web-inf\lib\saaj.jar</A uxClasspathEntry><AuxClasspathEntry>.\webgaot\aut\webgoat5.0\webroot\web-inf\lib\wsdl4j-1.5.1.jar</AuxClasspathEntry><SrcDir>.\webgaot\aut\webgoat5.0\src</SrcDir></Project>2、平台调用命令行接口执行FindBugs项目加载过滤文件,仅扫描安全相关问题输出结果到XML文件3、平台解析XML文件->存储代码问题相关信息到后台数据库->出报告。
RESTful API开发实战 使用REST JSON XML和JAX-RS构建微服务 大数据和Web服务应用

北京市版权局著作权合同登记号 图字:01-2017-5755-2 011-7430
本书封面贴有清华大学出版社防伪标签,无标签者不得销售。 版权所有,侵权必究。侵权举报电话:010-62782989 13701121933
如果希望真正透彻掌握 RESTful API 的设计理念和实际应用,译者 建议大家主动完成每章的程序练习,代码其实是最好的老师。每章最后 一节都包含详细丰富的环境设置和代码,使得我们更容易理解和掌握 RESTful API 的精髓。
最后要感谢清华大学出版社能给我这次宝贵的翻译机会,把自己 关于 RESTful API 的一些学习和理解在本书中与大家分享。尤其是要 感谢本书的编辑,在本书的翻译过程中付出了很多的心血和努力,非 常感谢他们的帮助和鼓励。另外感谢妻子以及我的家人,感谢你们一 直以来对我的包容和理解;本书也献给我未来的孩子,希望你会喜欢 老爸的这份礼物。
技术审稿人简介
Massimo Nardone 拥有超过 22 年的安全、 Web/移动开发、云计算和 IT 设施等领域的丰富经 验,对网络安全和 Android 有着狂热的技术激情。
在过去 20 多年,他一直致力于编程开发和教 学,包括 Android、Perl、PHP、Java、VB、Python、 C/C++、MySQL 等,拥有意大利萨莱诺大学计算机 科学专业的硕士学位。 他曾经担任项目经理、软件工程师、研究员、首席安全架构师以及 信息安全经理等,同时作为 PCI(国际安全标准)/SCADA(数据采集与监 视控制系统)审计员,还是 IT 安全/云/SCADA 高级架构师等。 他的技术栈包括安全、Android、Cloud、Java、MySQL、Drupal、 Cobol、Perl、Web 和移动开发、MongoDB、D3、Joomla、Couchbase、 C/C++、WebGL、Python、Pro Rails、Django CMS、Jekyll、Scratch 等。 他目前担任 Cargotec Oyj 公司的首席信息安全官,曾任赫尔辛基理 工大学(Aalto University)网络实验室的访问讲师和主管,拥有四项国际 专利(PKI、SIP、SAML 和 Proxy 领域)。 Massimo 已为不同的出版公司审阅了 40 多种 IT 类图书,同时是 Pro Android Games 的作者之一(Apress, 2015)
- 1、下载文档前请自行甄别文档内容的完整性,平台不提供额外的编辑、内容补充、找答案等附加服务。
- 2、"仅部分预览"的文档,不可在线预览部分如存在完整性等问题,可反馈申请退款(可完整预览的文档不适用该条件!)。
- 3、如文档侵犯您的权益,请联系客服反馈,我们会尽快为您处理(人工客服工作时间:9:00-18:30)。
资源类和资源方法的注解
@javax.ws.rs.Path 标注资源类的URI,该注解也可以用于类中的资源方法。 @javax.ws.rs.GET 标注该资源类中处理HTTP协议中GET请求的资源方法,经 常用于查询。该资源方法应做到幂等。 @javax.ws.rs.POST 标注该资源类中处理HTTP协议中POST请求的资源方法, 通常用于资源的创建,资源标识由服务器端产生。 @javax.ws.rs.PUT 标注该资源类中处理HTTP协议中PUT请求的资源方法,经 常用于更新,有时也用于资源的创建,但创建资源所需的标 识应由客户端提供。该资源方法应做到幂等。
单例模式的Application示例
/* 该示例实现了getClasses抽象方法的同时,改写了 getSingletons方法,将Hello资源类设置为单例模式。 ---------------------------------------------------------------------------------*/ @javax.ws.rs.ApplicationPath("/singletonres") public class ApplicationConfig extends Application{ Set<Object> singletons= new java.util.HashSet(); public Set<Class<?>> getClasses(){ return Collections.emptySet(); } @Override public Set<Object> getSingletons() { return singletons.add(new Hello()); } }
路径模板和@PathParam注解
用@Path定义资源的URI时,可以利用"{模板名}"定义路径模 板,匹配任意字符形成的路径信息。模板名的实际值可通过 @PathParam注入给资源方法的对应参数。 @Path("/hello") @Path定义了参数name,该参数名 称可以传递给@PathParam注解 public class Hello{ @GET @Path("{name}") public String sayHello(@PathParam("name") String name){ return "hello,"+name; } }
请求实例模式的Application示例
/* ApplicationConfig继承Application类,实现了getClasses抽象 方法,将Hello资源类设置为请求实例化方式。 另外,可以使用类级注解ApplicationPath设置该Web程序中 Web服务资源的URL模式,此示例中设置为/resource。 ---------------------------------------------------------------------------------*/ @javax.ws.rs.ApplicationPath("/resource") public class ApplicationConfig extends Application{ Set<Class<?>> prototypes= new java.util.HashSet(); @Override public Set<Class<?>> getClasses(){ prototypes.add(Hello.class); return prototypes; } }
}
getClasses和getSingletons方法
public abstract Set<Class<?>> getClasses() 此方法返回java.util.Set类型的一个集合,该集合中存储的是 以请求实例化模式的资源类的Class对象,Class对象的获取 可以通过表达式"类名.class"获取。 public Set<Object> getSingletons() 此方法返回的是以需要以单例模式建立实例的资源类的具体 实例的java.util.Set类型的集合。在该方法中,可以直接建立 对应资源类的实例,然后将这些实例加入到Set集合中,返回 该Set集合即可。
//GET标注的资源方法必须也是公开的,处理GET请求 @GET public String sayHello(){ return "hello,world!"; } }
资源类的实例化
如前所述,JAX-RS服务是Web程序的一部分,当用户请求到来 的时候,容器将建立资源类的实例,建立的方式有两种: 请求实例 这种方式是每接到用户请求,都将建立对应的资源类的实例。 单例模式 所有请求都使用同一个资源类的实例
Jersey服务的web.xml配置示例
<servlet> <servlet-name>ServletAdaptor</servlet-name> <servlet-class> org.glassfish.jersey.servlet.ServletContainer </servlet-class> <init-param> <param-name>javax.ws.rs.Application</param-name> <param-value>rs.ApplicationConfig</param-value> </init-param> </servlet> <servlet-mapping> <servlet-name>ServletAdaptor</servlet-name> <url-pattern>/resource/*</url-pattern> </servlet-mapping>
基于JAX-RS的RESTful Web 服务的构建
REST风格Web服务的构建框架
建立基于REST风格的Web服务可以采用一些技术框架简化构 建过程,常用的技术框架包括: WCF 微软提供的基于.NET技术的RESTful Web服务构架的框架 ,可以使用.NET支持的各种语言编写服务实现代码。 JAX-RS规范 由Java标准化组织JCP()制定的构建 RESTful风格的Web服务的技术规范,目前最新的规范版本是 2.1(JSR370)。 SpringFramework 是Spring的生态圈中对REST风格Web服务的实现。
在web.xml中设置资源类
使用@ApplicationPath设置服务资源的URL模式适用于直接 支持JAX-RS规范的容器或者实现了Servlet3.0及以上的规范 Servlet/JSP容器(如Tomcat7.x及以上版本)中部署时可用。 对于仅支持Servlet2.5规范的容器(如Tomcat6.x),JAX-RS 的实现类库一般会提供在web.xml中利用类似Servlet的配置 方式配置服务资源的URL模式。 例如,org.glassfish.jersey.servlet.ServletContainer是Jersey 提供的配置Servlet,它有一个名为"javax.ws.rs.Application" 的起始参数,用于设定Web服务中继承Application的子类类 名,配置该Servlet的url-pattern,就可设置Web程序中的 JAX-RS服务的URL模式。
资源类和资源方法的注解
@javax.ws.rs.DELETE 标注该资源类中处理HTTP协议中DELETE请求的资源方法 ,通常用于资源删除。该资源方法应做到幂等。 @javax.ws.rs.HEAD 标注该资源类中处理HTTP协议中HEAD请求的资源方法, 通常用于资源中元数据的获取。 @javax.ws.rs.OPTIONS 标注该资源类型中处理HTTP协议中OPTIONS请求的资源 方法,通常用于查询可用于资源的操作。
JAX-RS服务的部署
利用JAX-RS规范开发的Web服务是Java Web程序 (WAR文件)的一部分,可以直接部署在支持JavaEE6 或者JavaEE7全部功能的服务器中(例如GlassFish3.x或 者4.x版本),也可以部署在仅支持Servlet/JSP及规范的 服务器中(例如Tomcat)。 当在Servlet/JSP容器中部署时,需要在Web程序中添加 对应的JAX-RS实现类库(例如Jersey)。如果需要使用 JAX-RS的服务端事件(SSE),则要求容器必须支持 Servlet3.0规范(例如,Tomcat7.x及以上版本);否则只 要求容器支持Servlet2.5规范即可(例如,Tomcat6.x版 本)。
资源类示例
import javax.ws.rs.PATH; import javax.ws.rs.GET; //PATH注解使用String类型的value参数,设定资源类的URI @Path("/hello") //value参数名可以省略 public class Hello{//资源类必须是公开的
@QueryParam示例
@Path("/cal") public class CalReSource{ @GET public int add(@QueryParam("n") int n, @QueryParam("m") int m){ return n+m; } }
资源类和资源方法
如前所述,ROA中的资源就是可以用URI描述的信息,在 JAX-RS中,资源就是部署在Web程序中,可通过URI请求到 的资源类实例。 资源类 使用@javax.ws.rs.Path注解定义其URI的公开类,JAX-RS 也允许使用接口(interface)的实例作为资源。 资源方法 资源类或接口中能够处理诸如GET、POST等不同请求方式 的公开方法。
